With a Roku device, you can “cast” your Windows PC to your TV. That means you’ll be able to wirelessly project a slideshow, watch a movie, or listen to music from your computer on your big-screen TV. Here’s everything you need to know about how to cast from a Windows 10 or Windows 11 PC to a Roku TV, and what to try when it doesn’t work.
How to Cast from Windows to Roku
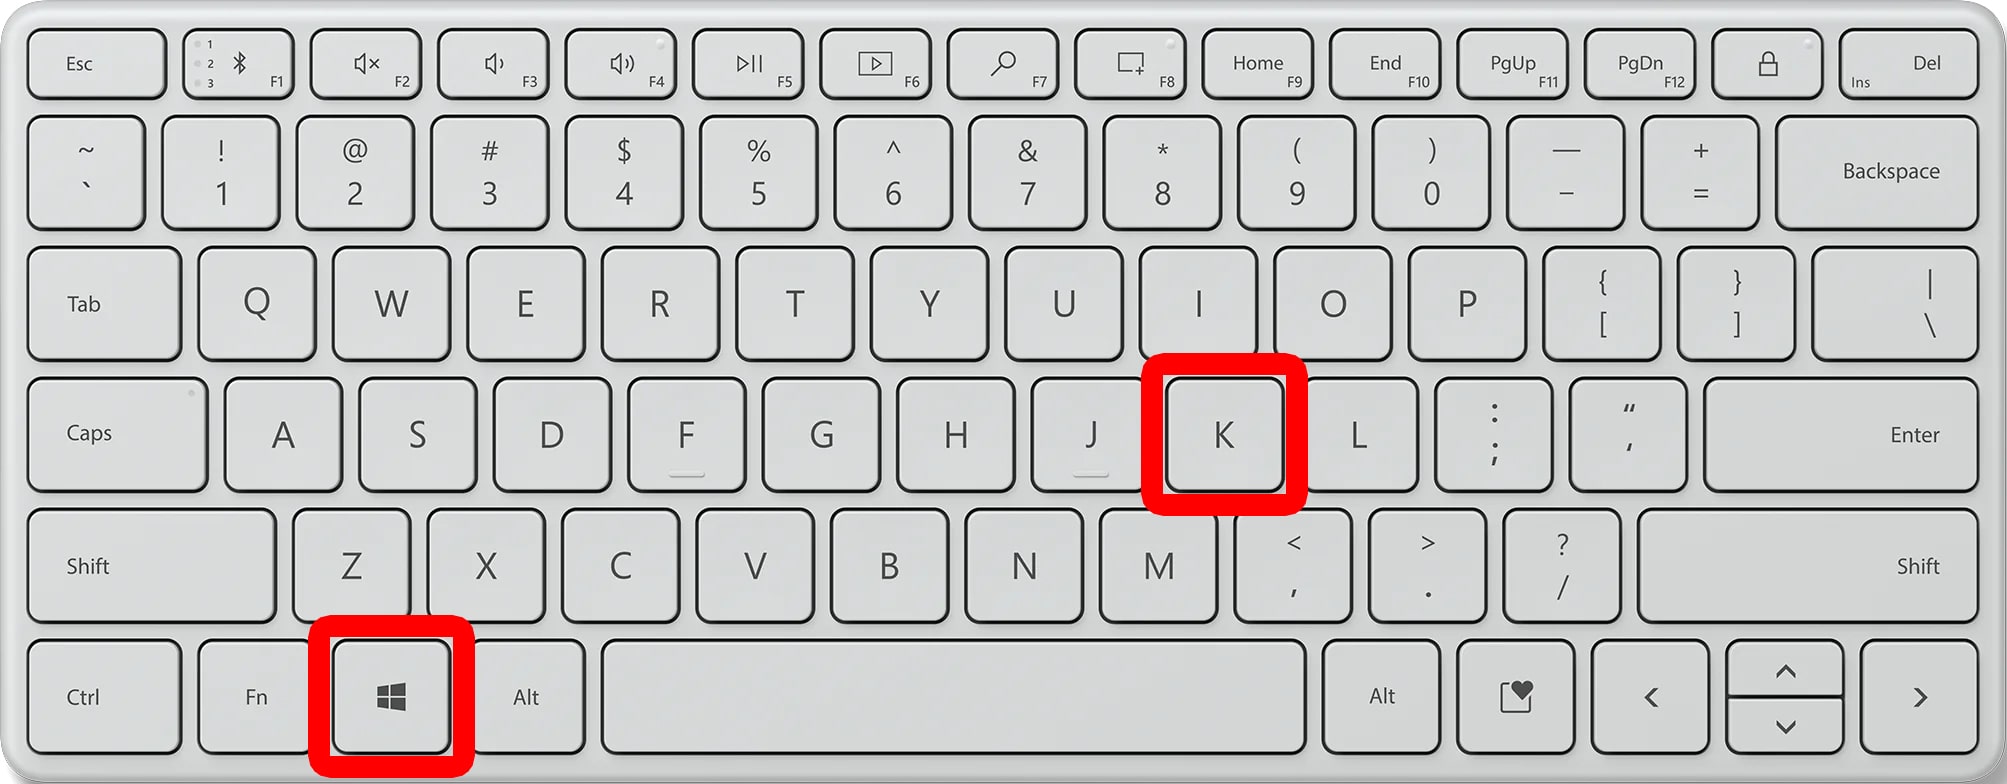
To cast from your Windows 10 or Windows 11 PC to a Roku device, press the Windows + K keys on your keyboard at the same time. Then, select your Roku device from the pop-up list on the right side of your screen. Finally, you can choose a projection mode to cast your Windows screen.
- Turn on your Roku device.
- Then, press the Windows + K keys on your keyboard. When you press these keys at the same time, you should see a pop-up on the right side of your screen.
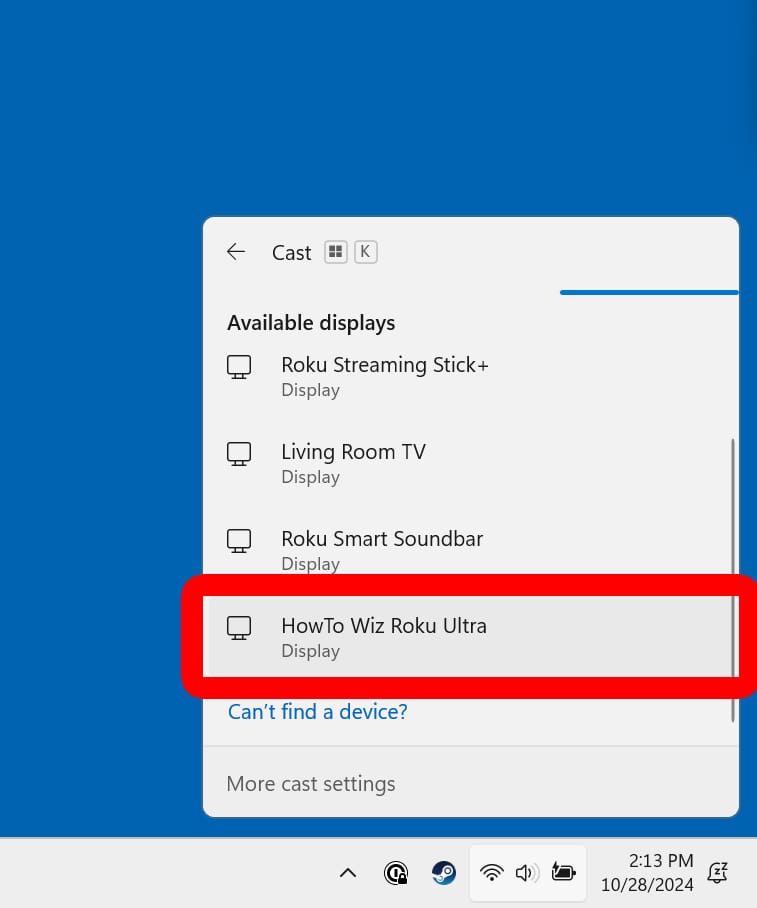
- Next, select your Roku device from the list. On a Windows 10 PC, you will see this take up the whole right side of your screen. On a Windows 11 PC, this will be a smaller pop-up window in the bottom-right corner.
- Finally, press the Windows + K keys again to change how you want to cast to your Roku TV. On a Windows 10 PC, you’ll need to click “Change projection mode” to access these settings.
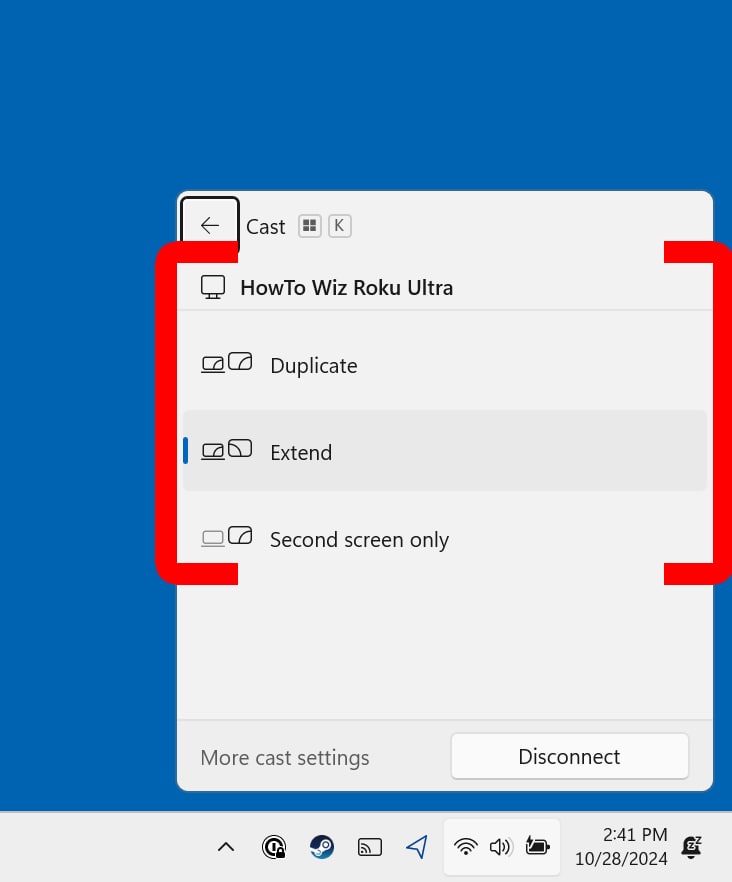
There are 3 projection modes you can choose from:
- Duplicate: This casts your main Windows screen to your Roku TV, so all the apps, windows, and mouse movements are the same on both screens.
- Extend: This turns your Roku screen into a secondary display, so you can move apps, windows, and the mouse between screens. If you choose this option, you can change the orientation of both screens by going to Settings > System > Display. Then, you can drag either screen and click Apply to choose how your mouse moves between both screens.
- Second screen only: This turns off your Windows screen, so you can use your Roku TV as the main display.
To stop casting, you can press the Windows + K keys again and click Disconnect. If you ever get stuck, press the Windows + P keys to quickly change the projection mode.
How to Turn on Screen Mirroring on Roku
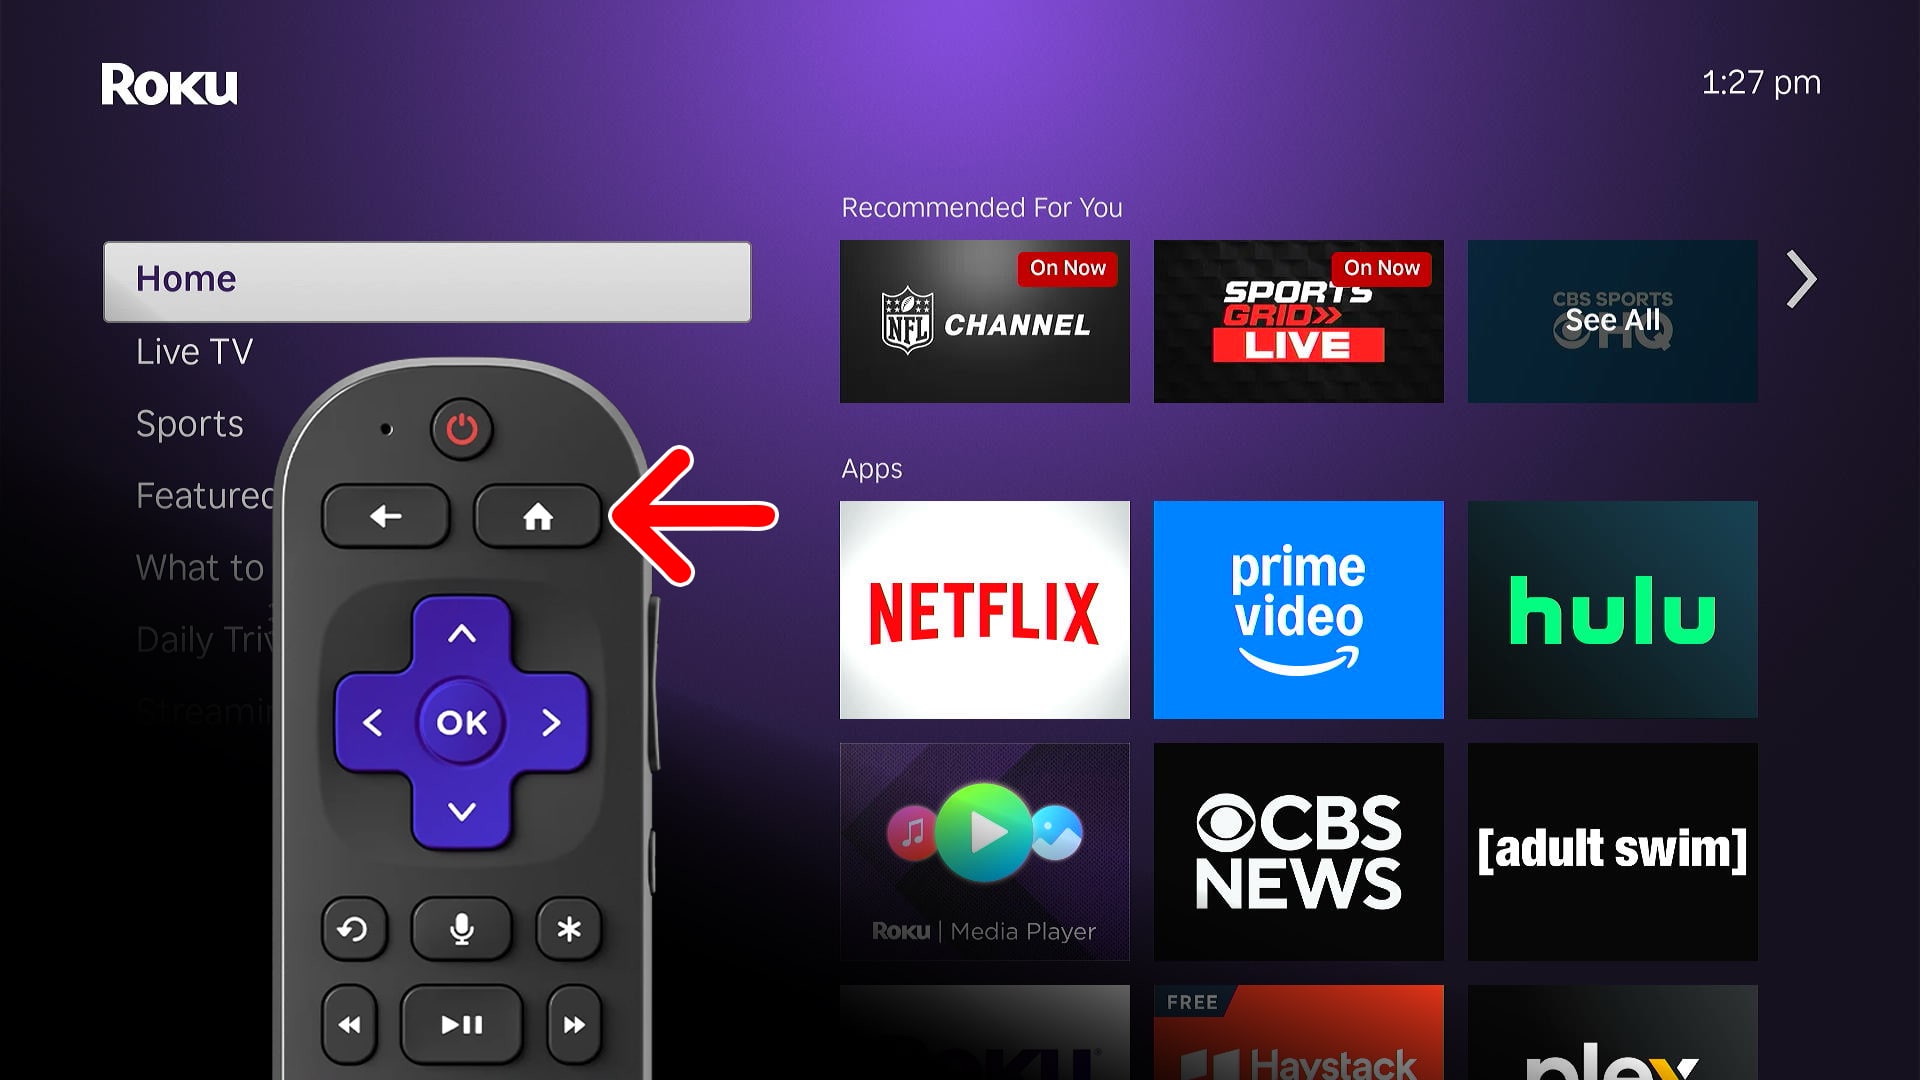
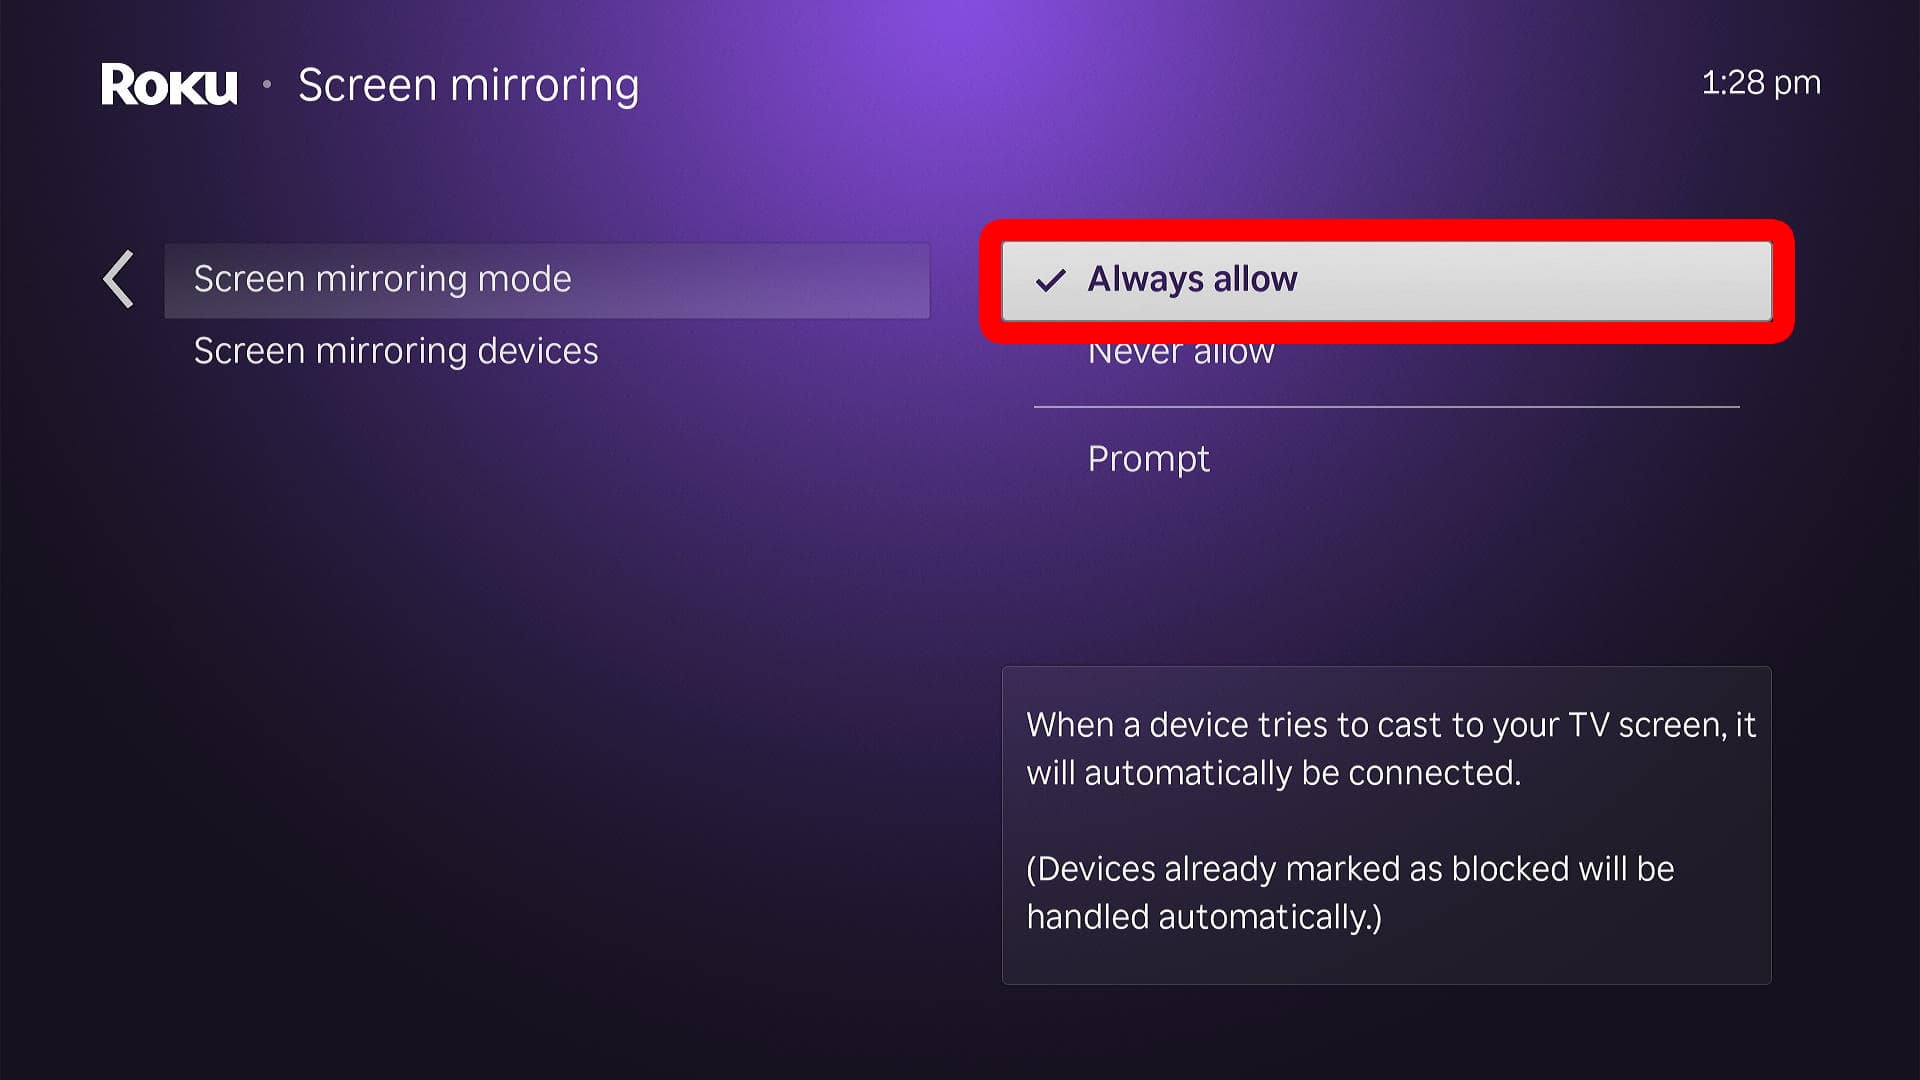
If you are having problems casting from your Windows PC to Roku, make sure you have “screen mirroring” enabled on your Roku device. To do this, press the Home button on your Roku remote and go to Settings > System > Screen mirroring > Screen mirroring mode and select Always allow.
- Press the Home button on your Roku remote. Press this button until you see the Roku home screen with a menu bar on the left.
- Then, go to Settings. To do this, press the left-direction button on your remote until the left menu is highlighted. Then, you can press the up-directional button once to highlight Settings.
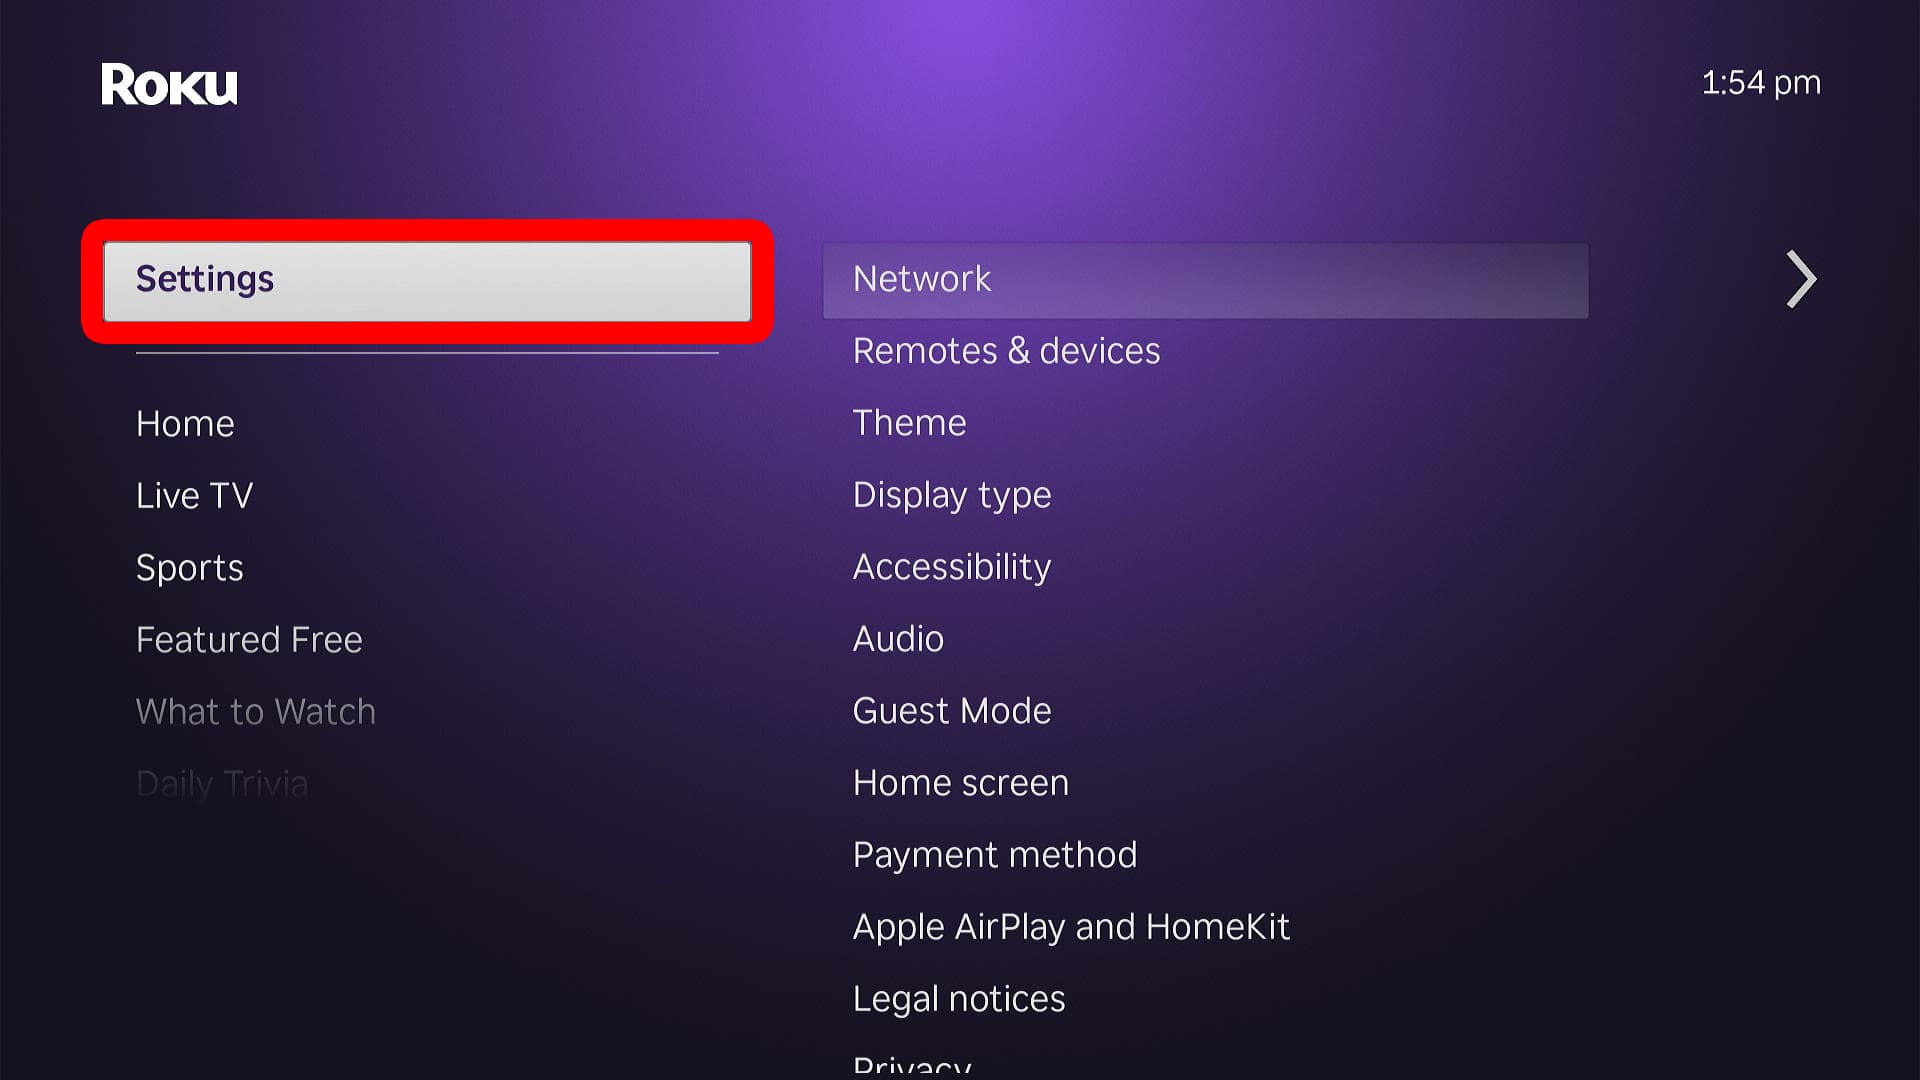
- Next, select System. You can access the Settings menu by pressing the right-directional button or the OK button on your remote.
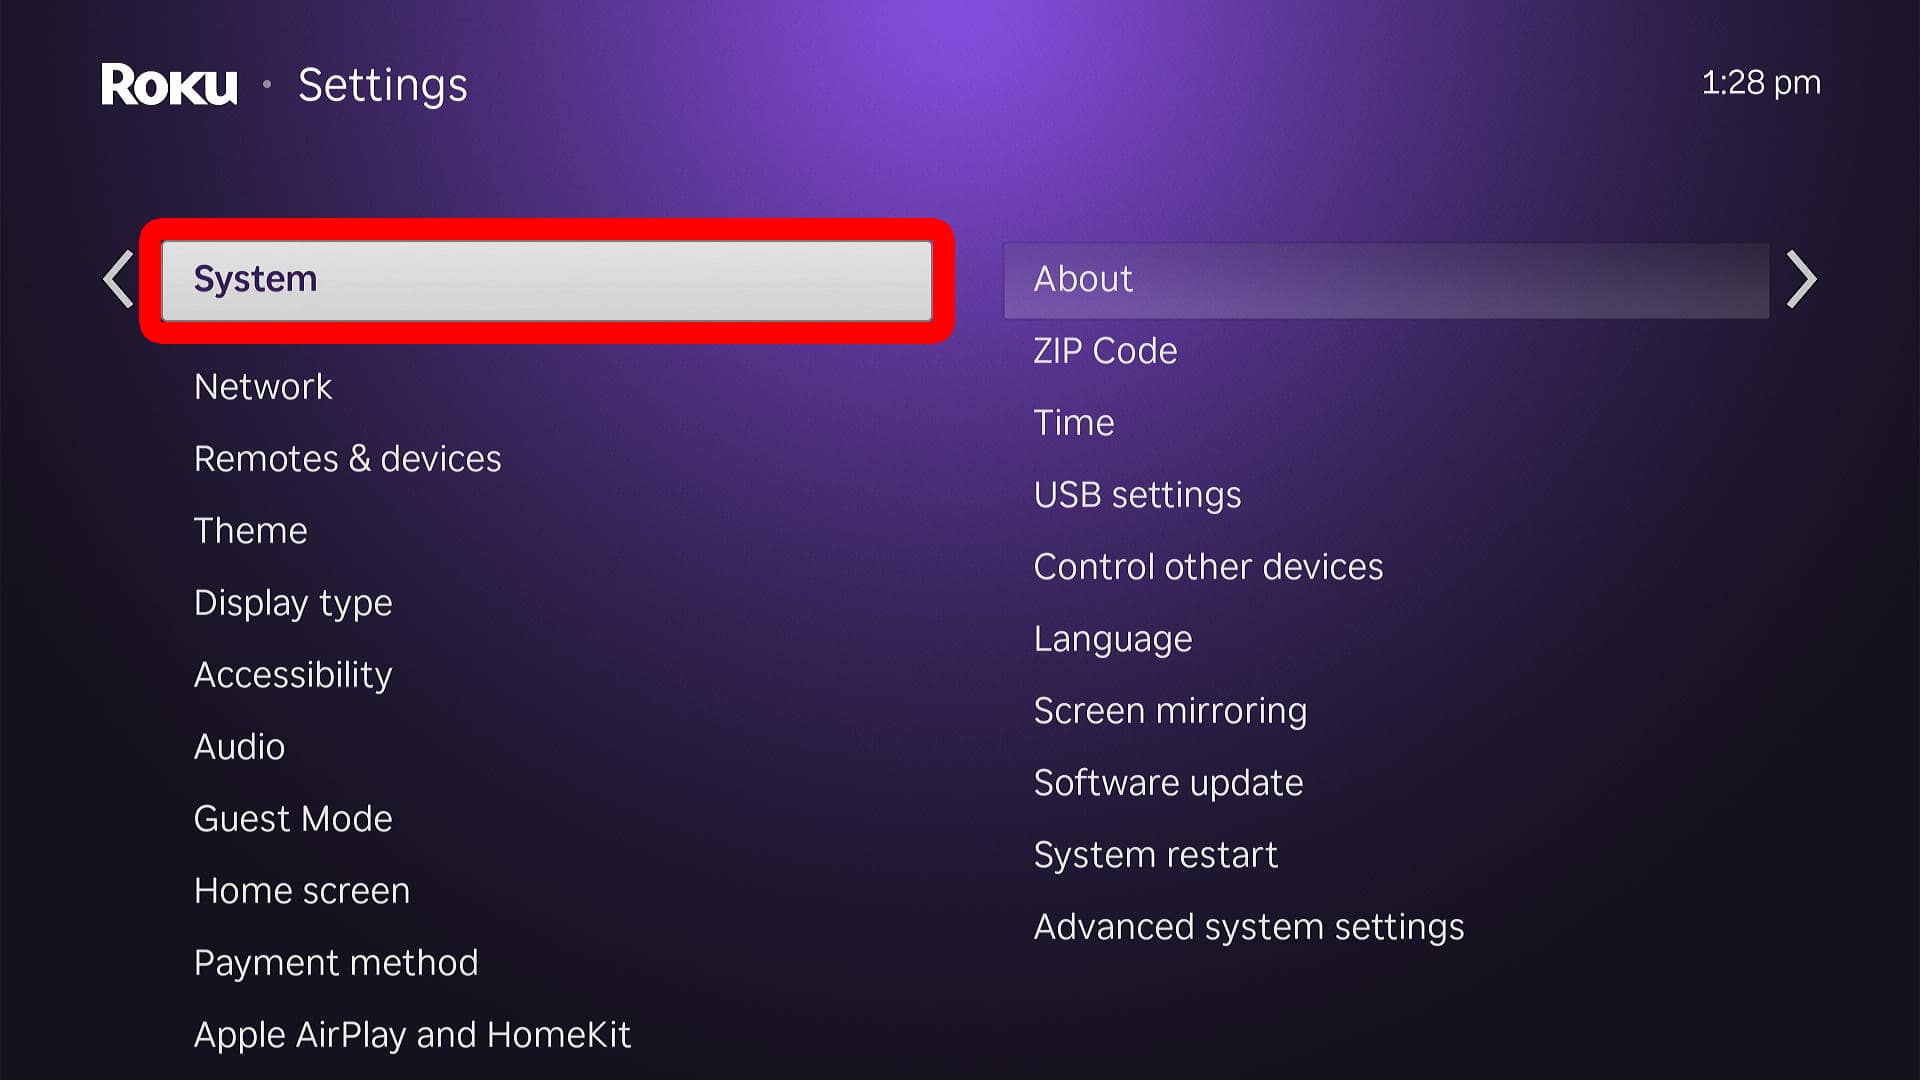
- Then, go to Screen mirroring.
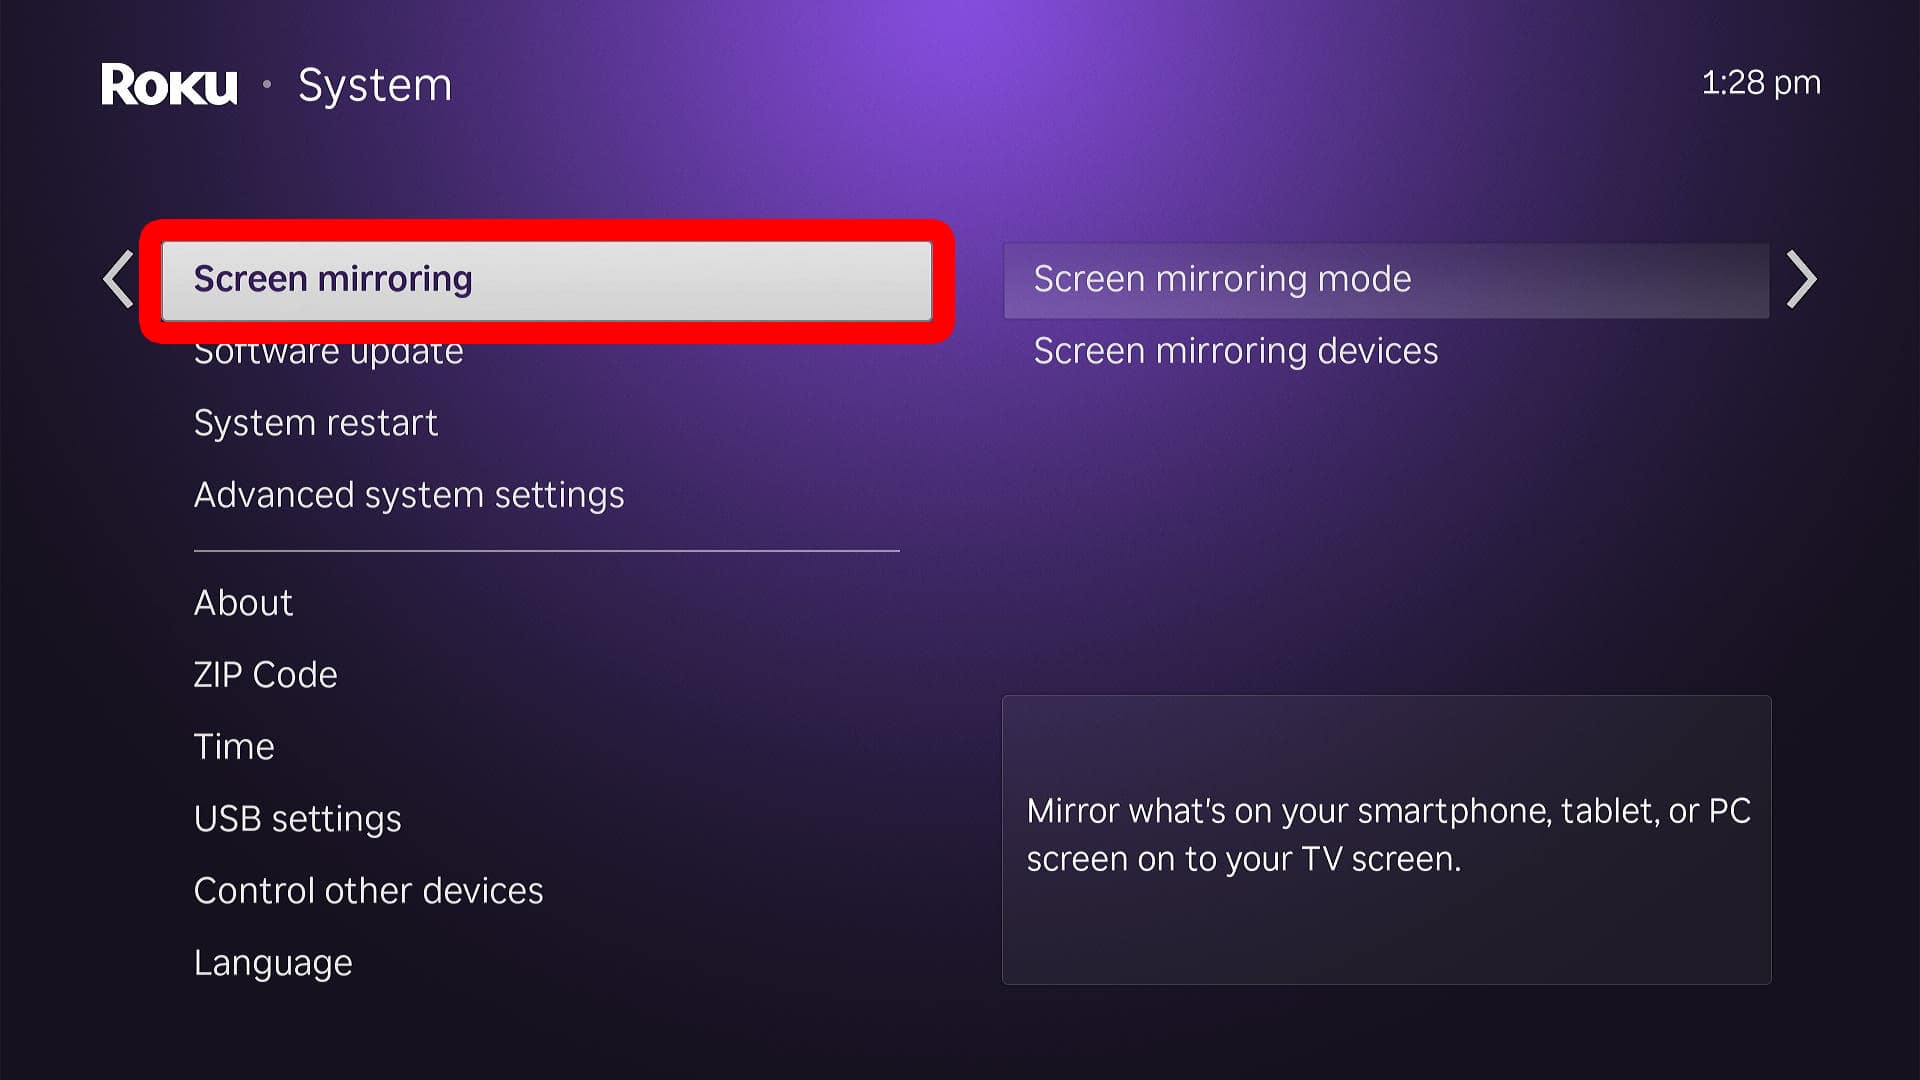
- Next, choose Screen mirroring mode.
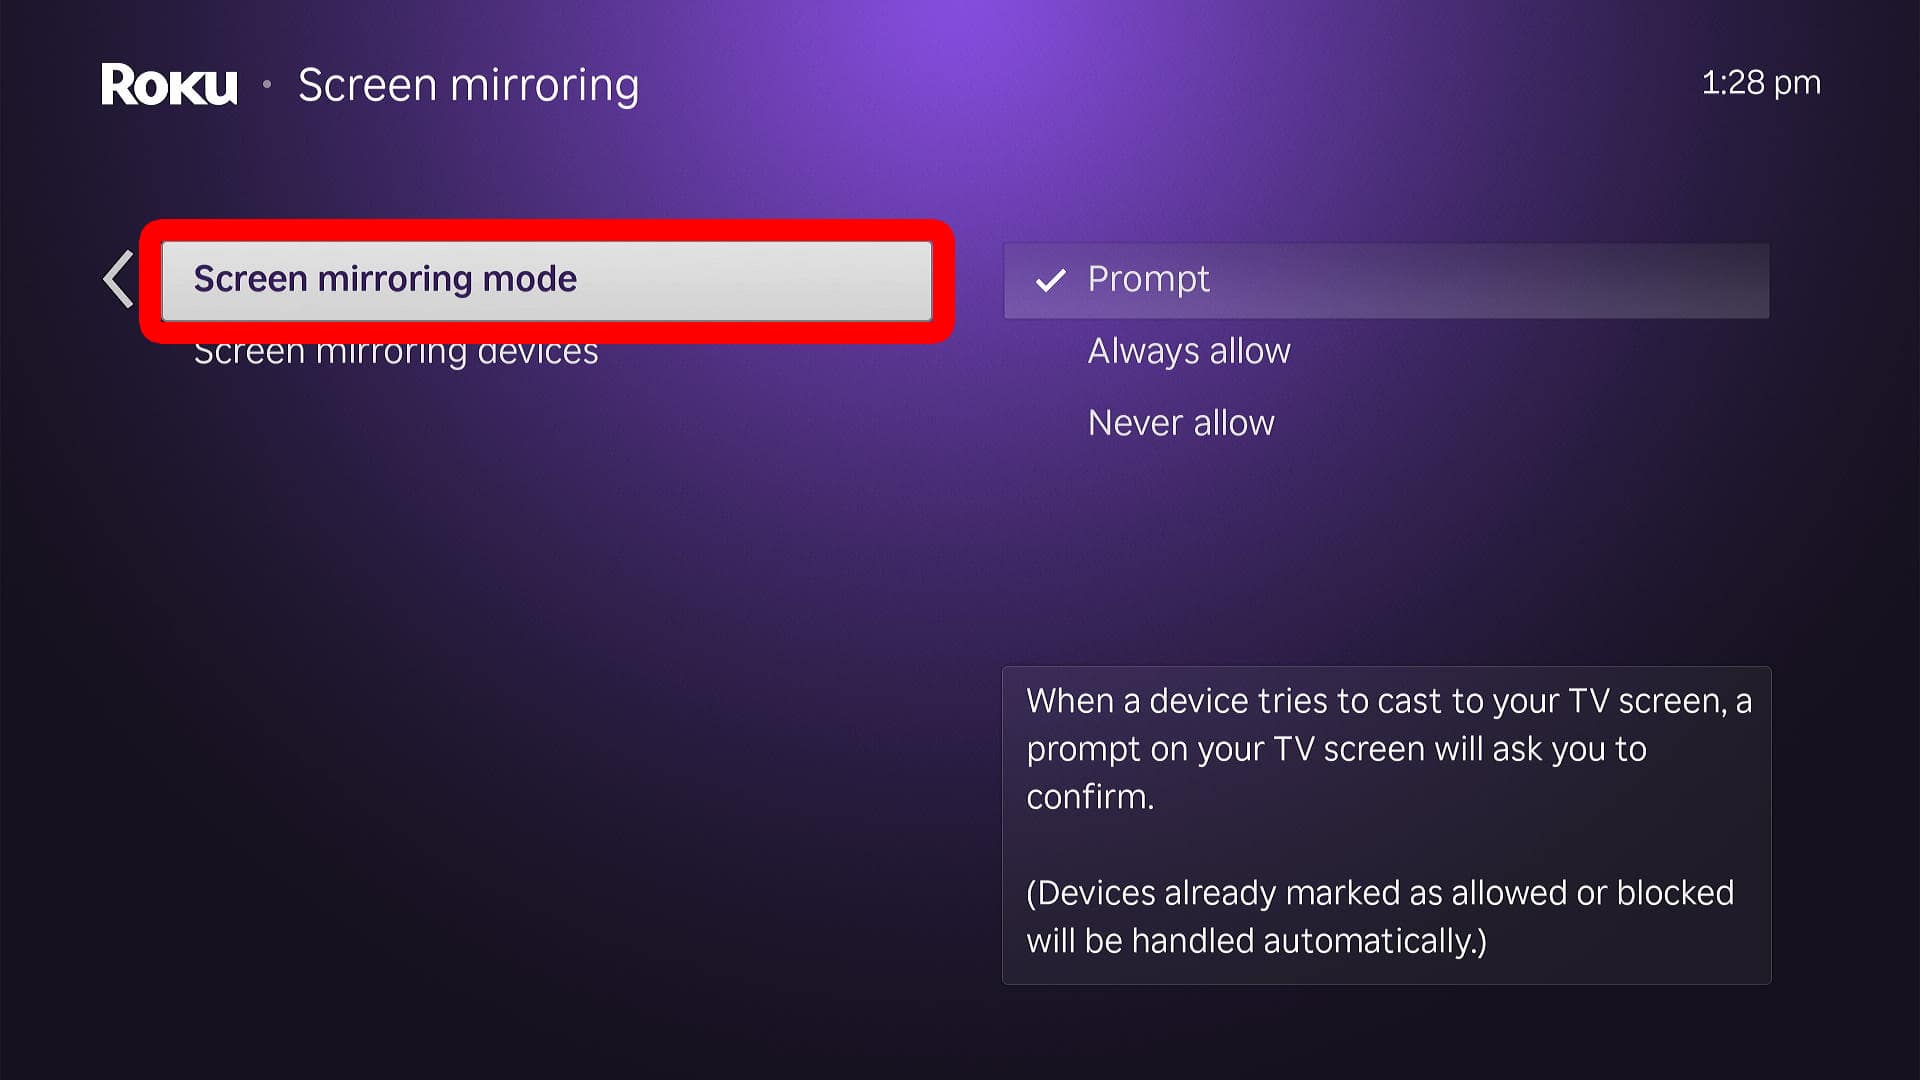
- Finally, select Always allow to turn on screen mirroring.
Why You Can’t Cast from Windows to Roku
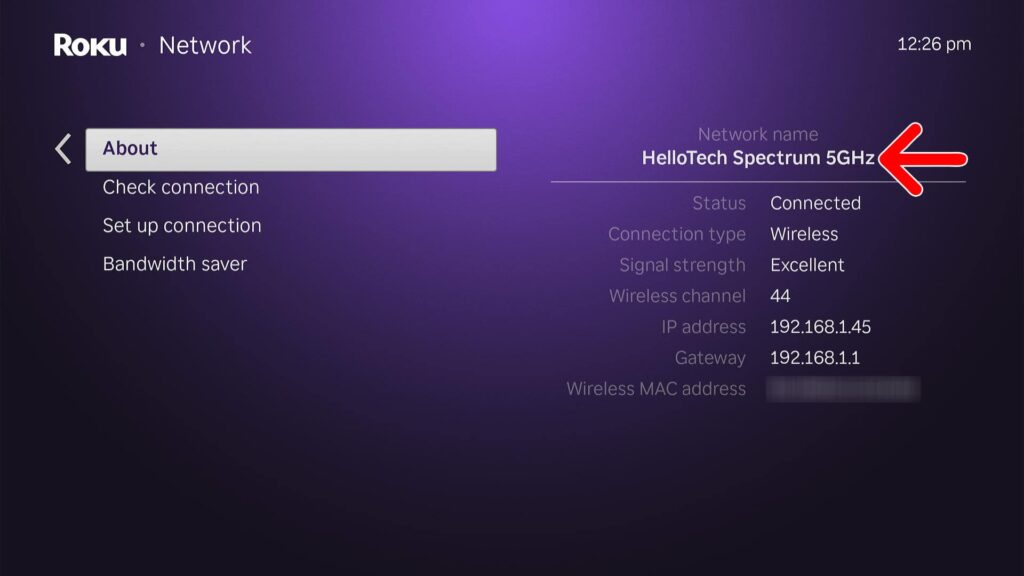
If you are having problems casting from Windows to Roku, make sure both devices are connected to the same WiFi network. To find which WiFi network your Roku device is currently connected to, go to Settings > Network > About.
From here, you can also join a different network by selecting Set up connection.
If you are still having problems, you can also go to Settings > System > Advanced System Settings > Device connect. Then, make sure Enable ‘Device connect’ is selected.
Miracast has been available since 2013, but your PC will need to be running Windows 10 version 1703 to support the feature over your current WiFi network.
If that still doesn’t work, try restarting your Windows PC and Roku device by going to Settings > System > System Restart > Restart.
