
Alexa not responding? Does she keep saying, “I am having trouble connecting to your network” every time you try to set a timer? Here’s how to change your WiFi settings and get your Echo, Echo Dot, Echo Pop, Echo Flex, or Echo Spot working again.
Read More: How to Combine Alexa Speakers
How to Change WiFi on an Echo Dot
To change the WiFi network on your Echo Dot, open the Alexa app and tap the light bulb icon at the bottom of your screen. Then select your Echo device and tap the gear icon in the pop-up. Finally, go to Change or remove a wifi network and follow the on-screen instructions.
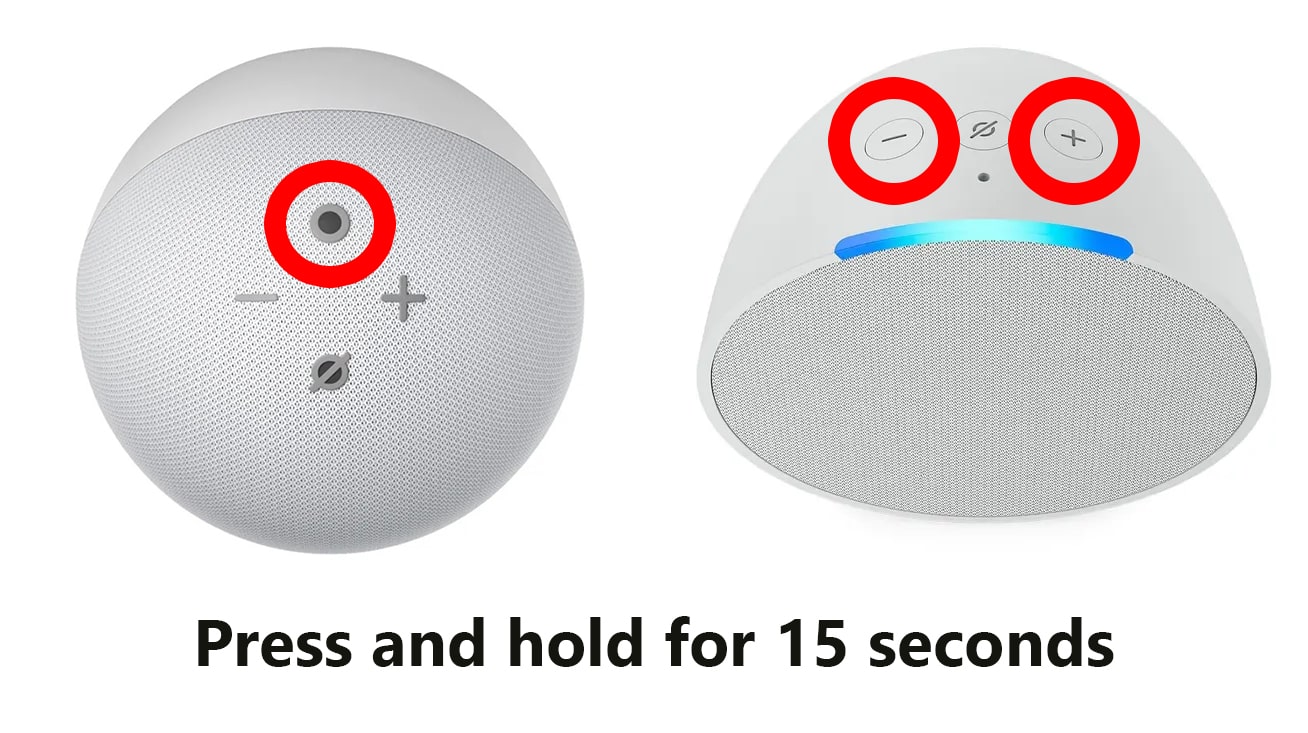
- Press and hold the Action button on your Echo Dot. The Action button is on top of your Echo device. It looks like a circle (without a line crossing through it). If you do not have this button on your Echo device, press and hold the Volume Up + Volume Down buttons at the same time instead.
- Keep pressing until an orange light appears. This should take about 15 seconds. Then you should hear your Echo device say, “Now in setup mode. Follow the instructions in the Alexa app.”
- Open the Alexa app.
- Tap Devices. This is the light bulb icon at the bottom of your screen.
- In the Devices section, select your Echo Dot. If you have lots of Alexa devices, you can tap Device Type and select Echo & Alexa to shorten the list.

- Tap the gear icon. You will see this in the top-right corner of the pop-up.
- Select Change or remove a wifi network.

- Select Join another Wifi network. The WiFi network at the top will be the one you are currently connected to. If you have connected to other networks before, you will see them under Previously Connected.
- Then tap Continue.
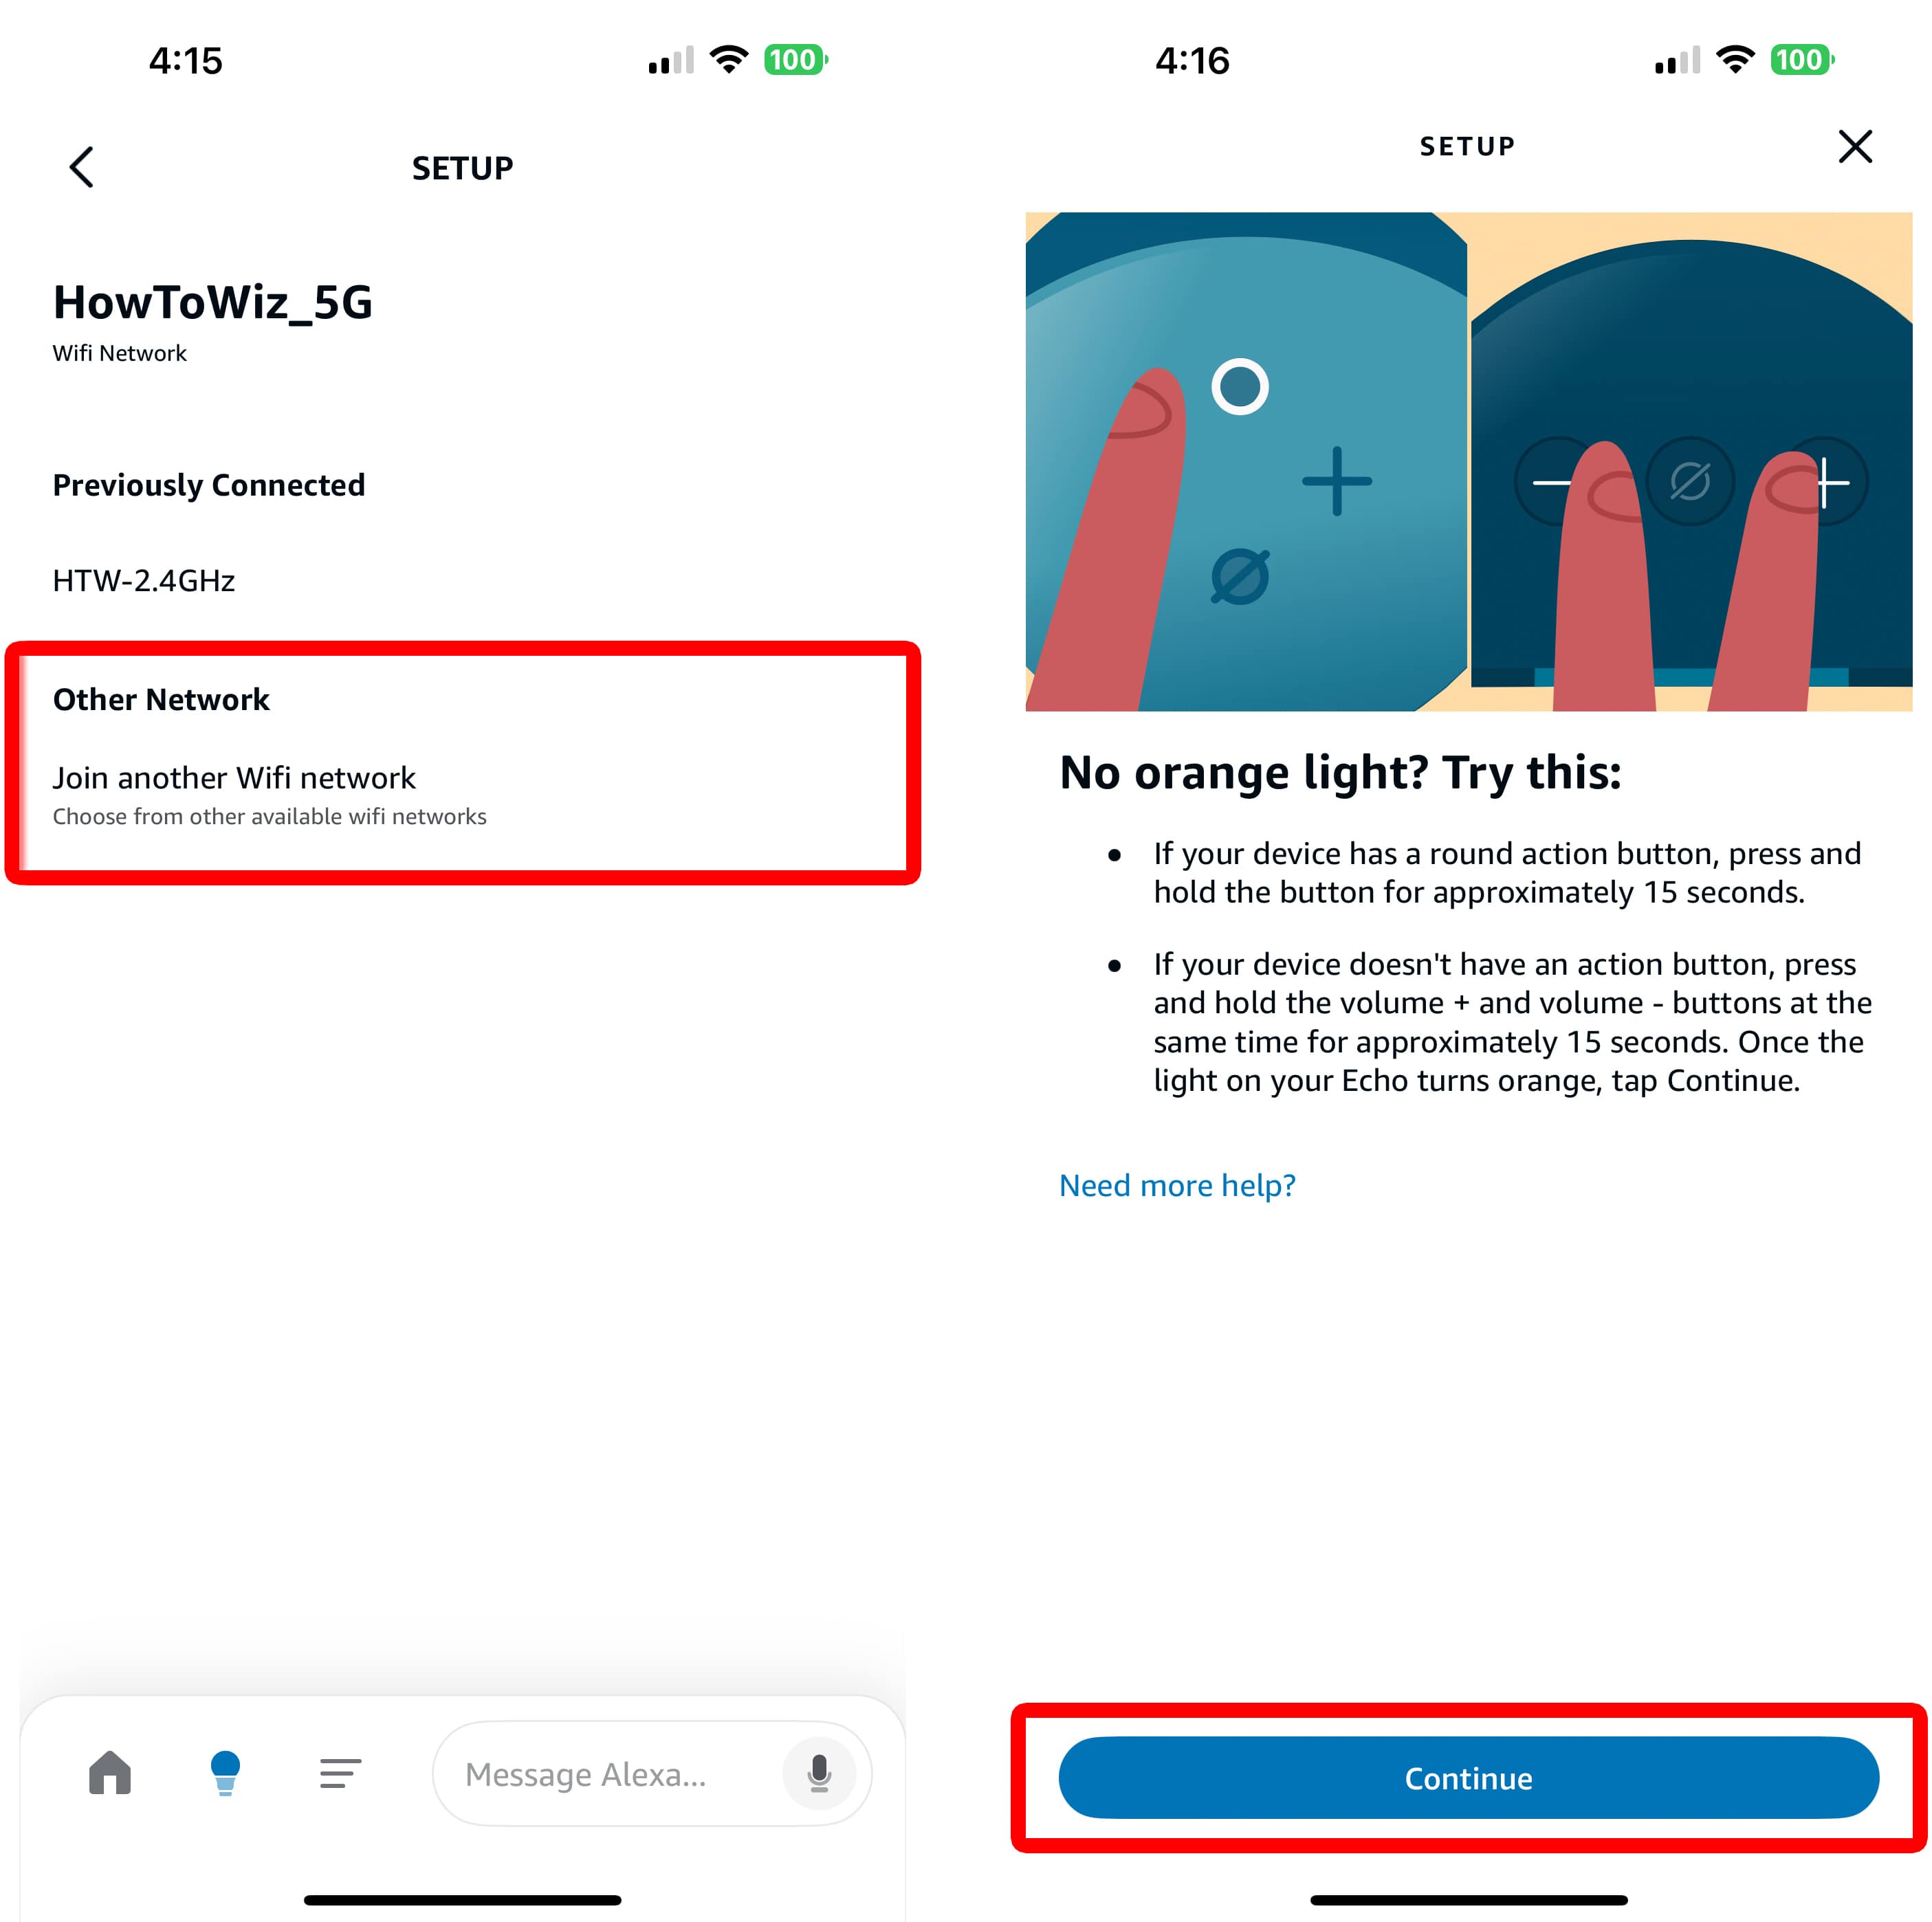
- Tap Yes. This screen simply confirms that you see an orange light on your Echo device.
- Then select your Echo Dot. If you see more than one device listed, you can find out which one to choose by going to amazon.com/mycd. Then select Echo and choose your device. Finally, you’ll see the device number at the end of its Serial Number.

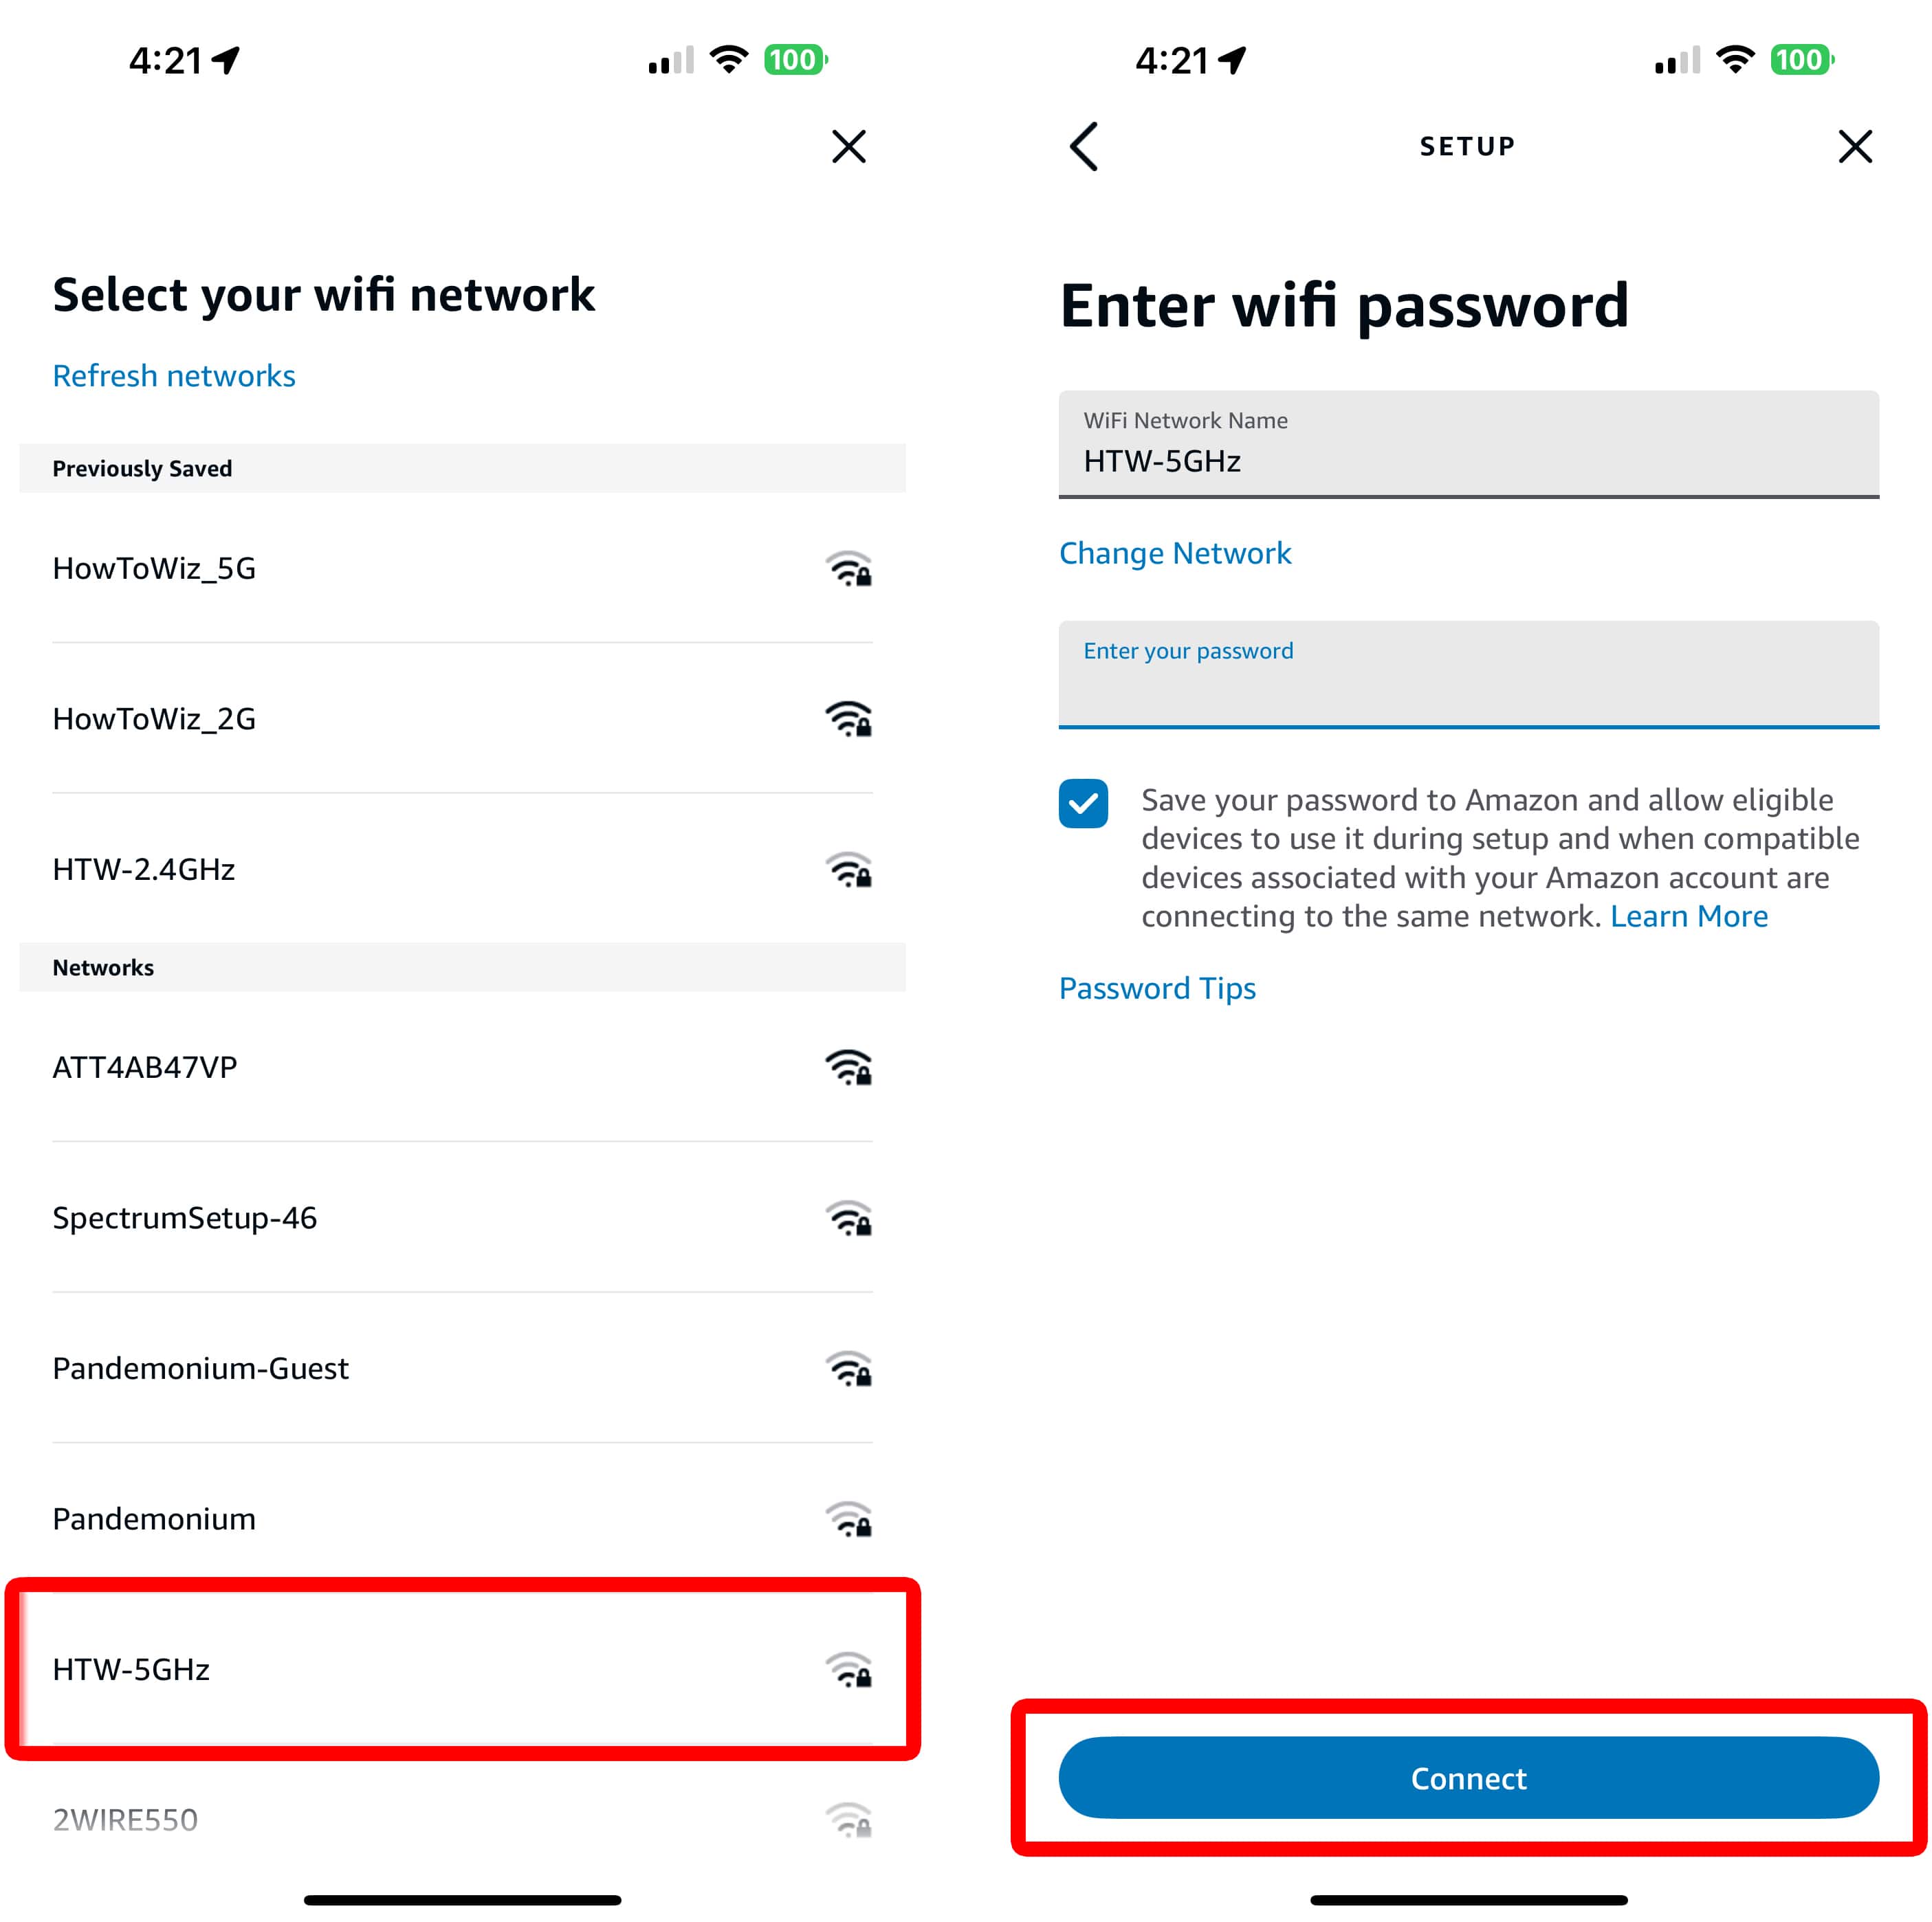
- Choose a new WiFi network. It might take a few minutes for Alexa to find available WiFi networks.
- Enter your WiFi password and tap Continue. If you have connected to this WiFi network before, Amazon might have your password saved, and you won’t need to enter your password at all.
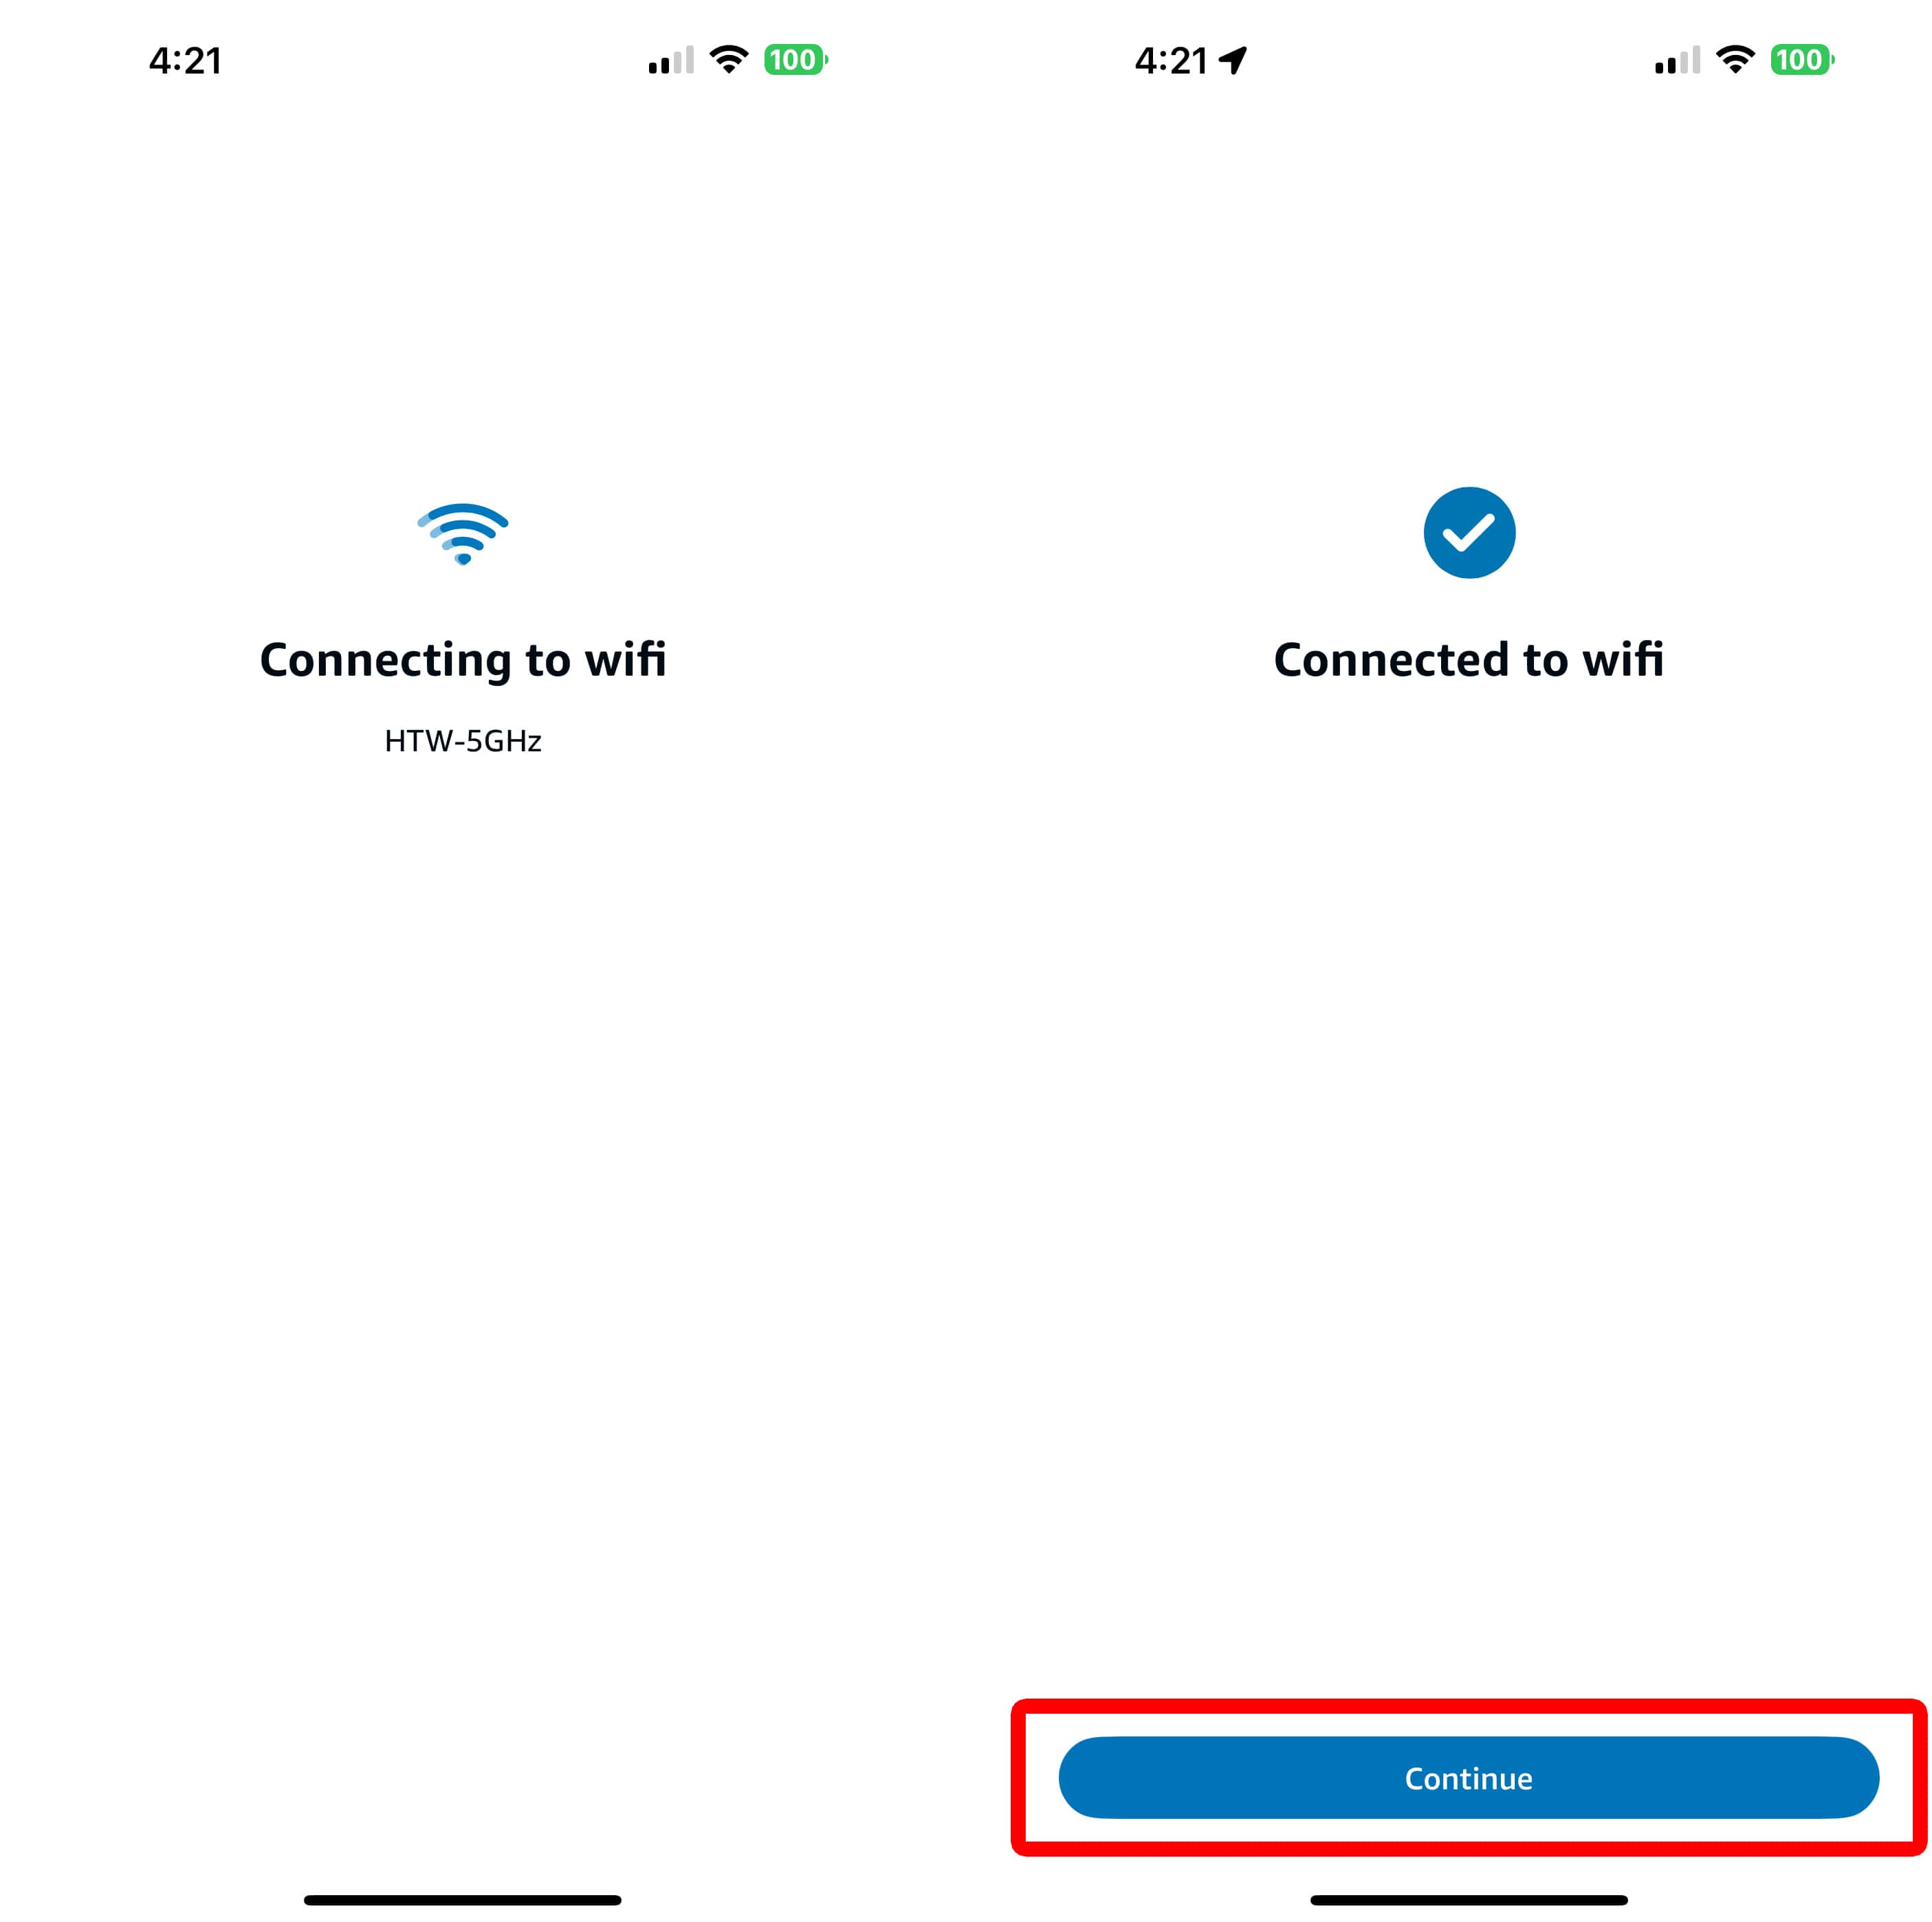
- Wait for Alexa to connect to your new WiFi network. Once connected, your Alexa device will say, “Your Echo is ready.”
- Then tap Continue. After you’ve connected to a WiFi network on your Echo Dot, you’ll need to set up additional features.
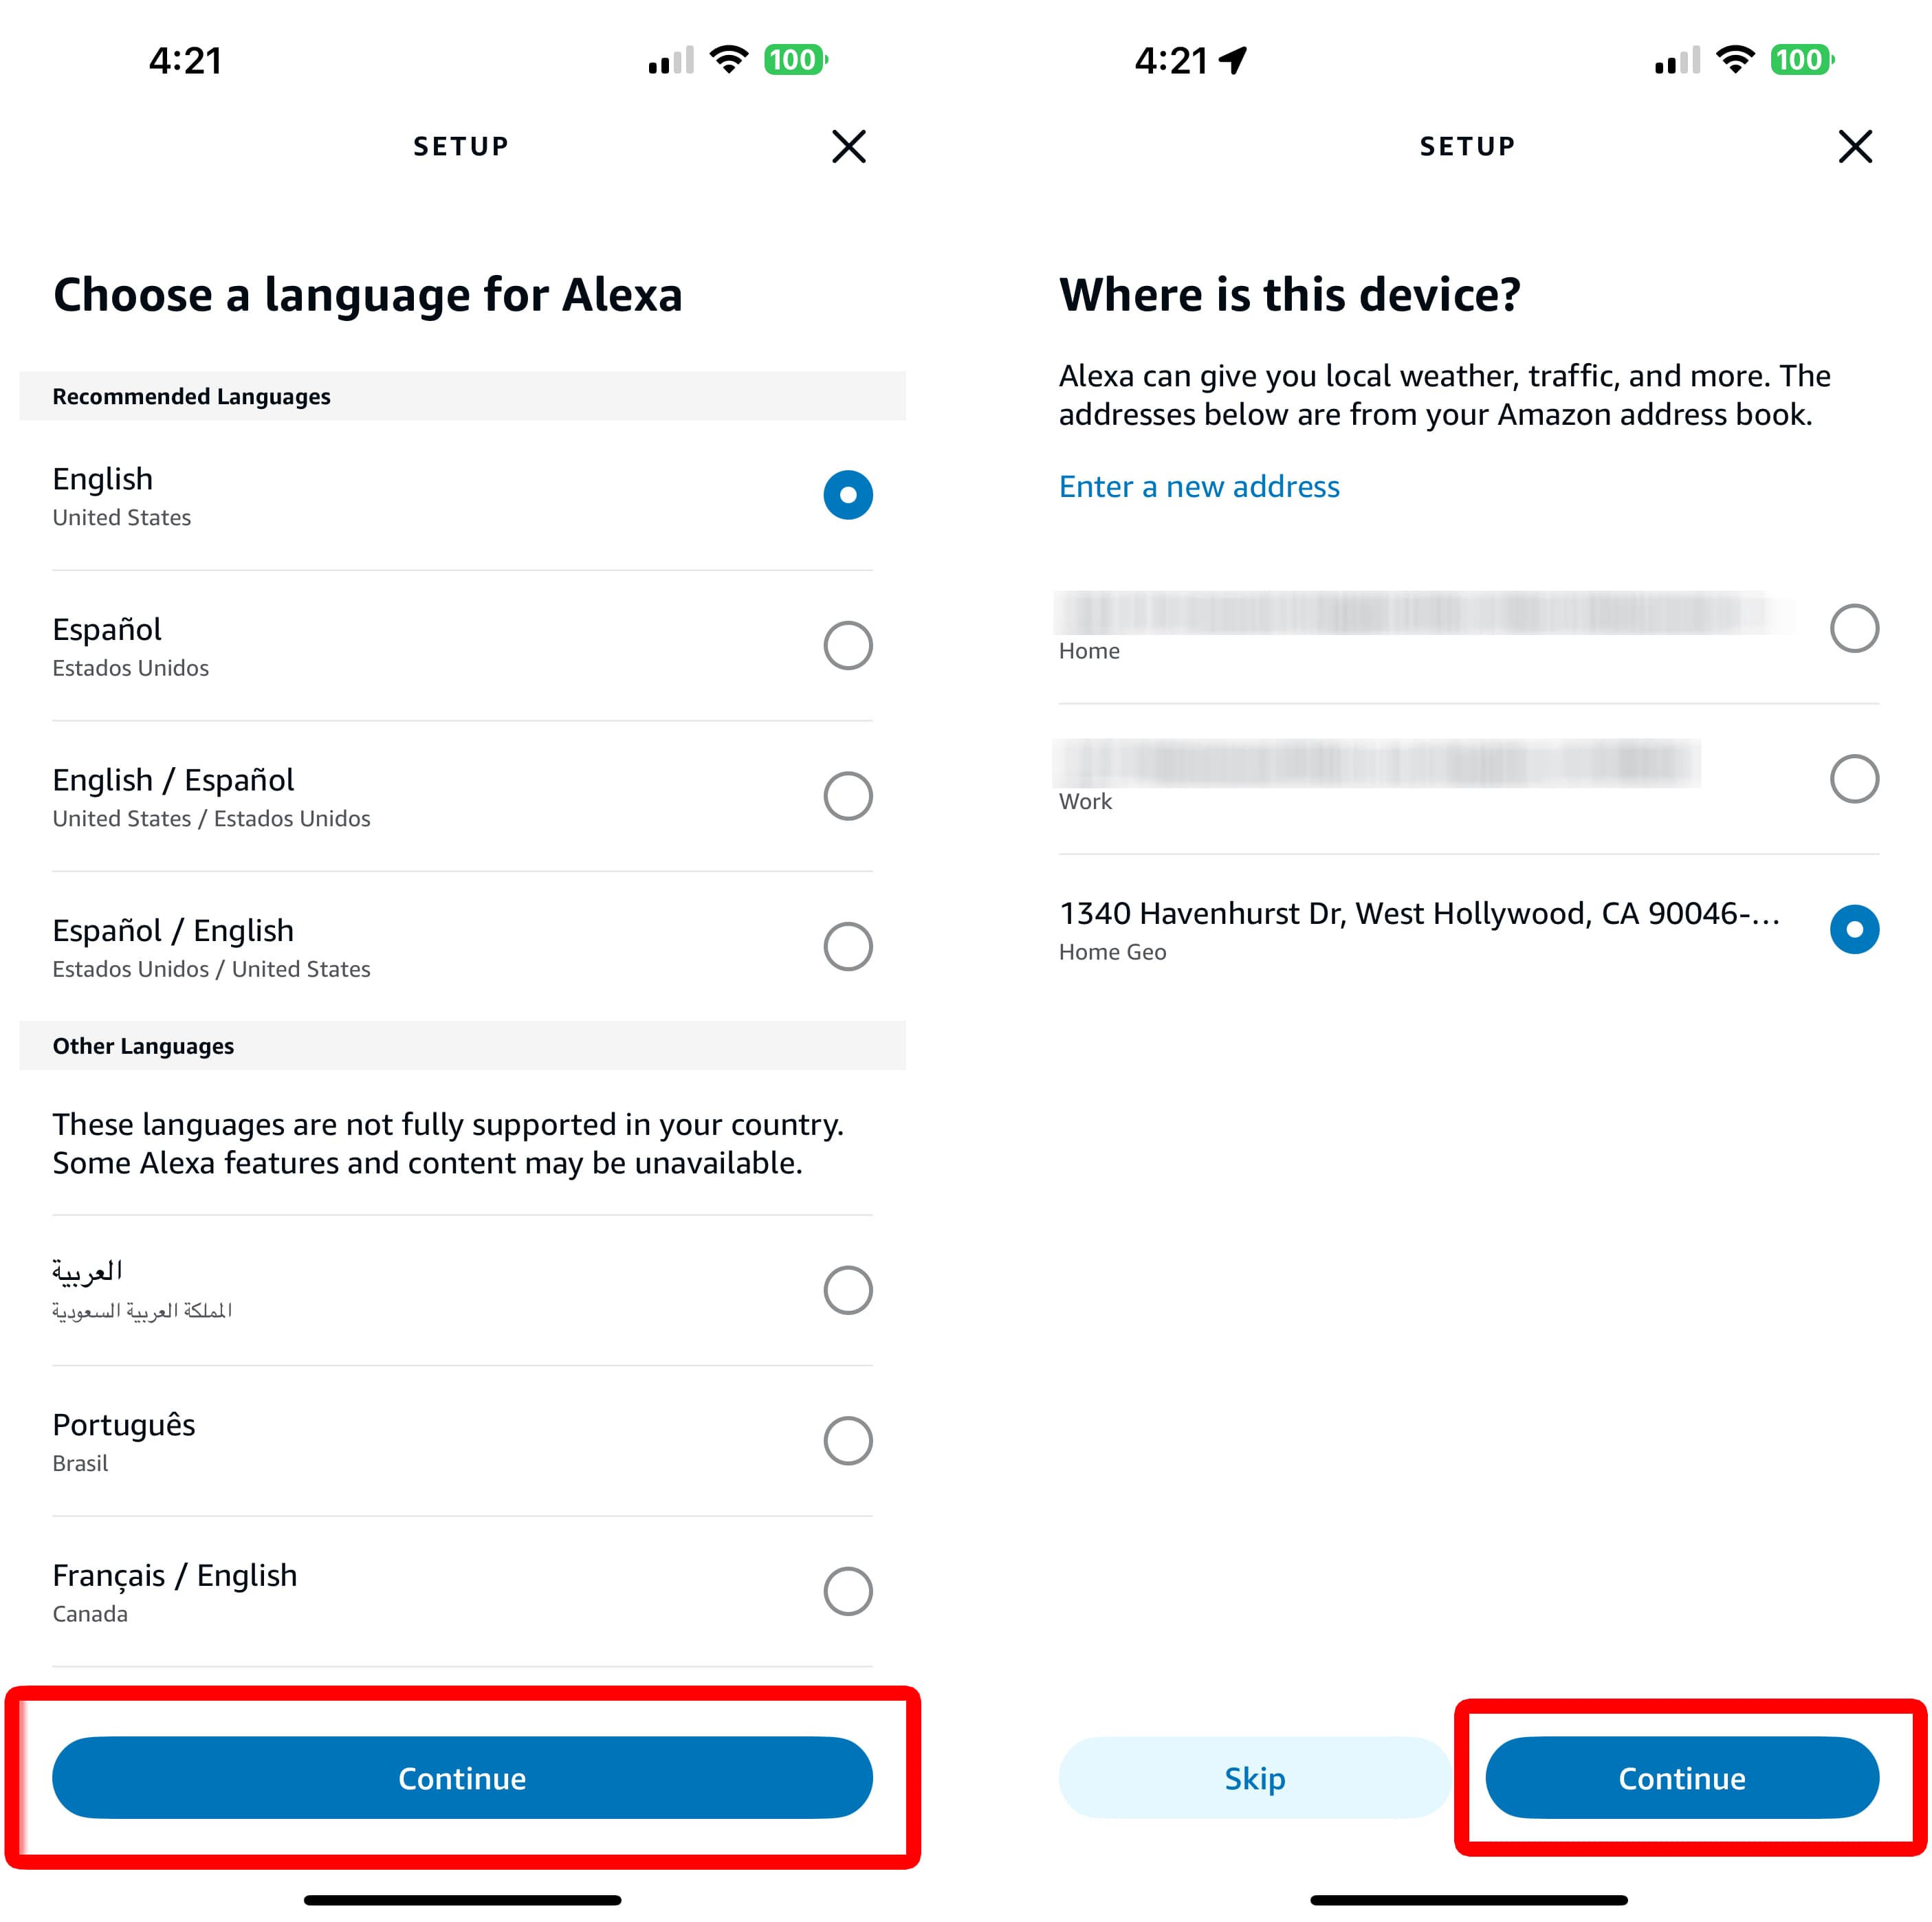
- Select your language.
- Set your location. Your location will determine the time, weather, and other settings on your device.
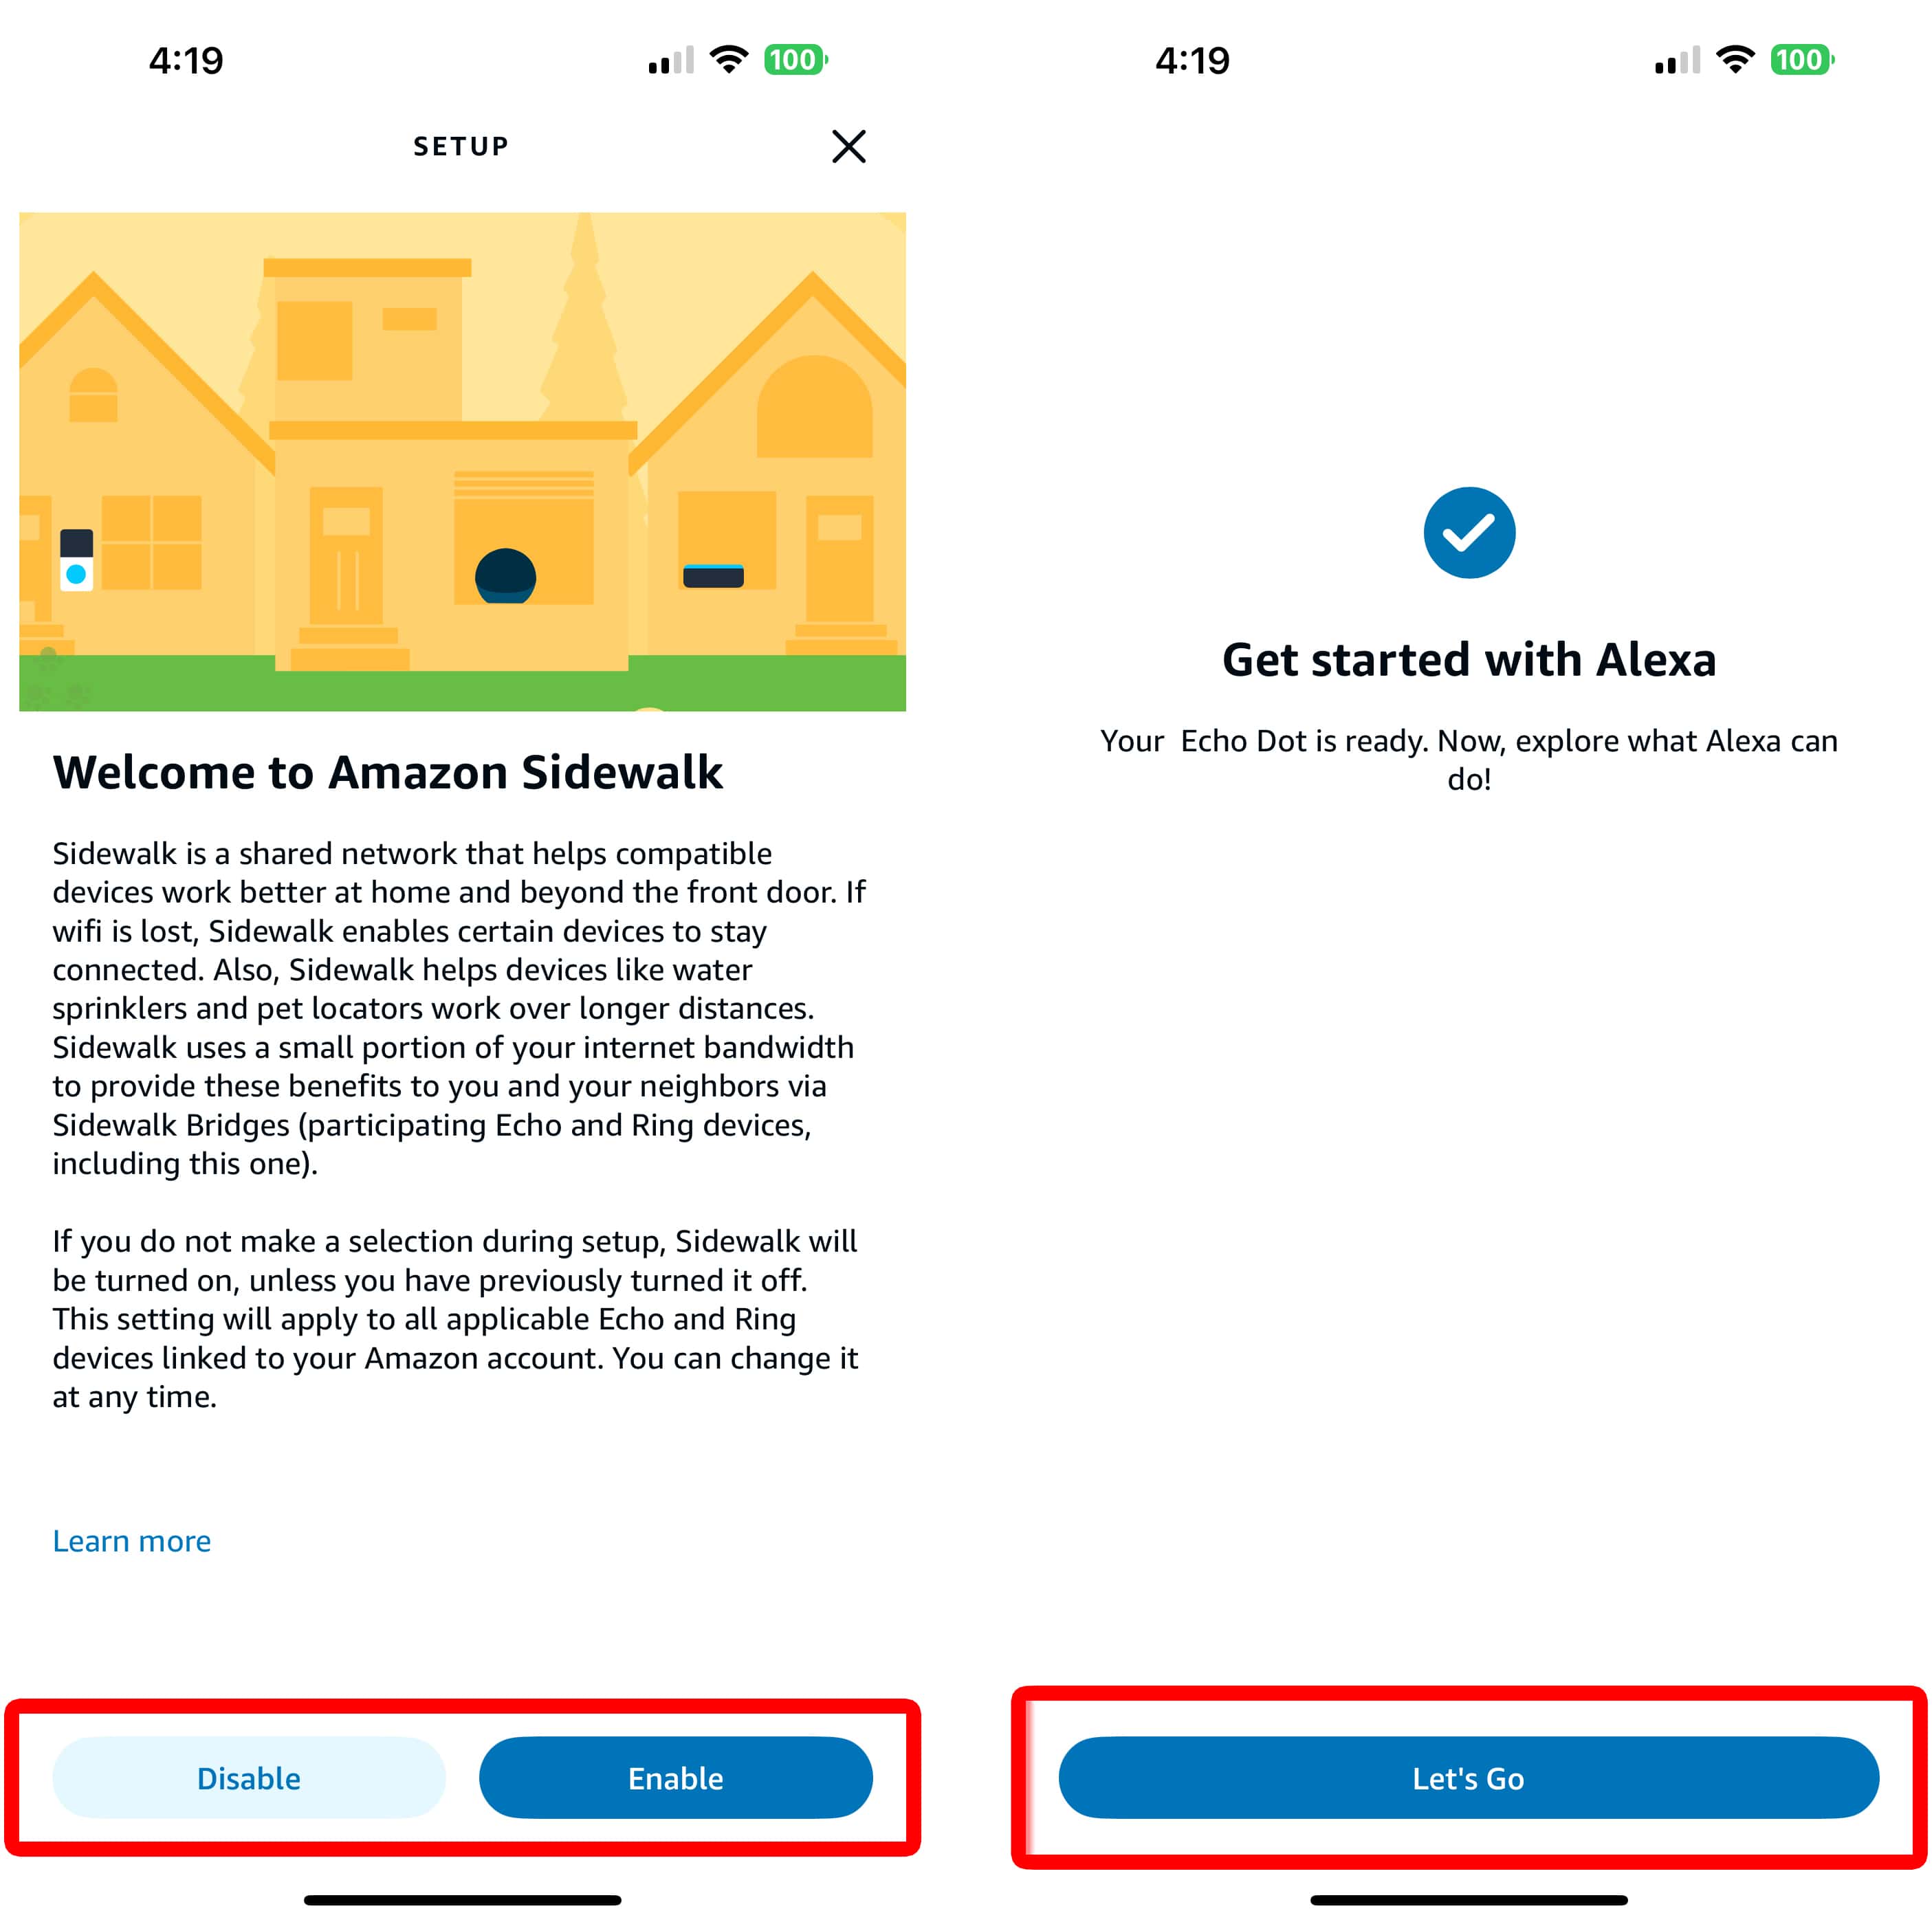
- Choose whether you want to enable Amazon Sidewalk. To find out more about Amazon Sidewalk and how it works, check out this guide from Amazon.
- Finally, tap Let’s Go.
Read More: How to Permanently Delete Alexa Devices