Lost your remote? No problem! With Alexa, you can turn on your Roku TV hands-free, pause movies with your voice, and much more. Here’s everything you need to know about how to connect your Roku TV or streaming device to Alexa and control it with voice commands.
Read More: How to Mirror Your iPhone to Roku
How to Connect Alexa to Roku
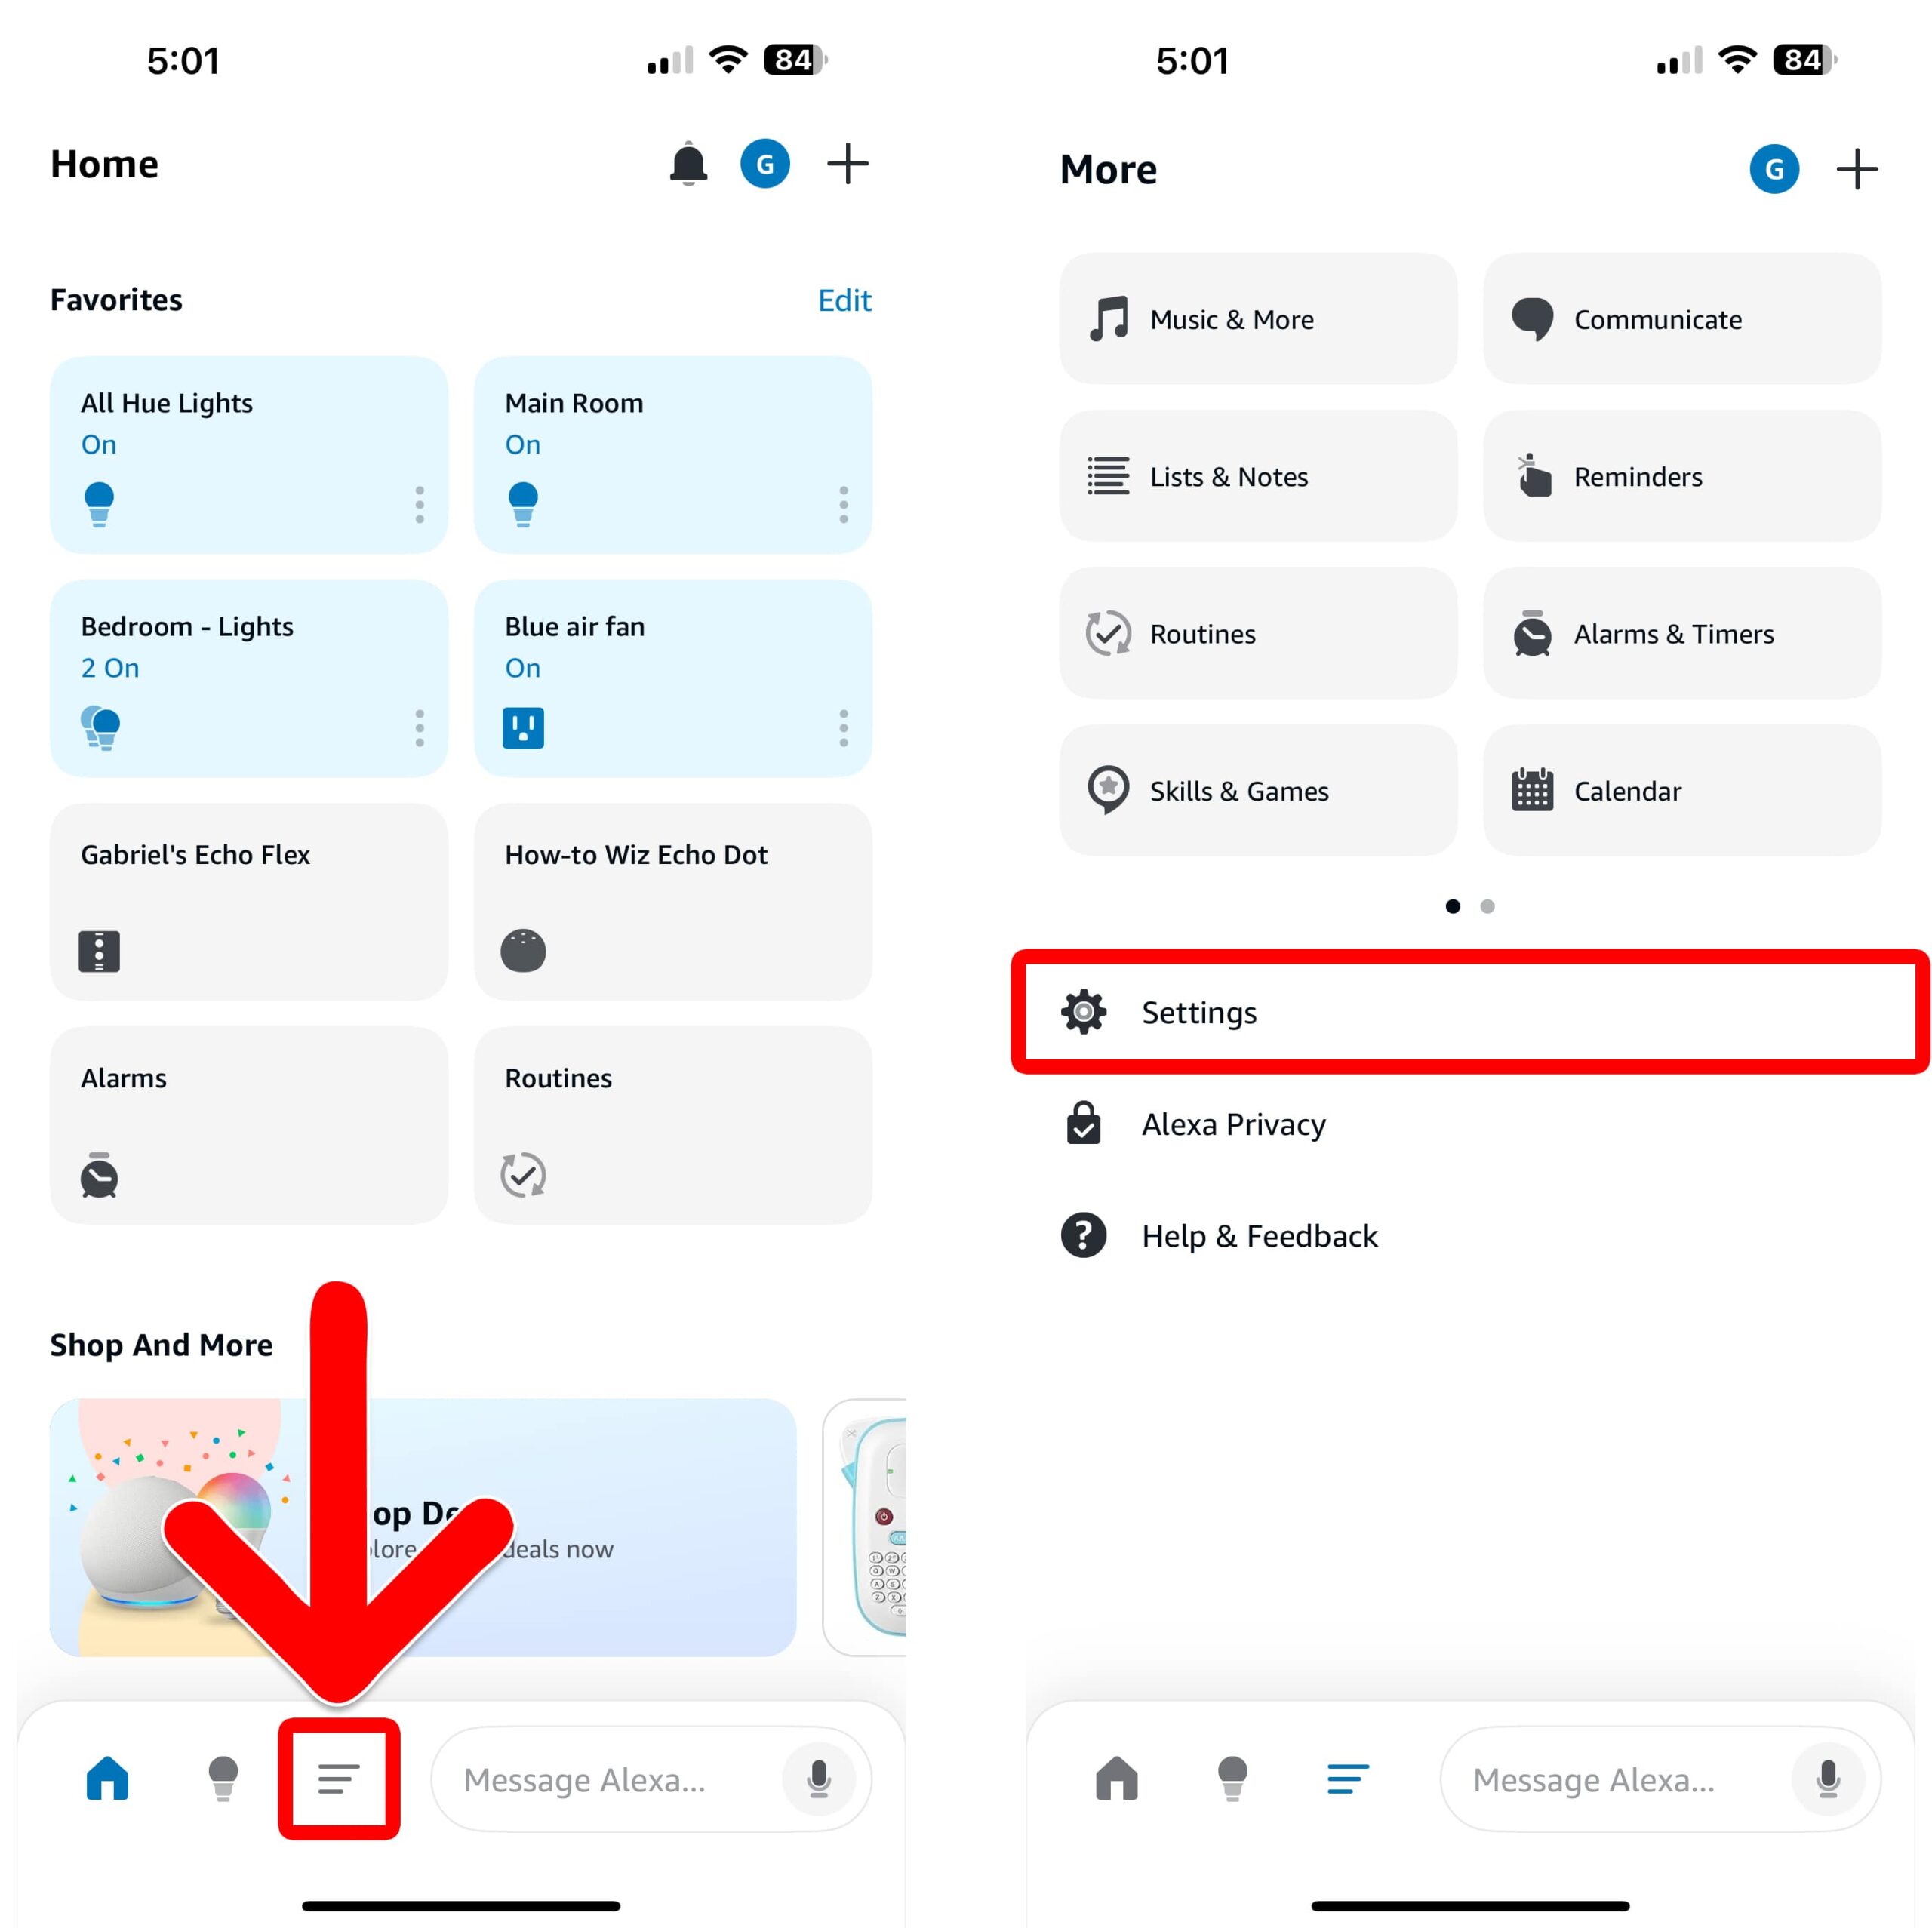
To connect Alexa to your Roku TV or streaming device, open the Alexa app and tap the three-line icon at the bottom of the screen. Then go to “TV & Video > Roku > Enable to Use.” Next, sign in to your Roku account and follow the on-screen instructions to connect Alexa.
- Open the Alexa app.
- Tap “More” (the three-line icon at the bottom of your screen).
- Tap “Settings.” You will see this in the bottom half of your screen.

- Tap “TV & Video.”
- Select “Roku.” If you don’t see a plus-sign icon next to this option, you might need to disable the skill and re-enable it to connect to a new Roku device.
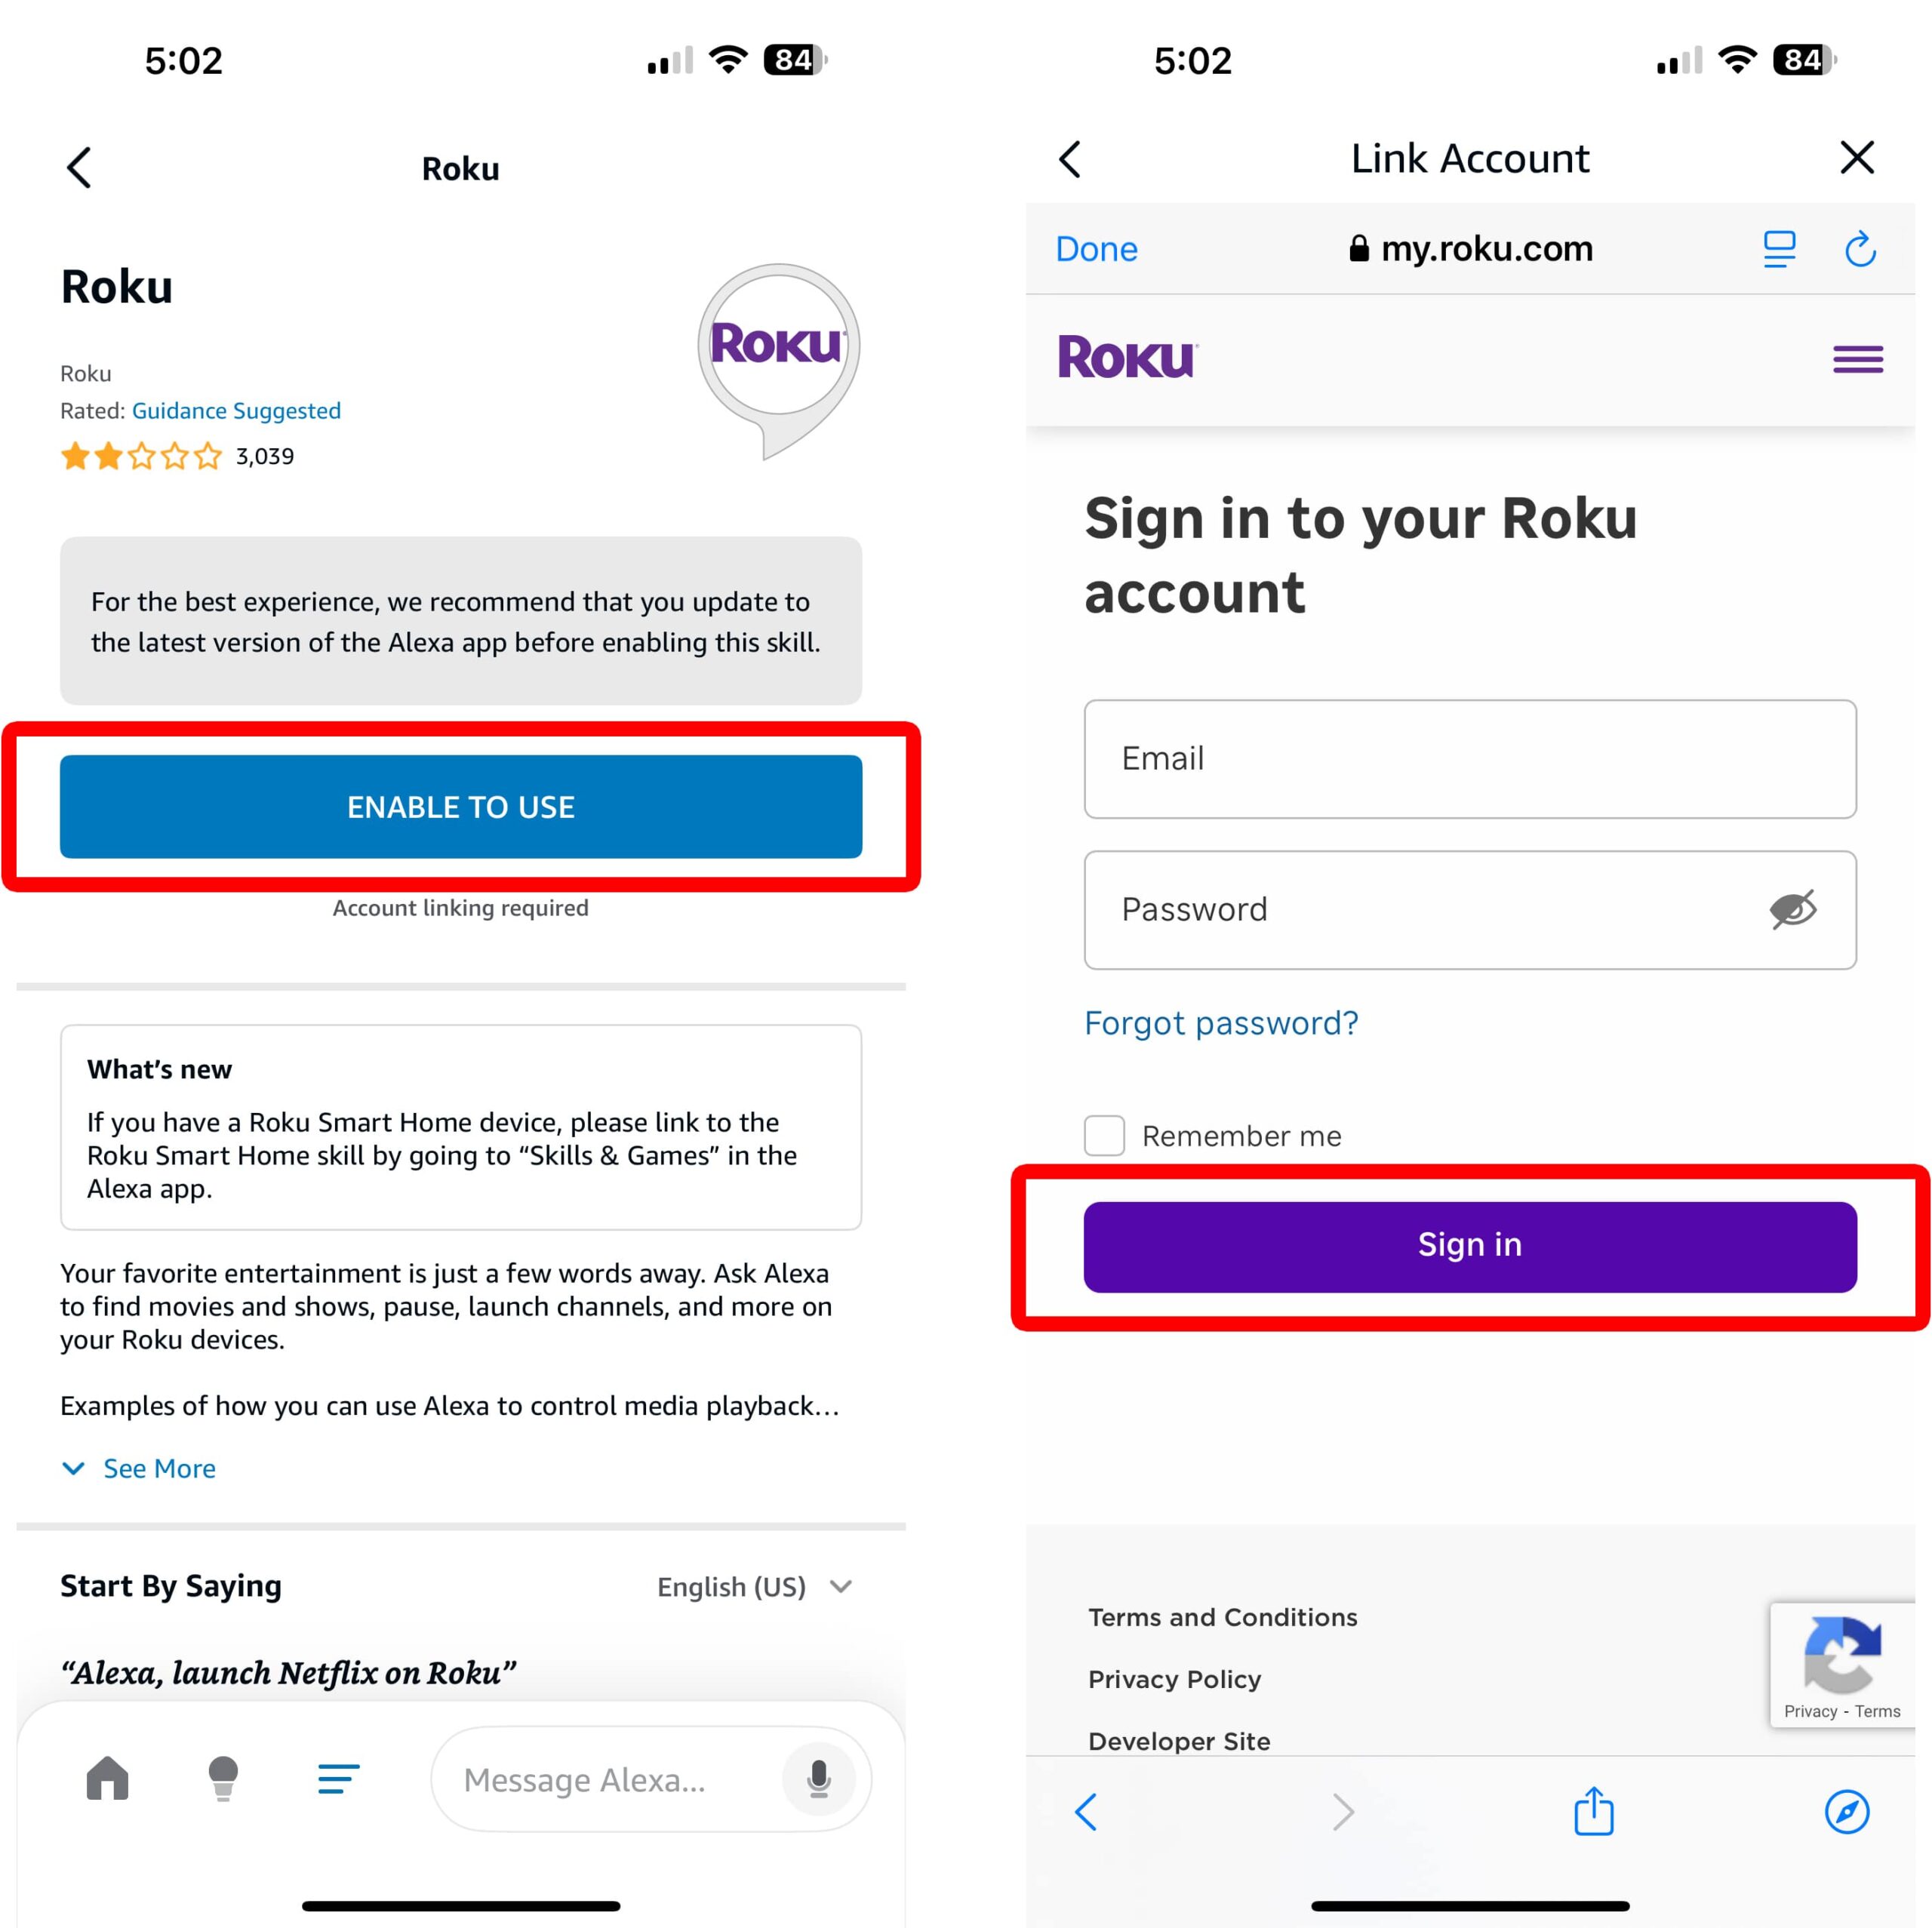
- Tap “Enable to Use.” This will open a web page where you can log into your Roku account.
- Sign in with your Roku account and tap “Sign In.”
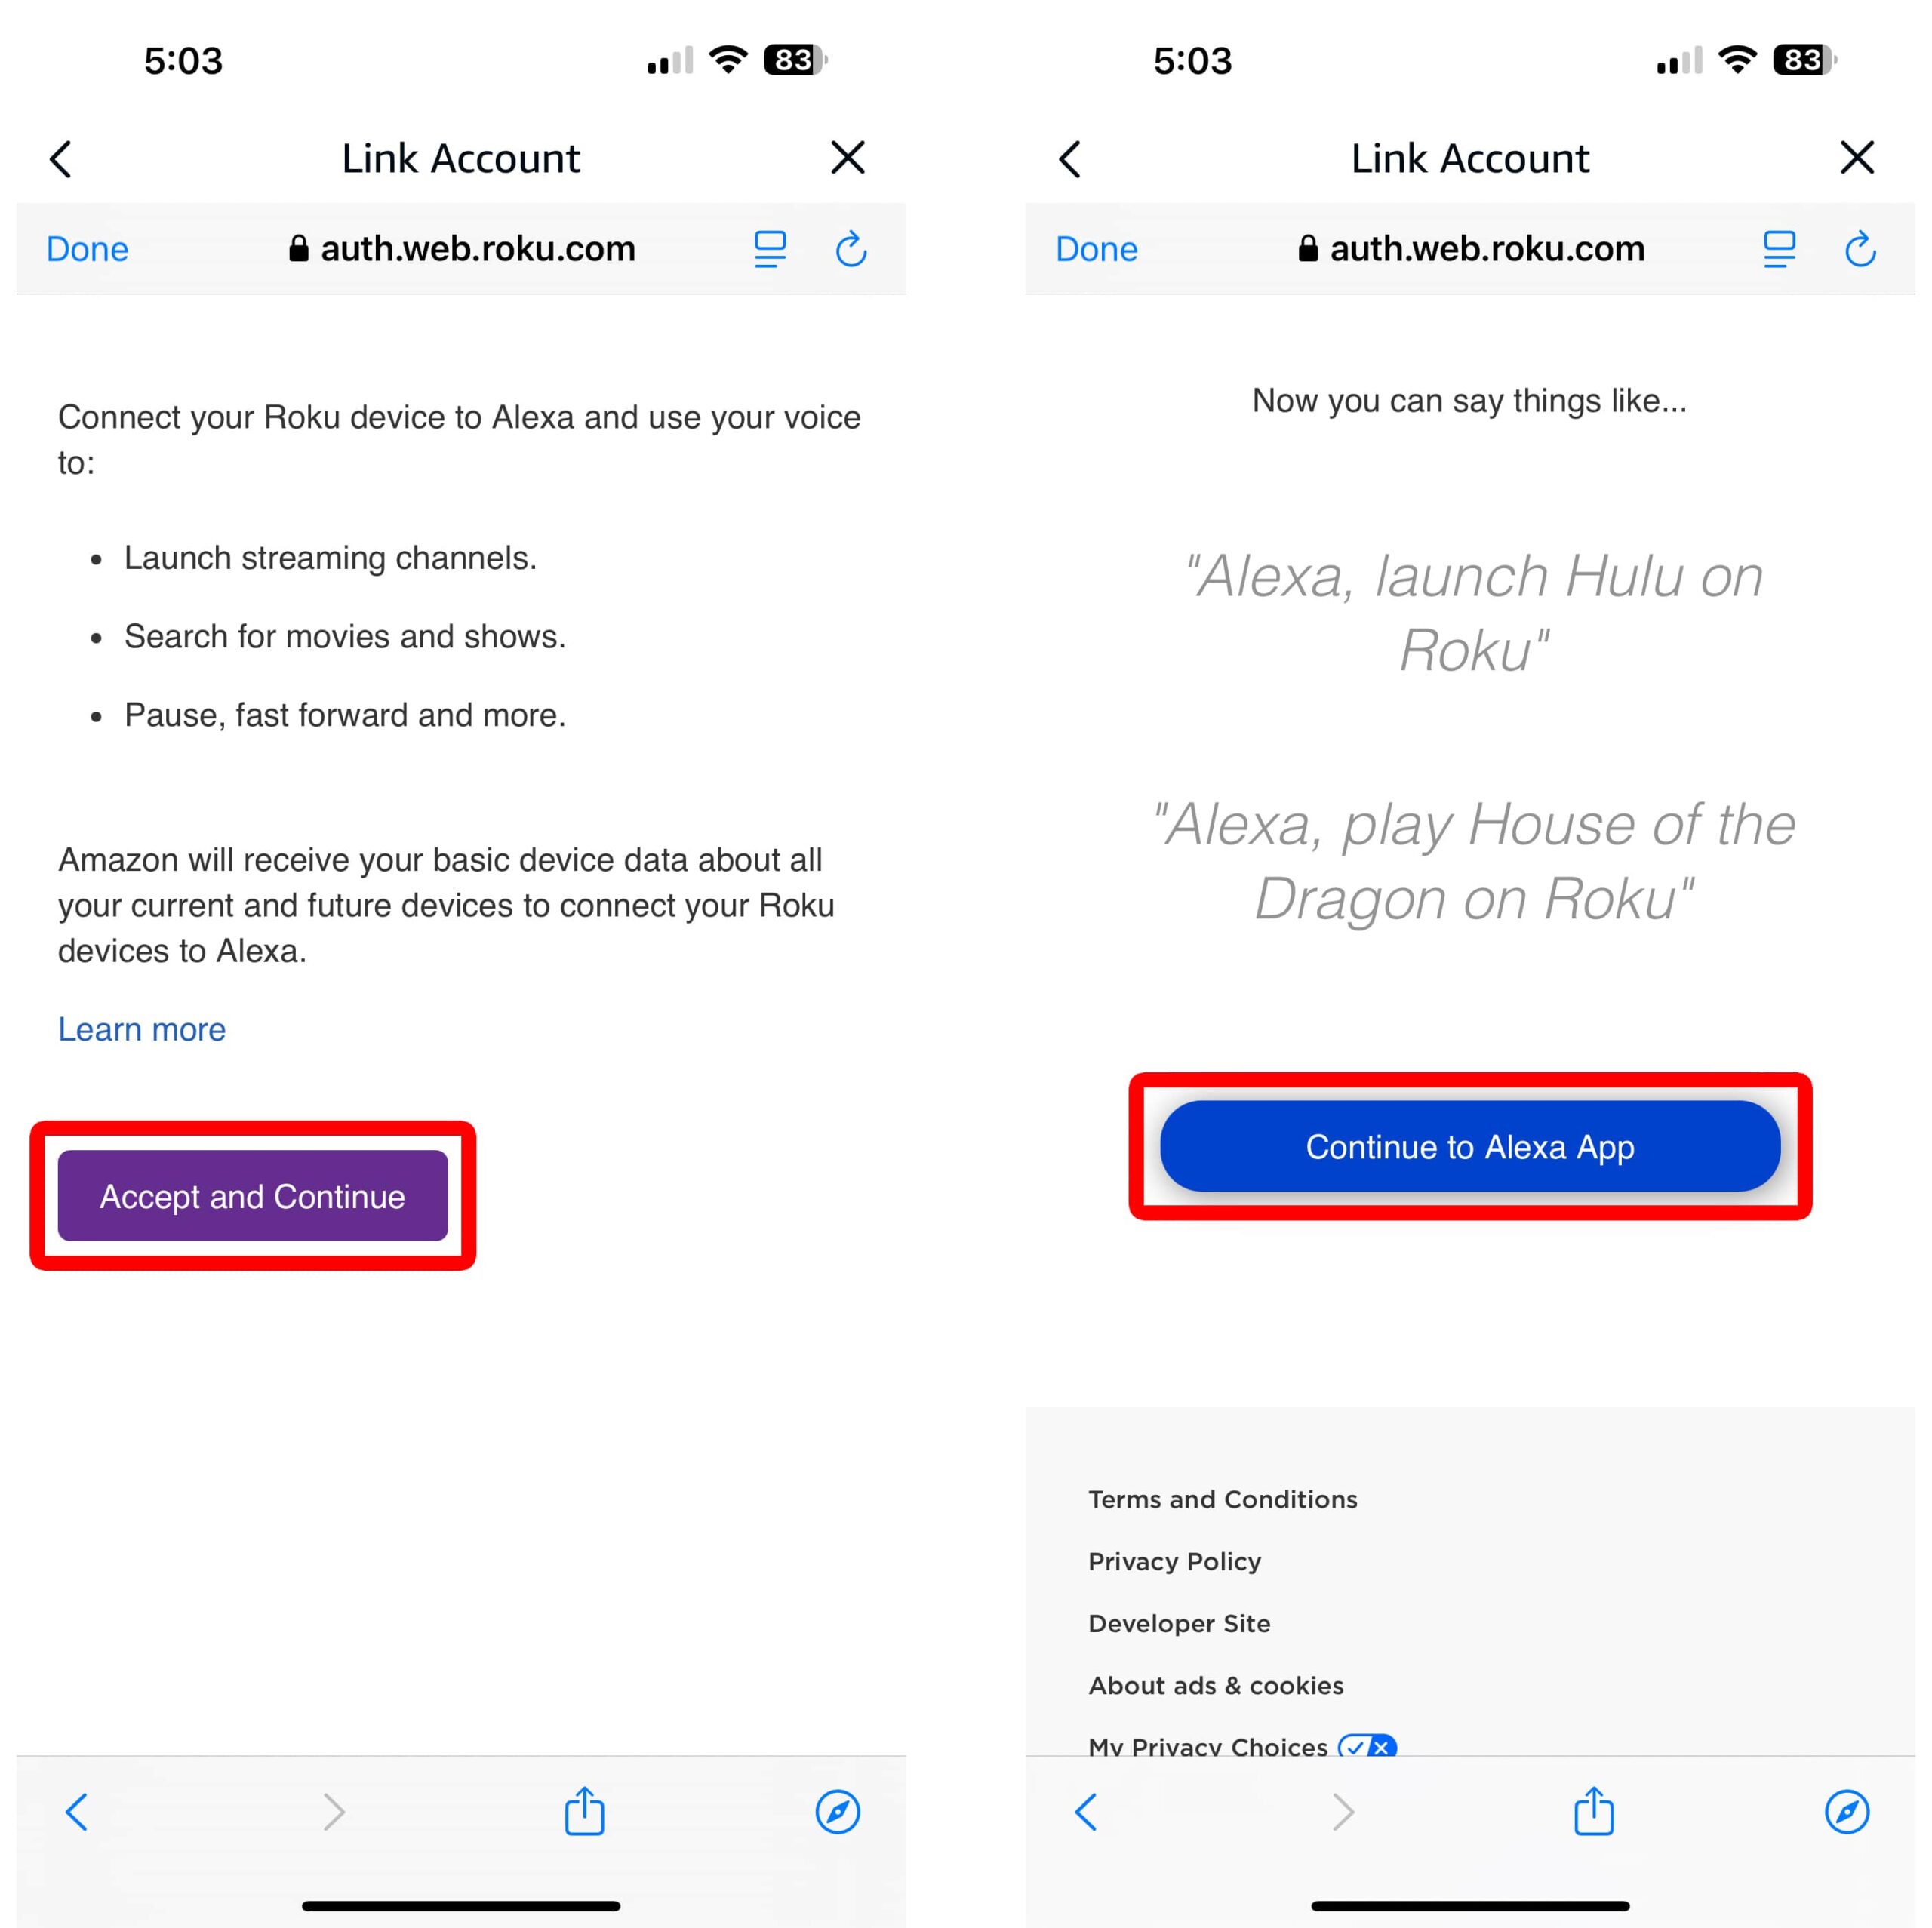
- Tap “Accept and Continue.”
- Tap “Continue to Alexa App.”
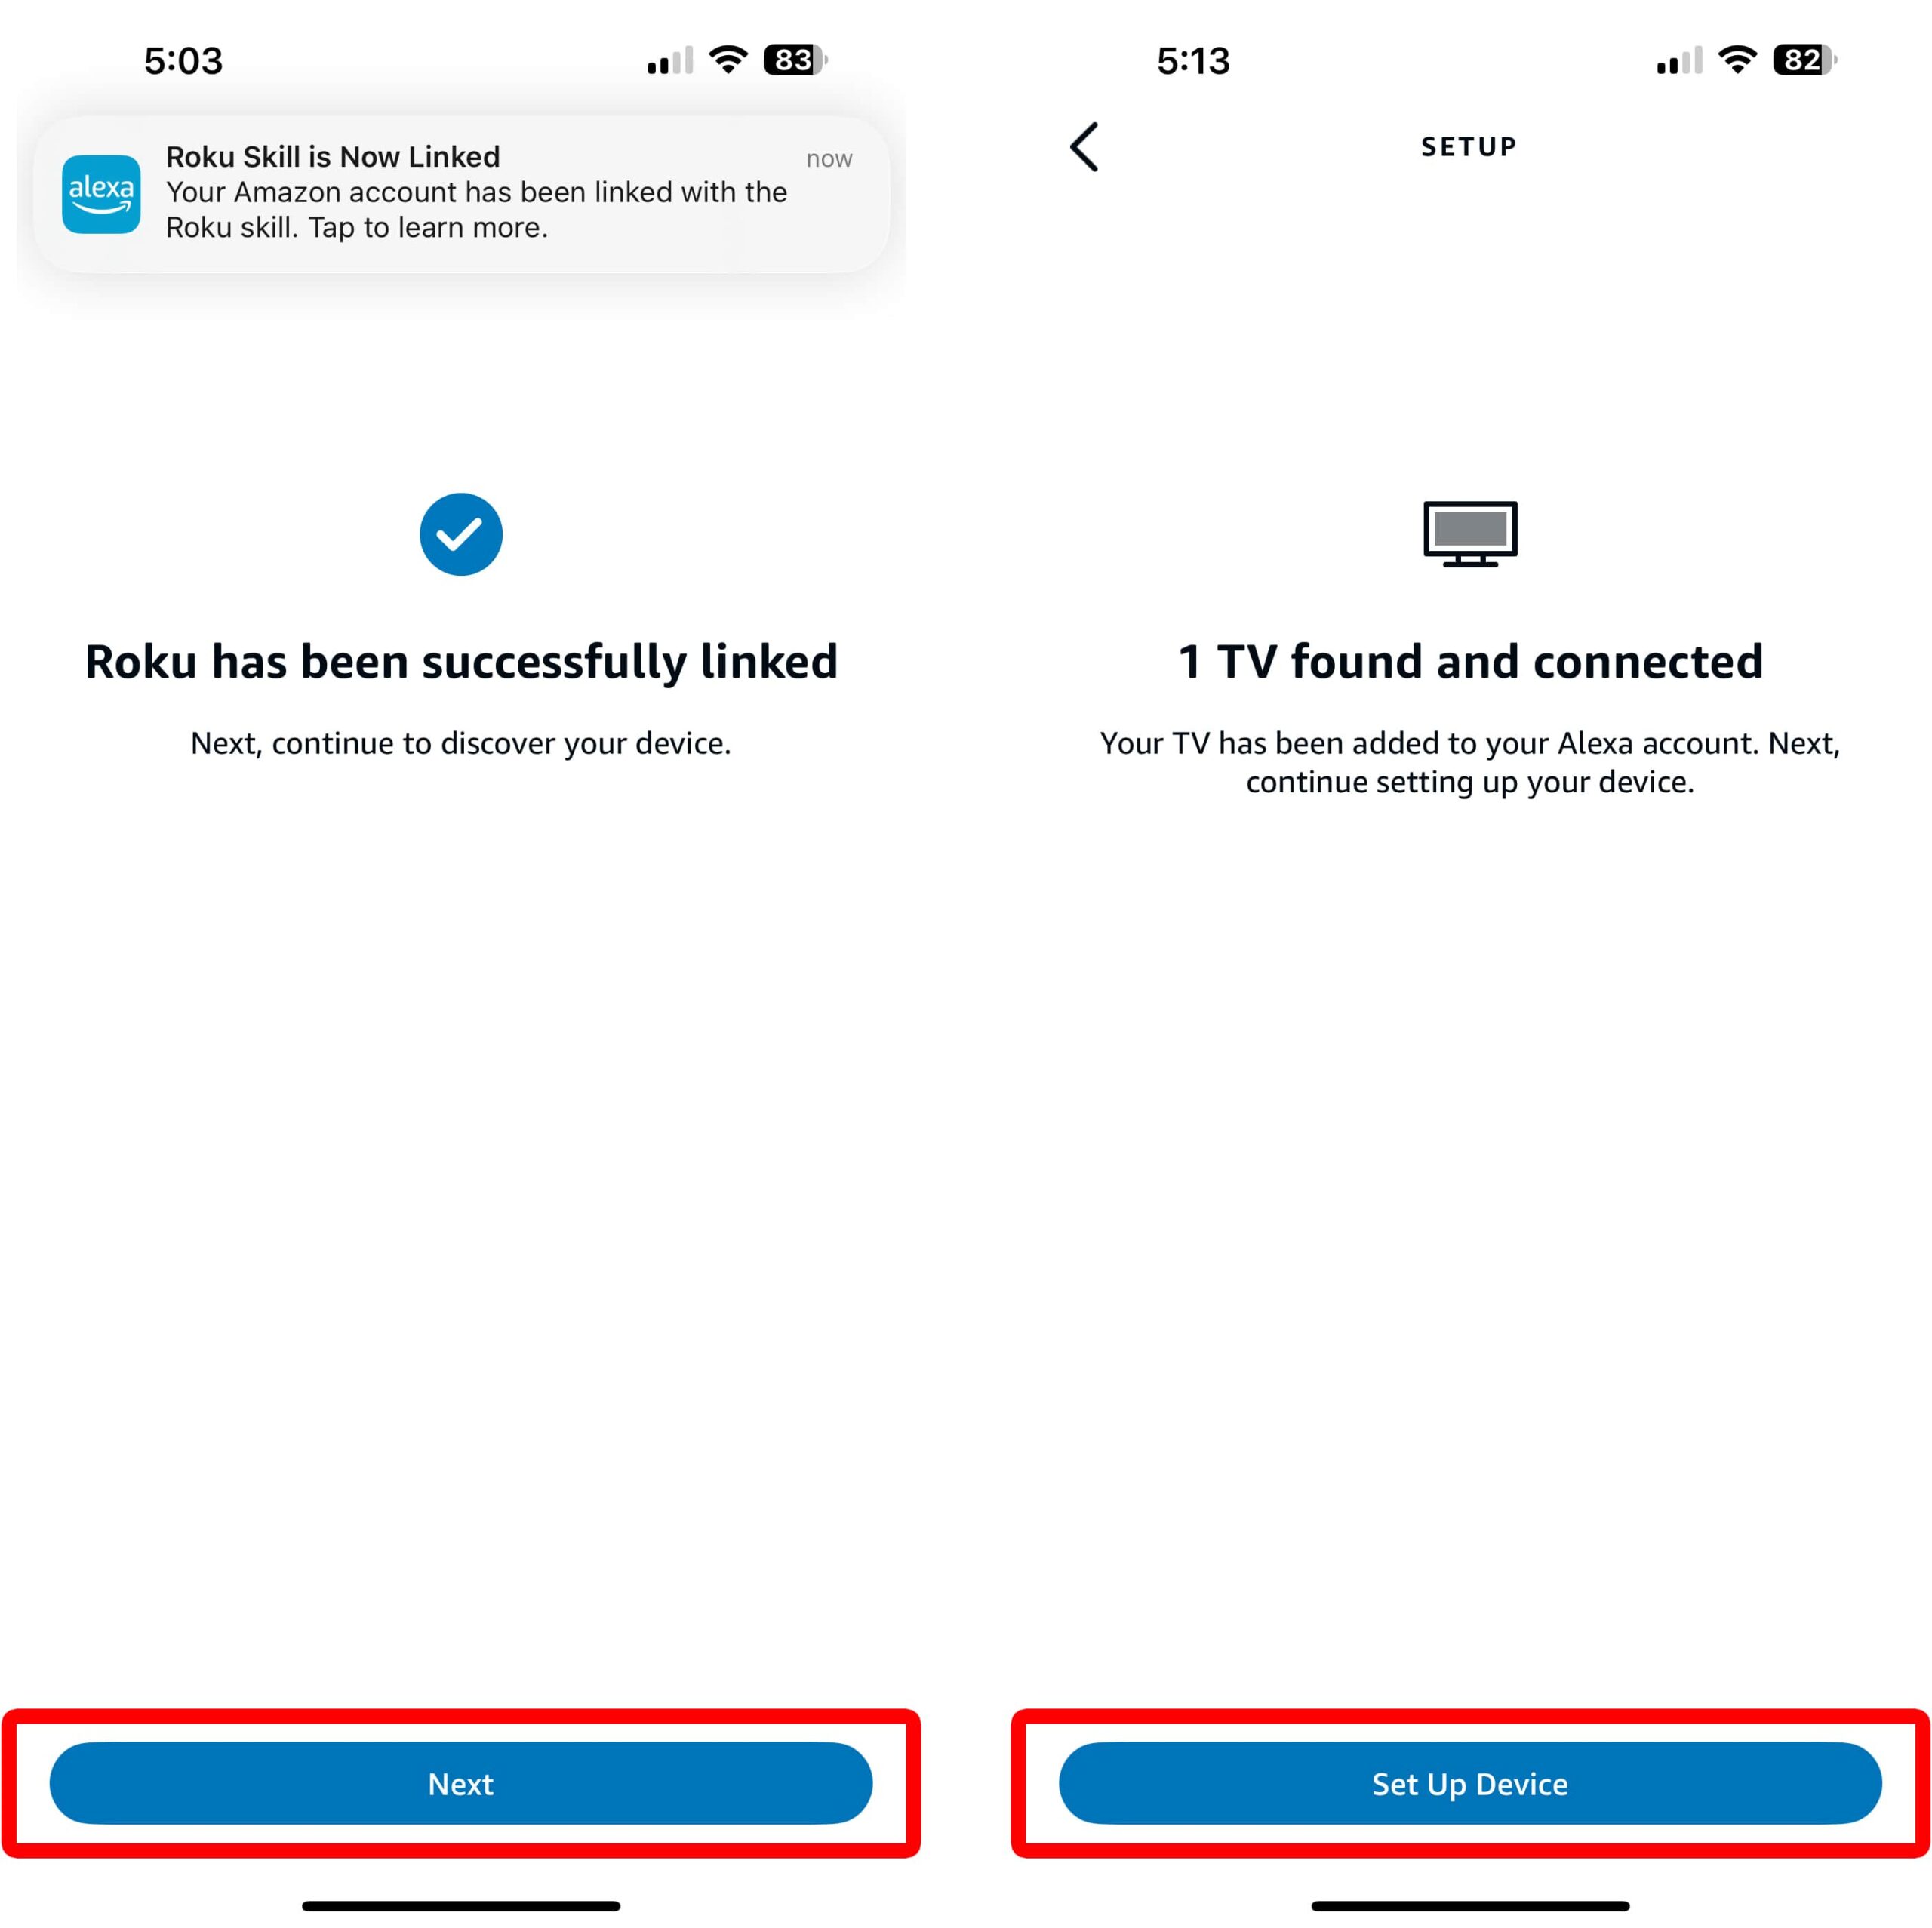
- Tap “Next.”
- Wait for Alexa to connect to your Roku device. This might take a few minutes.
- Select “Set Up Device.” If Alexa doesn’t connect to your Roku device, make sure your smartphone and Roku device are on the same WiFi network. You can find out how to check your Roku’s WiFi network in the next section.
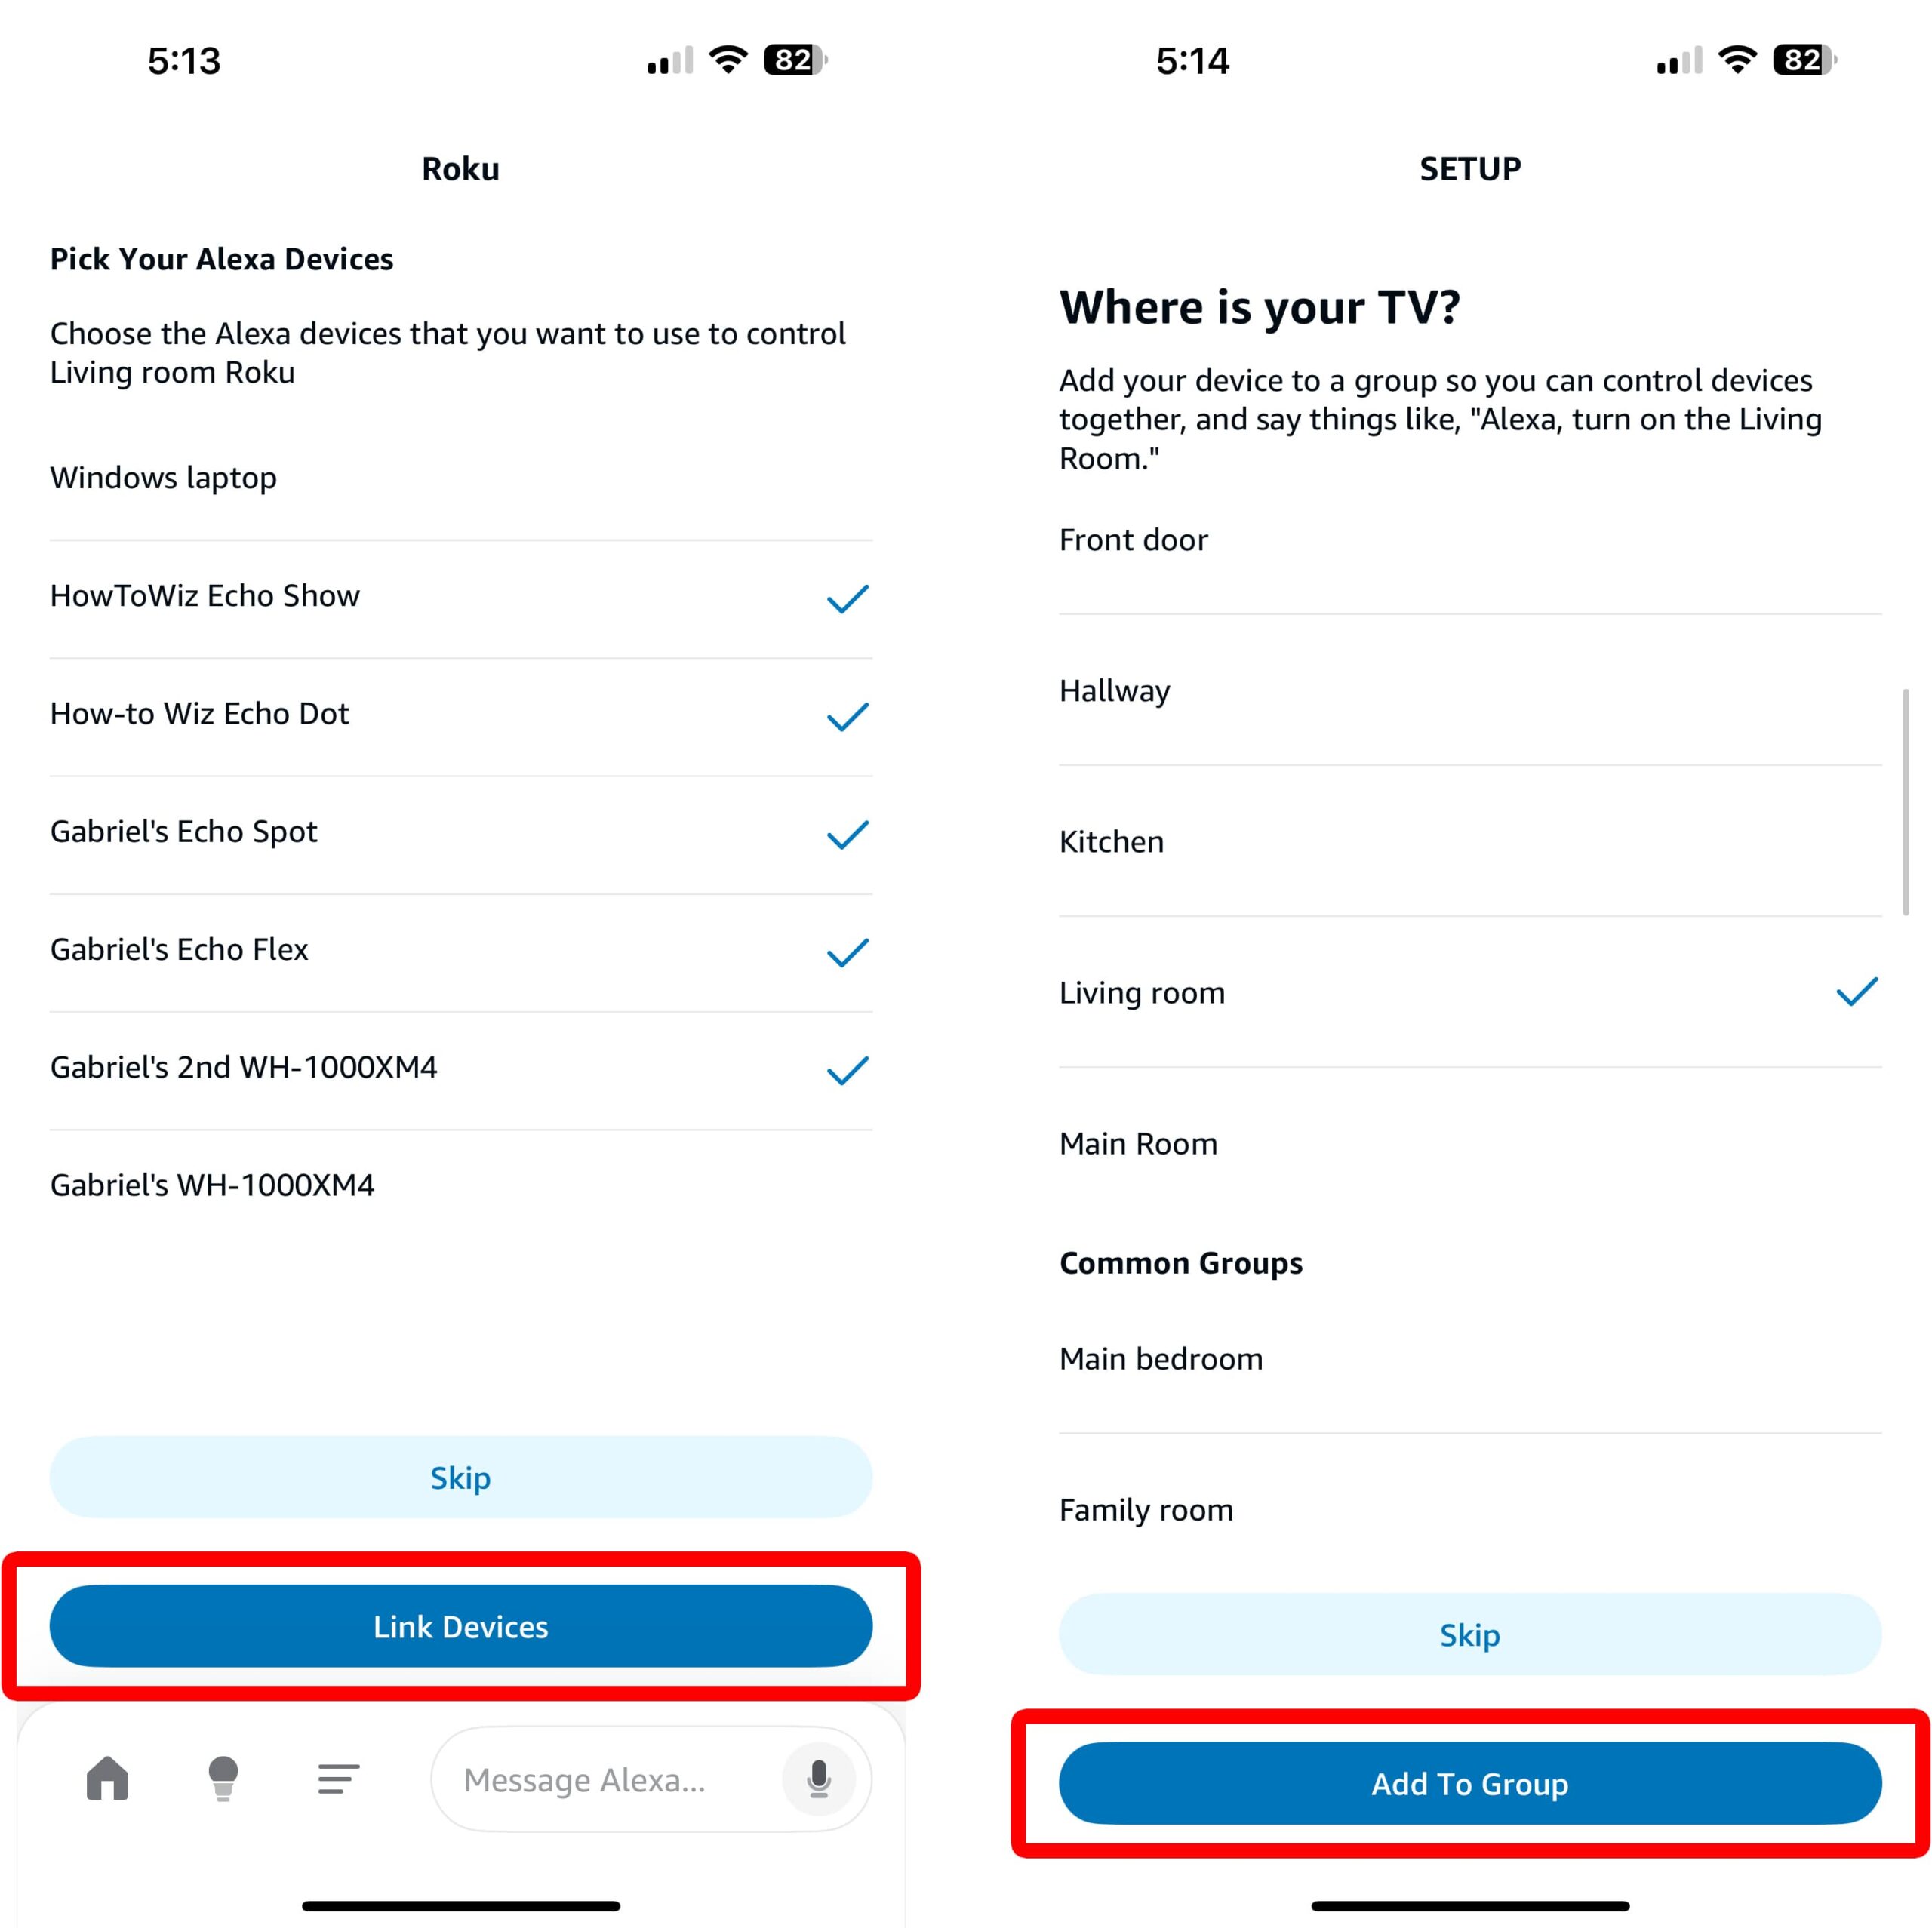
- Select Alexa devices to connect and tap “Link Devices.” This will allow you to control your TV with certain Alexa devices, such as your Echo smart speakers or Alexa-enabled headphones.
- Select your TV room and tap “Add to Group.”
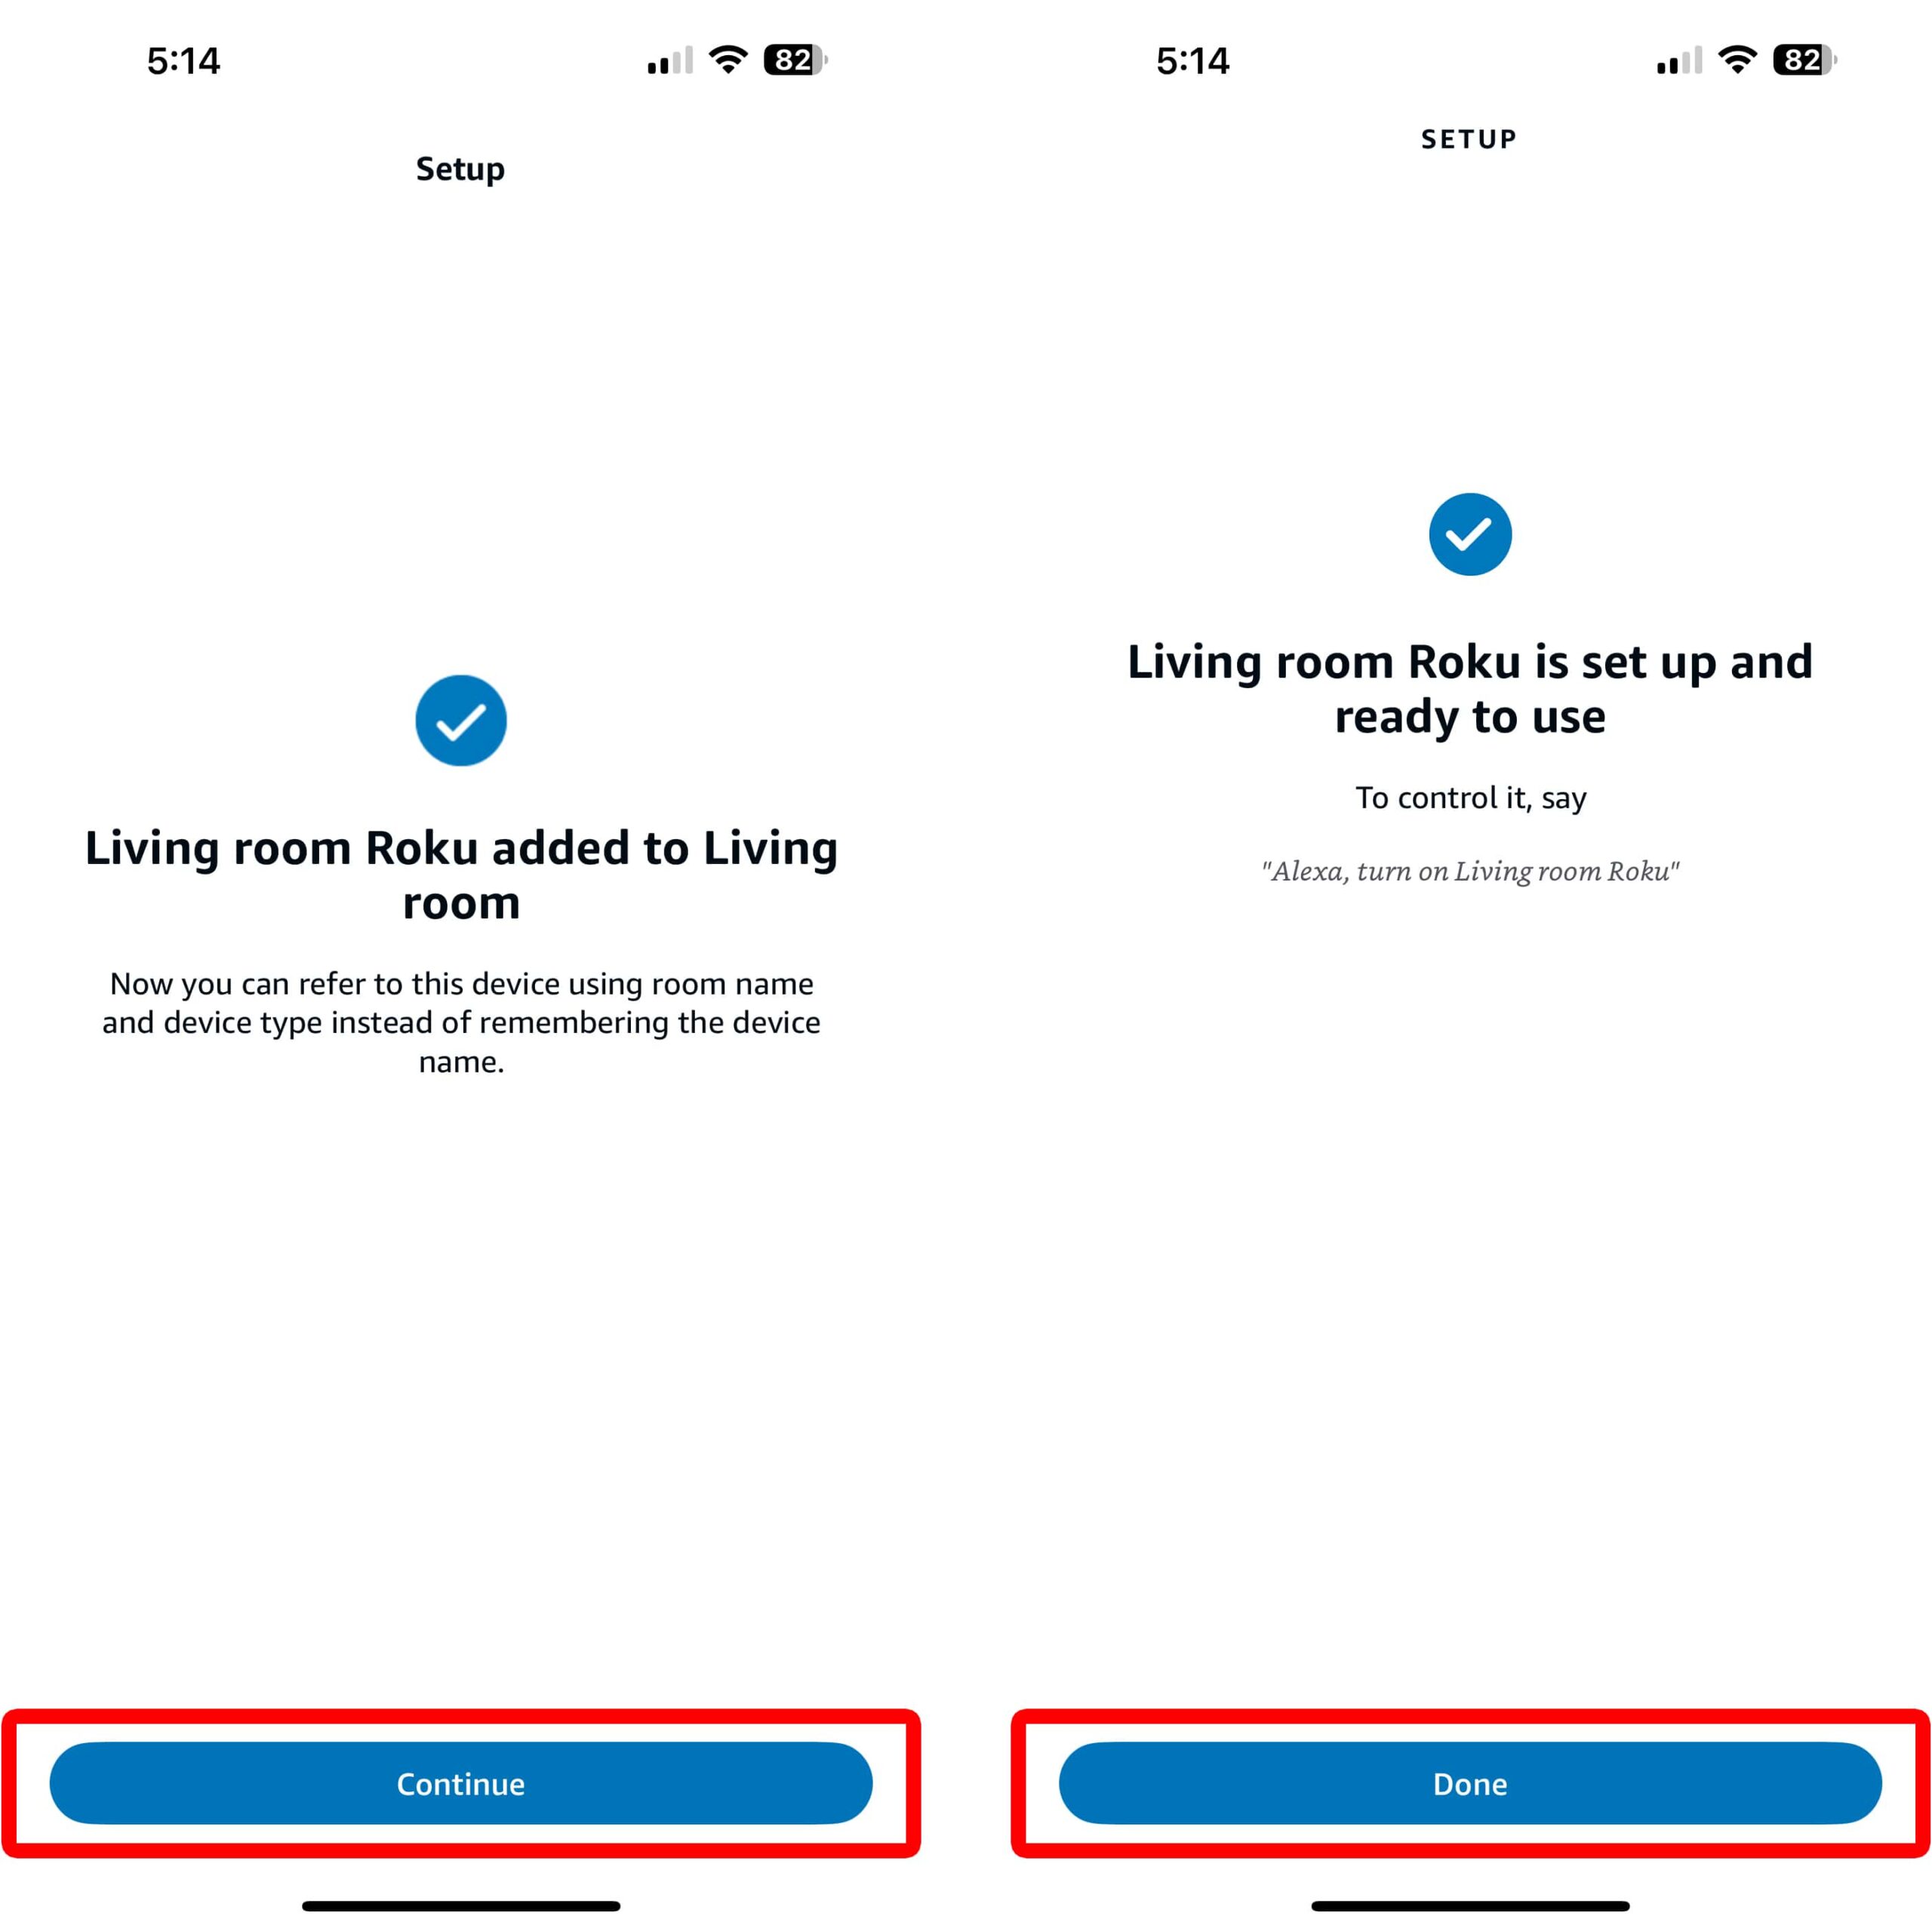
- Tap “Continue.”
- Finally, tap “Done.”

Read More: How to Permanently Delete Alexa Devices
How to Check Your WiFi Network on Roku
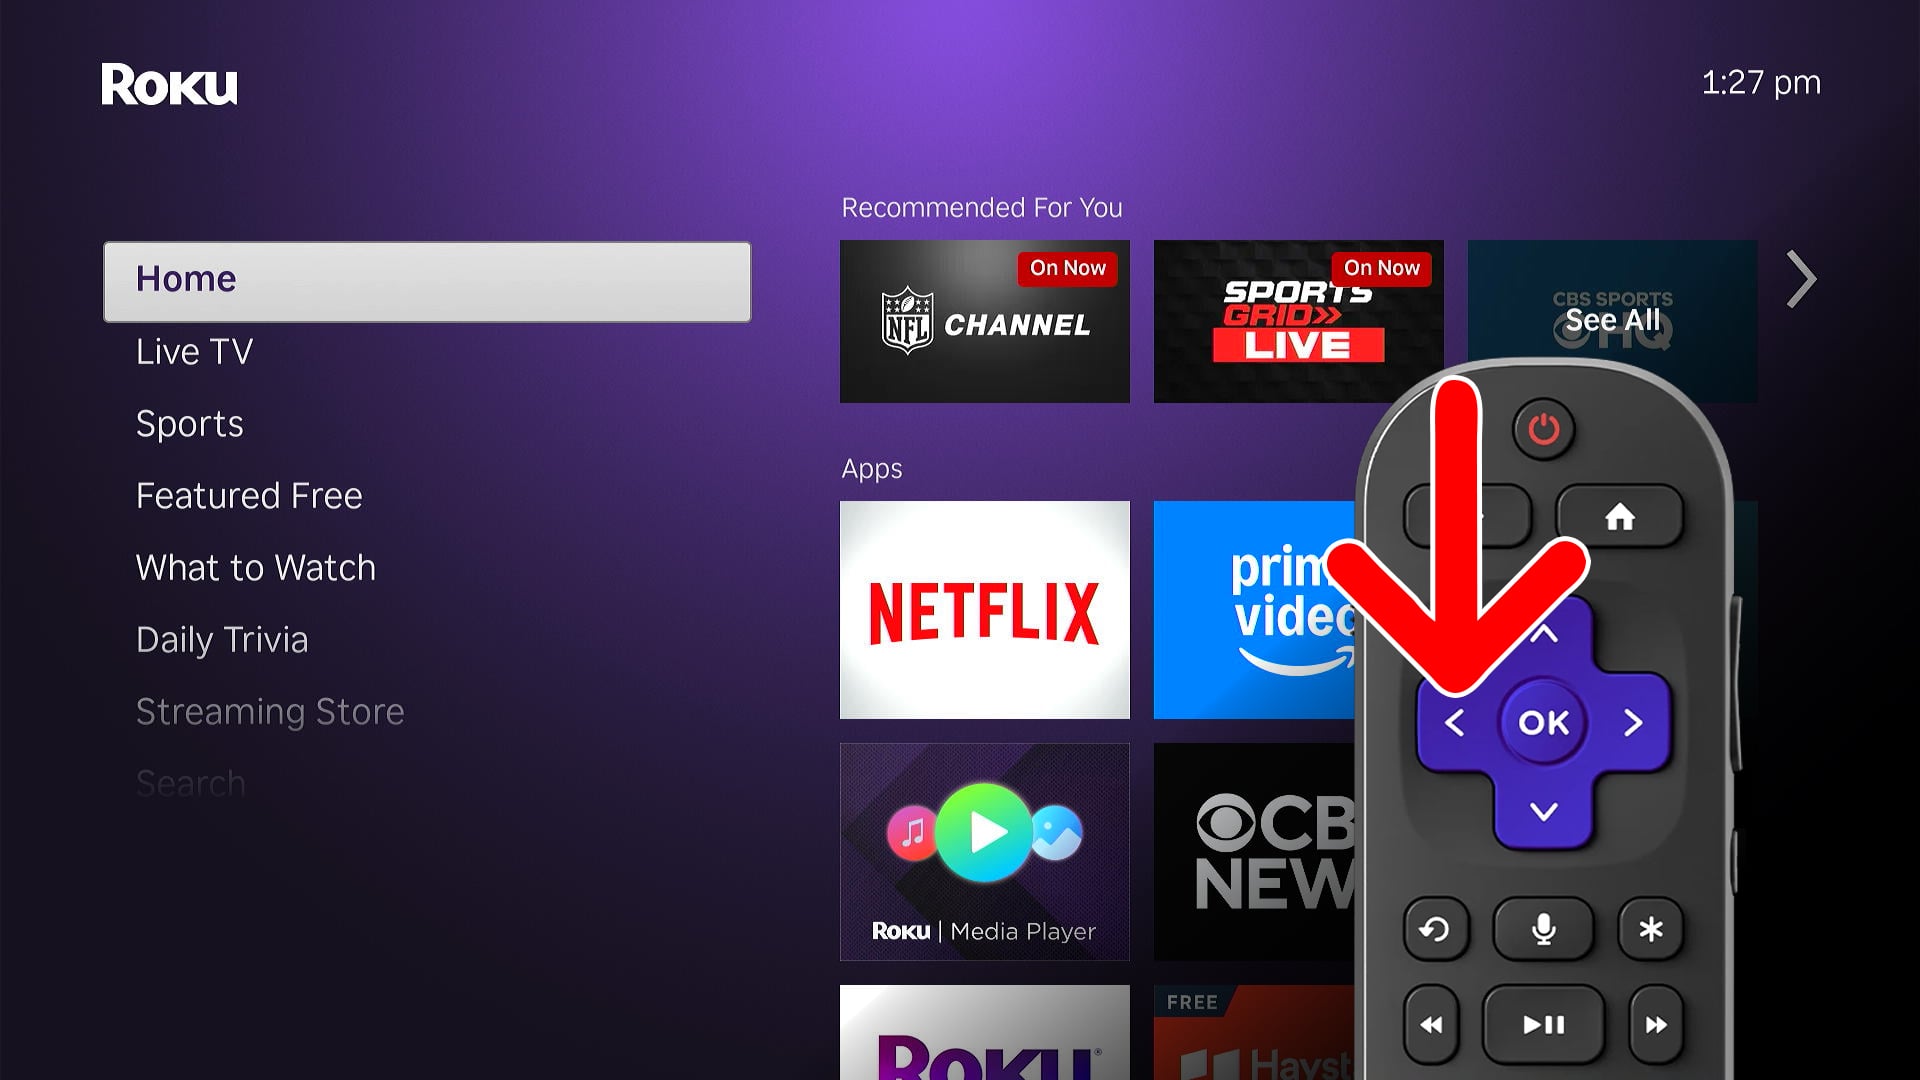
- Press the “Left” button on your Roku remote. This will open the Roku menu on the left side of your screen.

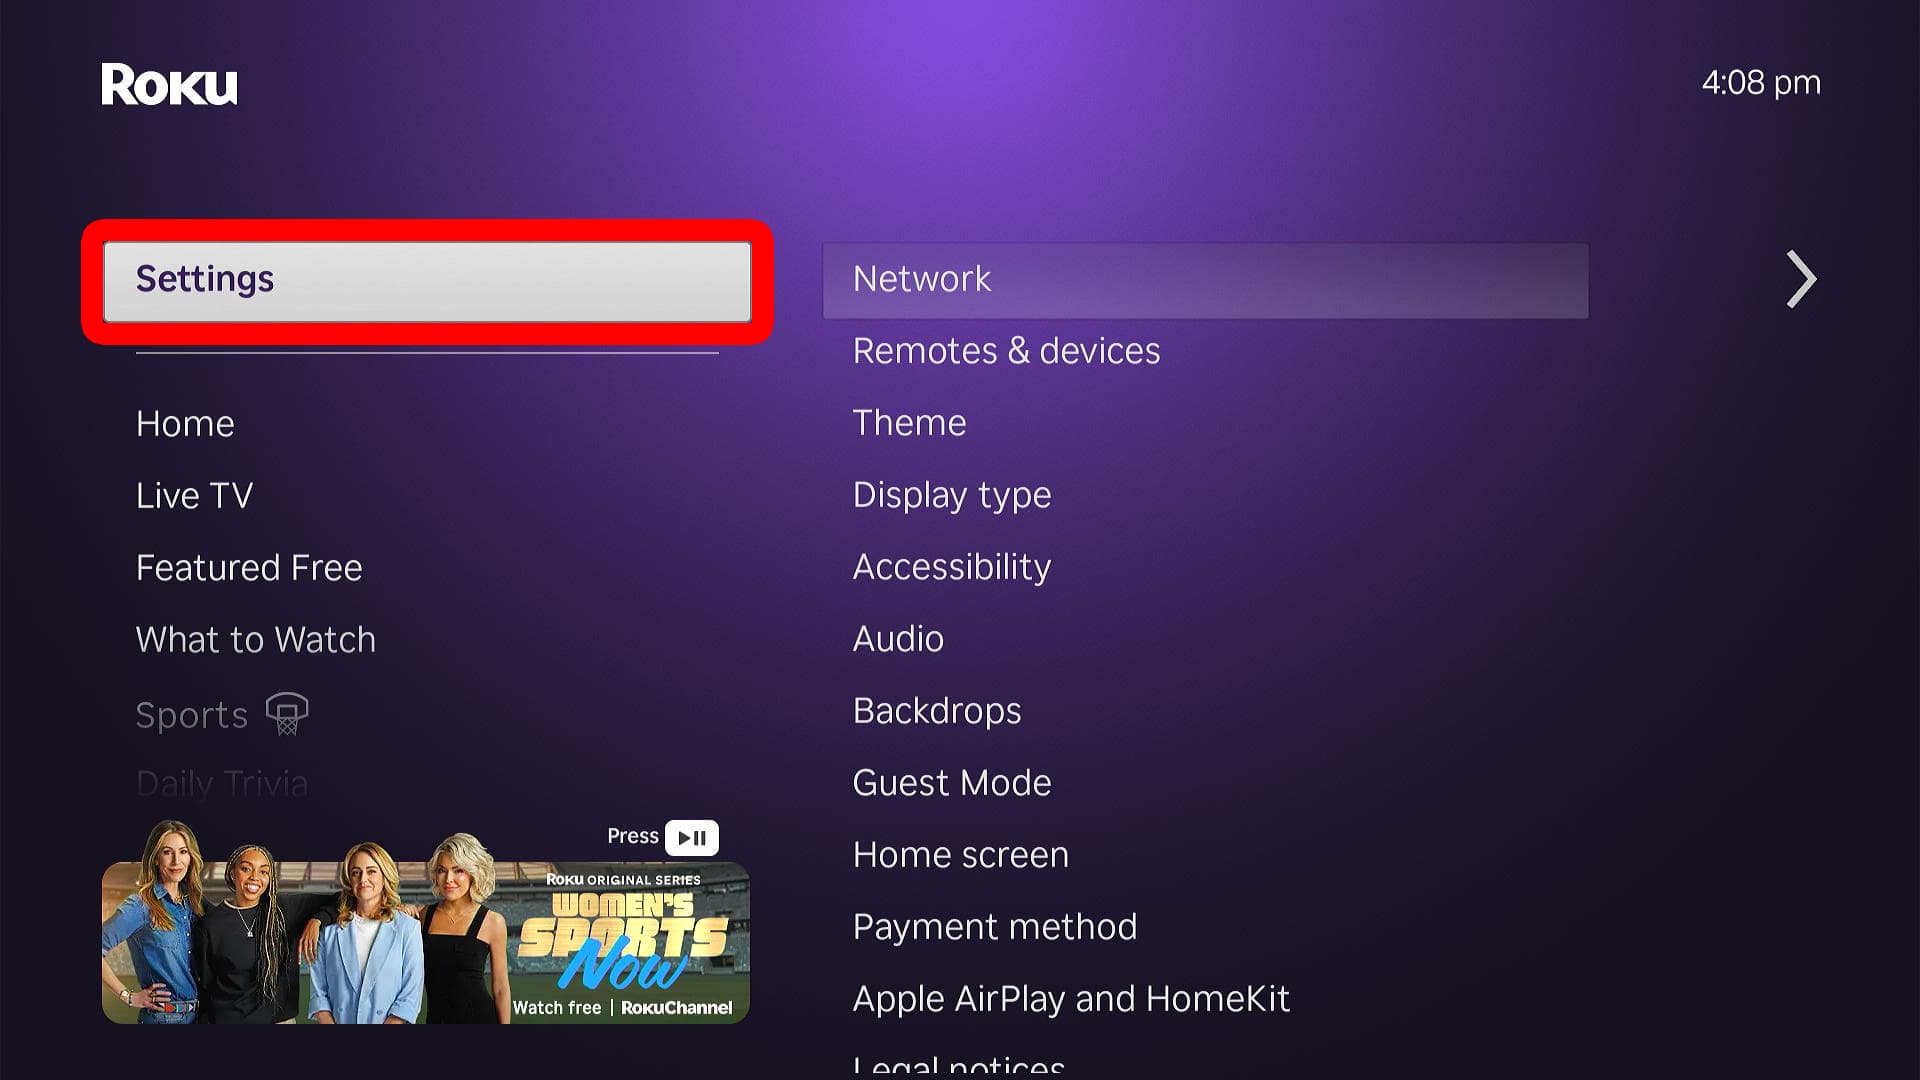
- Go to “Settings.” To do this, press the Up button on your Roku remote once.
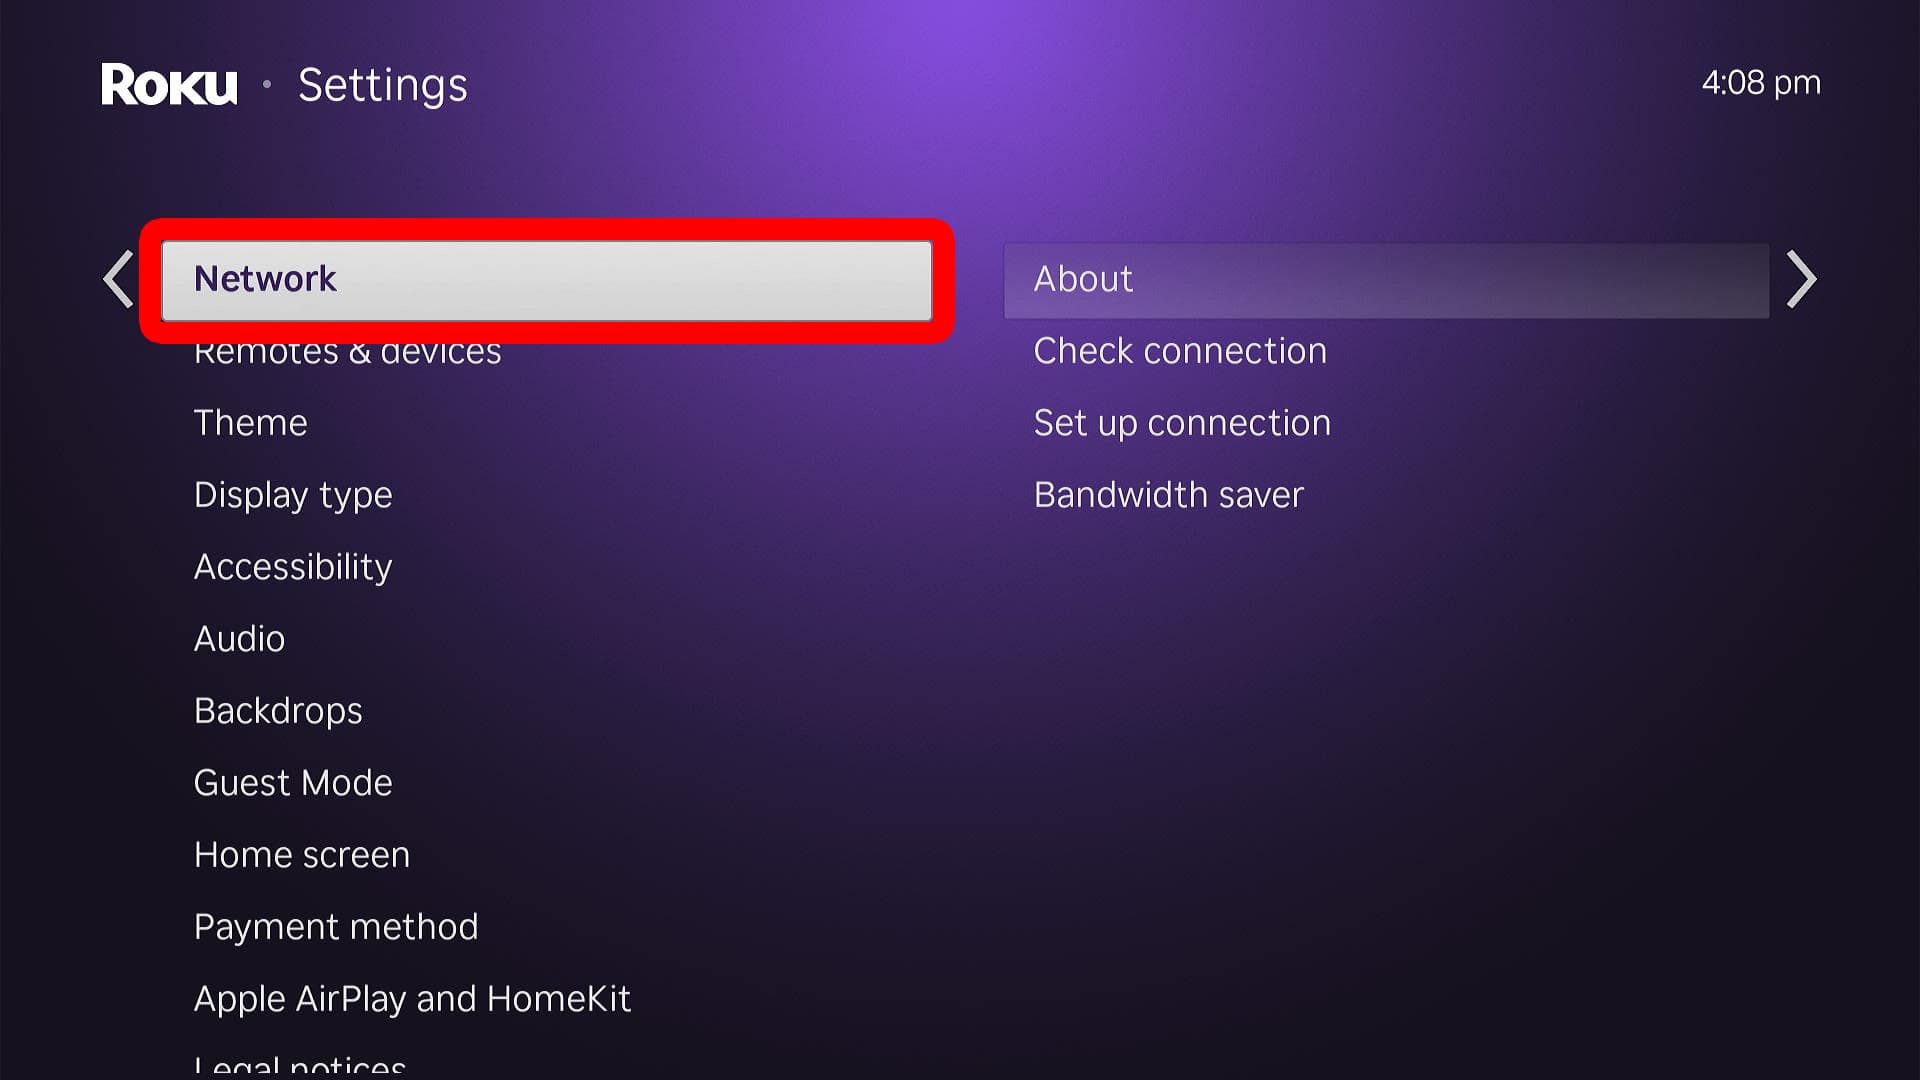
- Select “Network.”
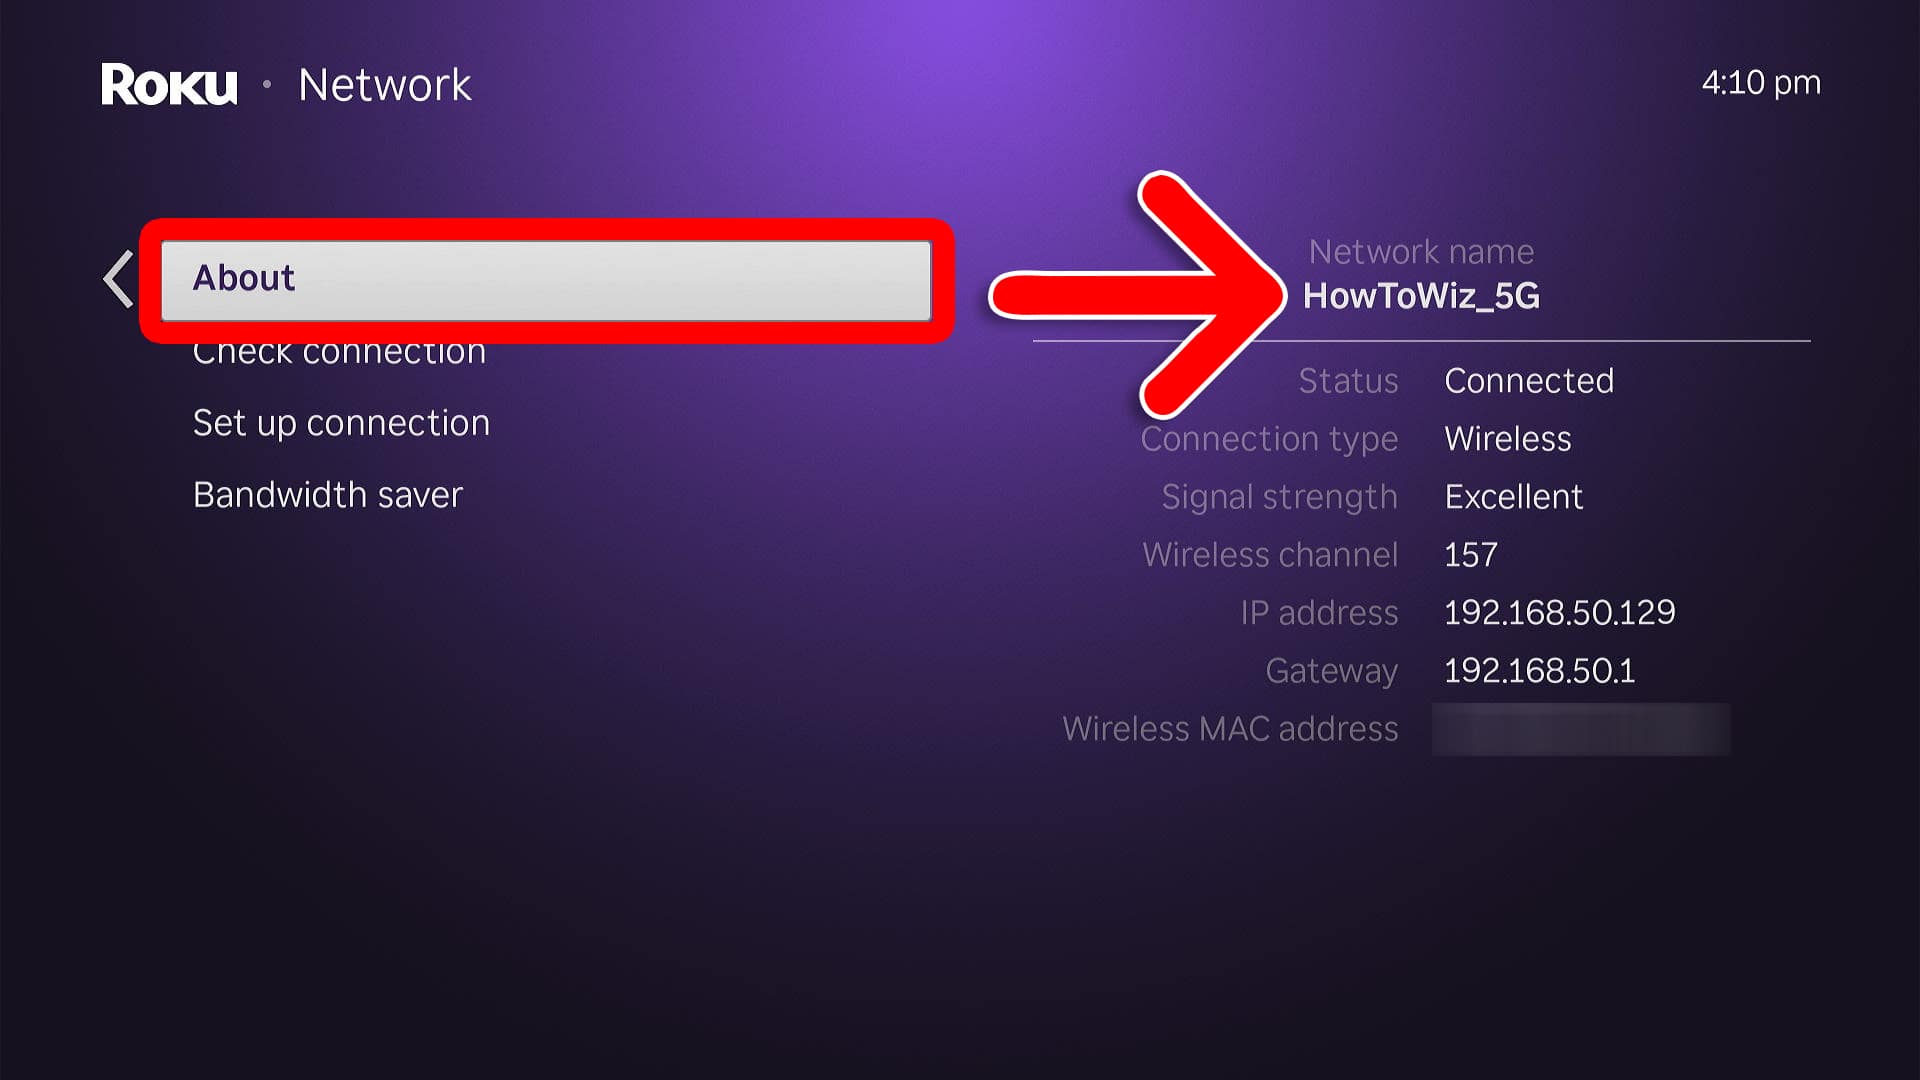
- Finally, select “About” to see your WiFi network on the right.
If nothing else works, you can always reset your Roku device and set it up from scratch.
Read More: How to Reset Your Roku Device or TV