If your Mac is running slow, you can speed things up by freeing up space. To keep things running smoothly, you should always keep 10–20% of your storage free. Here’s how to free up space on your Mac and reduce “System Data.”
How to Check Your Free Space on a Mac
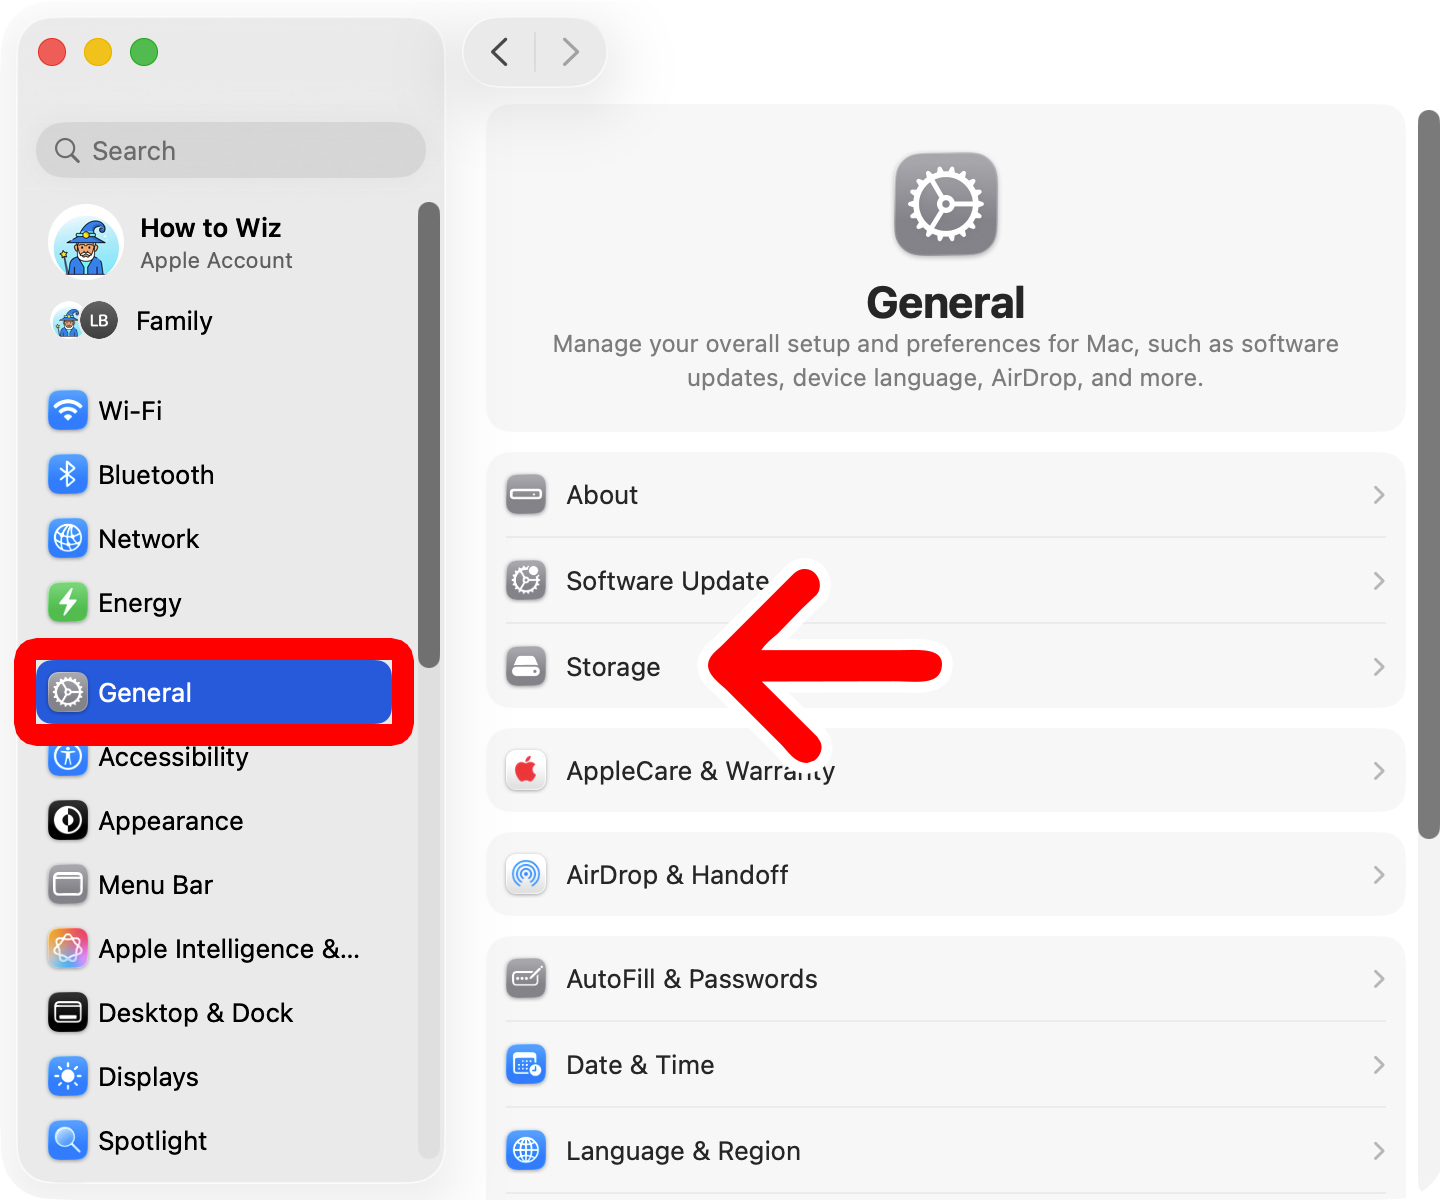
To check your free space on a Mac, click the Apple icon in the top-left corner of your screen and select “System Settings.” Then go to “General” in the left sidebar and select “Storage” on the right. Finally, you will see your total storage and free space in the top-right corner of the window.
- Click the Apple icon in the top-left corner of your screen.
- Select “System Settings.”

- Go to “General.” You will see this in the left sidebar of the Settings window.
- Select “Storage.” You will see this on the right side of the window.

- Finally, you will see your total storage capacity and remaining disk space in the top-right corner.


From here, you can scroll down and select one of the options under “Recommendations” to automatically free up space on your Mac. For example, select “Store in iCloud” to move your photos and other documents to iCloud.
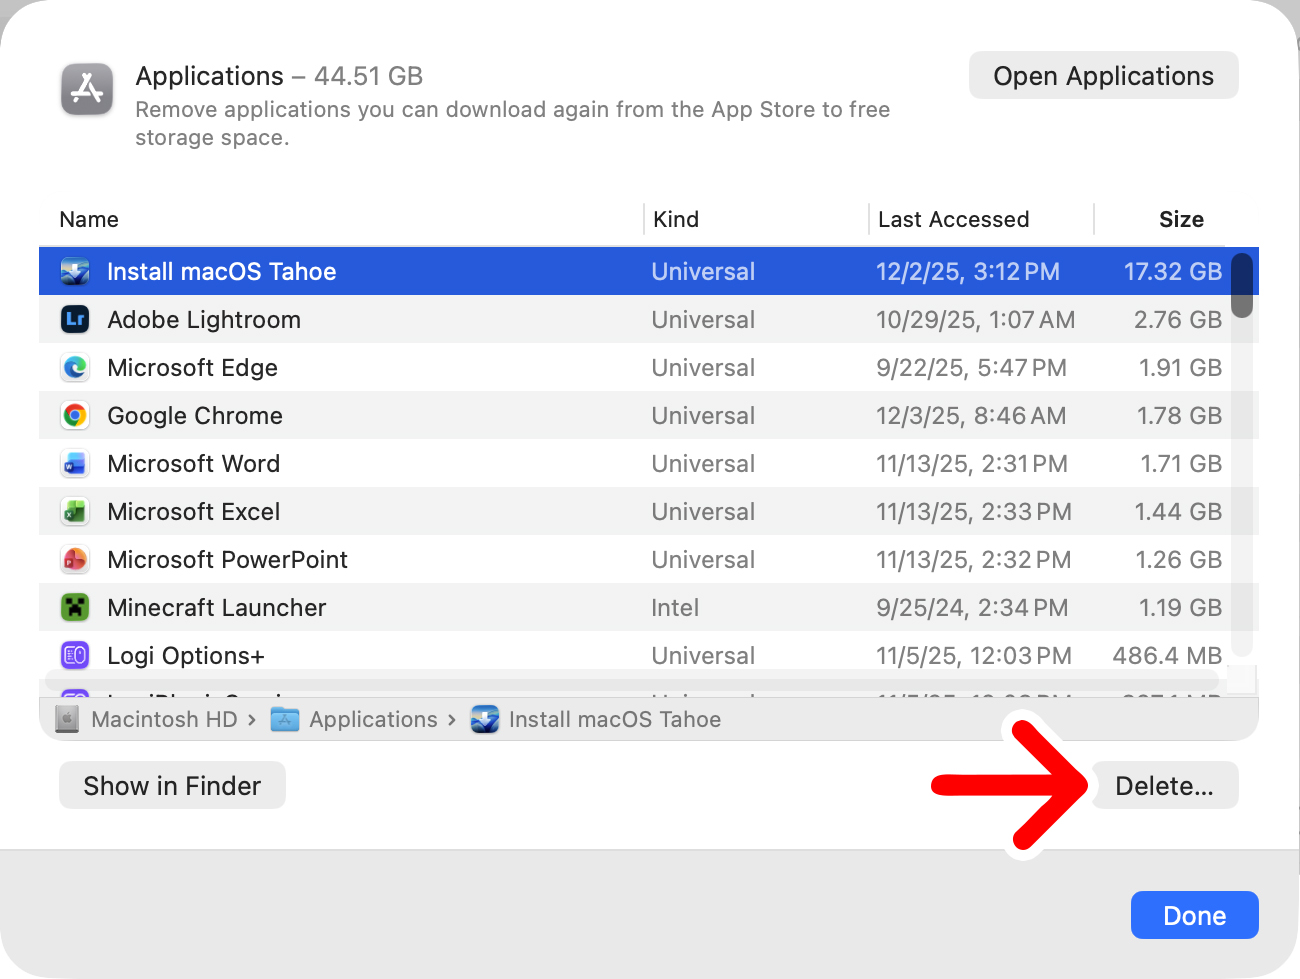
Below the recommendations, you can also click the “i” icon to the right of any category to find and delete the largest files on your Mac. For example, if you click the “i” icon next to “Applications,” you can see all your installed apps, sort them by size, and click “Delete” to remove them.
How to Reduce System Data on a Mac
If you have a lot of space being taken up by “System Data” storage (formerly known as “Other” storage), that means data that doesn’t neatly fit into a storage category. This includes cached files, logs, Time Machine snapshots, and other large hidden files.
How to Clear Your Mac’s Cache
To clear your Mac’s cache, open a Finder window and click “Go” at the top of your screen. Then select “Go to folder,” and type “~/Library” and press Enter. Finally, open the “Caches” folder and delete any large folders you find.
To see which files are taking up the most space, make sure to click “View” at the top of your screen and select “as List.” Then press the Command + J keys on your keyboard and check the box next to “Calculate all sizes.” Finally, sort by file size and delete any large folders.
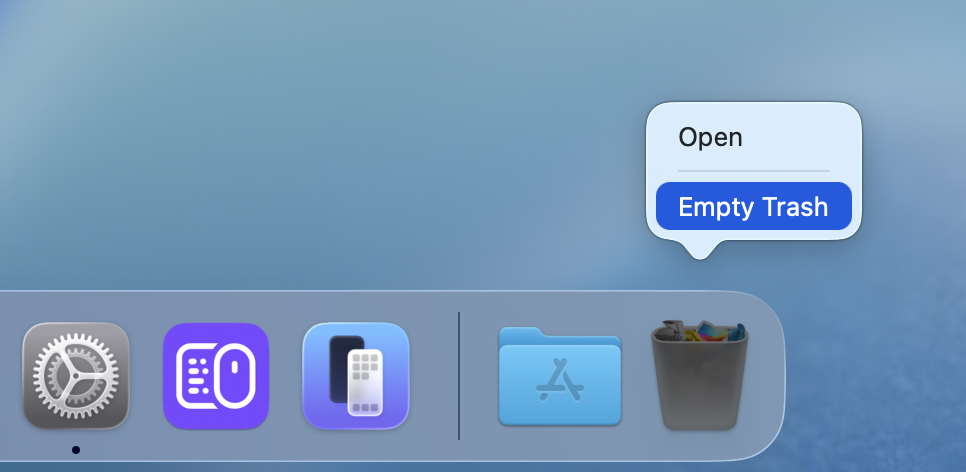
Finally, make sure to empty the Trash.
How to Delete Time Machine Snapshots
If you use Time Machine to back up your Mac, the snapshots might be taking up a lot of space.
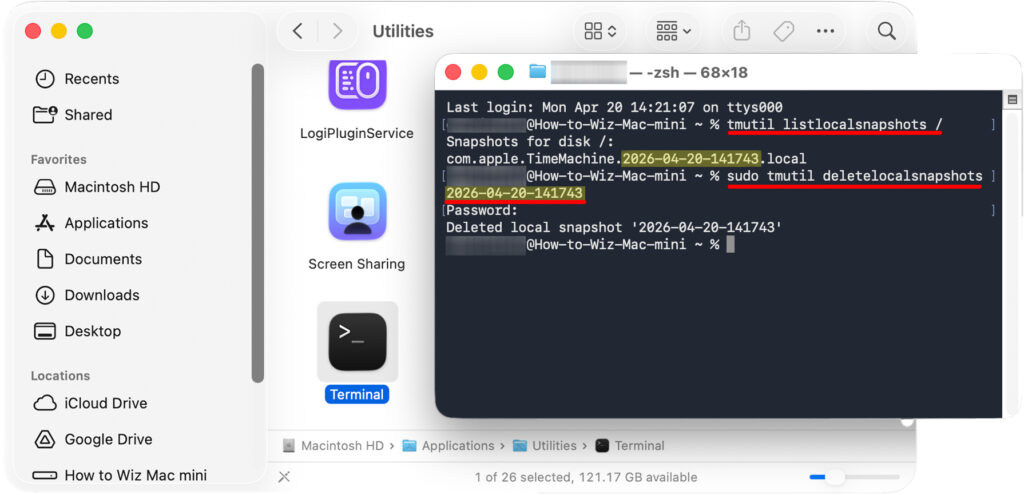
To delete Time Machine snapshots, open a Finder window and go to “Applications > Utilities > Terminal.” Then type this command “tmutil listlocalsnapshots /” to see a list of all your local snapshots. You can delete one by typing “tmutil deletelocalsnapshots [DATE]”
Just replace “[DATE]” with the snapshot date shown in the list. For example, enter something like: “tmutil deletelocalsnapshots 2026-04-02-141743”.
You might need to enter your admin password (the same password you use to sign in to your Mac).
To delete multiple Time Machine snapshots at once, enter “sudo tmutil thinlocalsnapshots / 999999999999 4”.
How to Find and Delete Large Files on Your Mac
If you still have too much storage taken up by System Data, you might have to find and delete files manually.
To find the largest files on your Mac, open a Finder window, click “Go” at the top of your screen, and select “Computer.” Then click “View” and select “as List.” Then, press the Command + J keys on your keyboard and check the box next to “Calculate all sizes.”
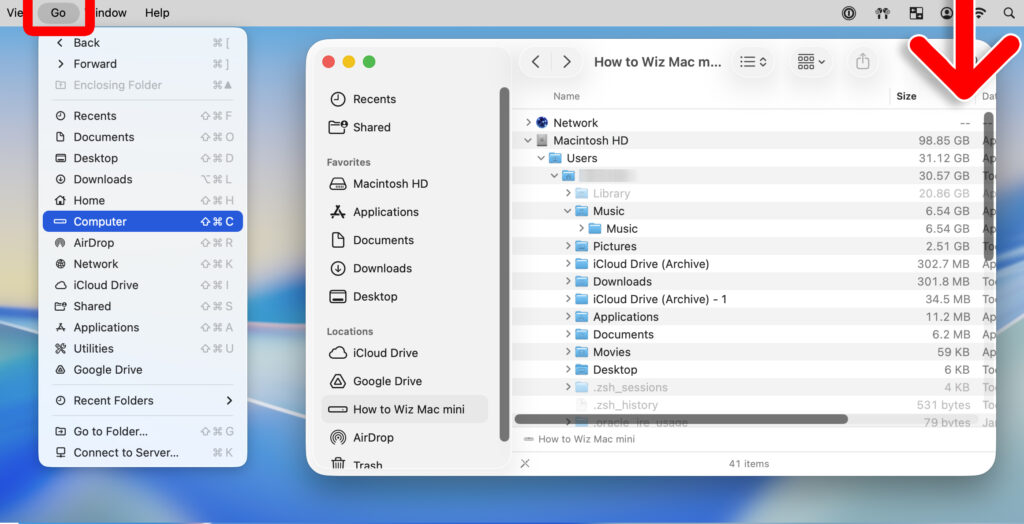
Once you’re done, make sure to empty the Trash and restart your Mac.