The average person has about 2,400 photos on their iPhone, according to Photutorial. To make sure those memories don’t get lost, it’s important to back them up occasionally. Here’s everything you need to know about how to import photos to a Windows computer using the Photos app or File Explorer.
Read More: How to Turn On Night Shift on an iPhone
How to Import from iPhone to the Windows Photos App
To import photos from an iPhone to a Windows computer, open the Photos app on your Windows PC. Then click “Import > Apple iPhone.” Select the photos you want to import and click “Add Items.” Finally, choose a folder and click “Import.”
- Plug your iPhone into a Windows computer. Use a USB-C cable for the fastest transfer speed.
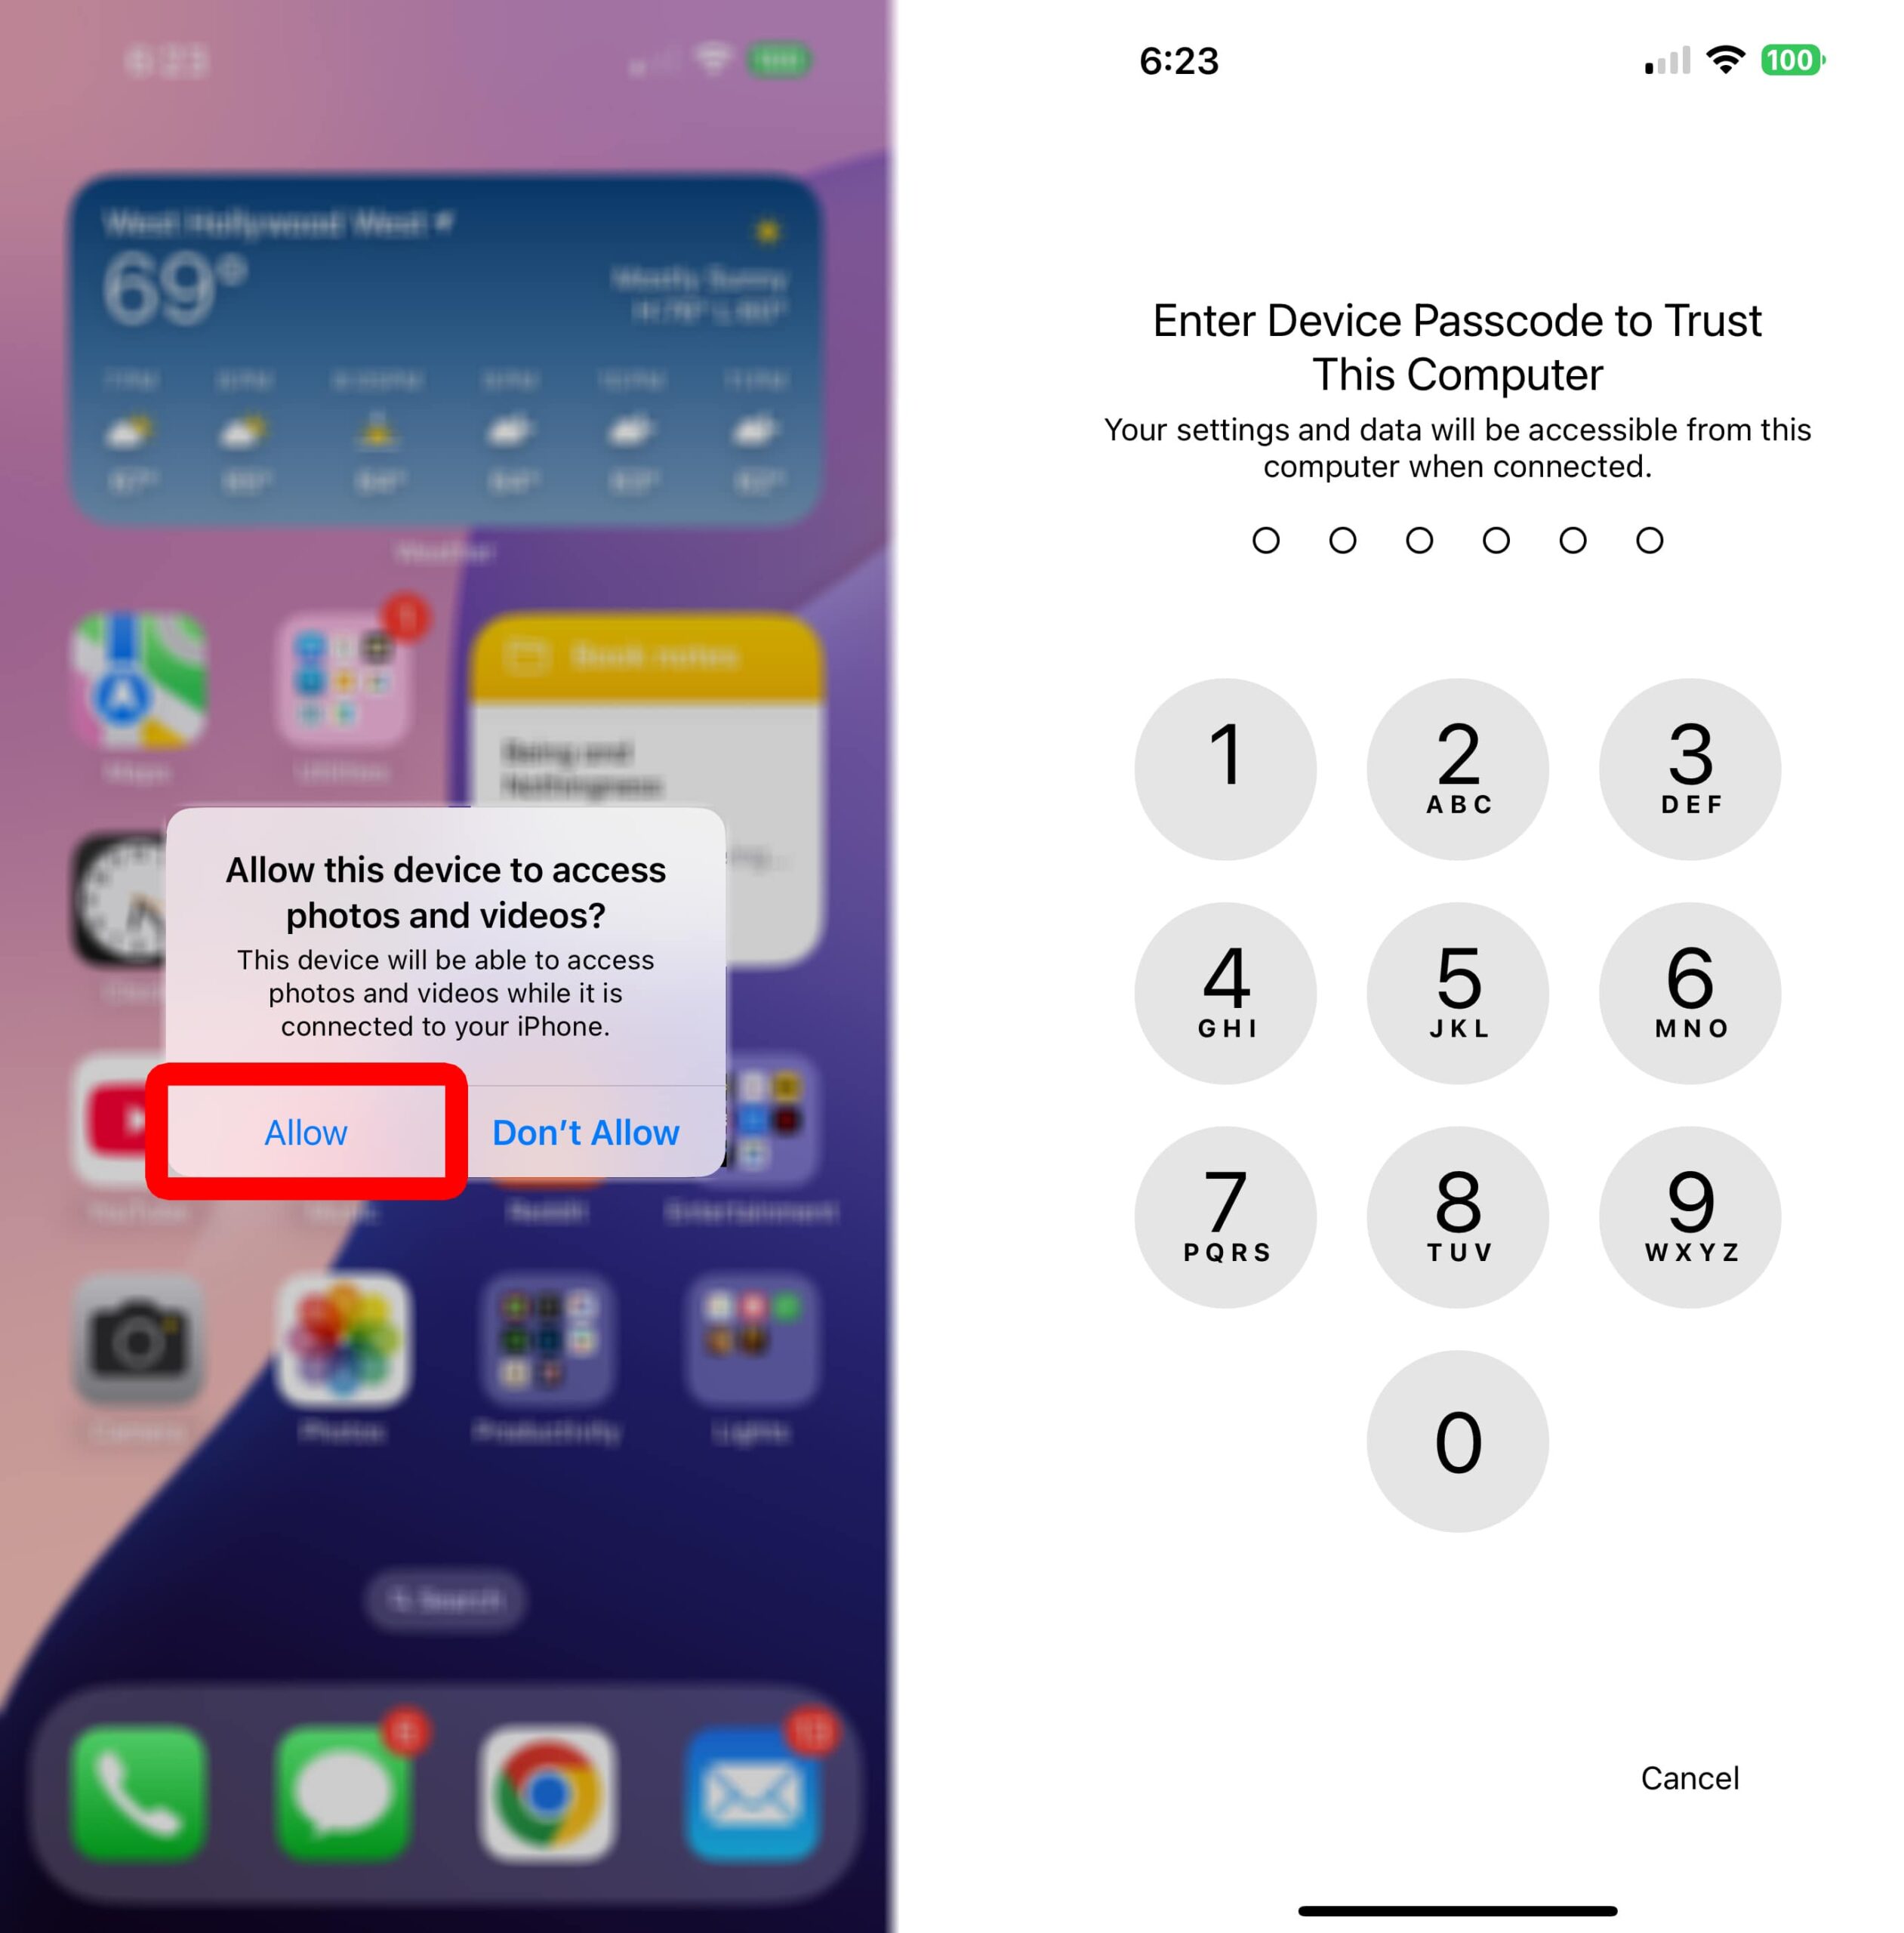
- Enter your iPhone passcode. After you plug your iPhone into your computer, you may see a prompt to “Trust this computer.” Tap Allow and enter the code you use to unlock your iPhone. If you skip this step, you won’t be able to import any photos.

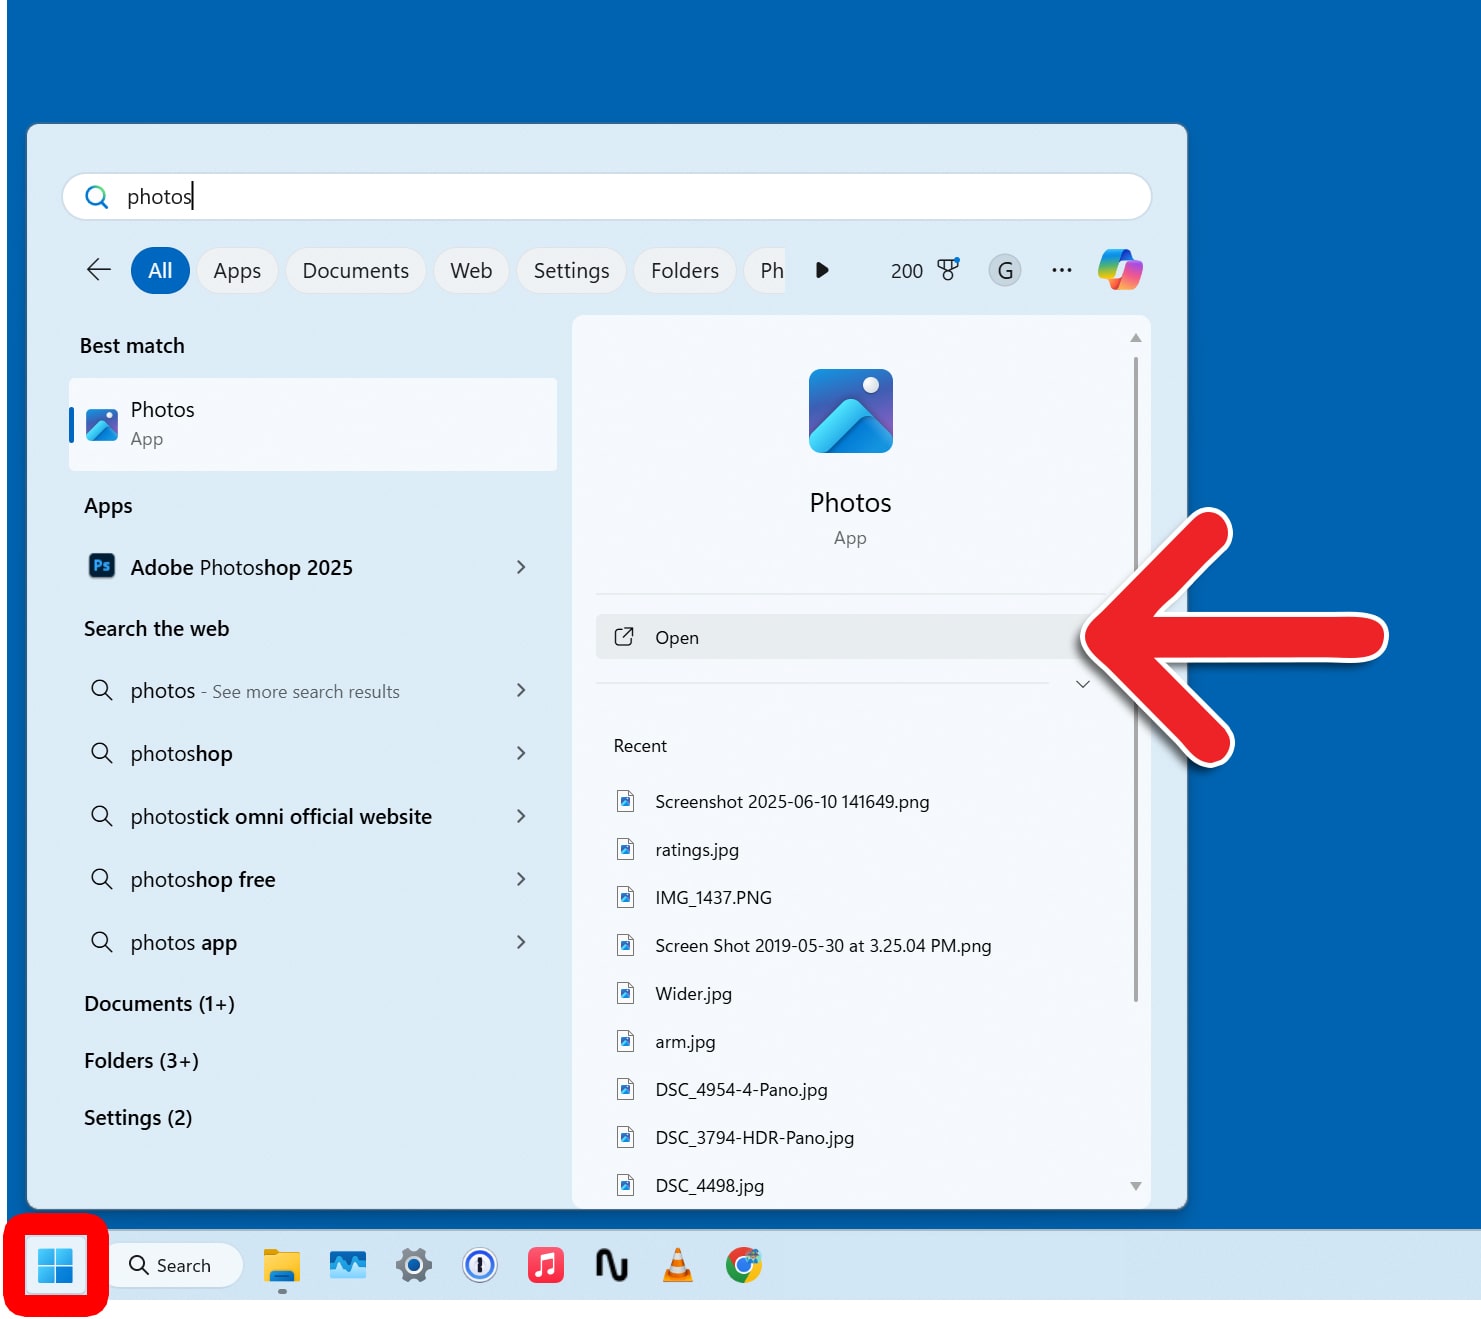
- Click the Windows logo at the bottom of your screen. This will open the Windows Start Menu.
- Type “Photos” and click “Open.” The Microsoft Photos app comes pre-installed on all Windows 10 and Windows 11 computers.

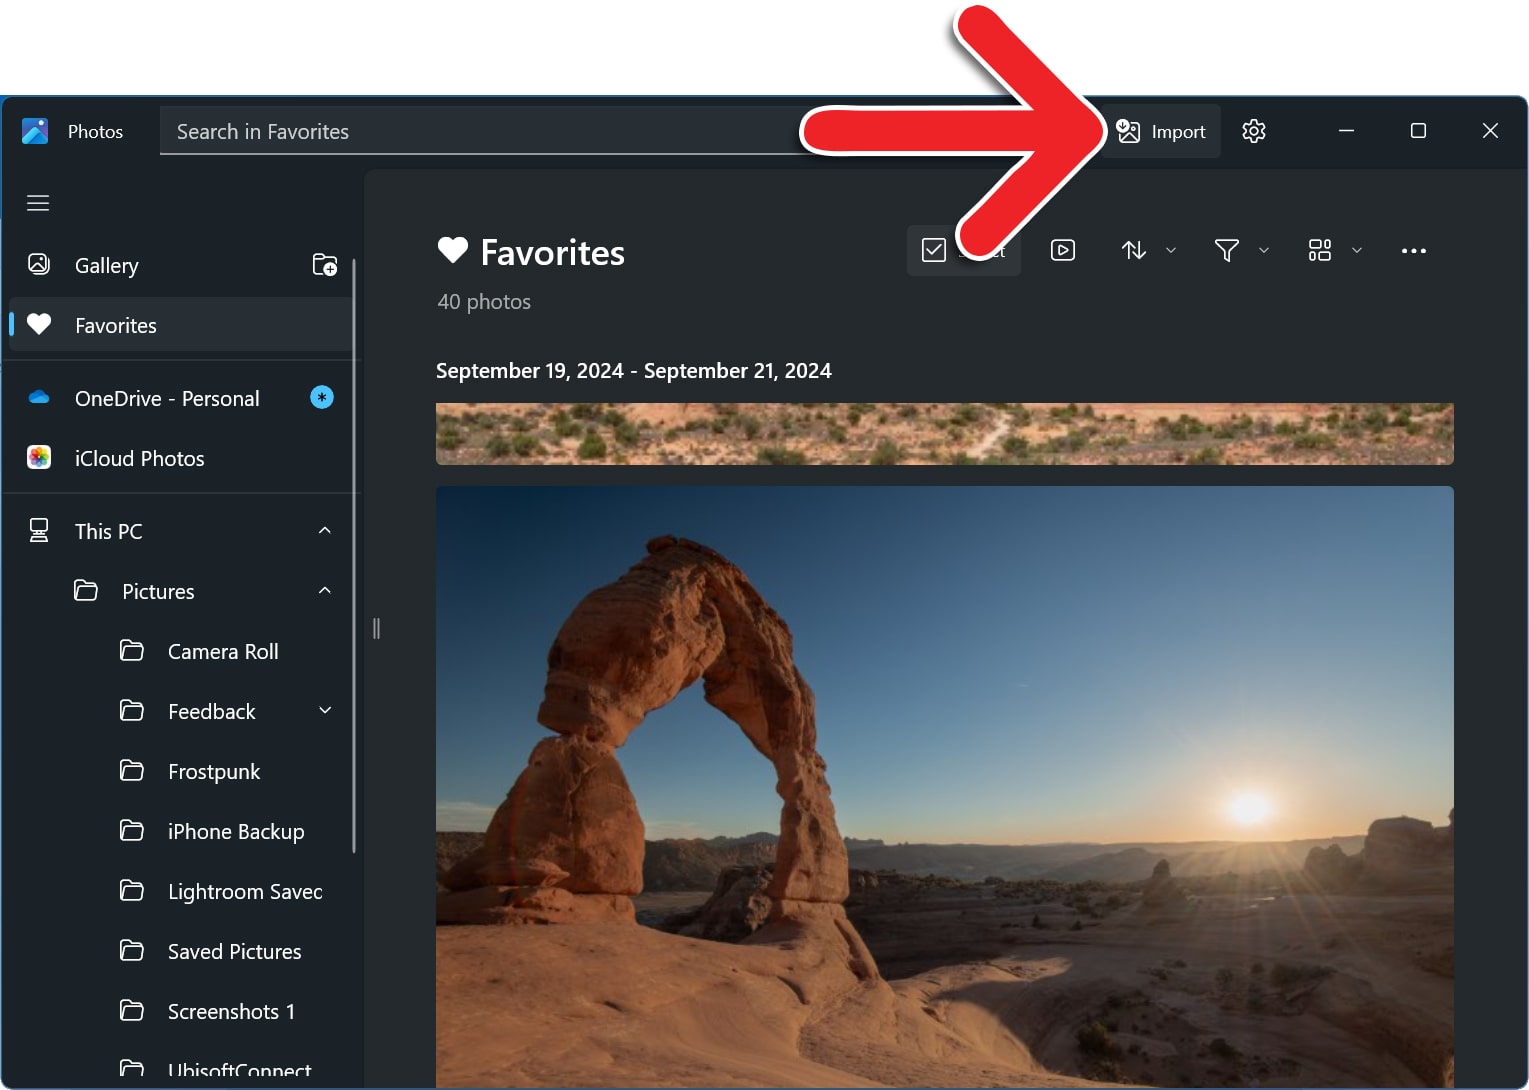
- Click “Import.” You will see this button in the top-right corner of the Photos window.

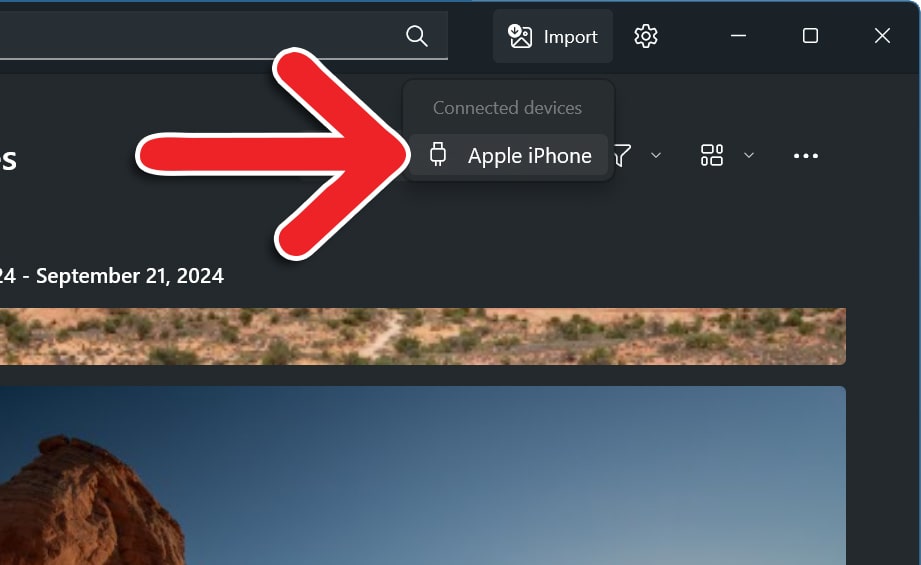
- Select “Apple iPhone.”

- Wait for your photos and videos to load. This can take a long time, depending on how many photos and videos you have.
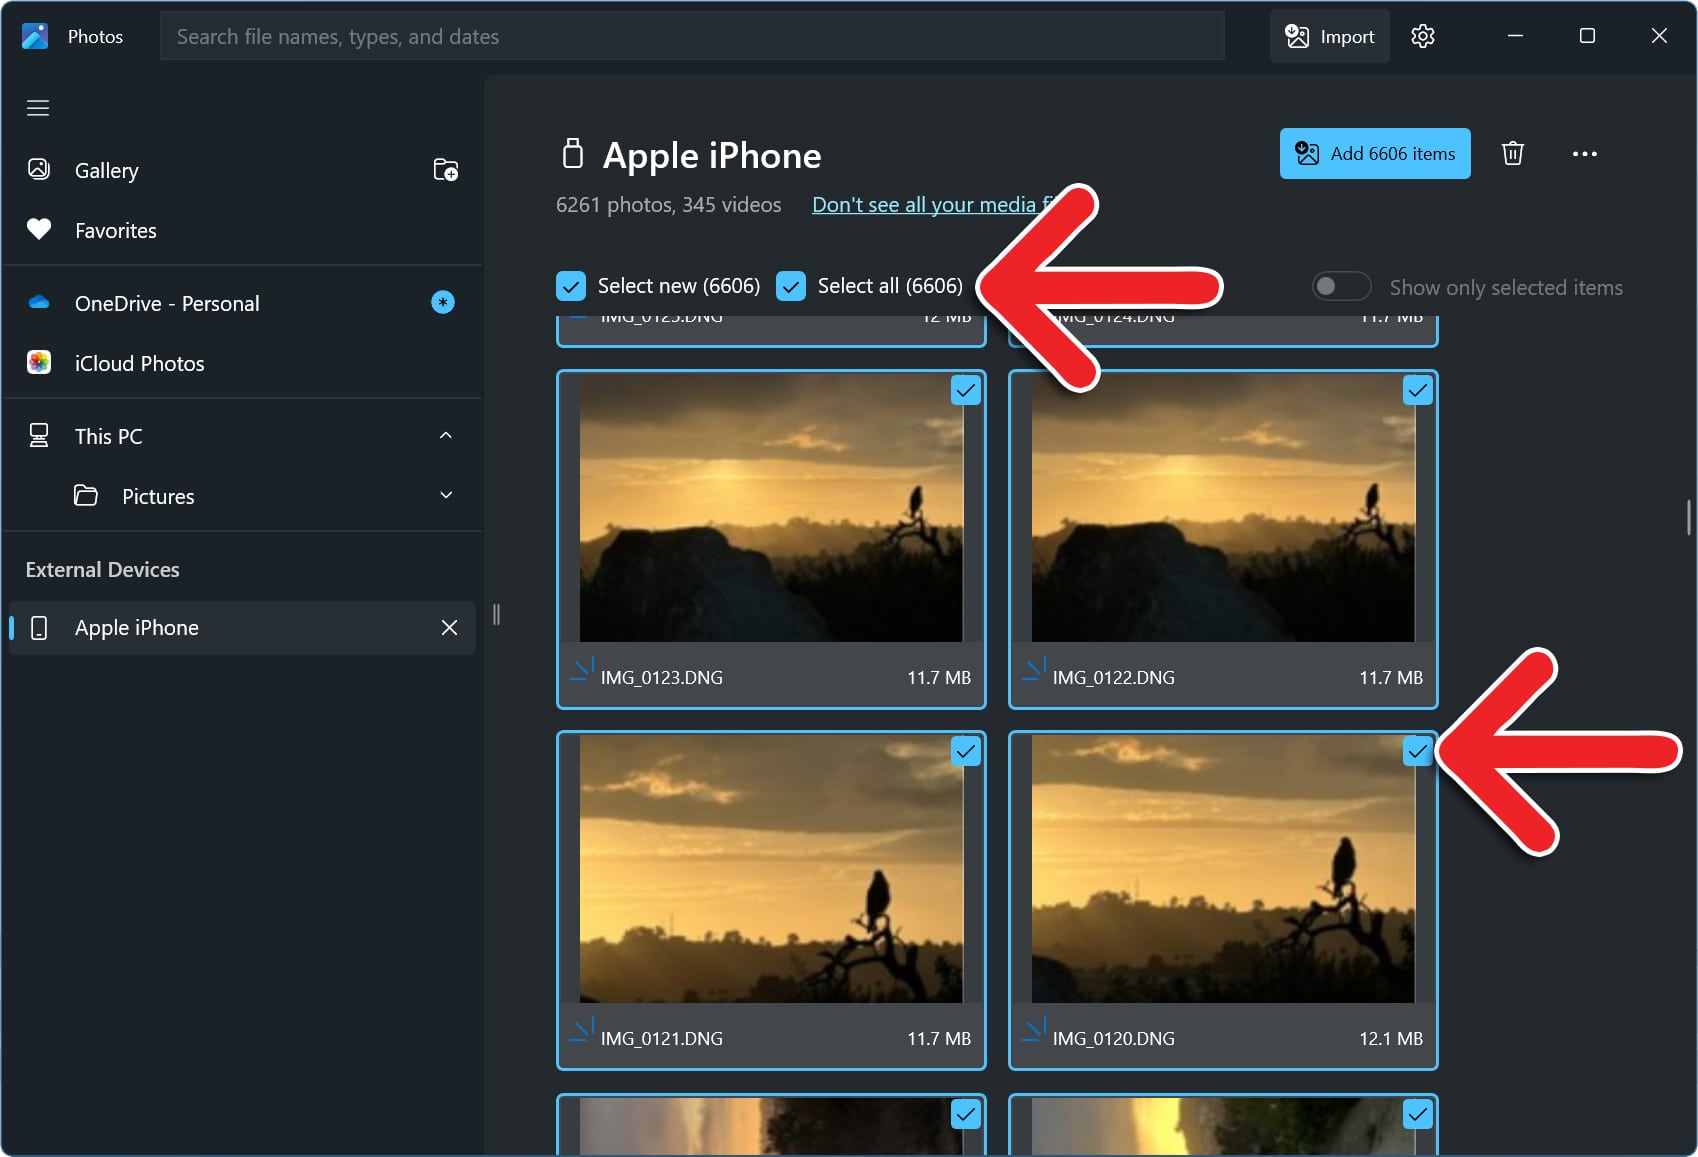
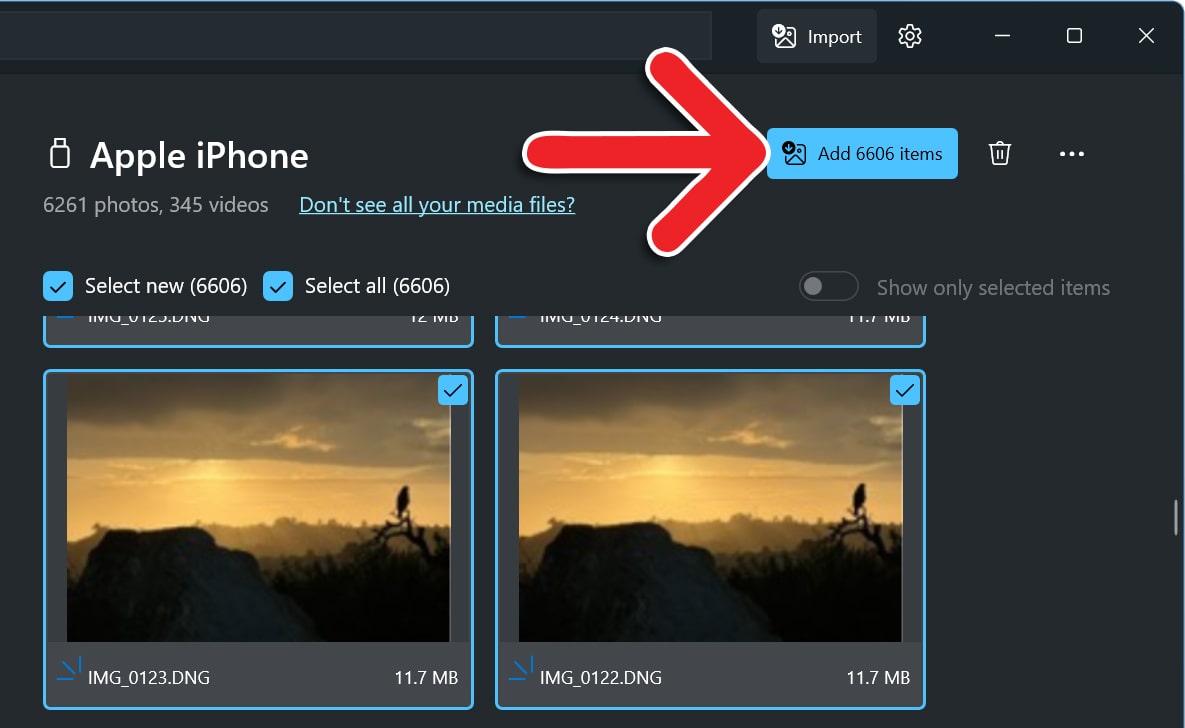
- Select the photos you want to import. You can select individual photos and videos or you can check the box next to “Select All” or “Select New.” The “Select New” button will only allow you to import photos from your iPhone that are not already on your Windows PC.

- Click “Add [number] Items.” This will show you how many photos and videos you are importing to your Windows computer.

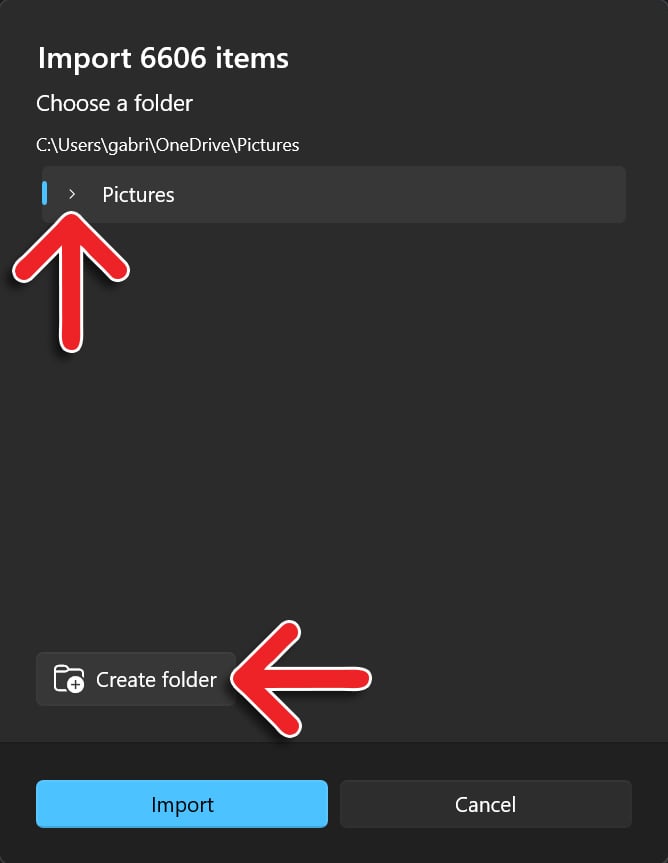
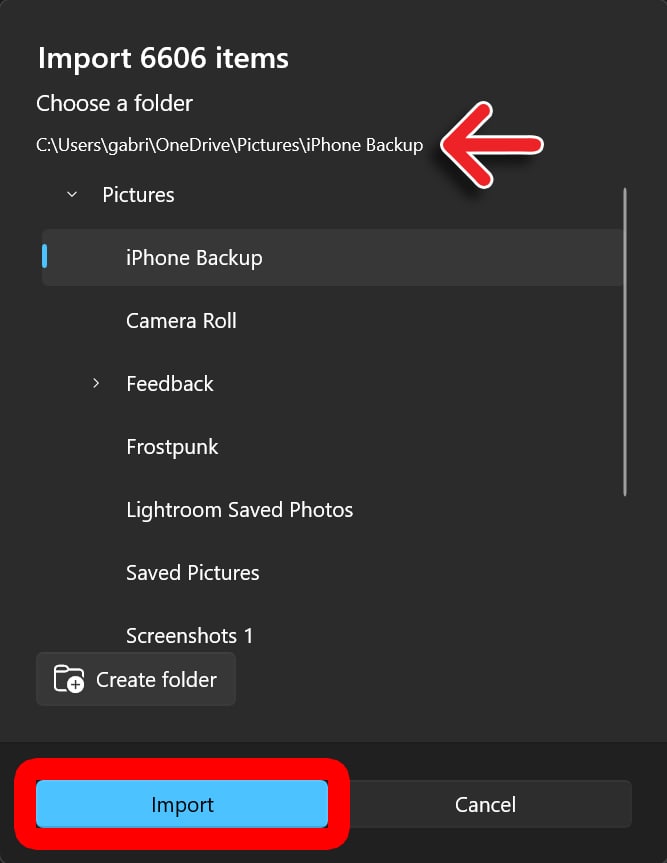
- Choose a folder. You can also click the Create folder button at the bottom to add a new folder. However, you can only use the Photos app to import photos from your iPhone to your main hard drive—not to external drives or network locations.

- Finally, click “Import.” At the top of the pop-up window, you will also see the folder where your photos will be imported.
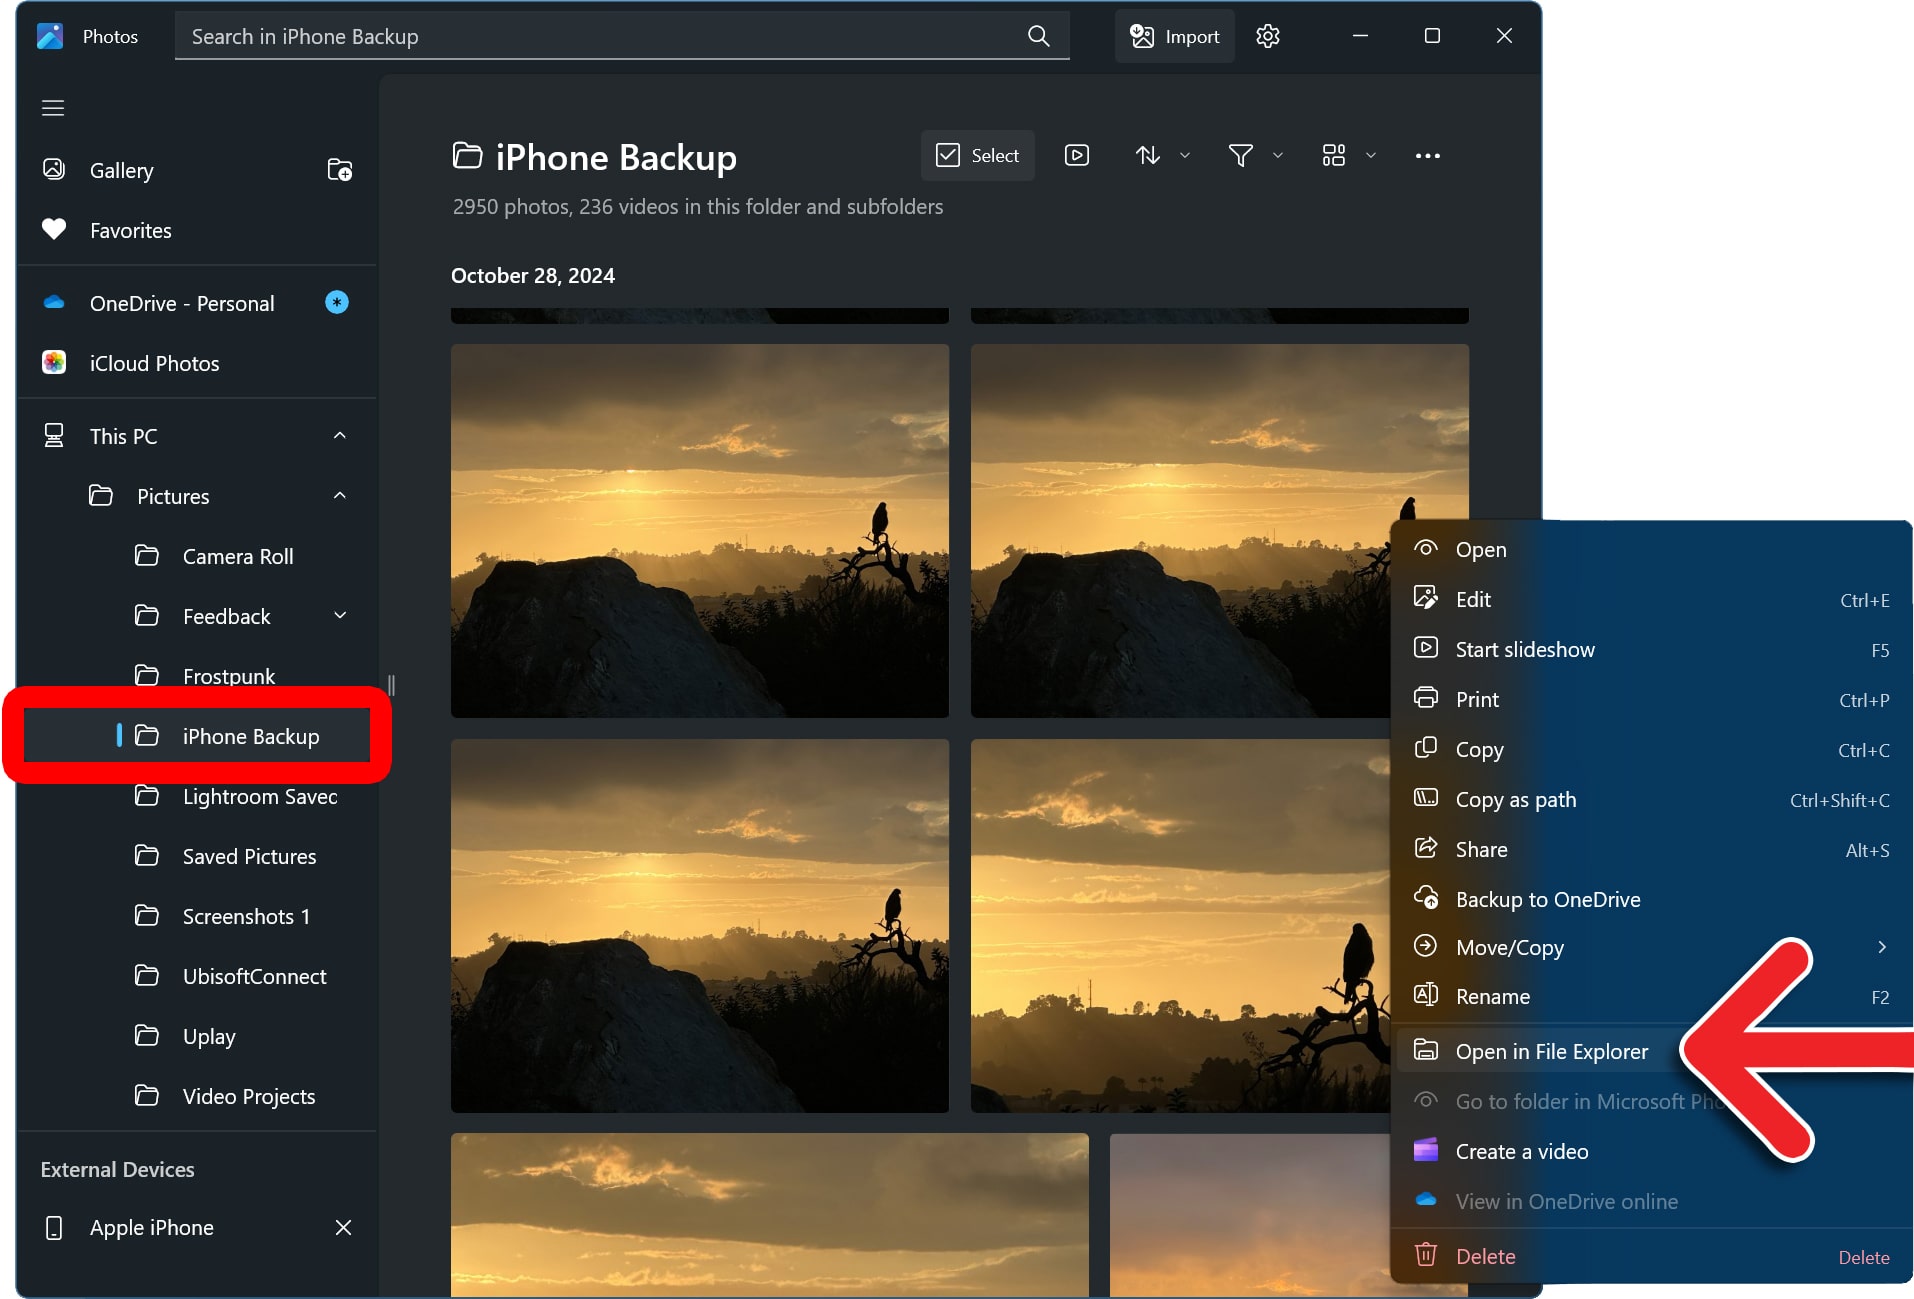
To find your iPhone photos on a Windows PC, open the Photos app and select a folder in the left sidebar. Then right-click any photo and select “Open in File Explorer.” This will reveal where your photos and videos are, so you can transfer them to a backup drive.
If you are having problems with the Photos app, you can also import photos and videos from your iPhone using File Explorer instead.
How to Import Photos with File Explorer
- Plug your iPhone into a Windows computer.
- Open a File Explorer window. You can do this by pressing the Windows + E keys on your keyboard at the same time.
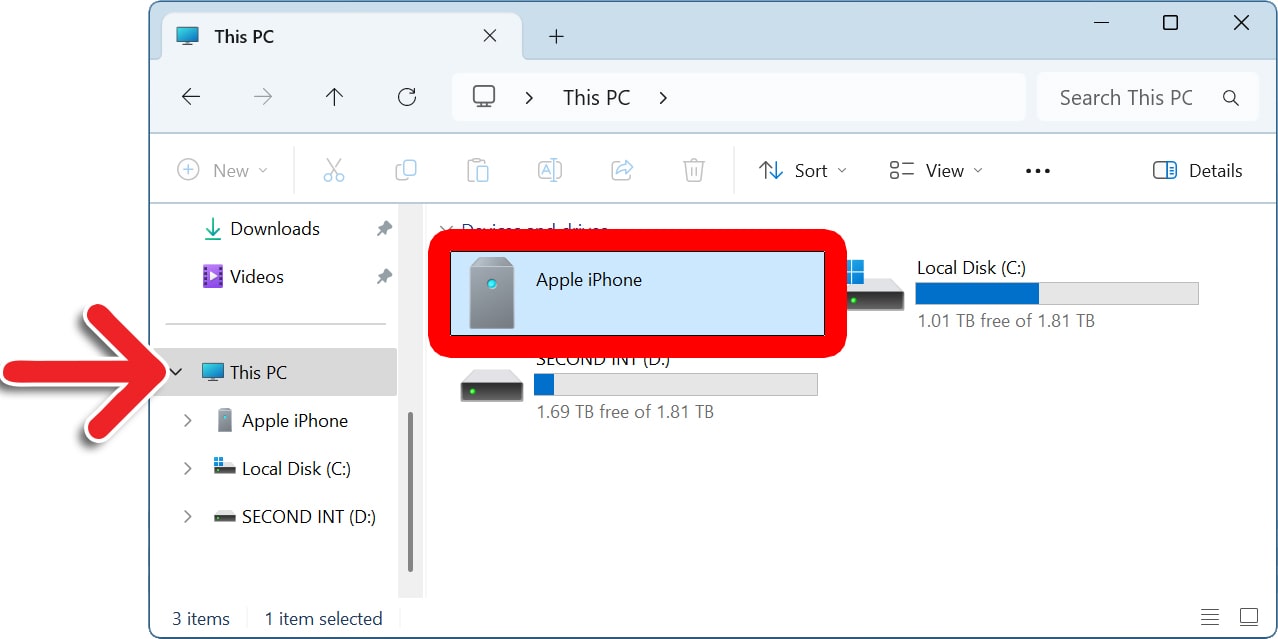
- Go to “This PC.” You will see this in the left sidebar of your File Explorer window.
- Select “Apple iPhone.”

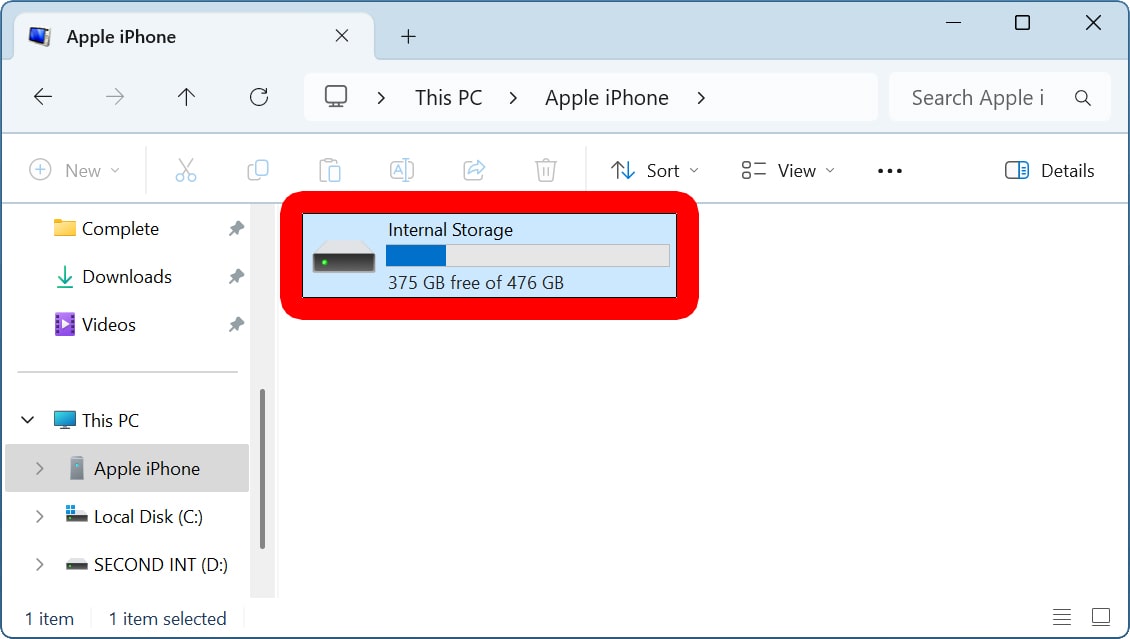
- Open “Internal Storage.”

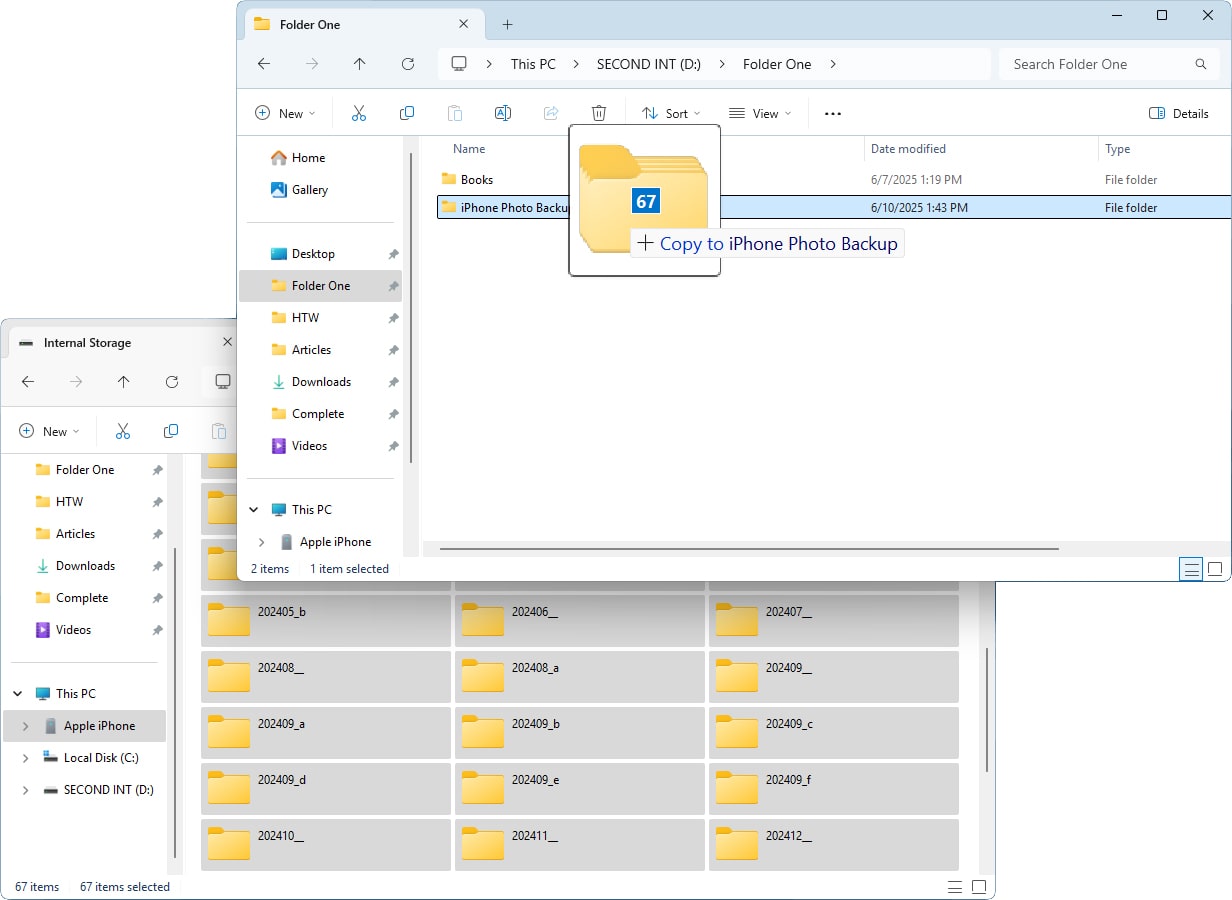
- Select files or folders and drag them to a folder on your computer. These folders will contain the photos and videos saved to your iPhone library. You can open any folder to import photos individually. Or you can press the Control + A keys on your keyboard, then drag all the folders to your Windows computer to import them all at once.