OptiFine is one of the most popular Minecraft mods for enhancing performance and visuals. Installing this mod can instantly increase your frame rate. It also adds support for HD textures and makes installing shaders much easier. Here’s everything you need to know about how to install OptiFine and how to add shaders in Minecraft.
Before You Start:
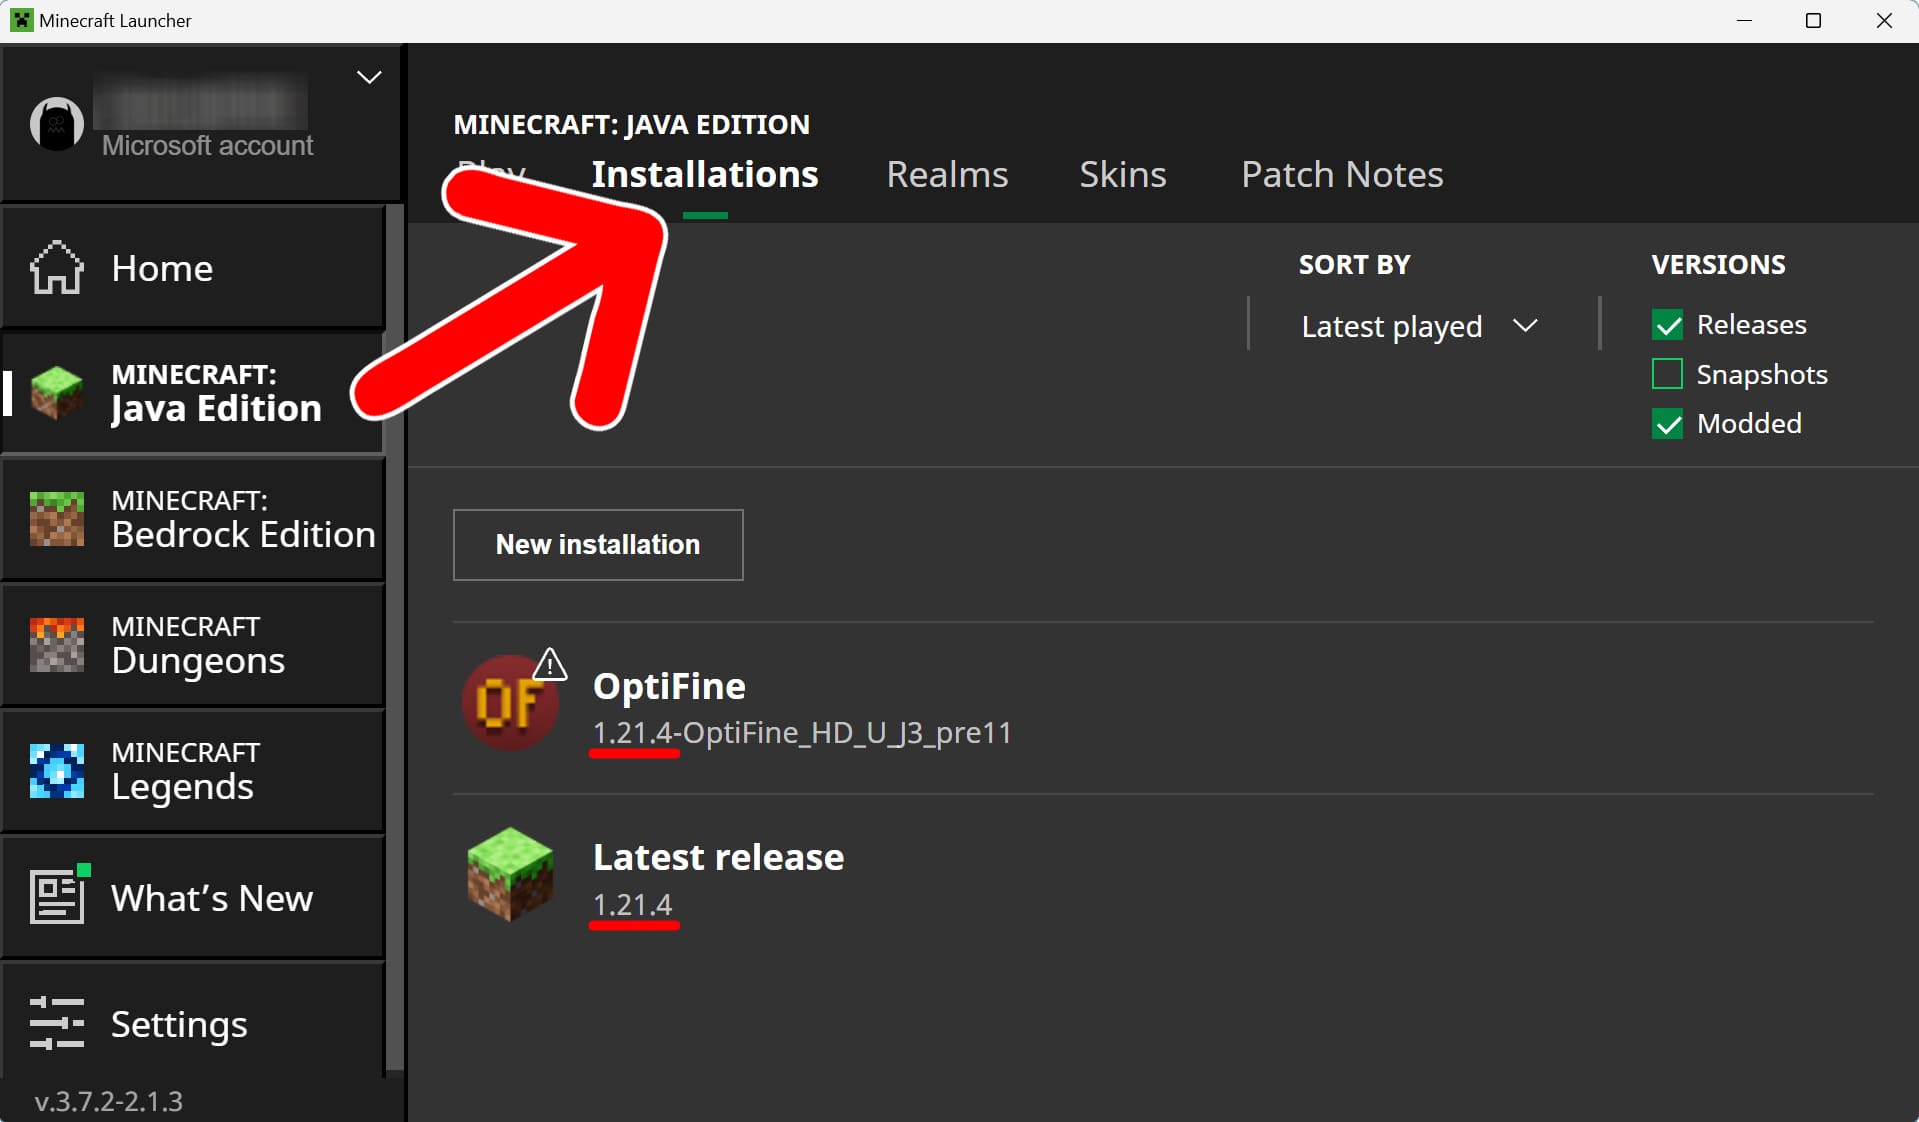
- Check which version of Minecraft you are running: To do this, open the Minecraft Launcher app. Then, click “Minecraft: Java Edition” in the left sidebar and go to the “Installations” tab at the top of the window. Finally, you will see your Minecraft version number listed next to the installation profile. Keep this number in mind because you’ll need to download the corresponding version of OptiFine.
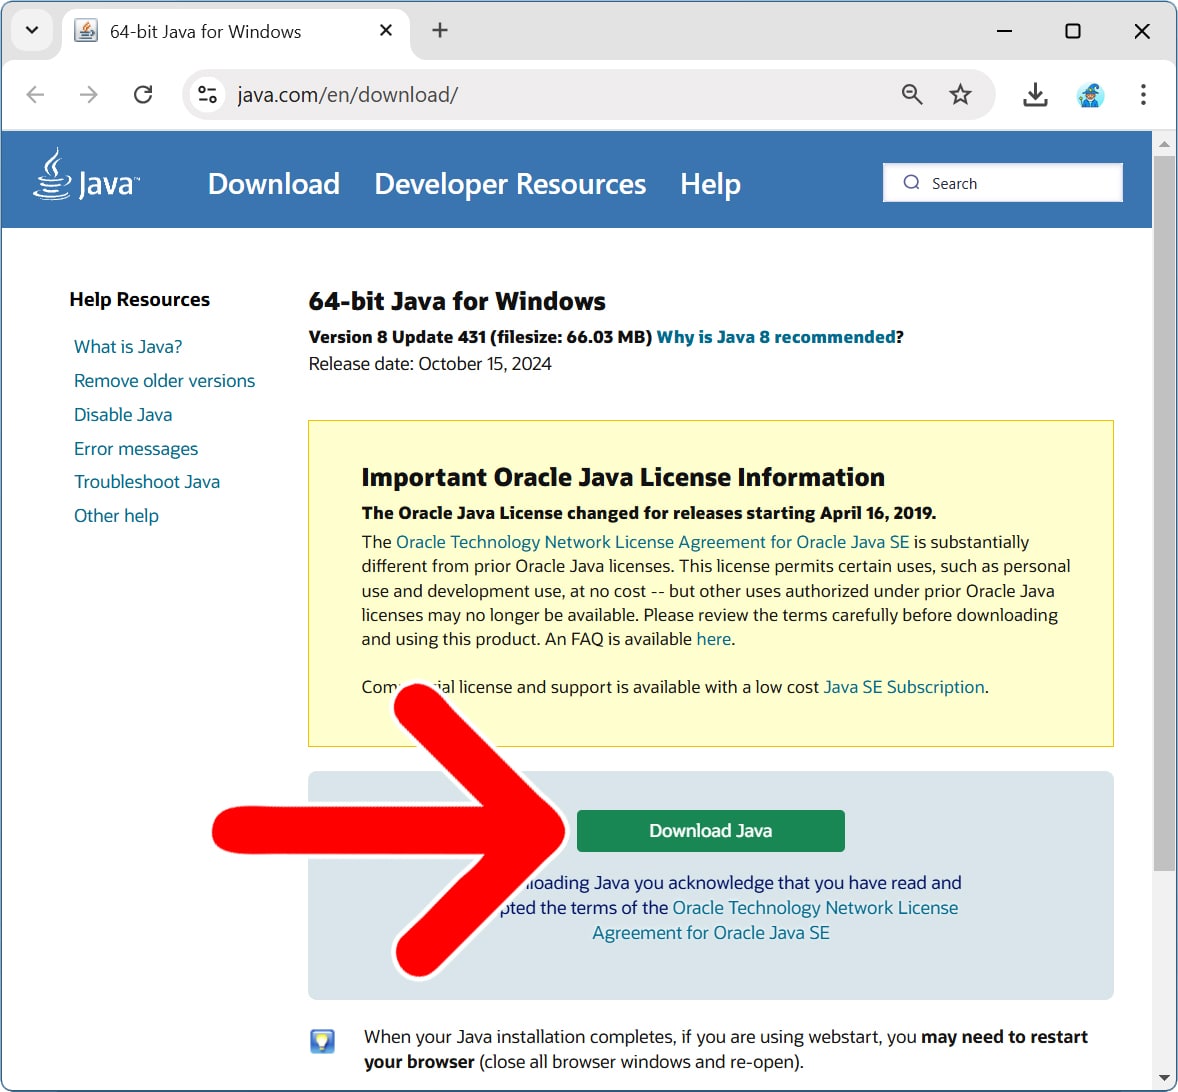
- Install Java: The Minecraft Launcher app will install its own version of Java, but OptiFine requires a separate, manually installed version of Java. If you don’t already have Java installed, go to Java.com/download, select the “Download Java” button, and follow the on-screen instructions.
- Close Minecraft: You’ll want to quit the game and close the Minecraft Launcher app before installing OptiFine.
How to Install OptiFine for Minecraft
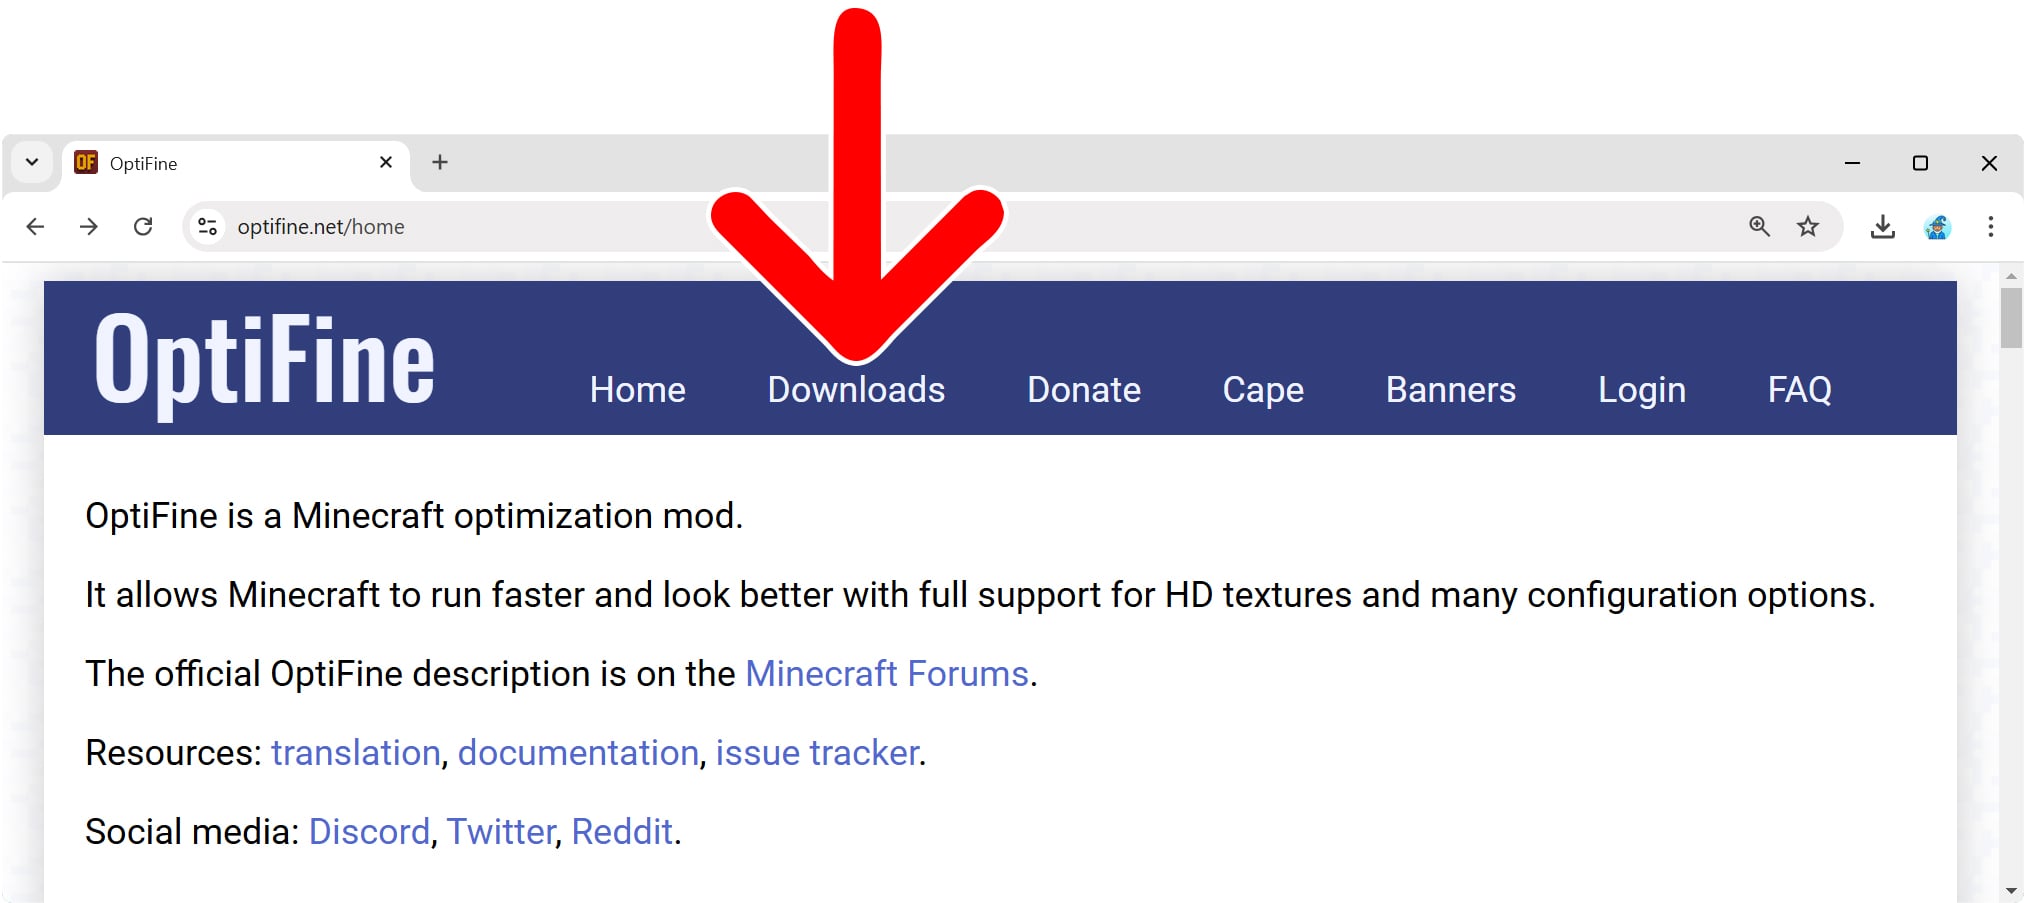
To install OptiFine, go to OptiFine.net and click “Downloads.” Then, click “Download” for the version of Minecraft you’re running. Next, open the installer from your downloads folder and follow the on-screen instructions. Finally, open the Minecraft Launcher app, change the version to OptiFine, and click “Play.”
- Go to OptiFine.net.
- Click “Downloads.” You will see this in the menu bar at the top of the webpage.
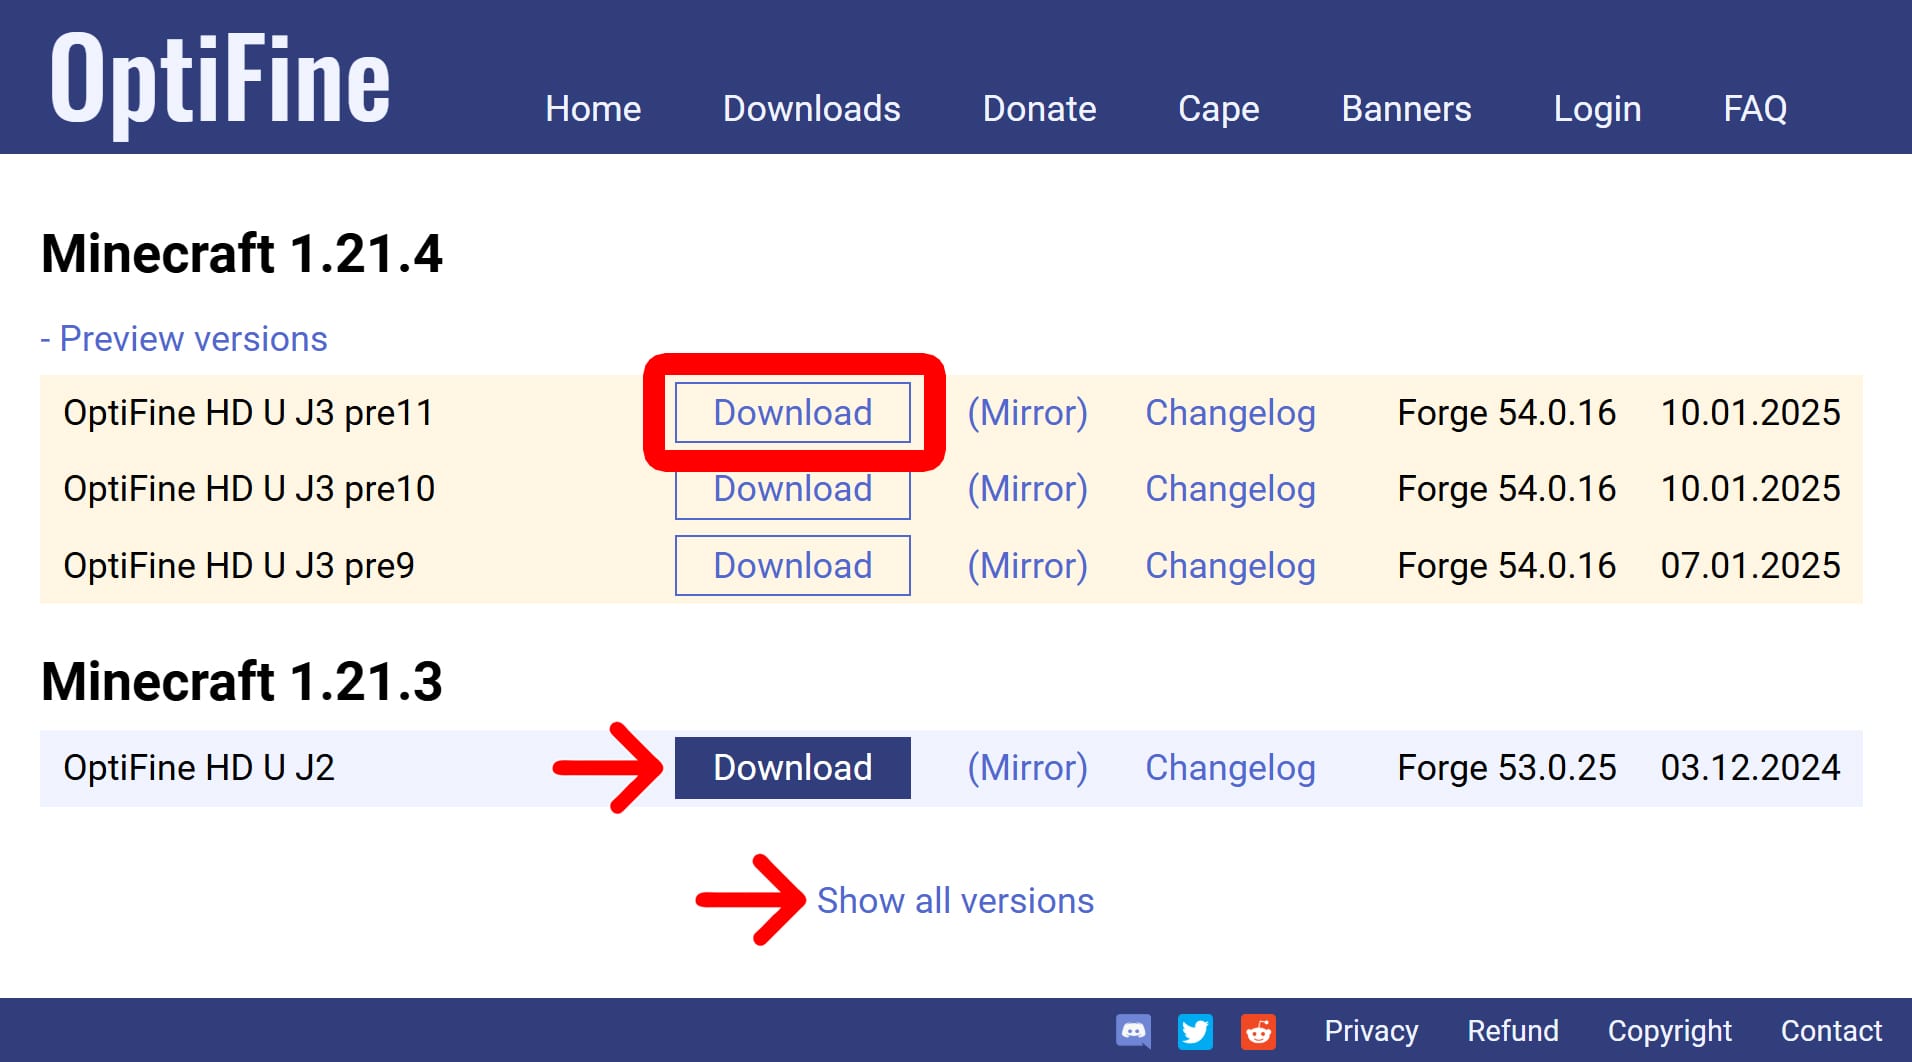
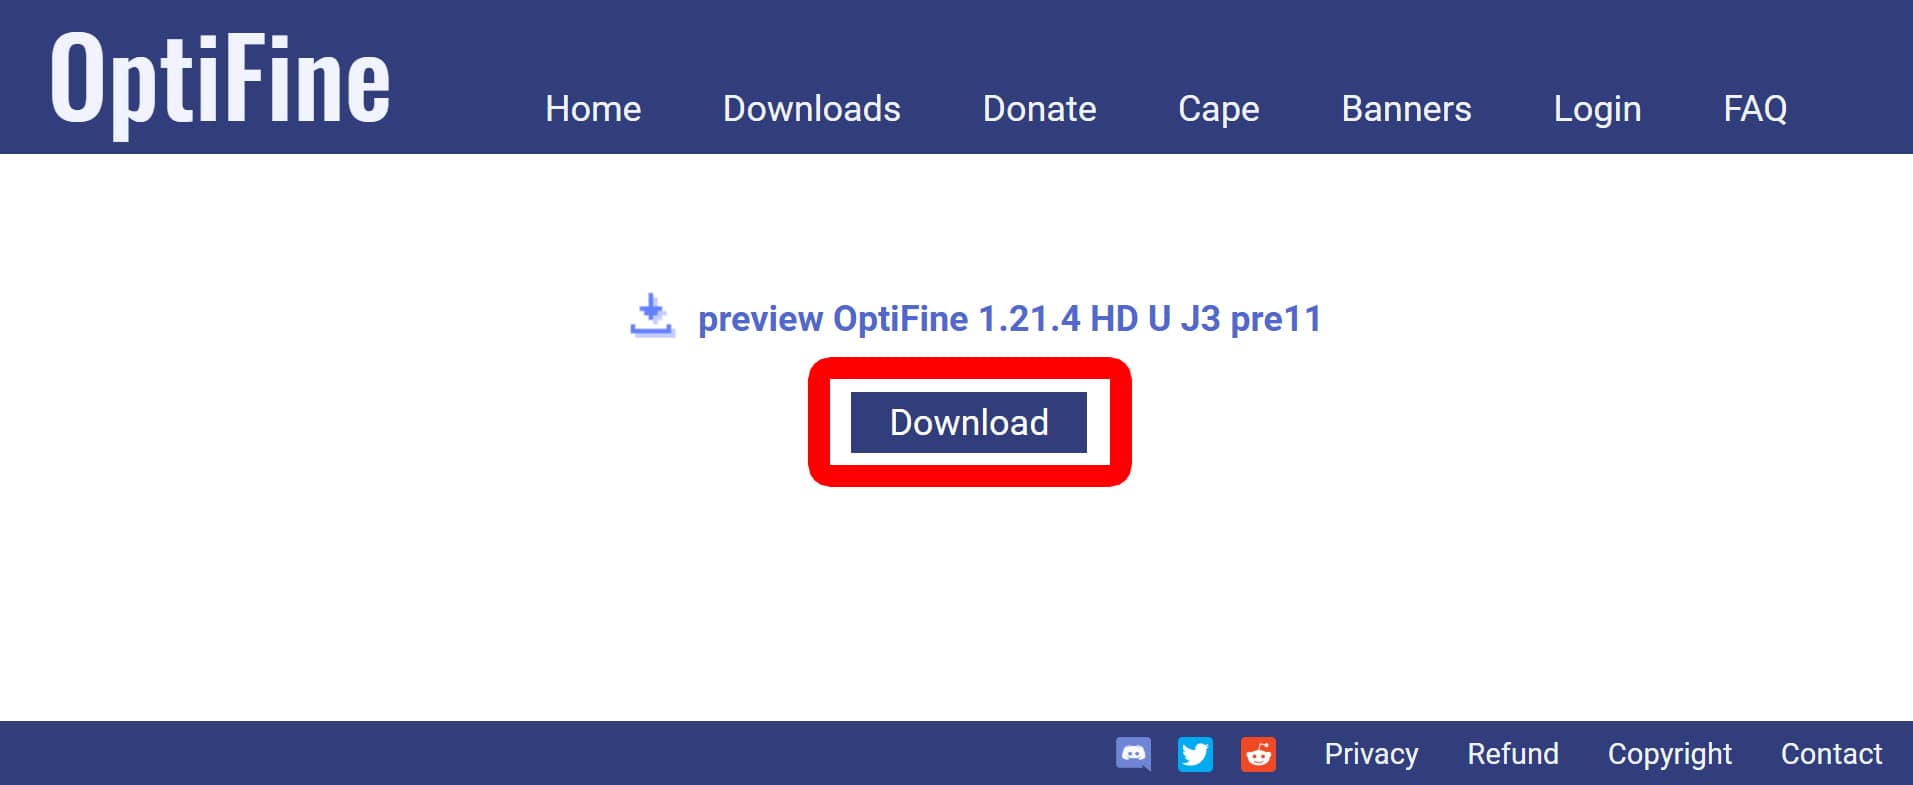
- Click “Download” under the version of Minecraft you’re running. Make sure the OptiFine version matches your Minecraft version. For example, if you’re running Minecraft 1.21.4, download OptiFine 1.21.4.
- Select “Skip.” You will see this appear in the top-right corner of the webpage about 5 seconds after you select which version of OptiFine to download.
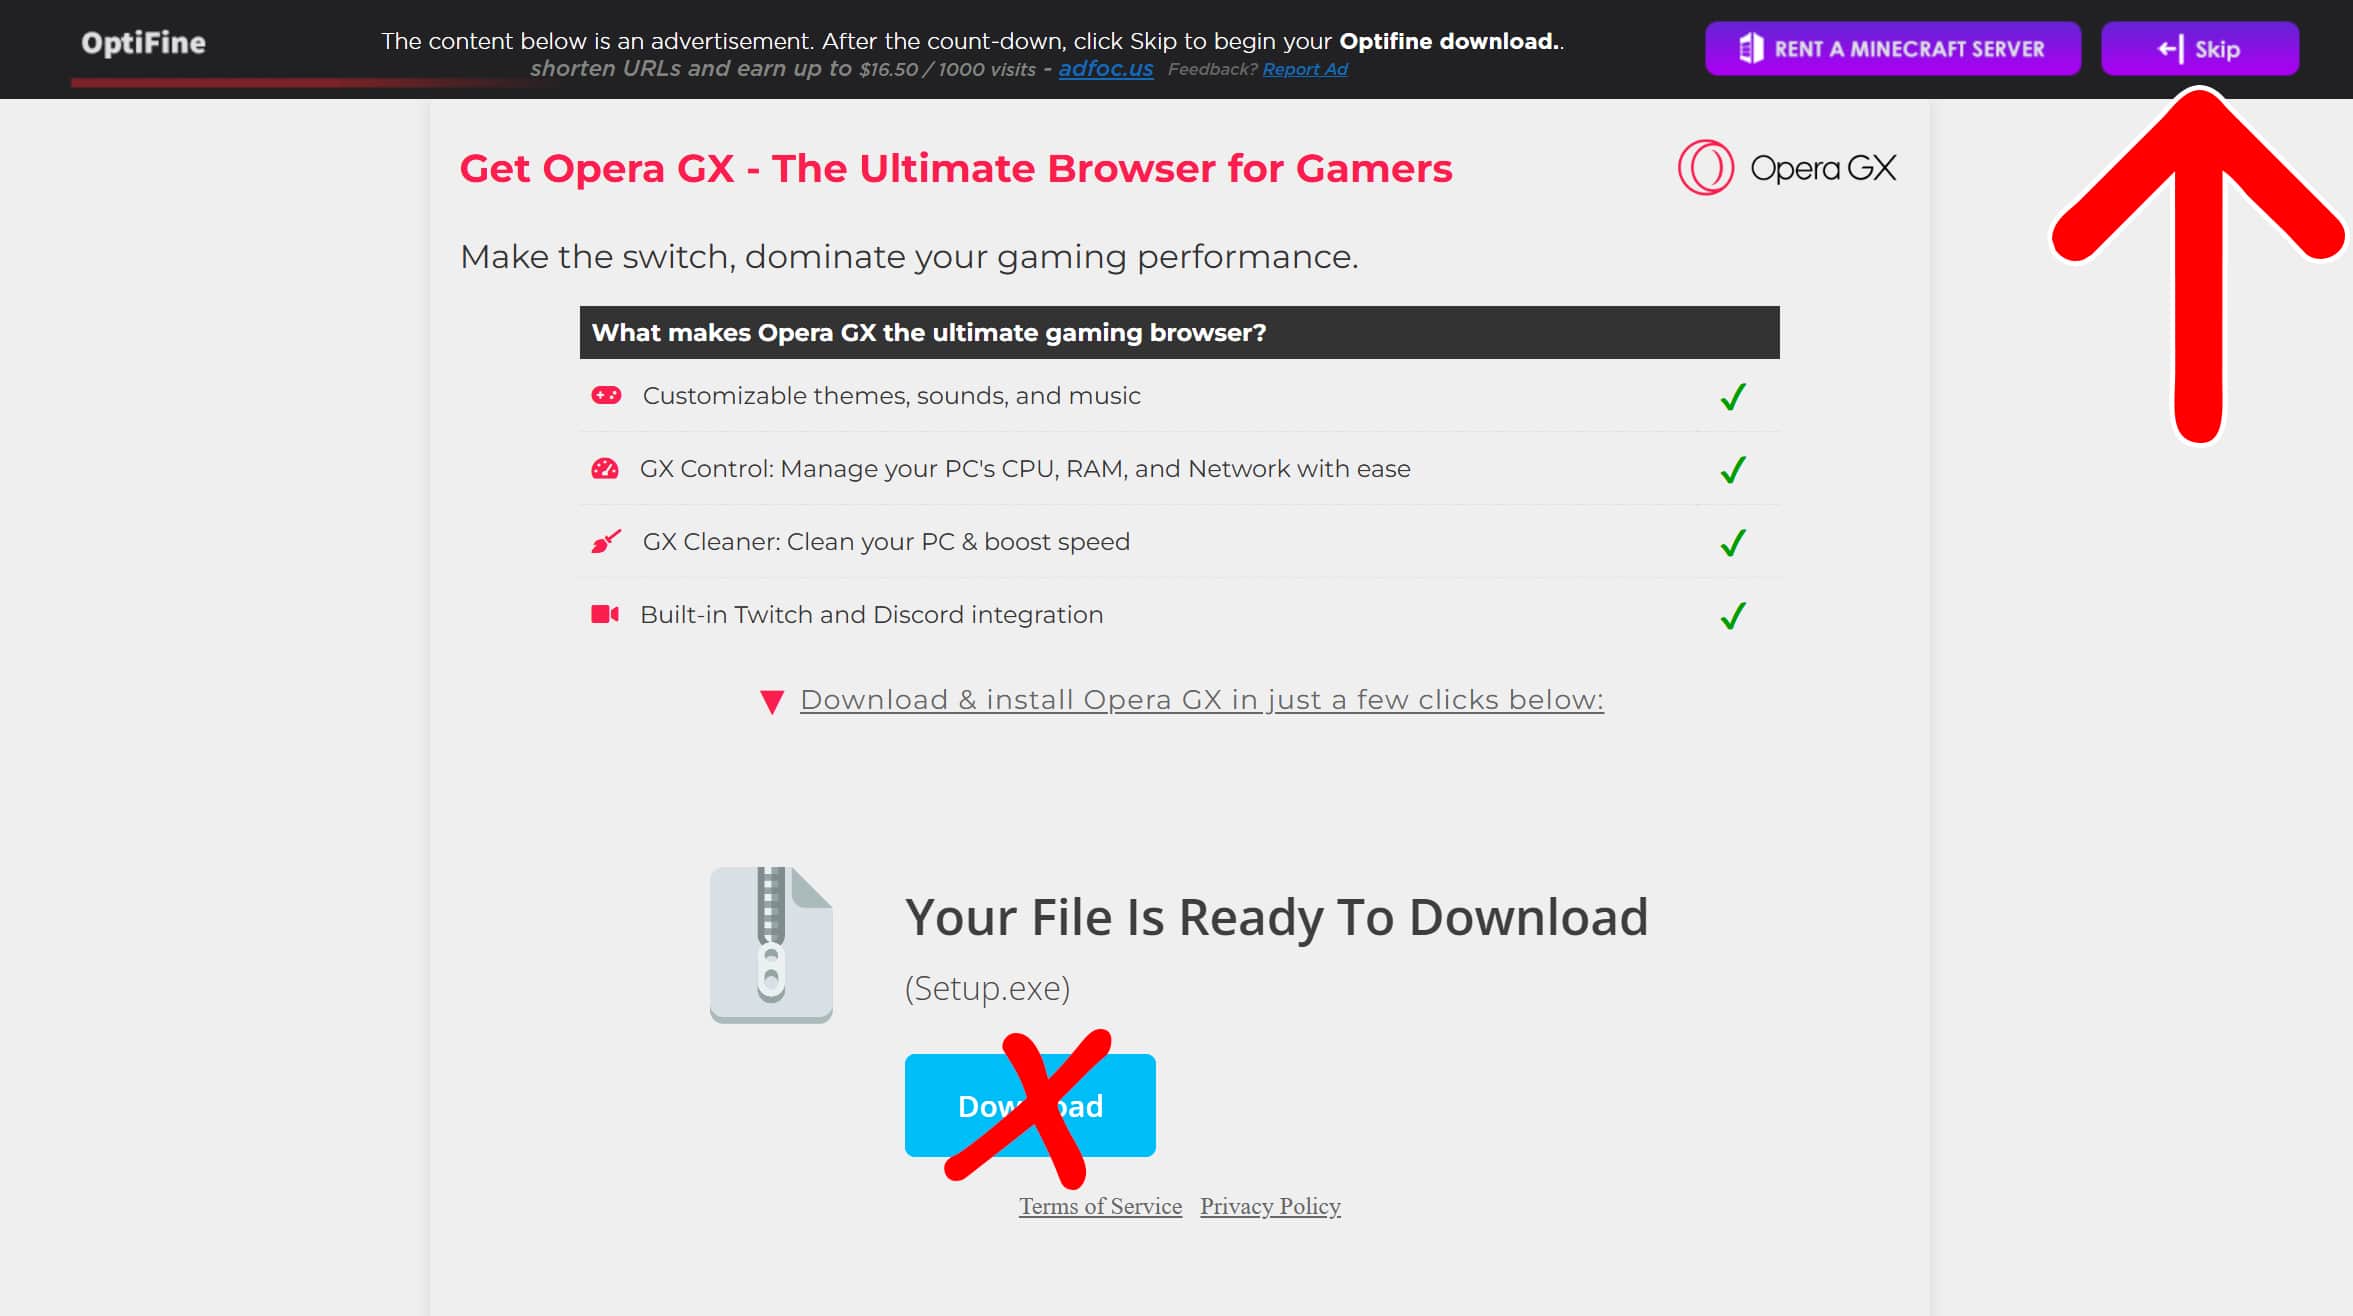
- Click “Download.” This will download the OptiFine installer to your computer.
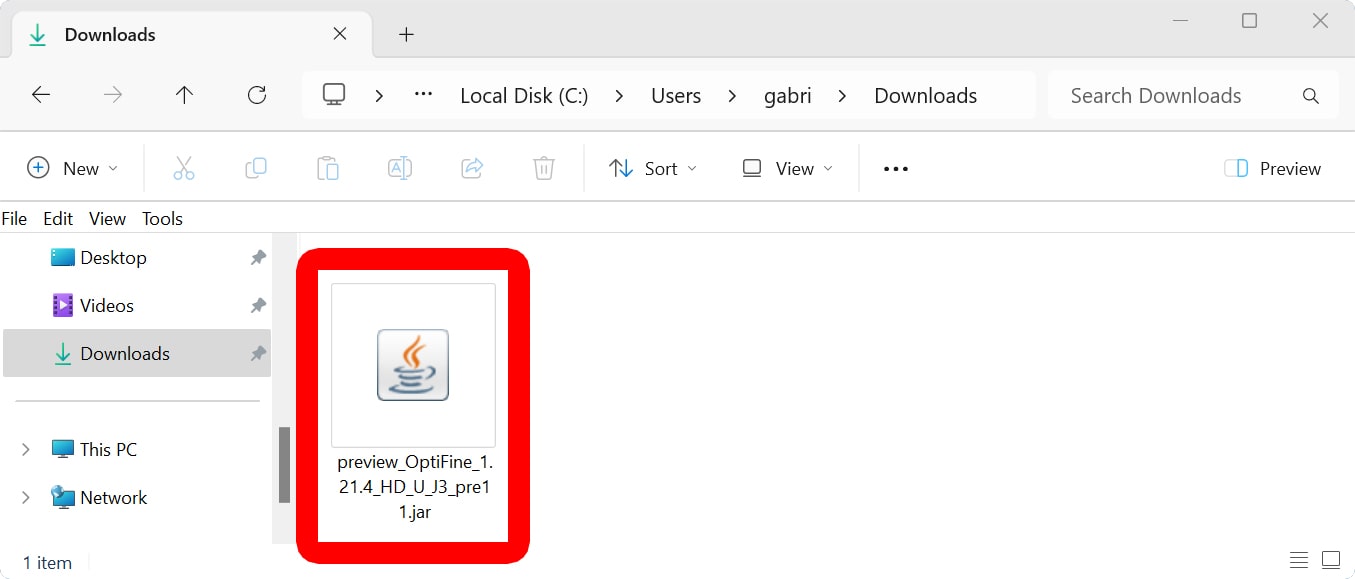
- Open the OptiFine installer. You can find this “.jar” file wherever your browser saves downloads. By default, a Windows computer will save files to C:\users\USERNAME\downloads. On a Mac, you can access the default downloads folder by pressing Option + Command + L on your keyboard.
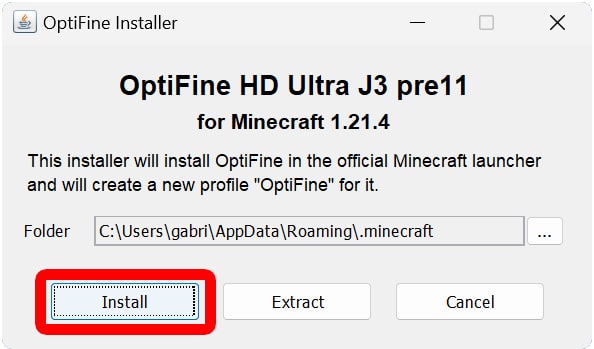
- Click “Install.”
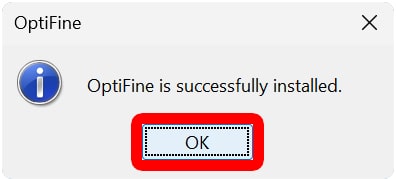
- Click “OK.” You will see this pop-up window when the installation is complete.
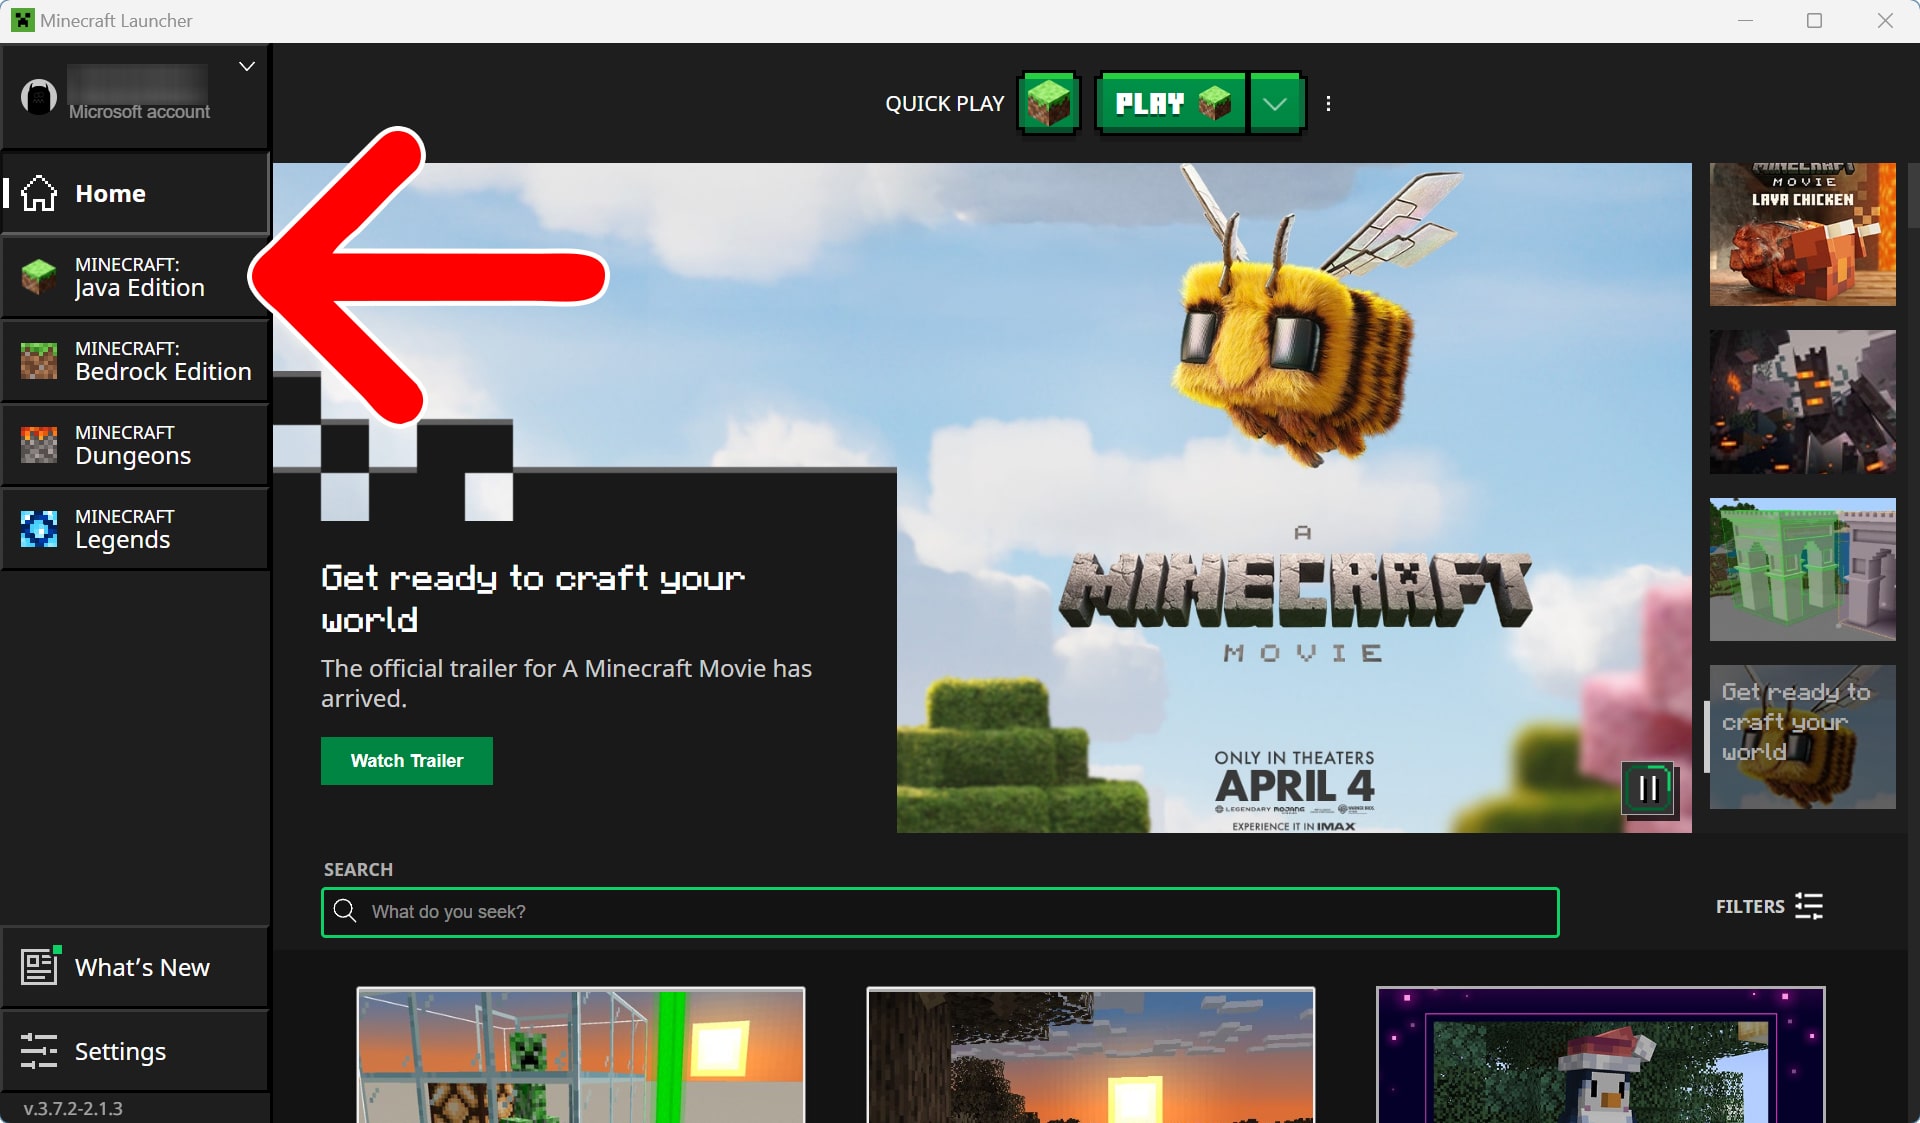
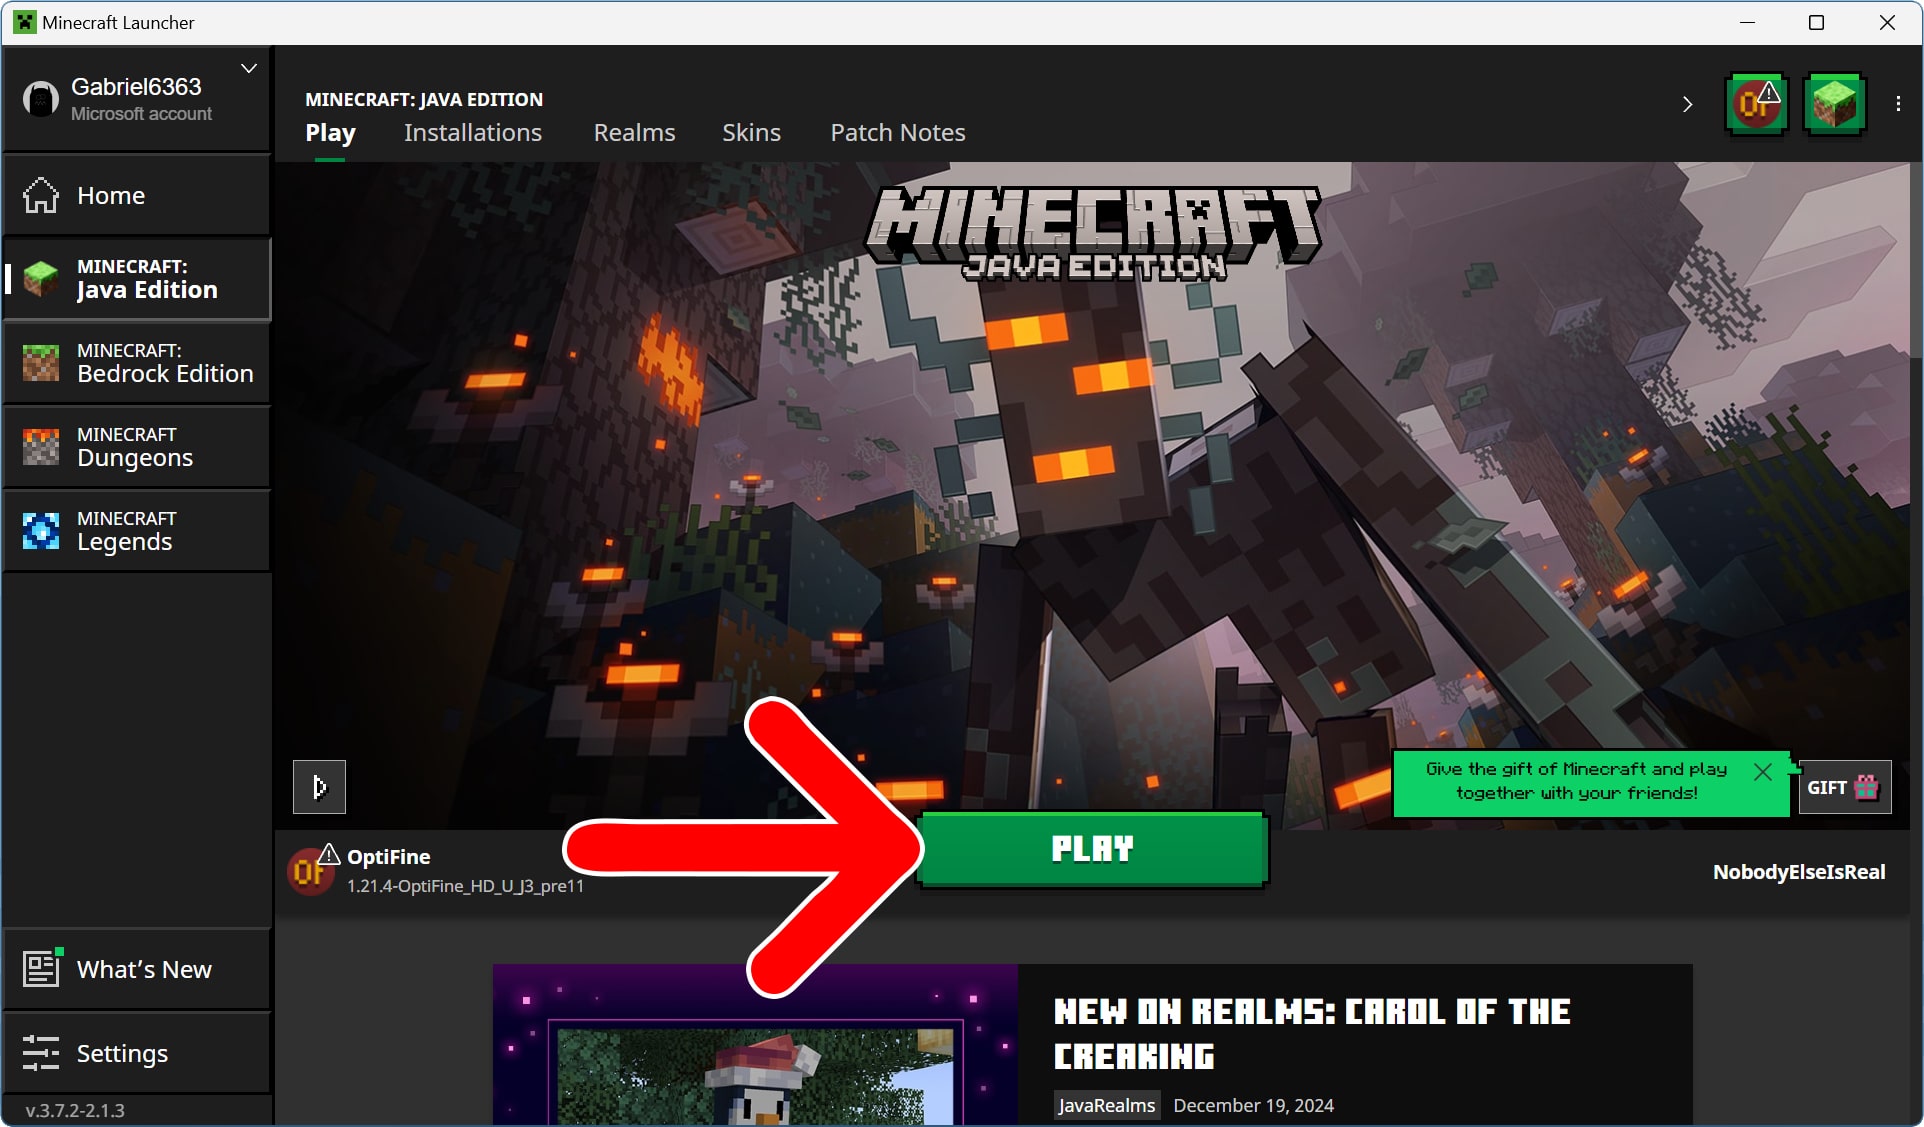
- Open the Minecraft Launcher app.
- Select “Minecraft: Java Edition.” You should see this in the left sidebar of the app window.
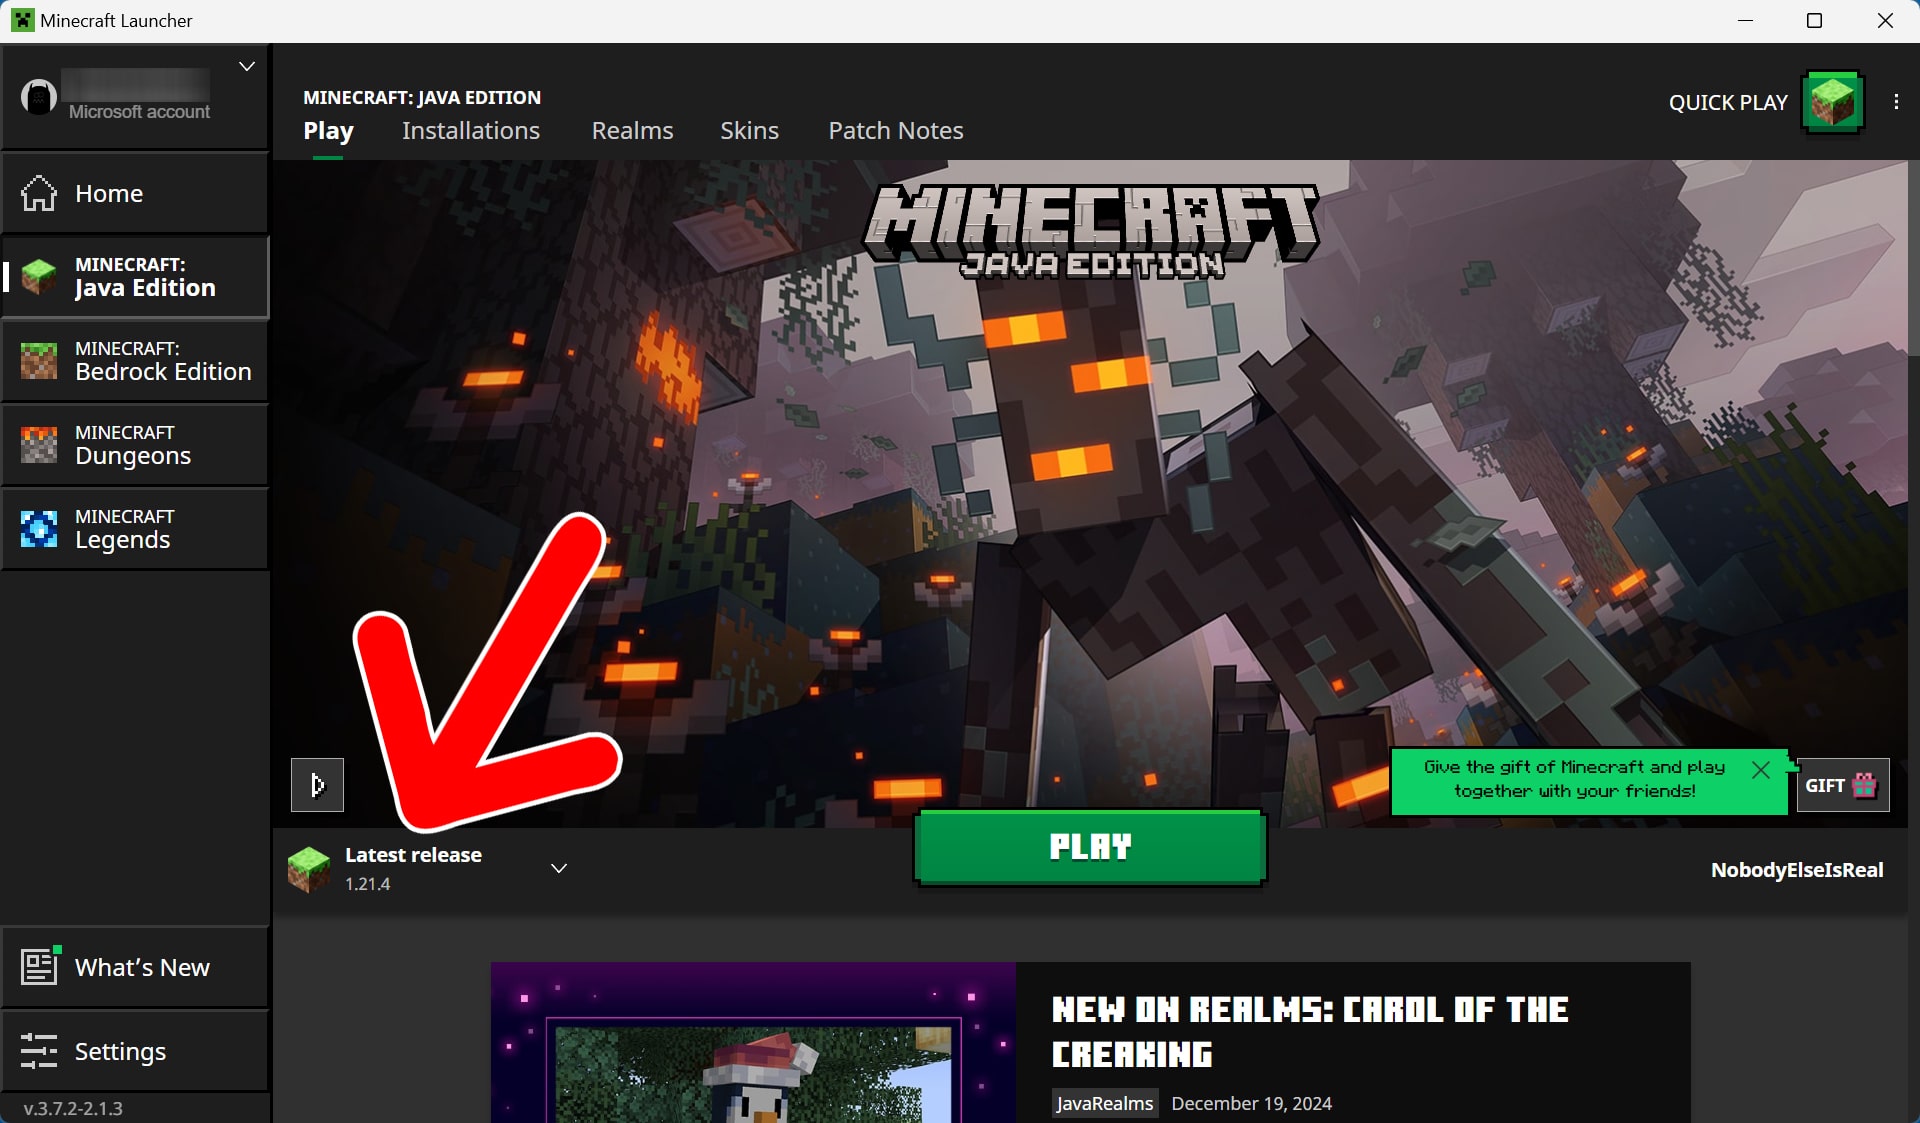
- Then click the version you are running. You will see this in the lower-left corner of the window.
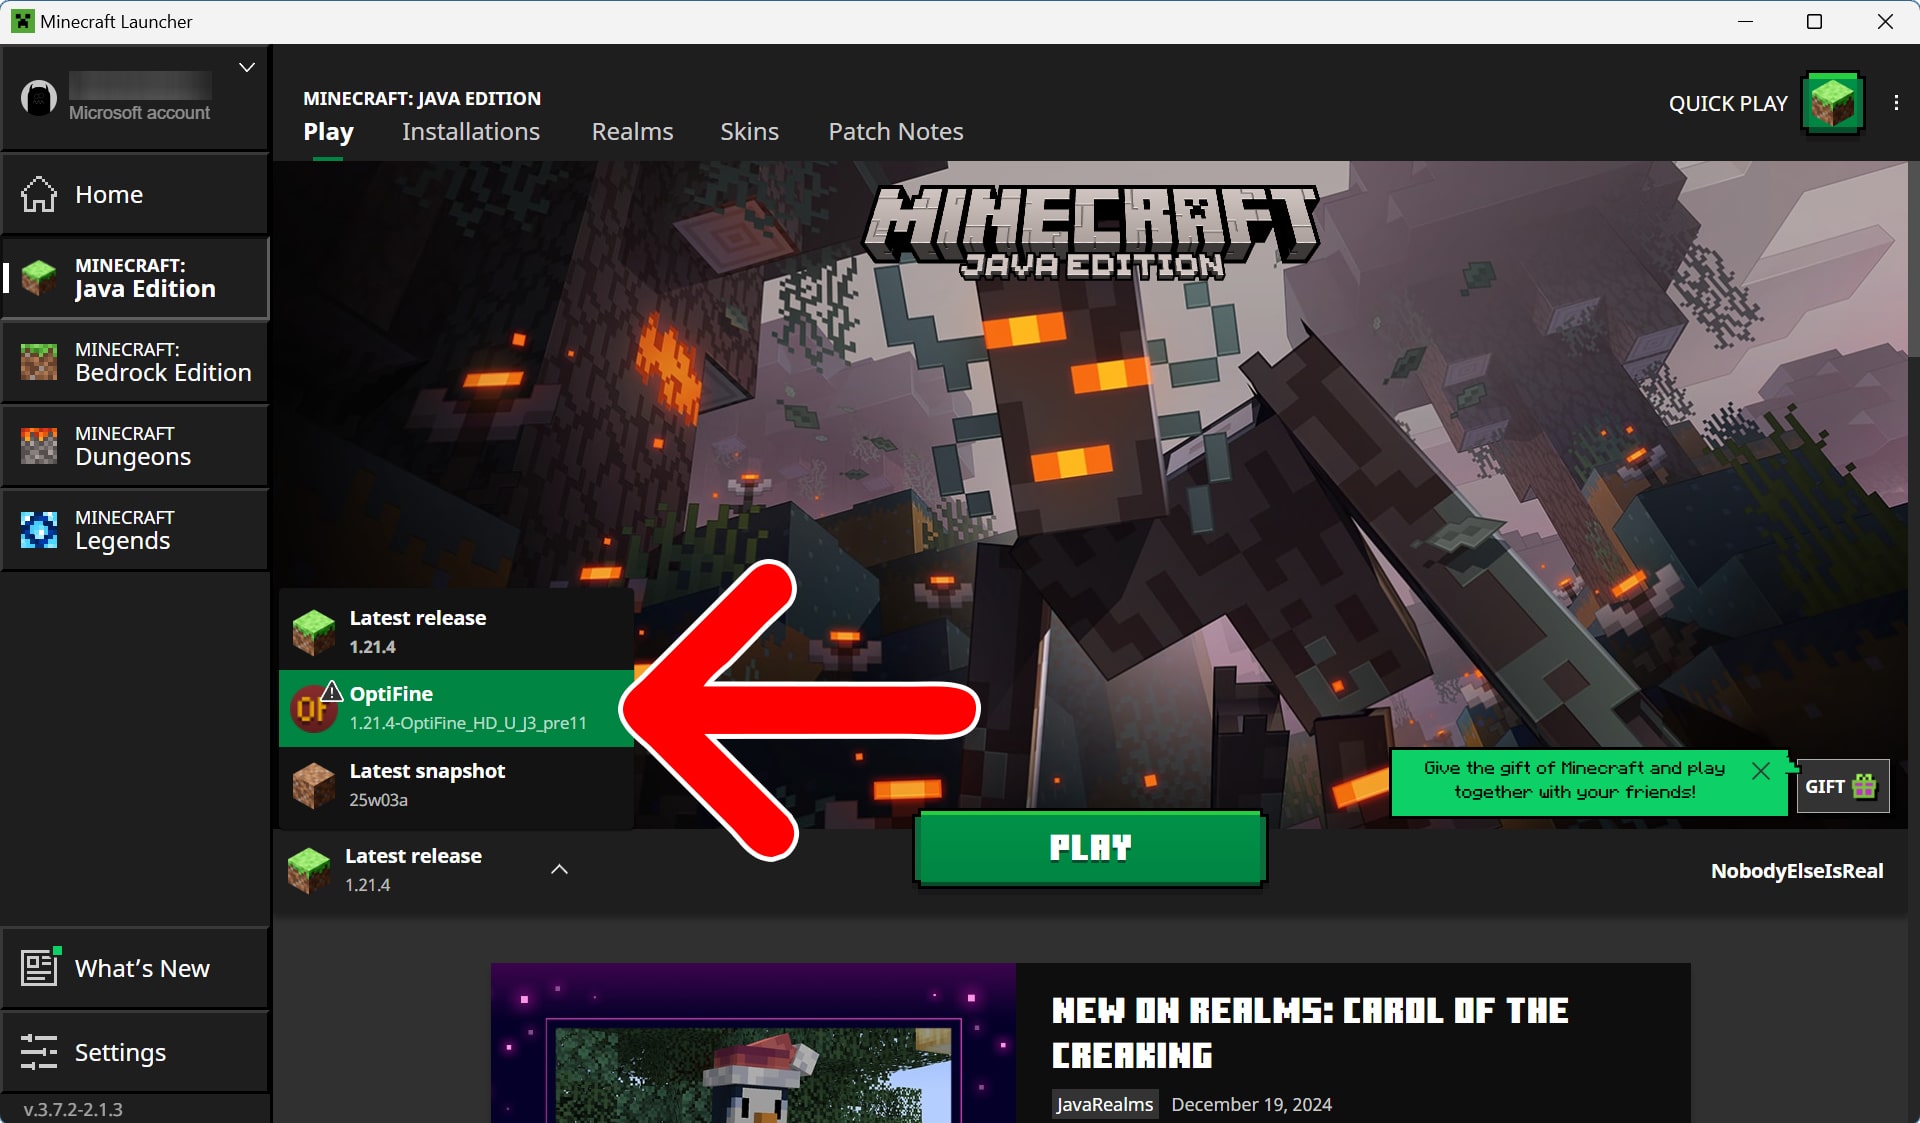
- Select “OptiFine” from the list. Once you select OptiFine from this list, it will remain the default version when you open the Minecraft Launcher next time.
- Finally, select “Play.”
How to Install OptiFine Shaders
To install Minecraft shaders using OptiFine, open the Minecraft Launcher app and run the game with OptiFine. Then, go to “Options > Video Settings > Shaders > Shaders Folder.” Next, drag the shader “.zip” file into the “shaderpacks” folder. Finally, go back to Minecraft, select the shader, and click “Done.”
- Open the Minecraft Launcher app.
- Launch the game using OptiFine.
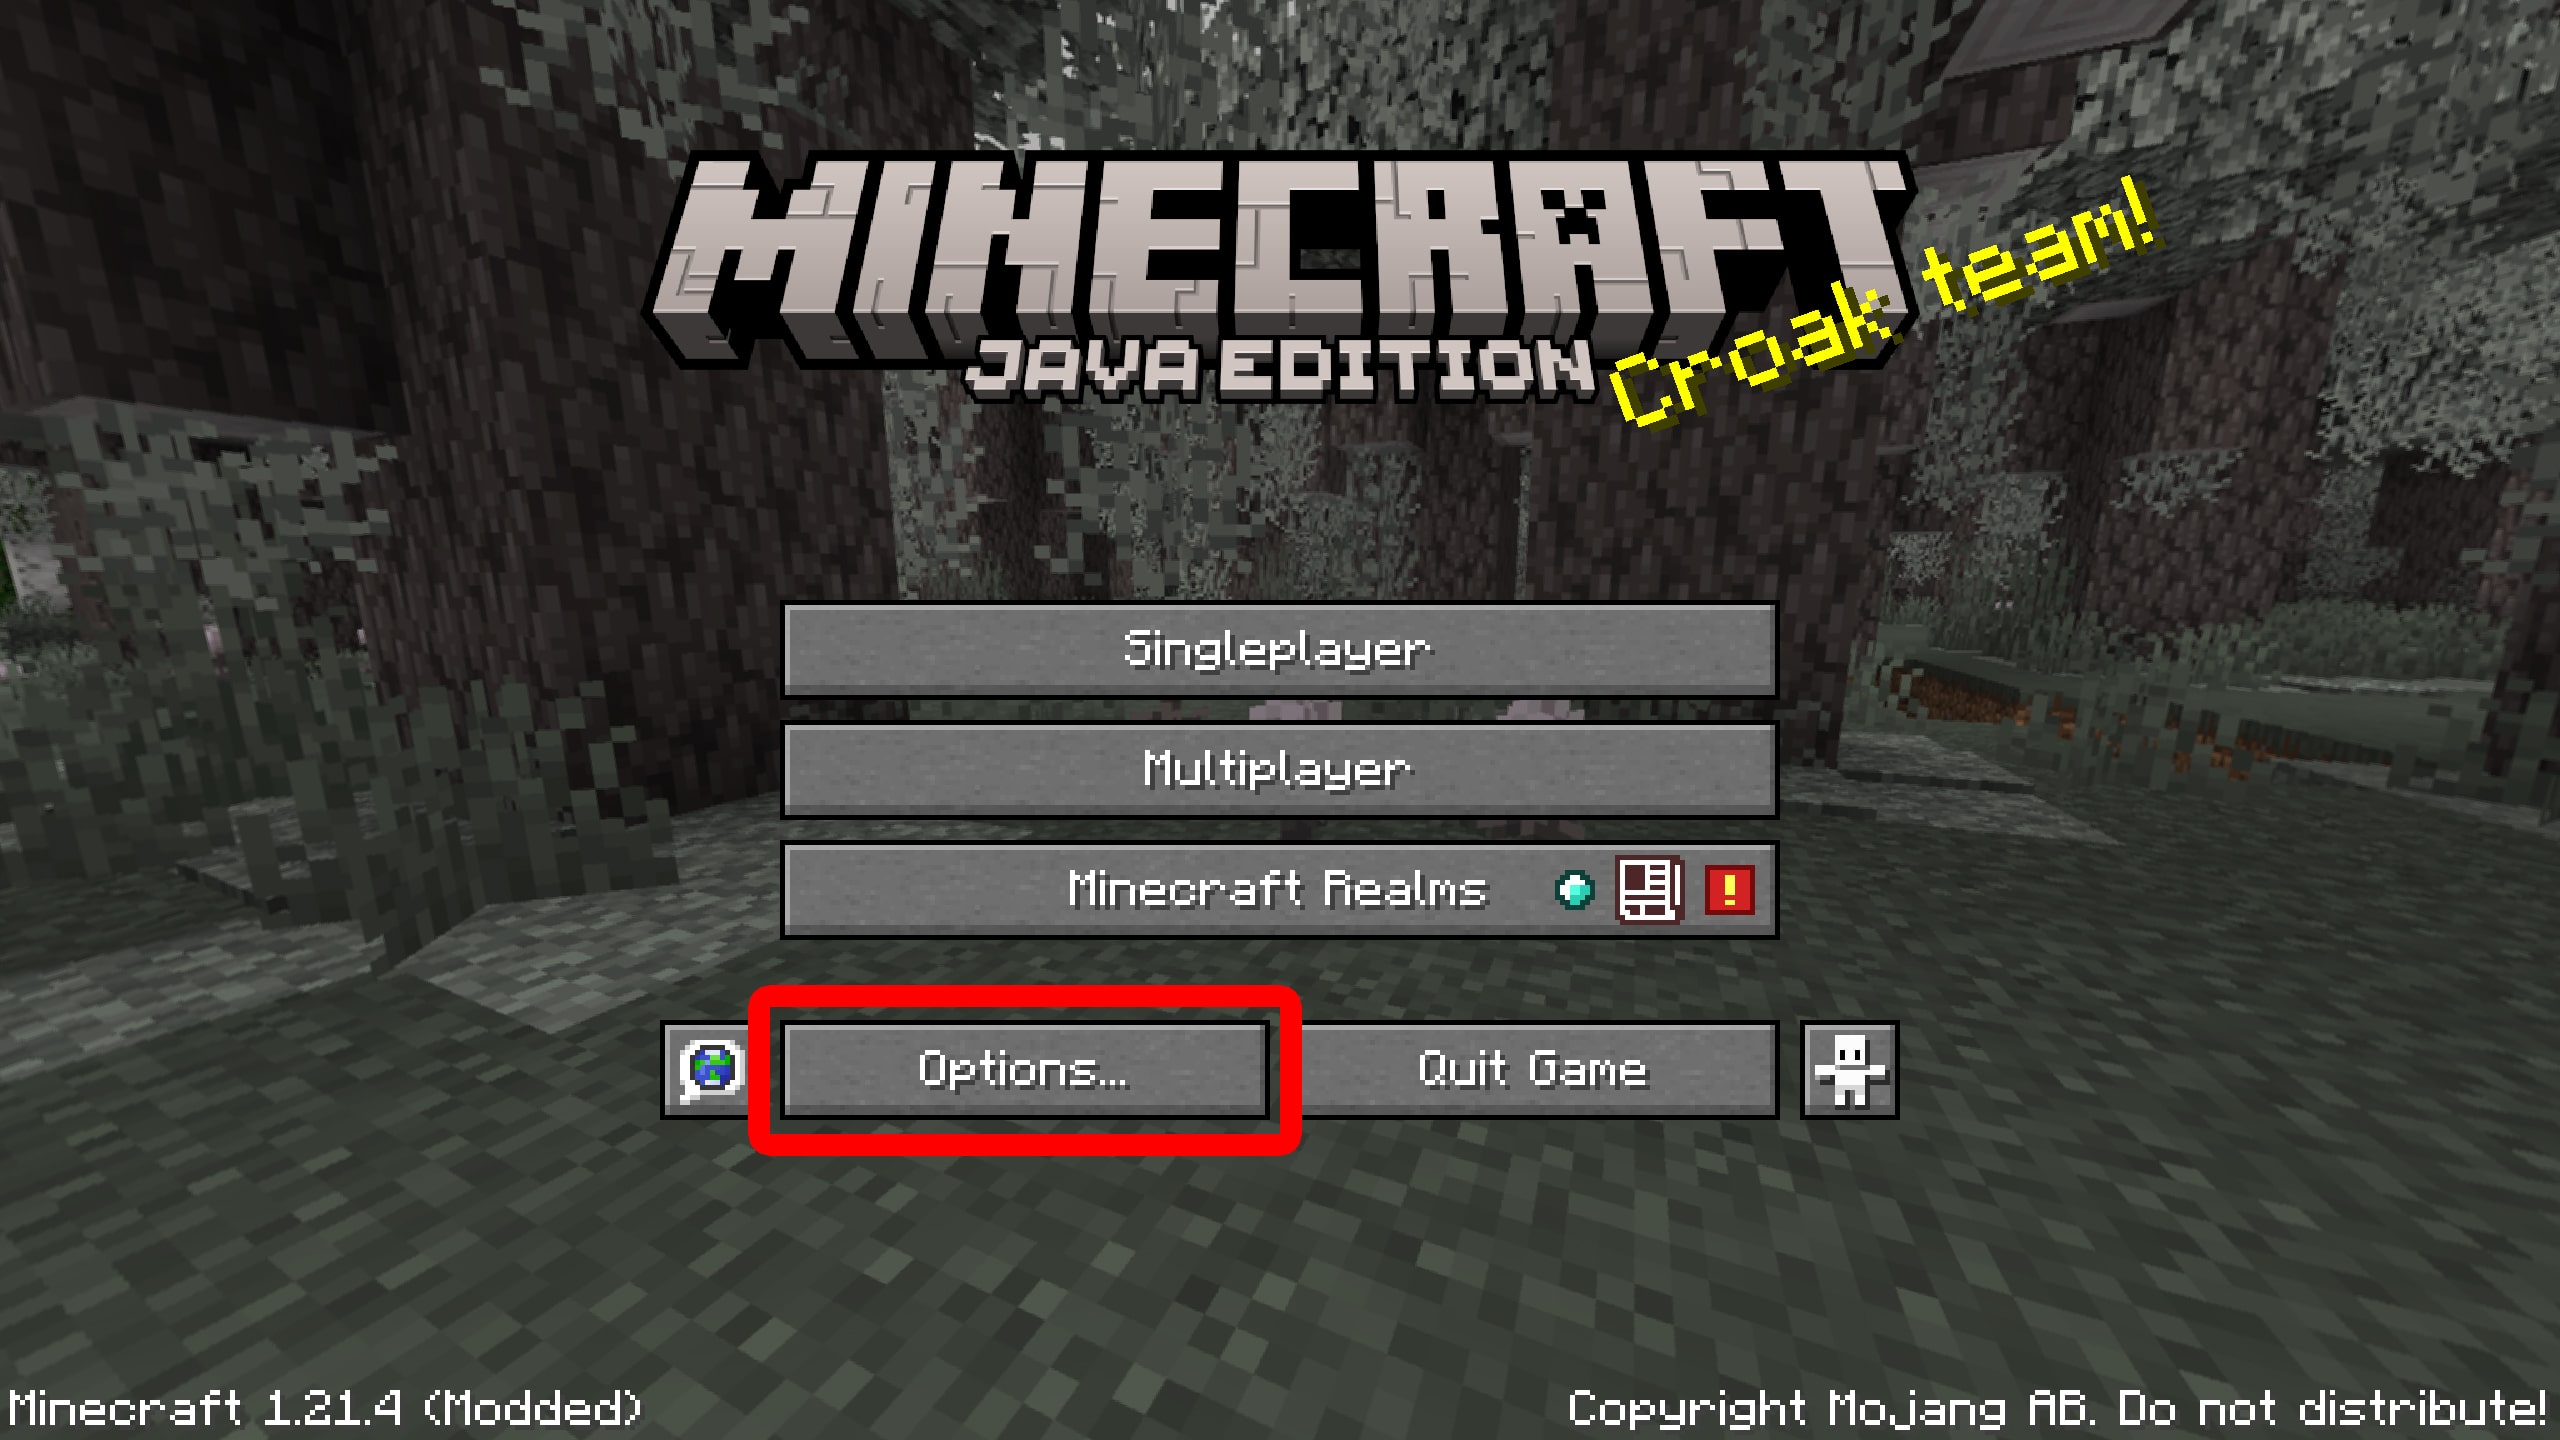
- Go to “Options.” You will see this at the bottom of the Minecraft main menu screen.
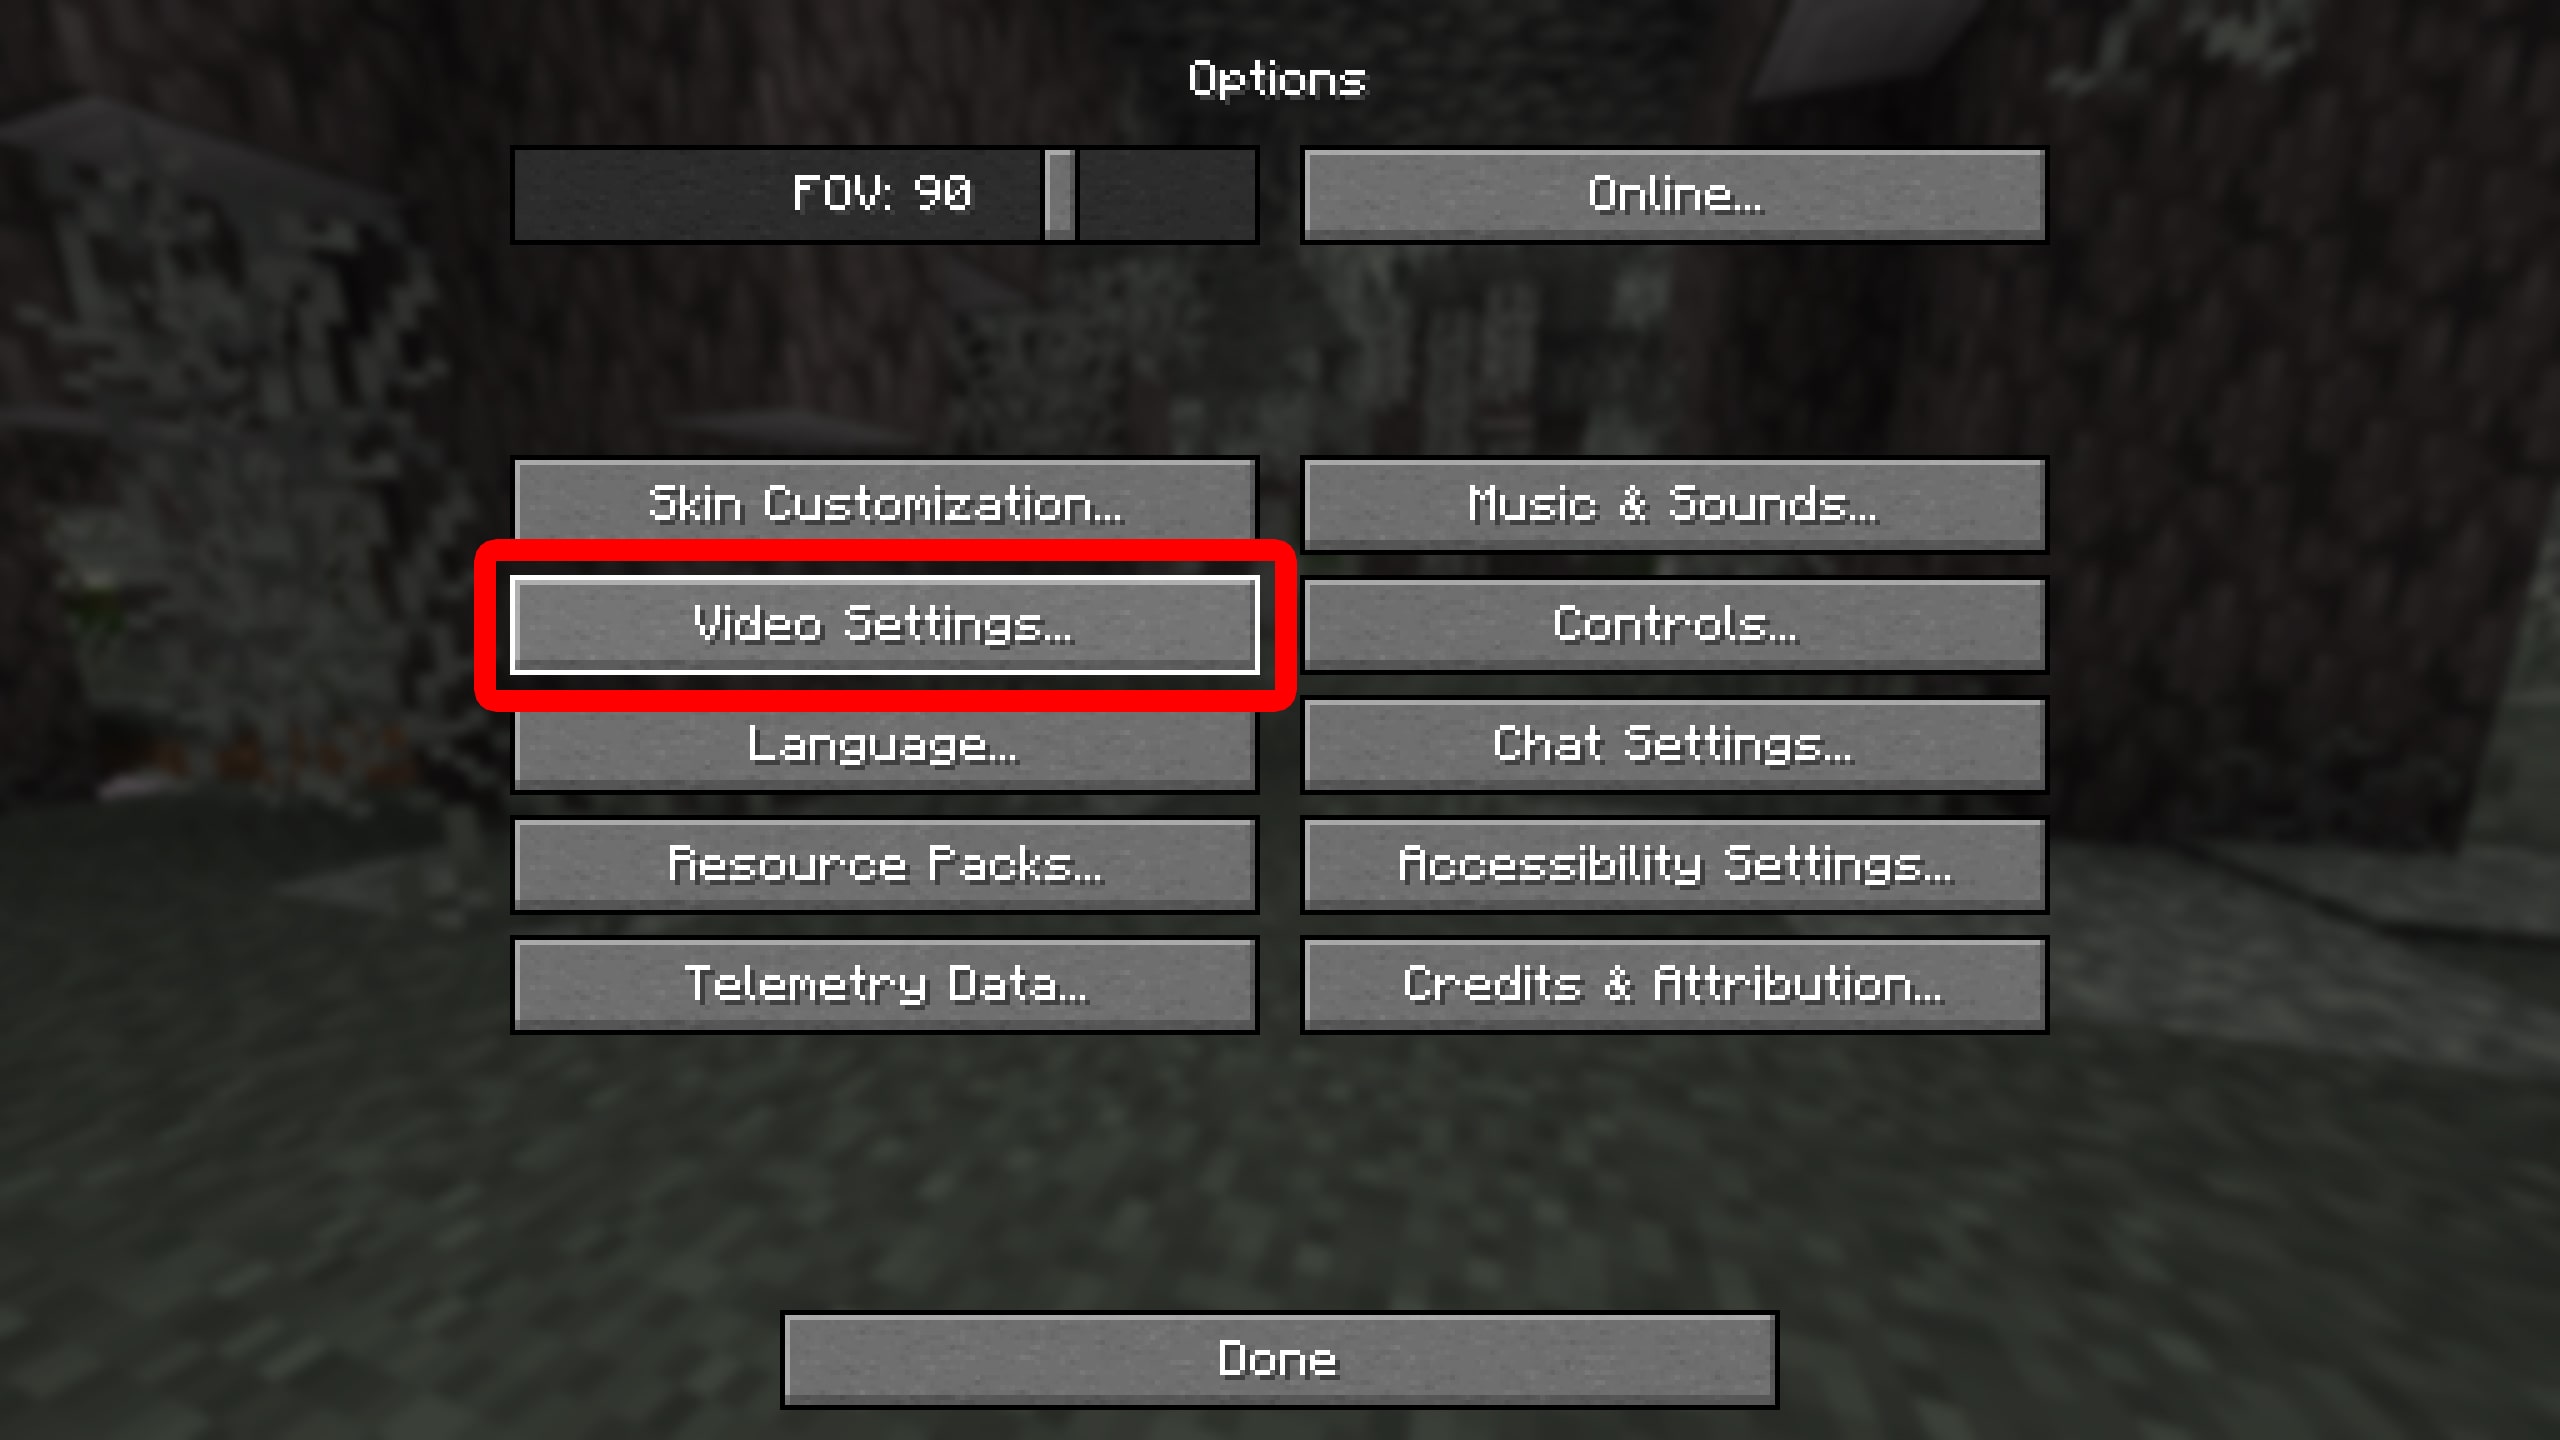
- Select “Video Settings.”
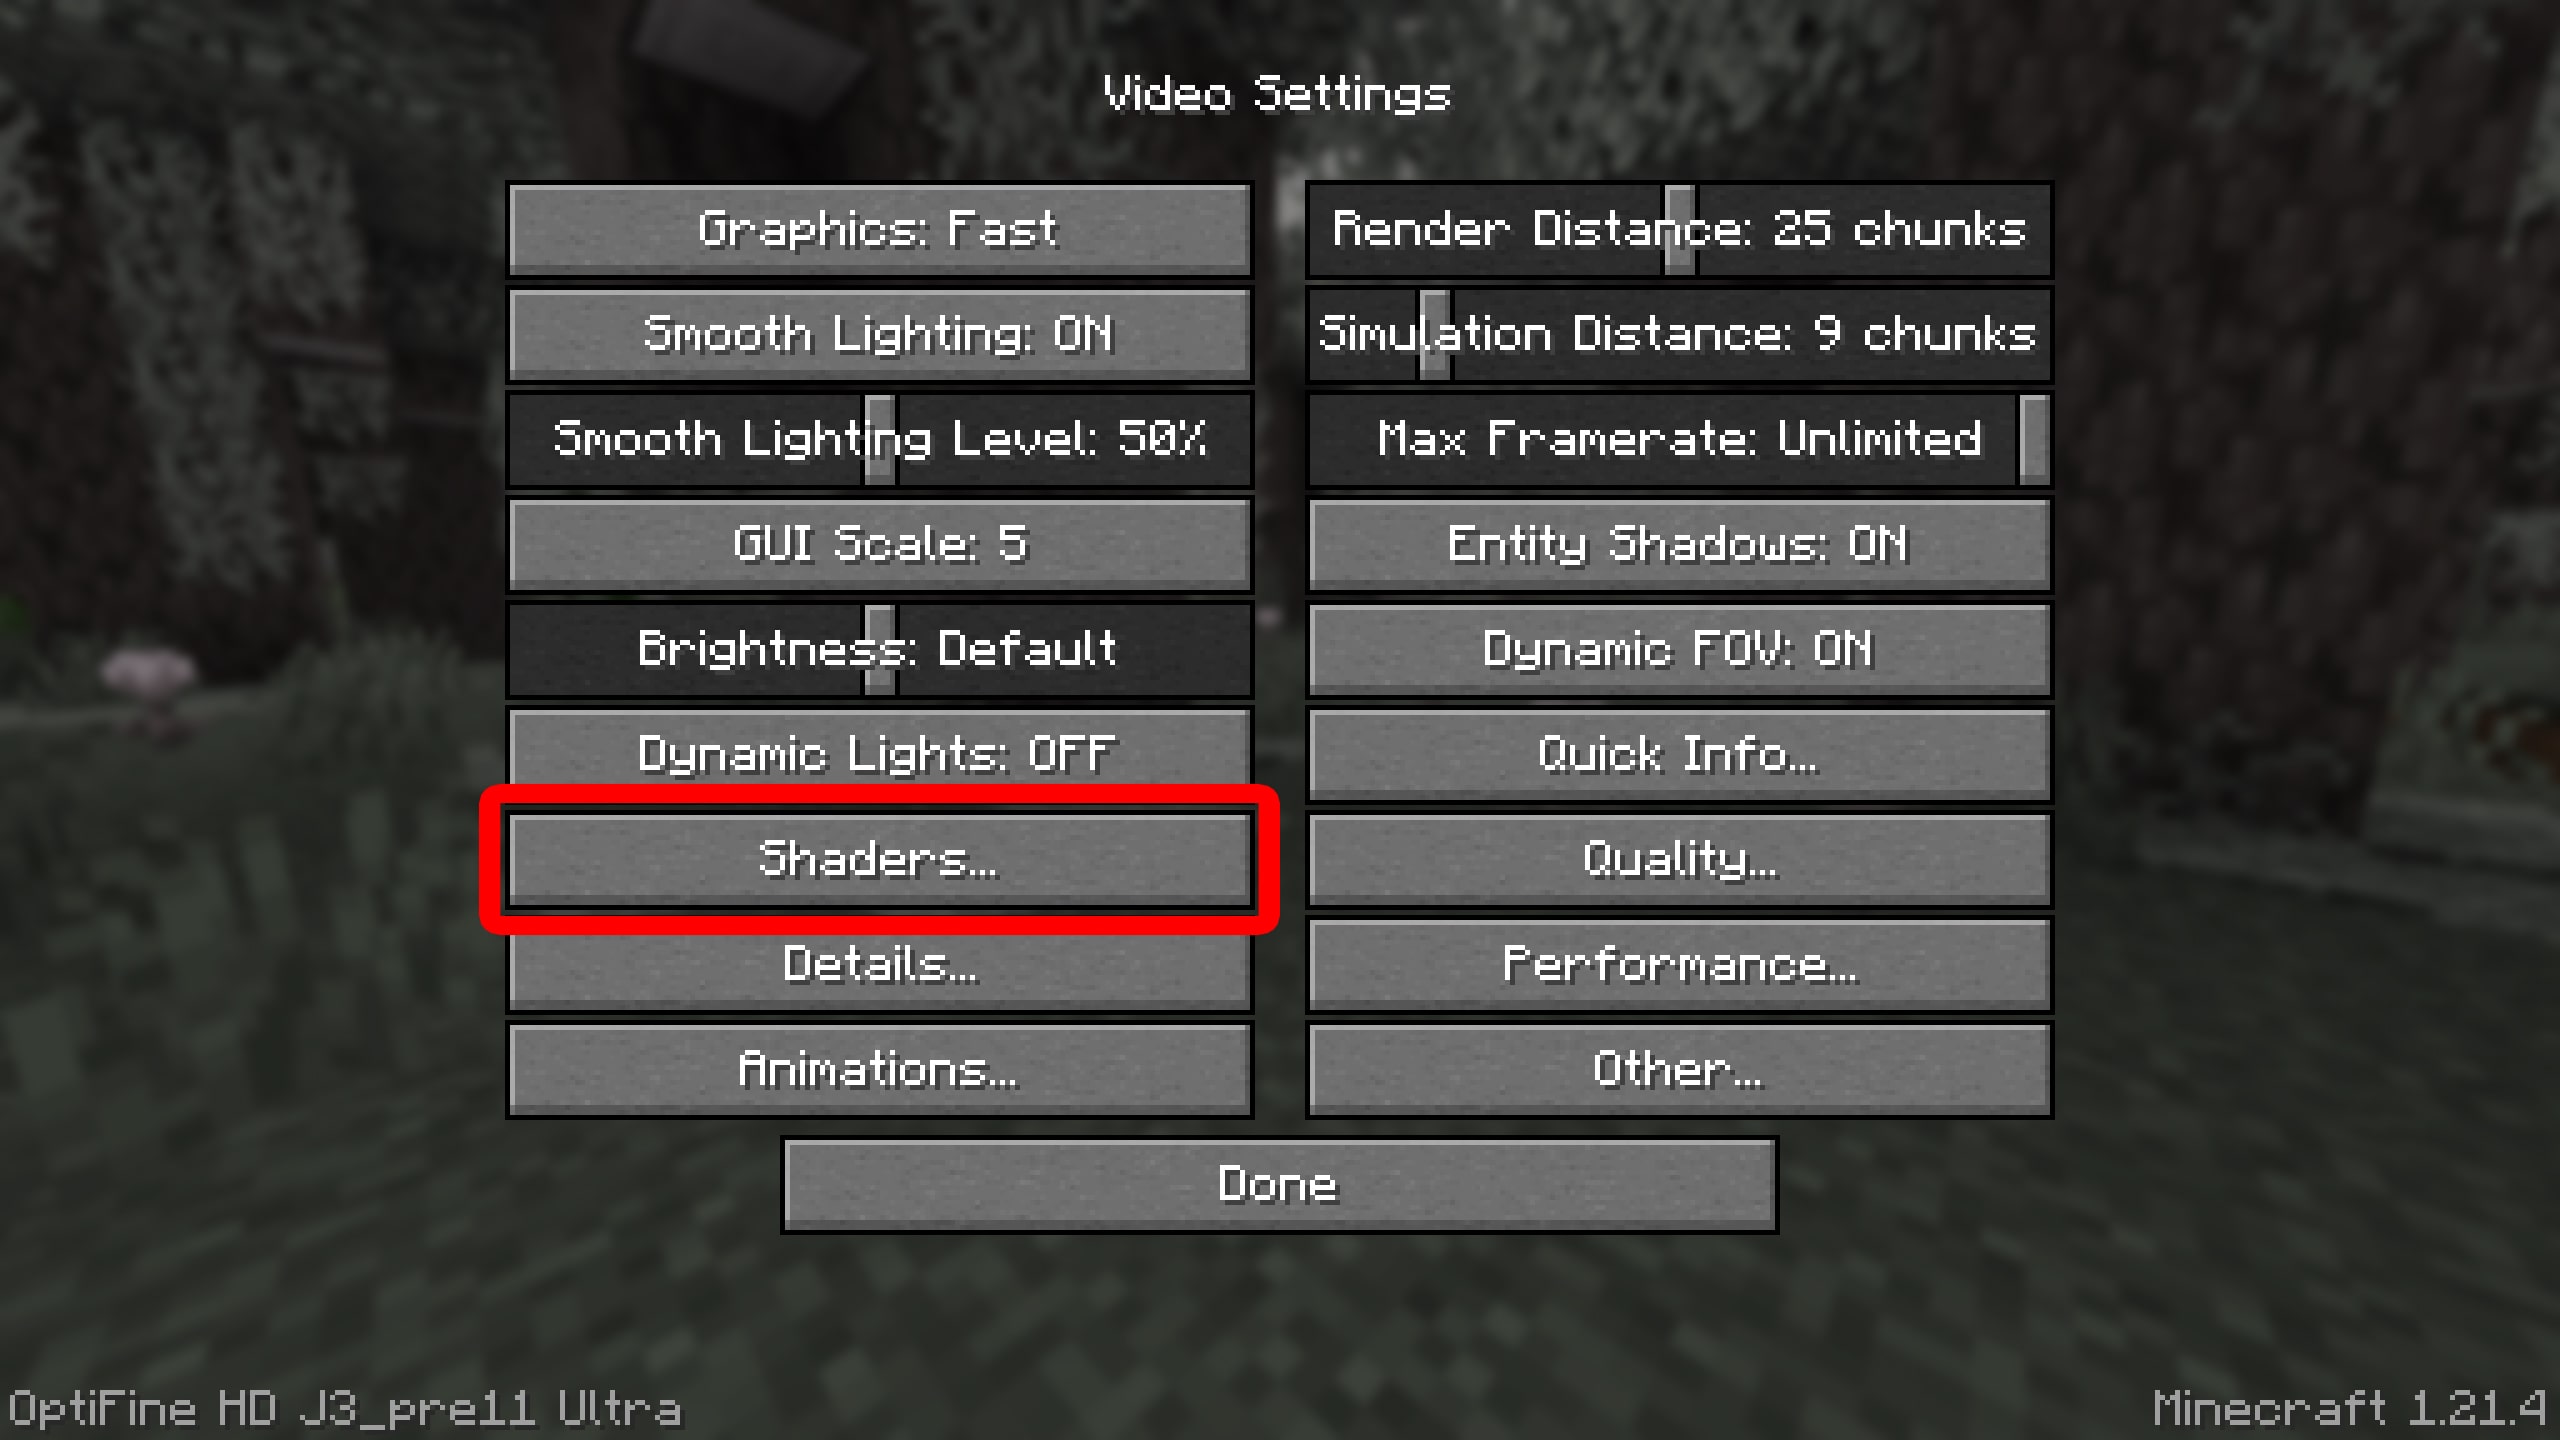
- Click “Shaders.”
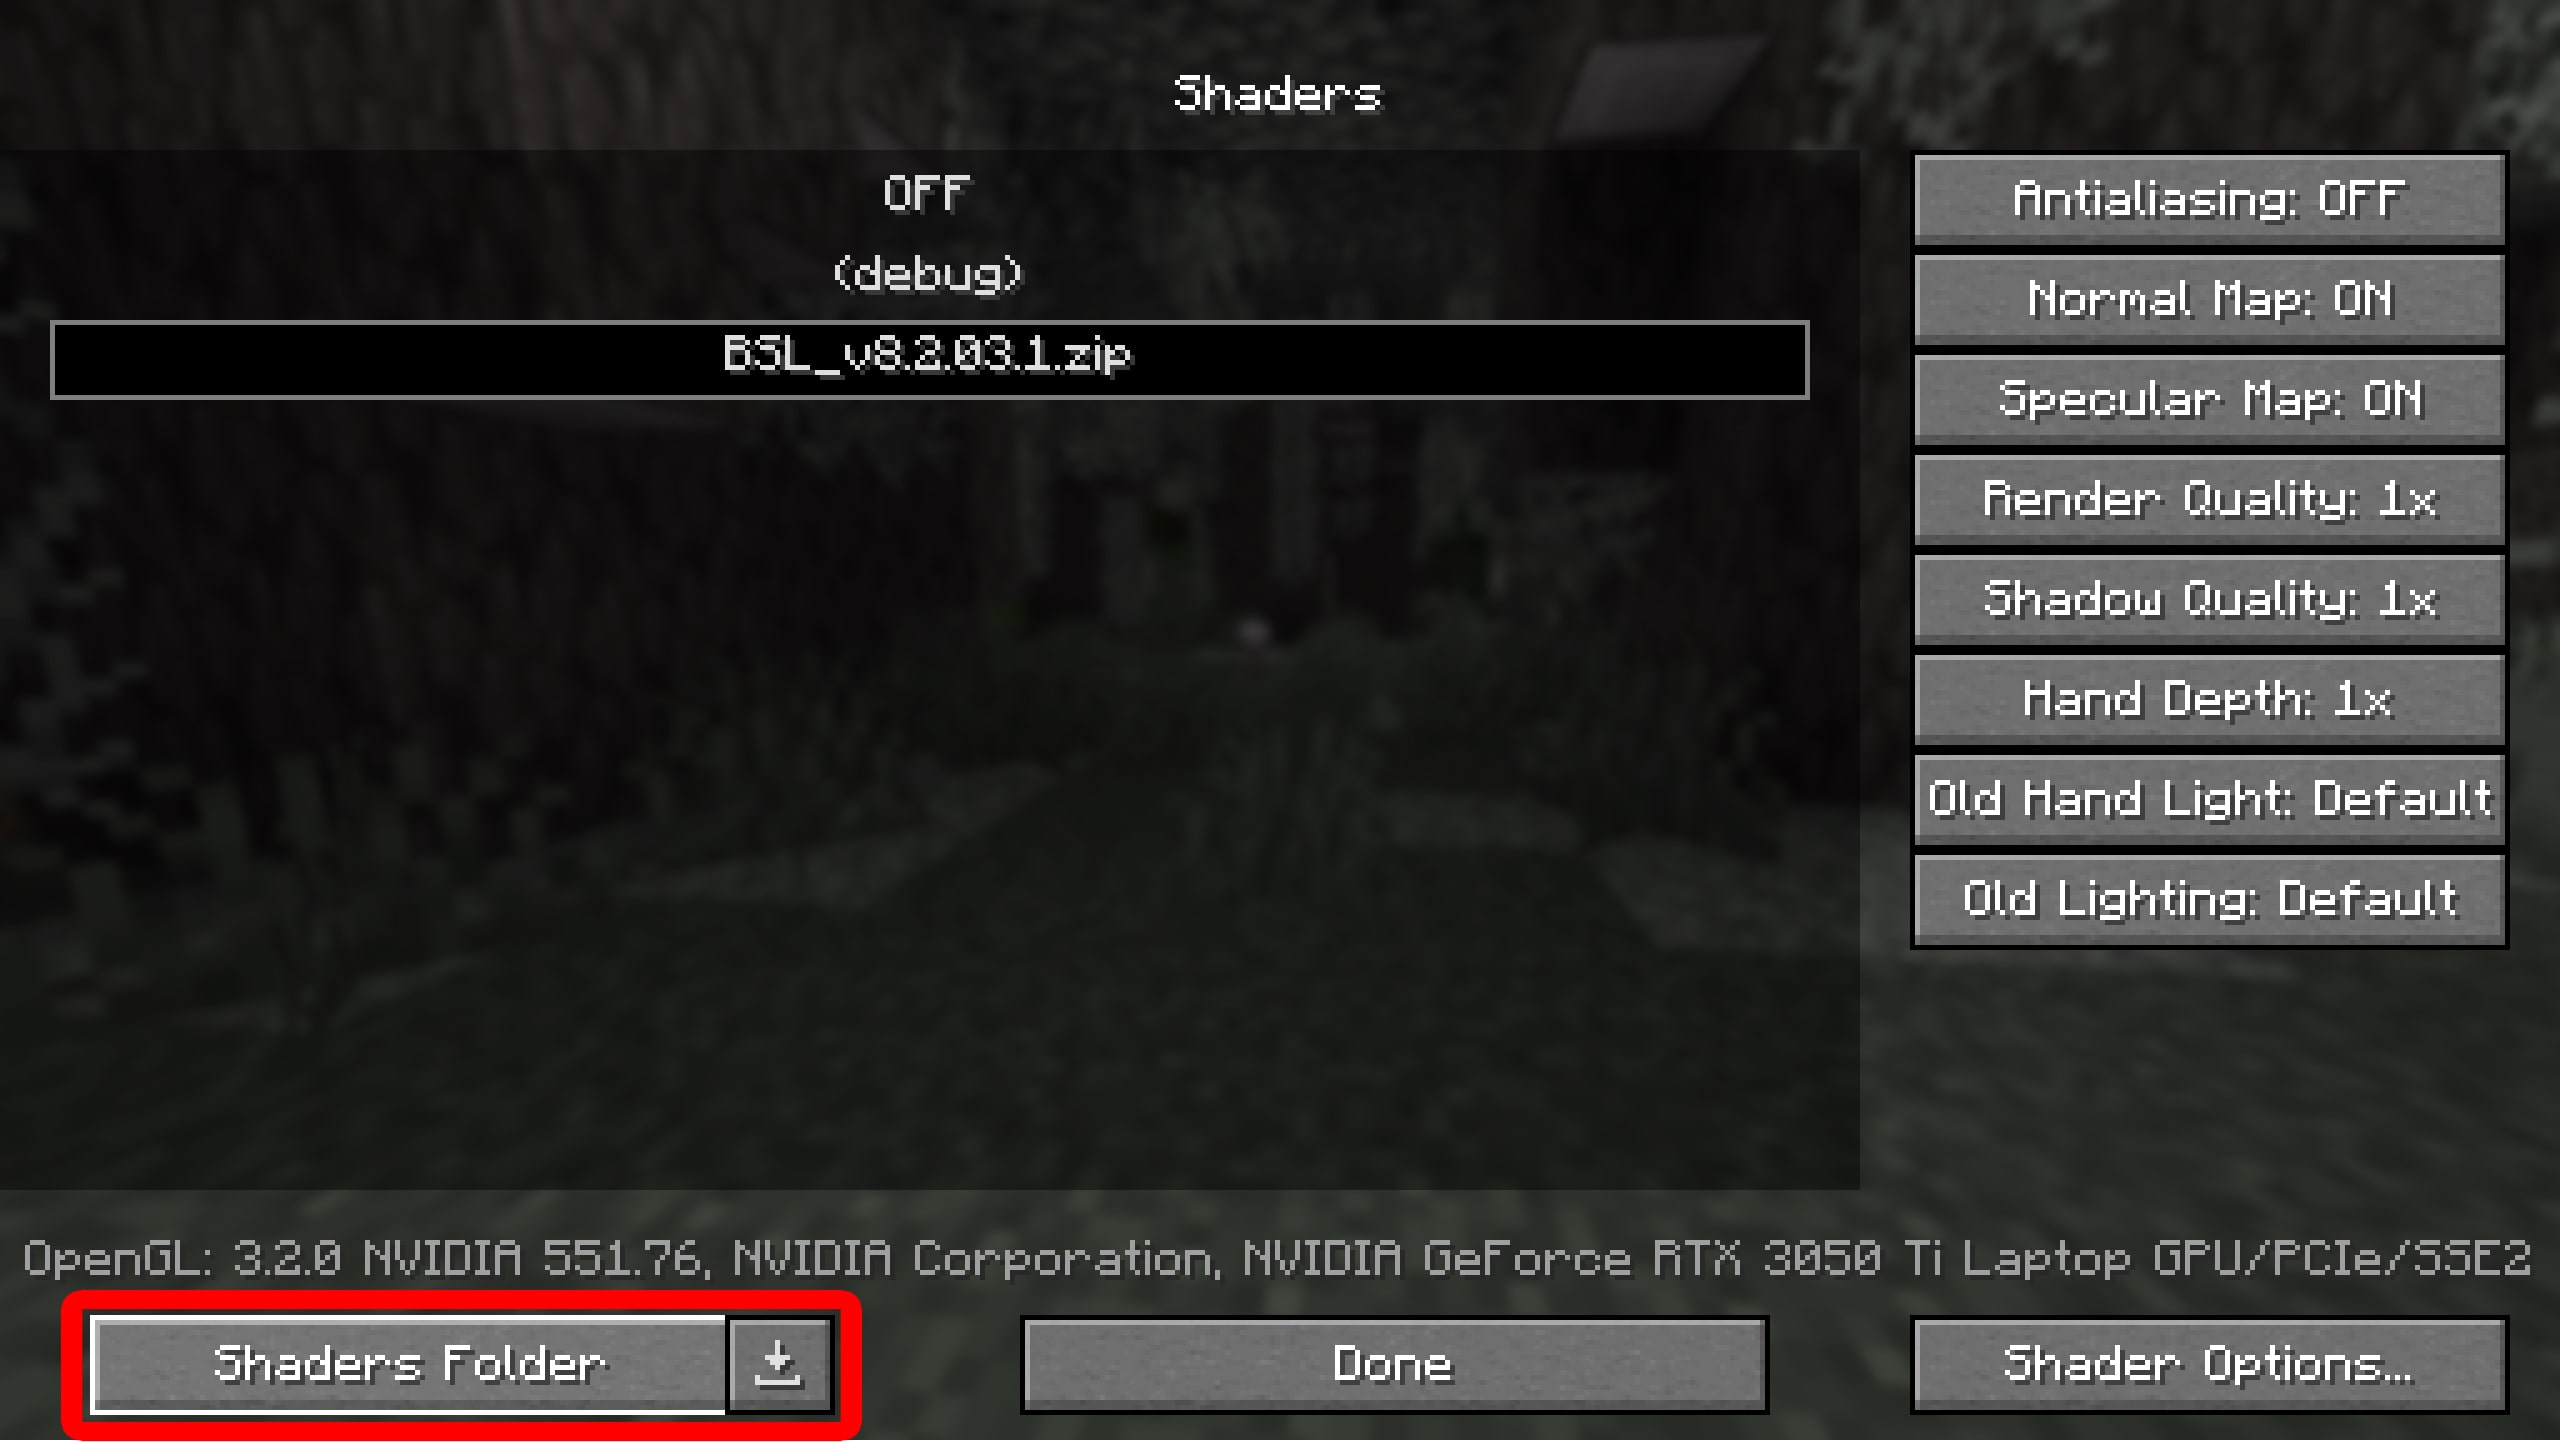
- Select “Shaders Folder.” This will open a folder on your computer. If you are playing in full-screen mode, the game will minimize to the Taskbar (on Windows) or Dock (on Mac) at the bottom of your screen.
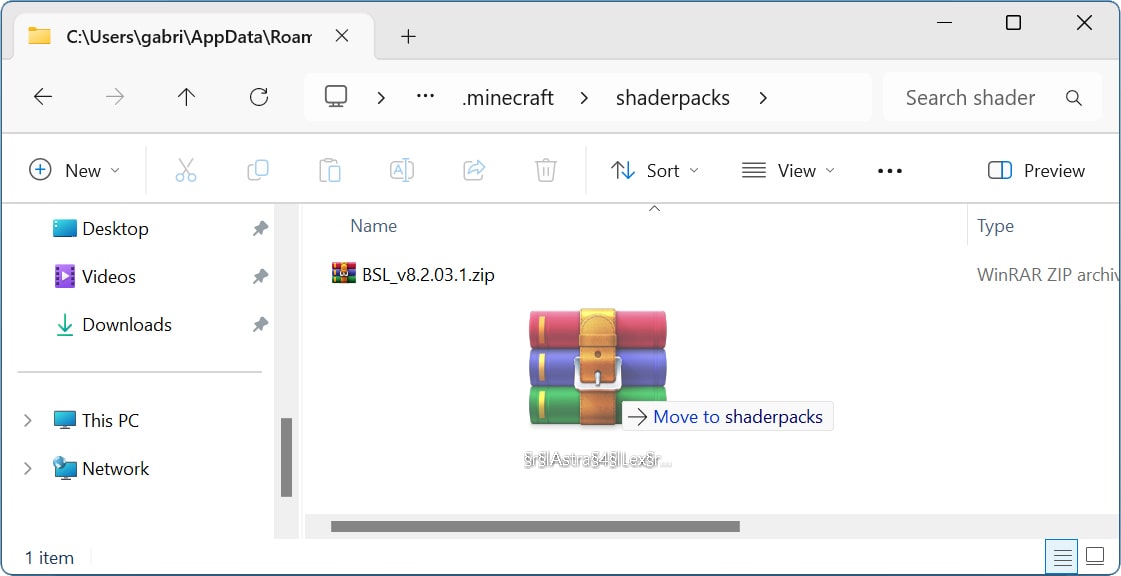
- Drag your “.zip” shader file into the “shaderpacks” folder.
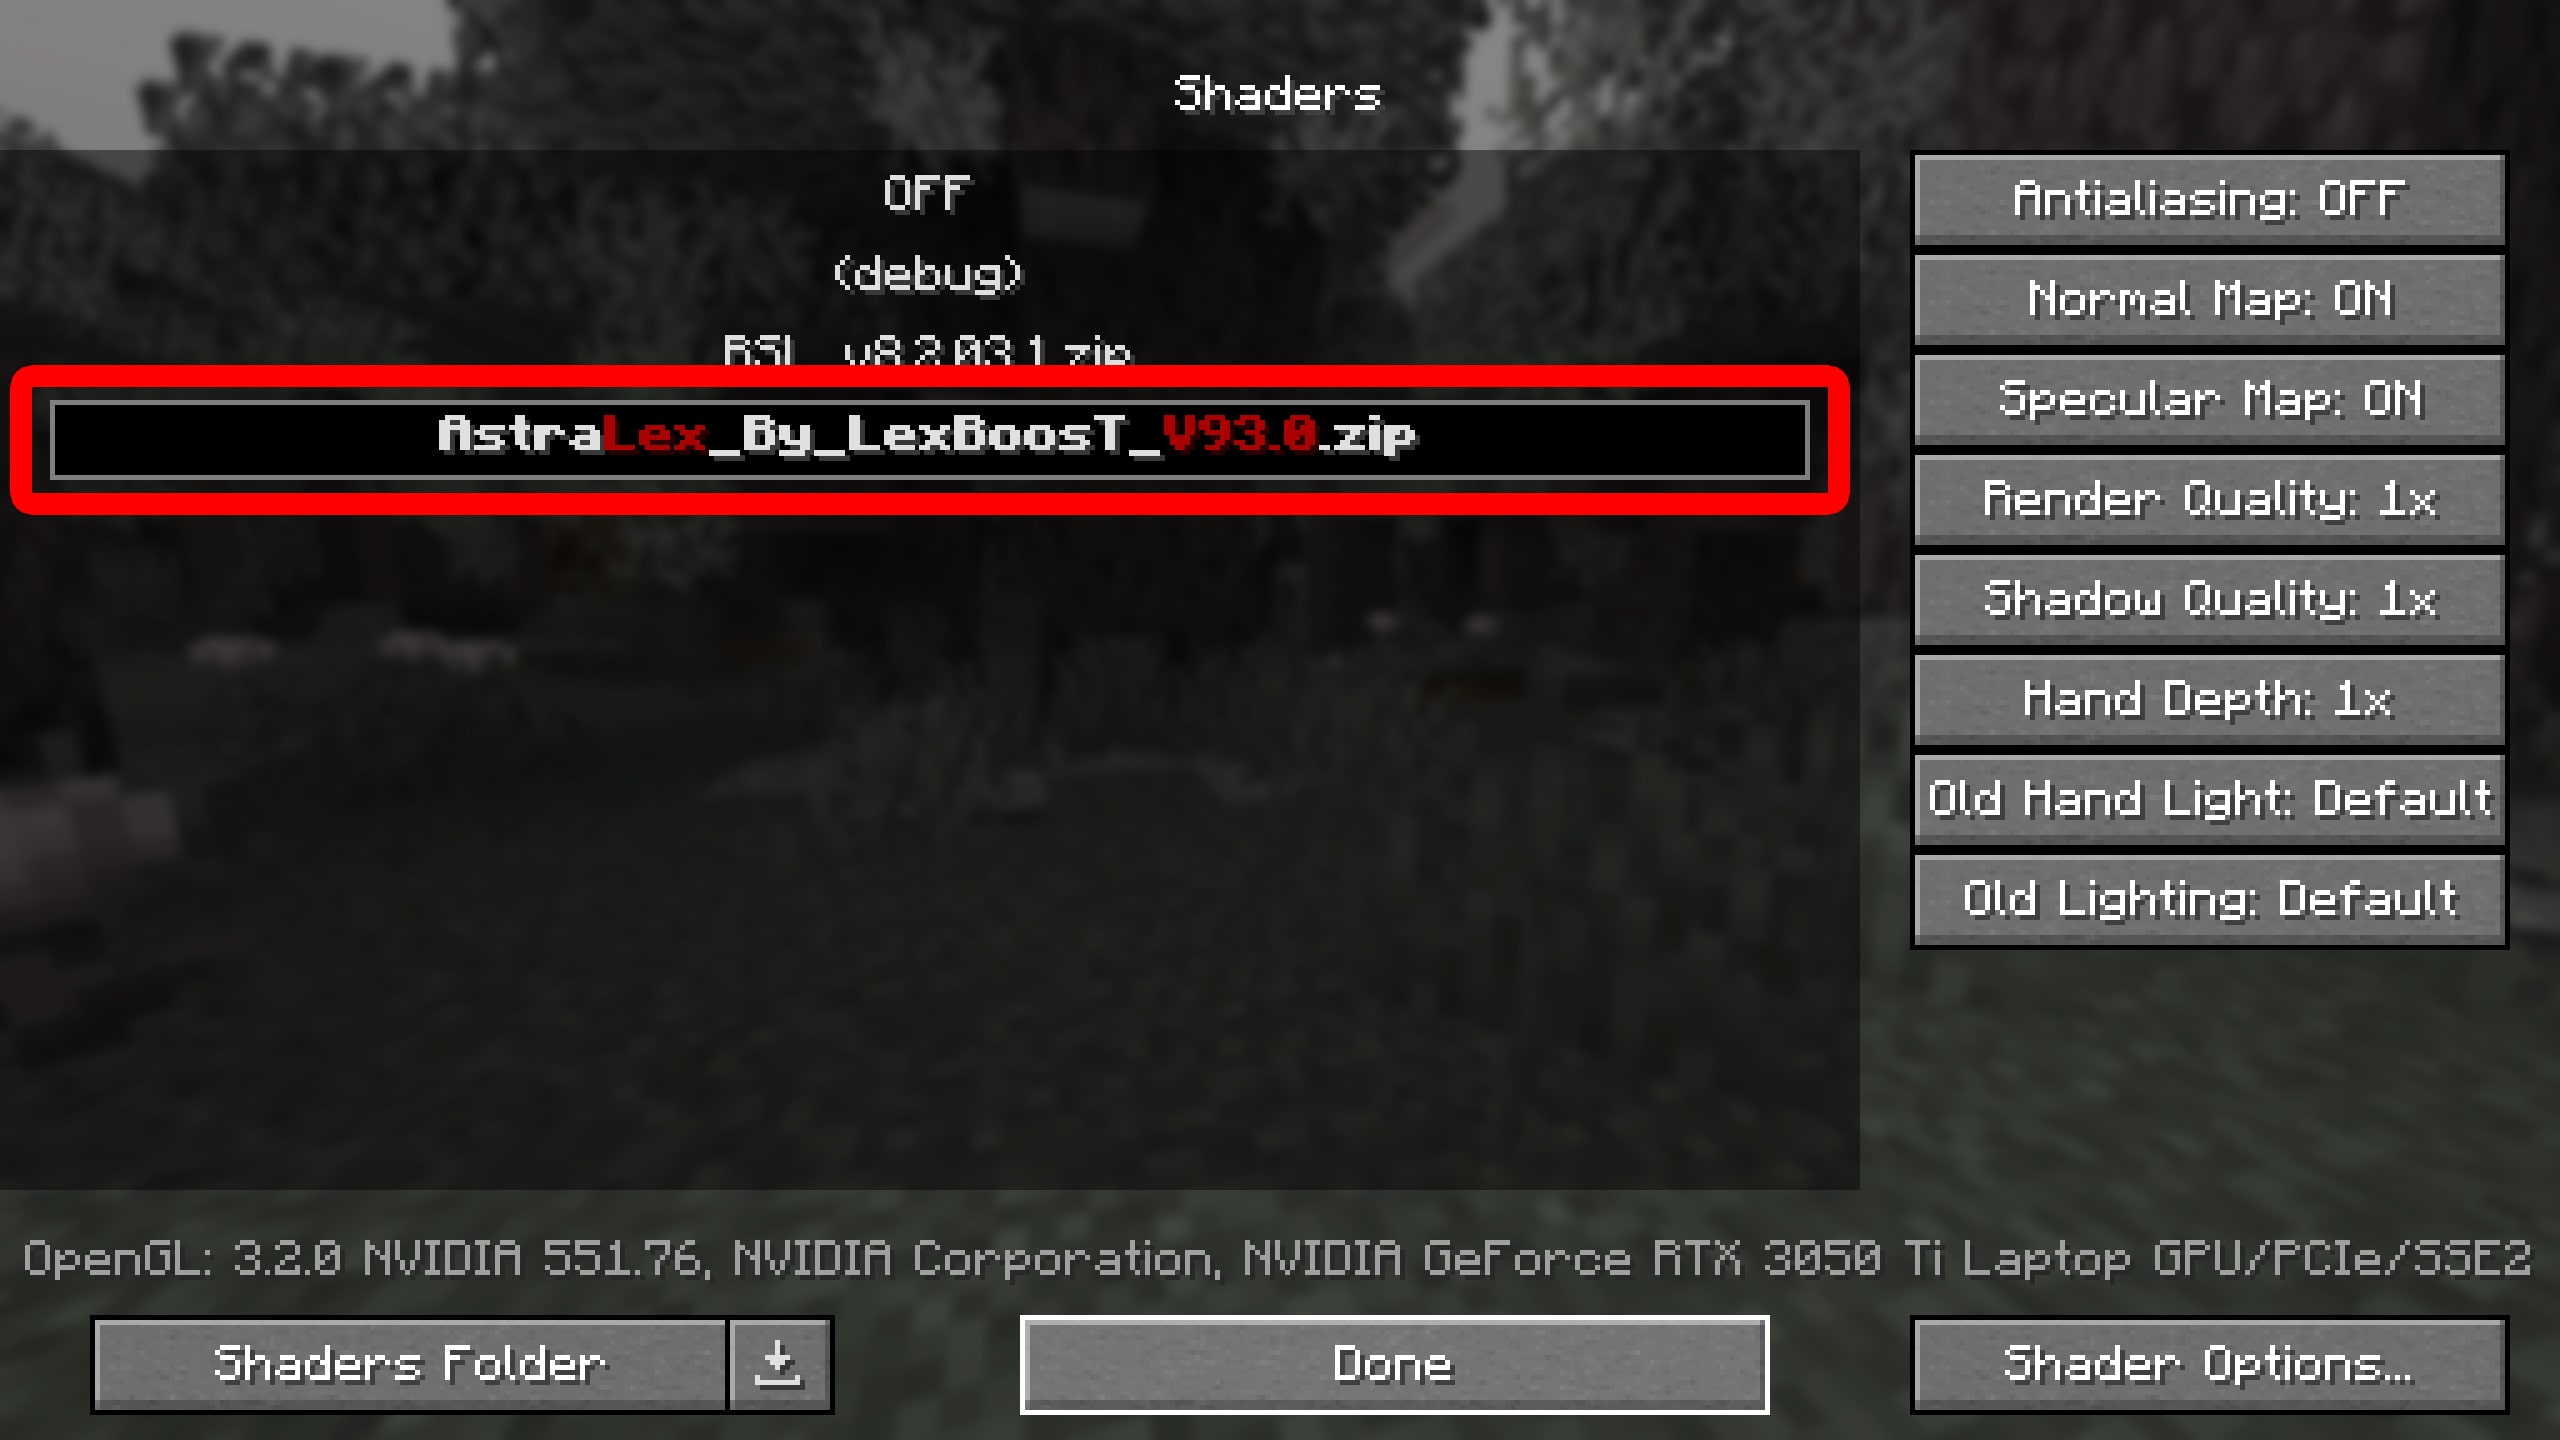
- Select a shader. You should see your new shader appear in the list under “Shaders.”
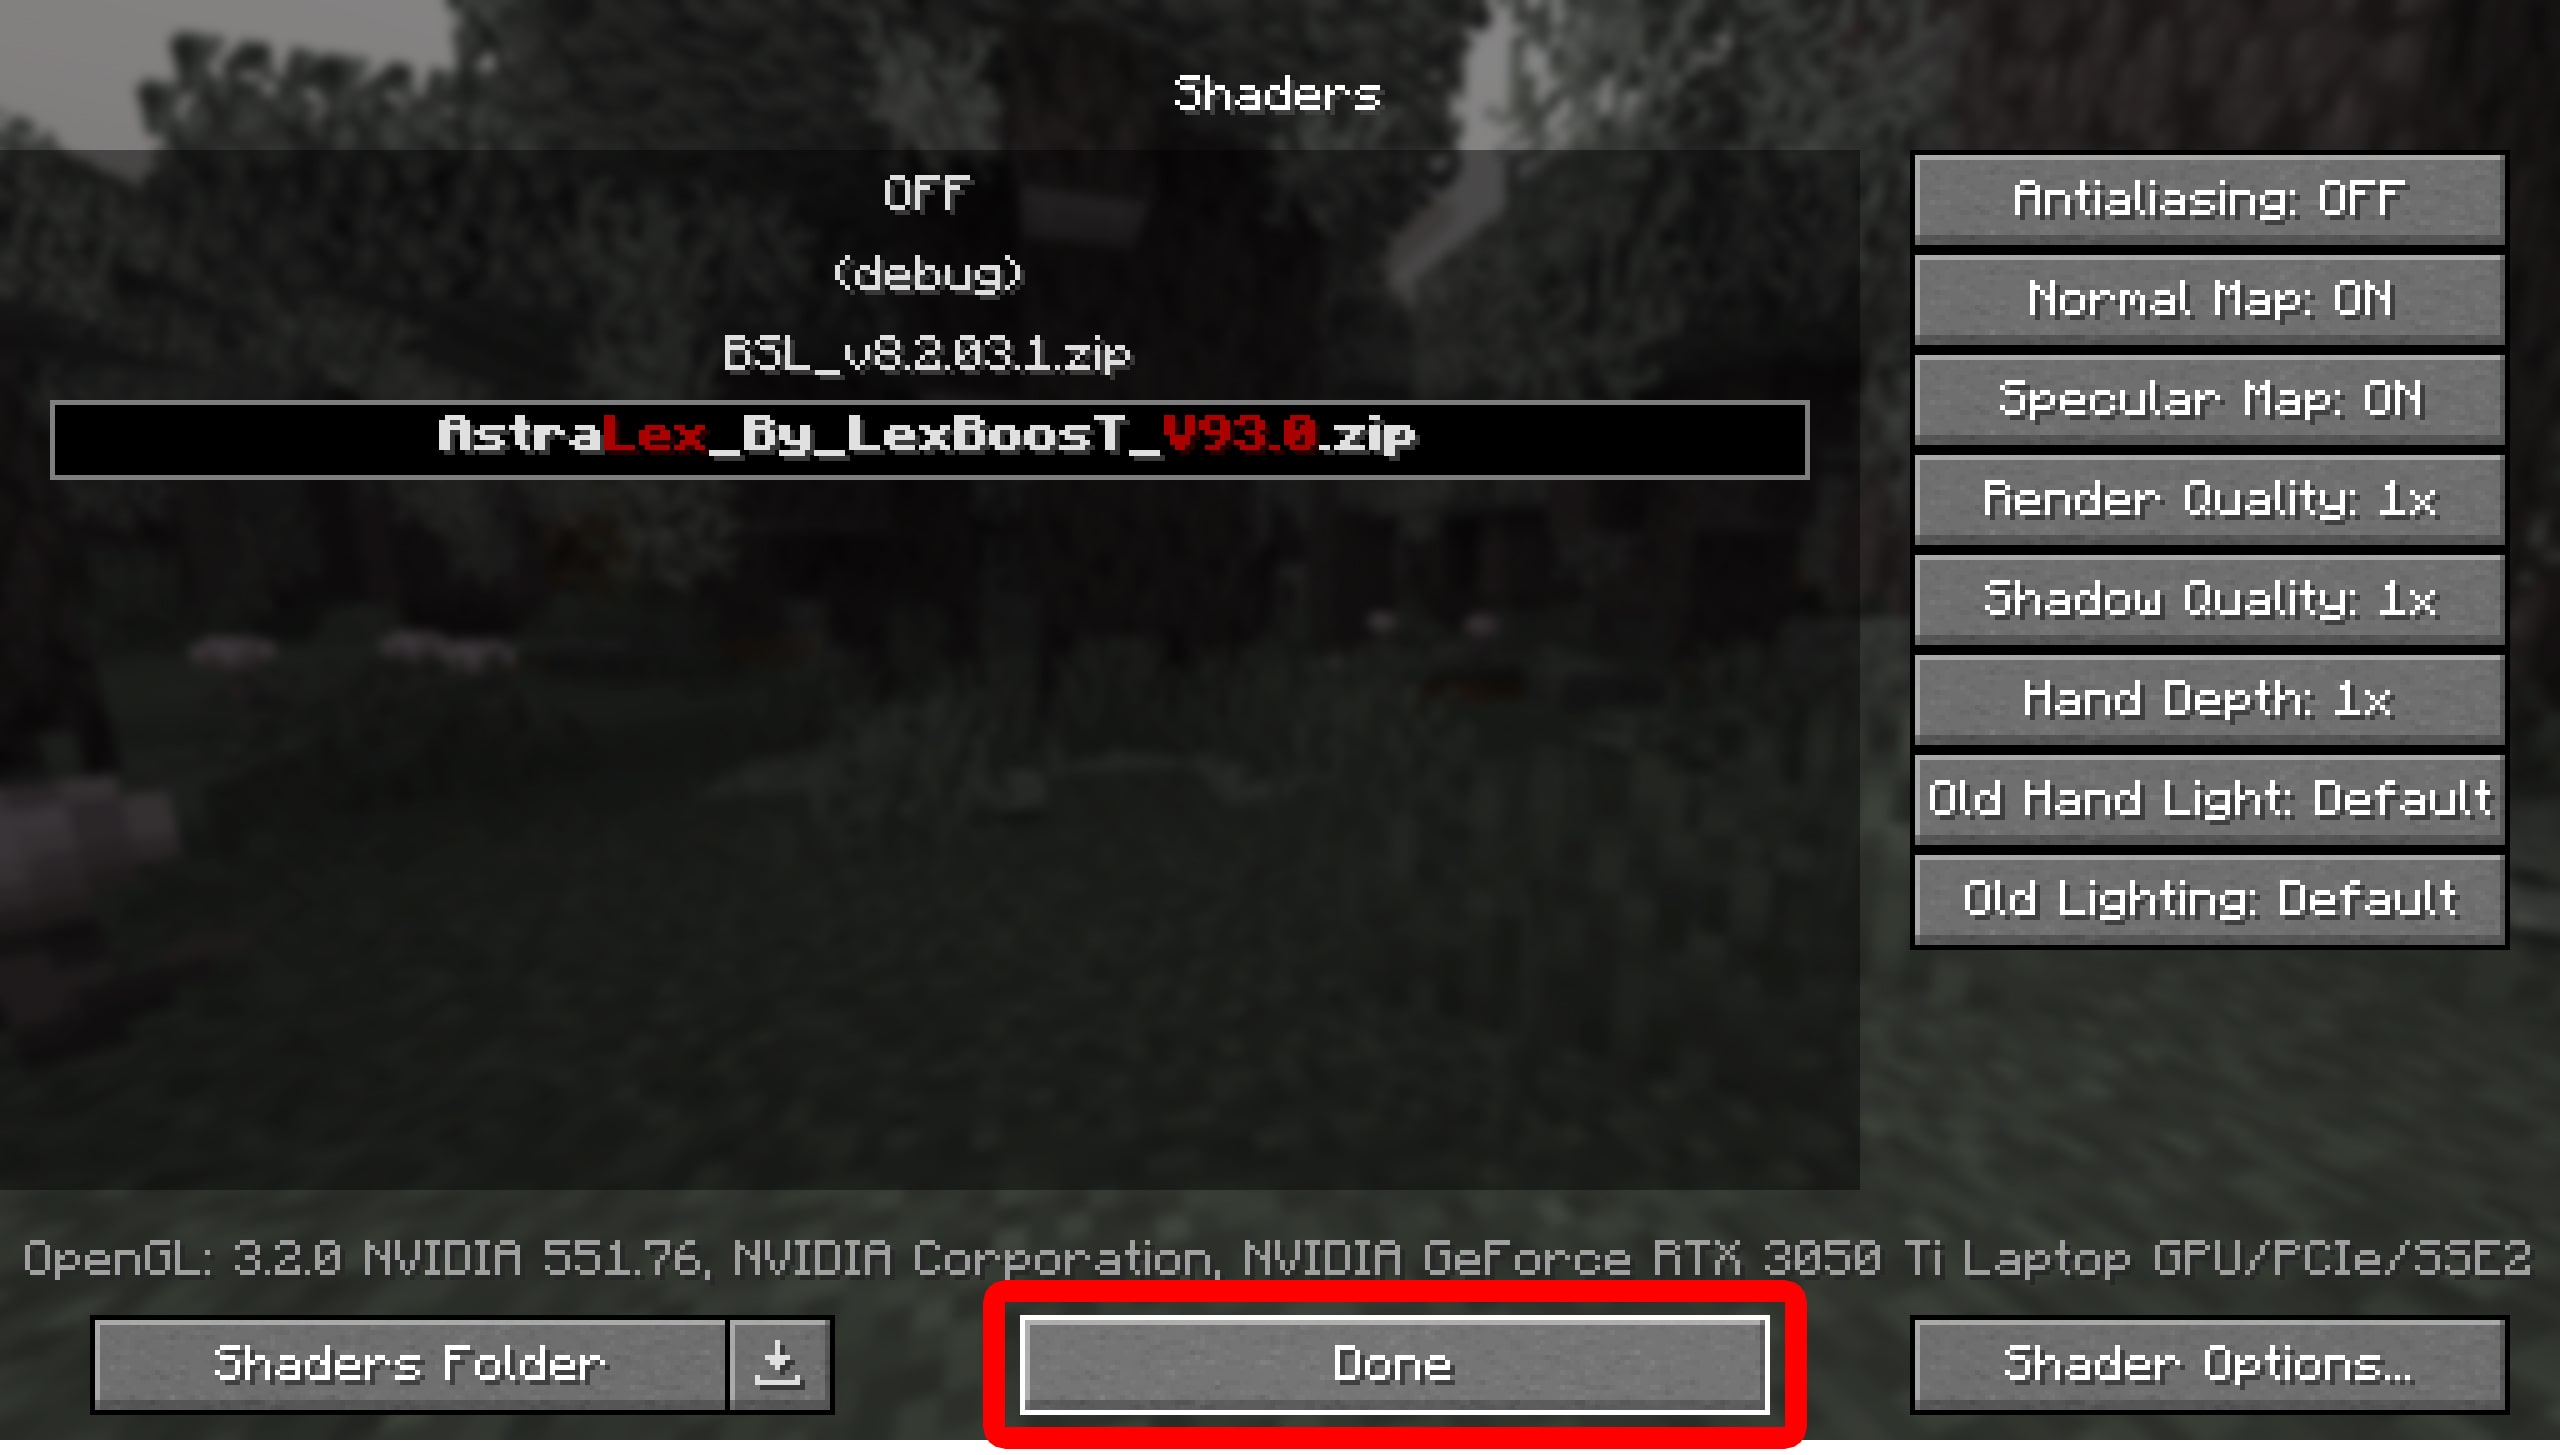
- Finally, click “Done.” When you start playing, your shaders should be live.
Read More: How to Clear Your Netflix Watch History
