Want to give a presentation, watch a movie from your computer, or just work on a bigger screen? Screen mirroring lets you display your entire Mac screen on your Roku, so everything on your Mac appears instantly on your TV. Here’s everything you need to know about how to mirror your Mac to Roku and what to do if it’s not working.
Read More: How to Mirror Your iPhone to Roku
How to Mirror from Mac to Roku
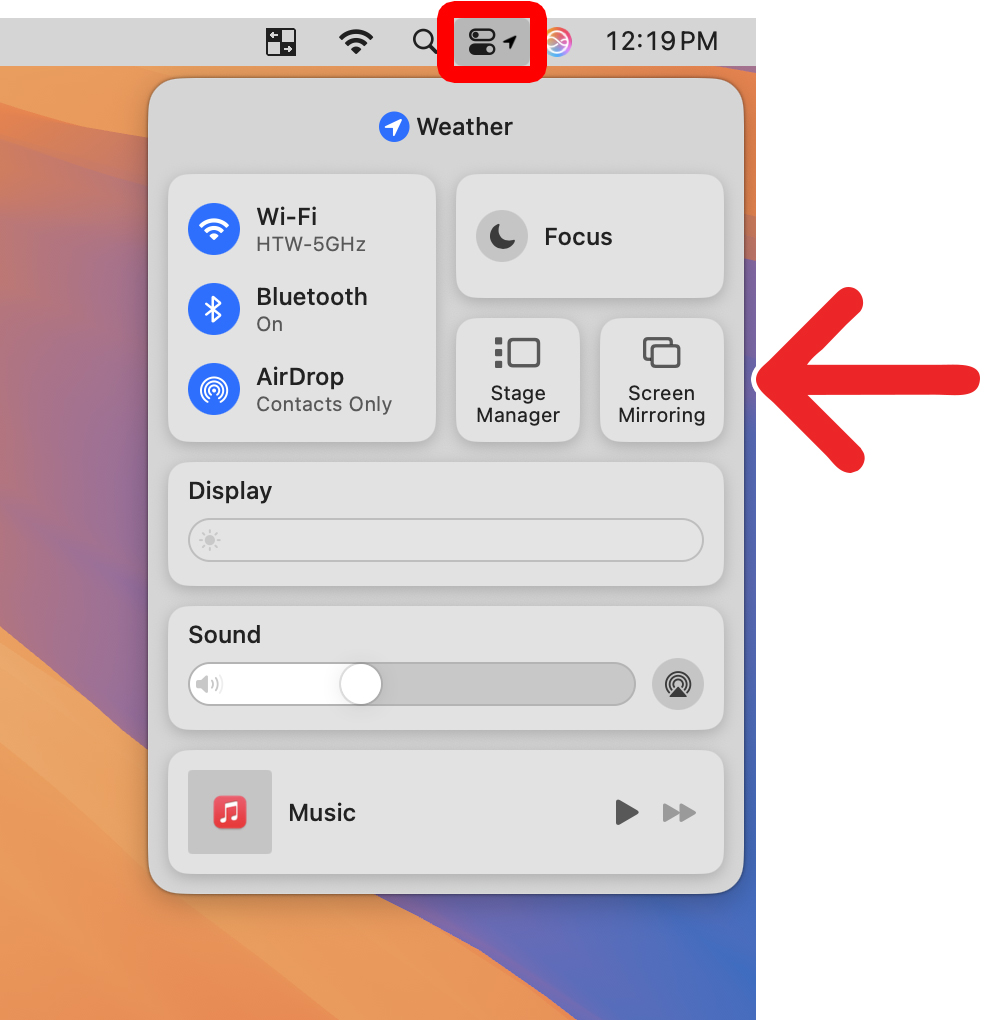
To mirror your Mac to a Roku TV, click the Control Center icon in the top-right corner of your Mac screen and select “Screen Mirroring.” Then select your Roku device from the list and enter the four-digit code shown on your TV.
- Open the Control Center on your Mac. To do this, click the icon in the top-right corner of your screen that looks like two toggle switches on top of each other.
- Click “Screen Mirroring.”

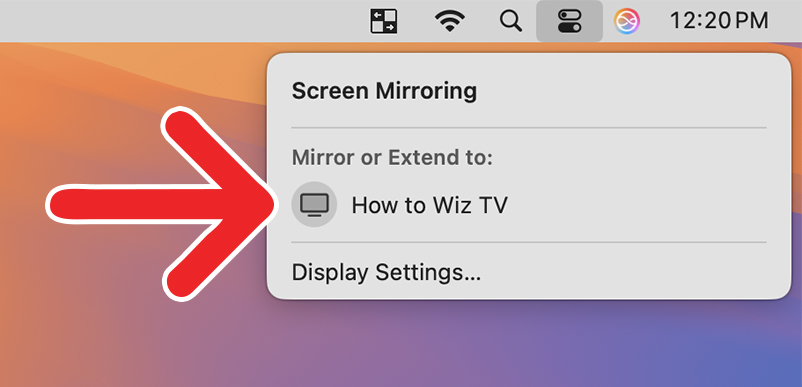
- Select your Roku device.

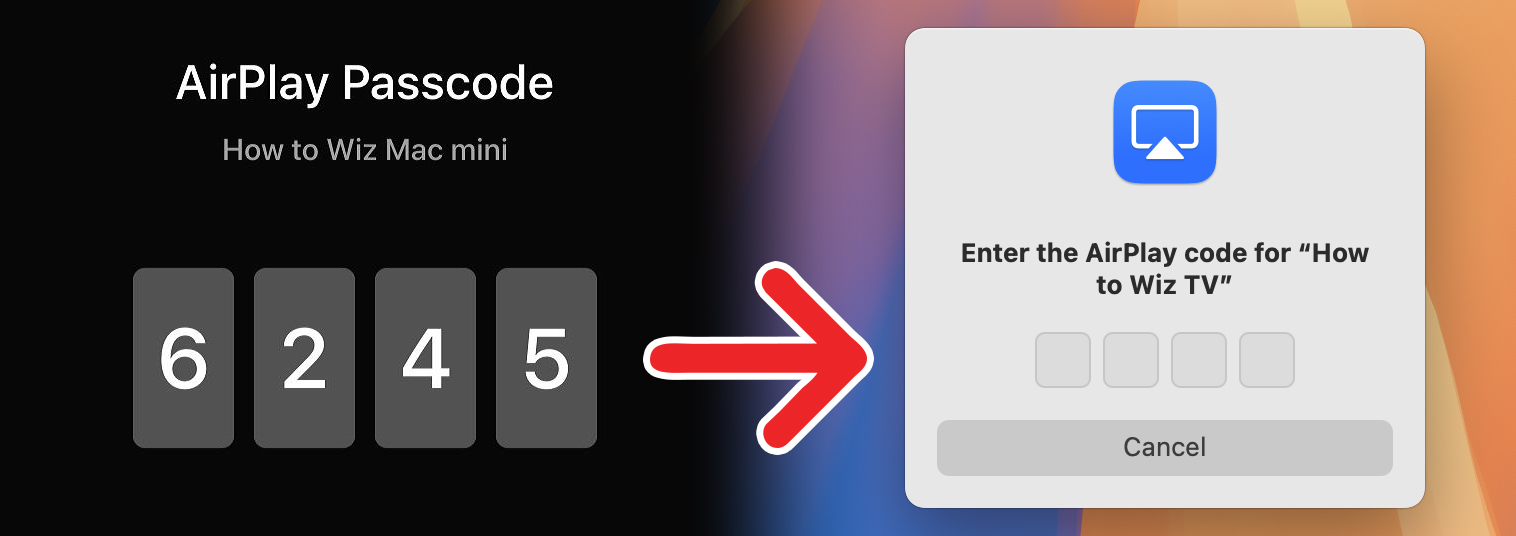
- Finally, if a code appears on your TV, enter it on your Mac. By default, Roku asks you to enter a four-digit code before mirroring your screen.

If you don’t see your Roku device listed, make sure you have AirPlay enabled.
How to Enable AirPlay on Roku
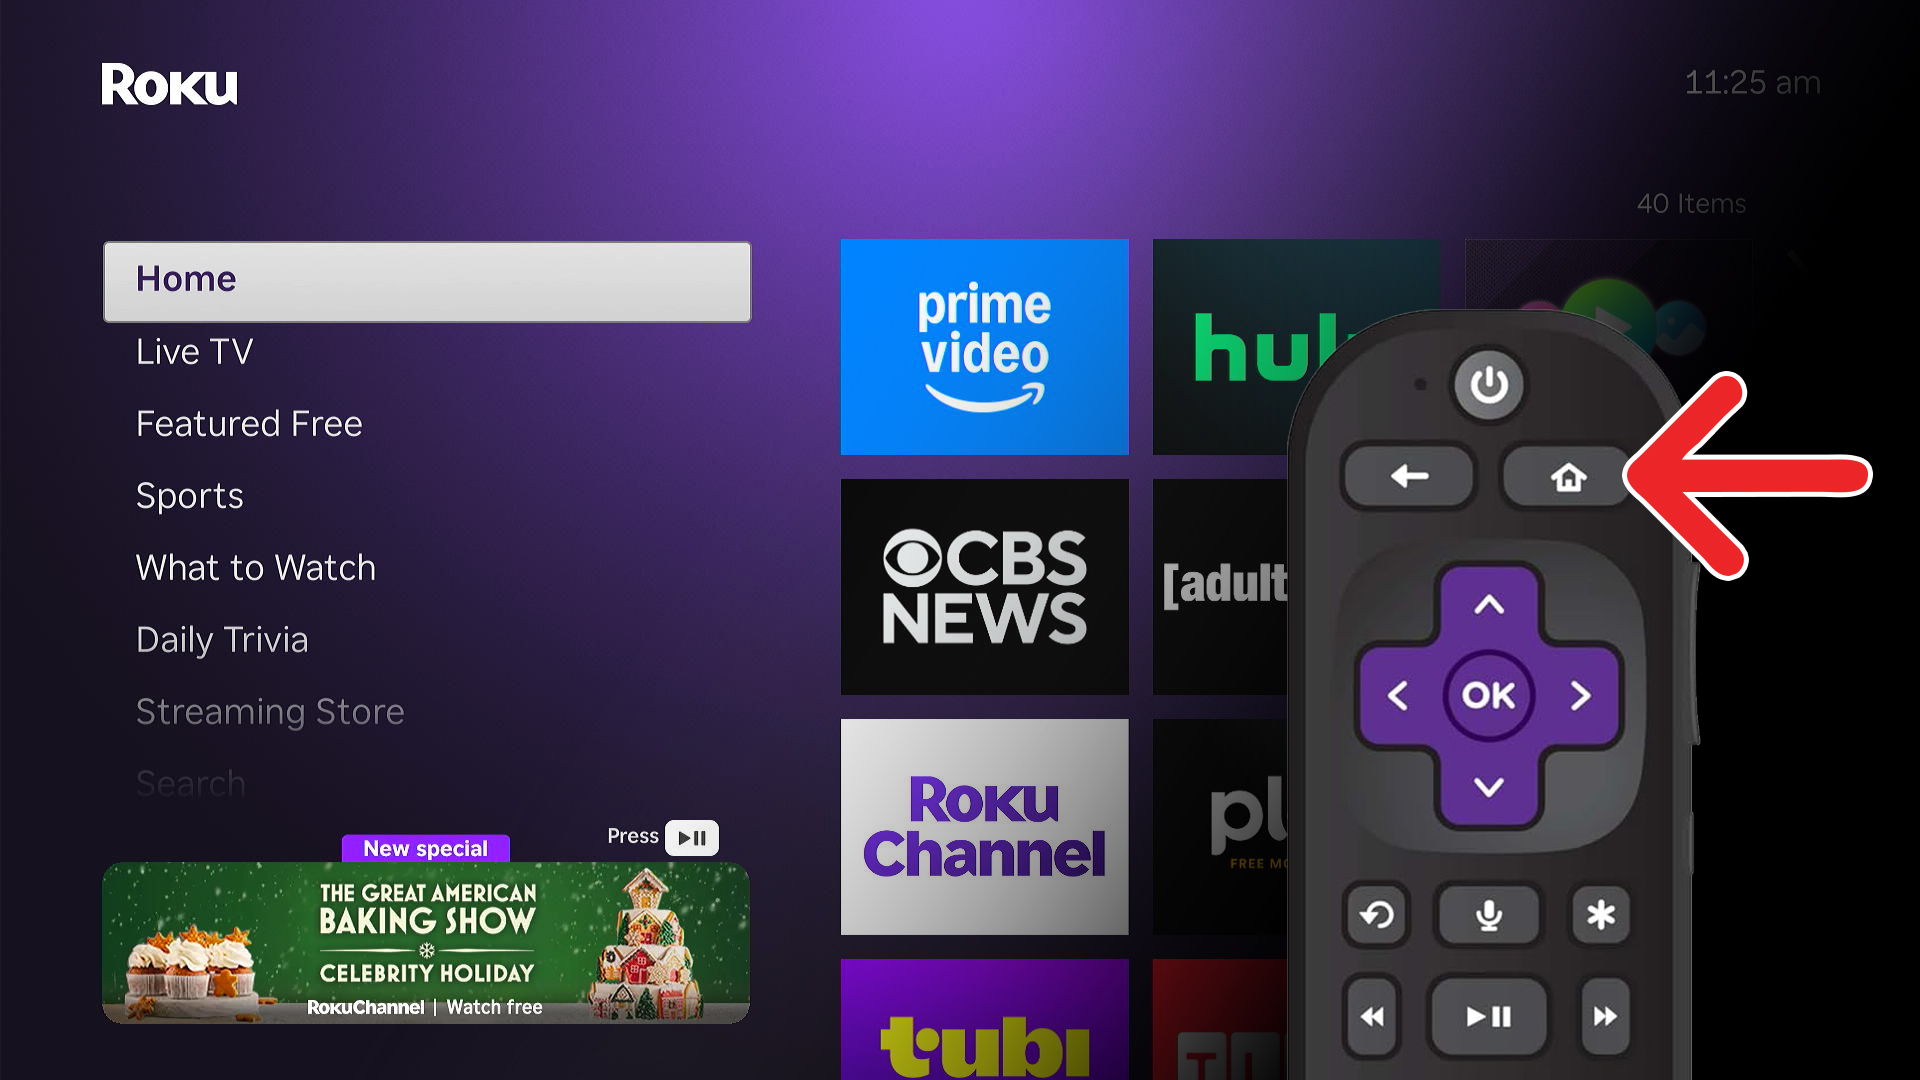
To enable AirPlay on your Roku device, press the Home button on your remote and go to “Settings > Apple AirPlay and HomeKit.” Finally, turn AirPlay “On.” From here, select “Require Code” to choose whether you need to enter a four-digit code.
- Press the Home button on your Roku remote.

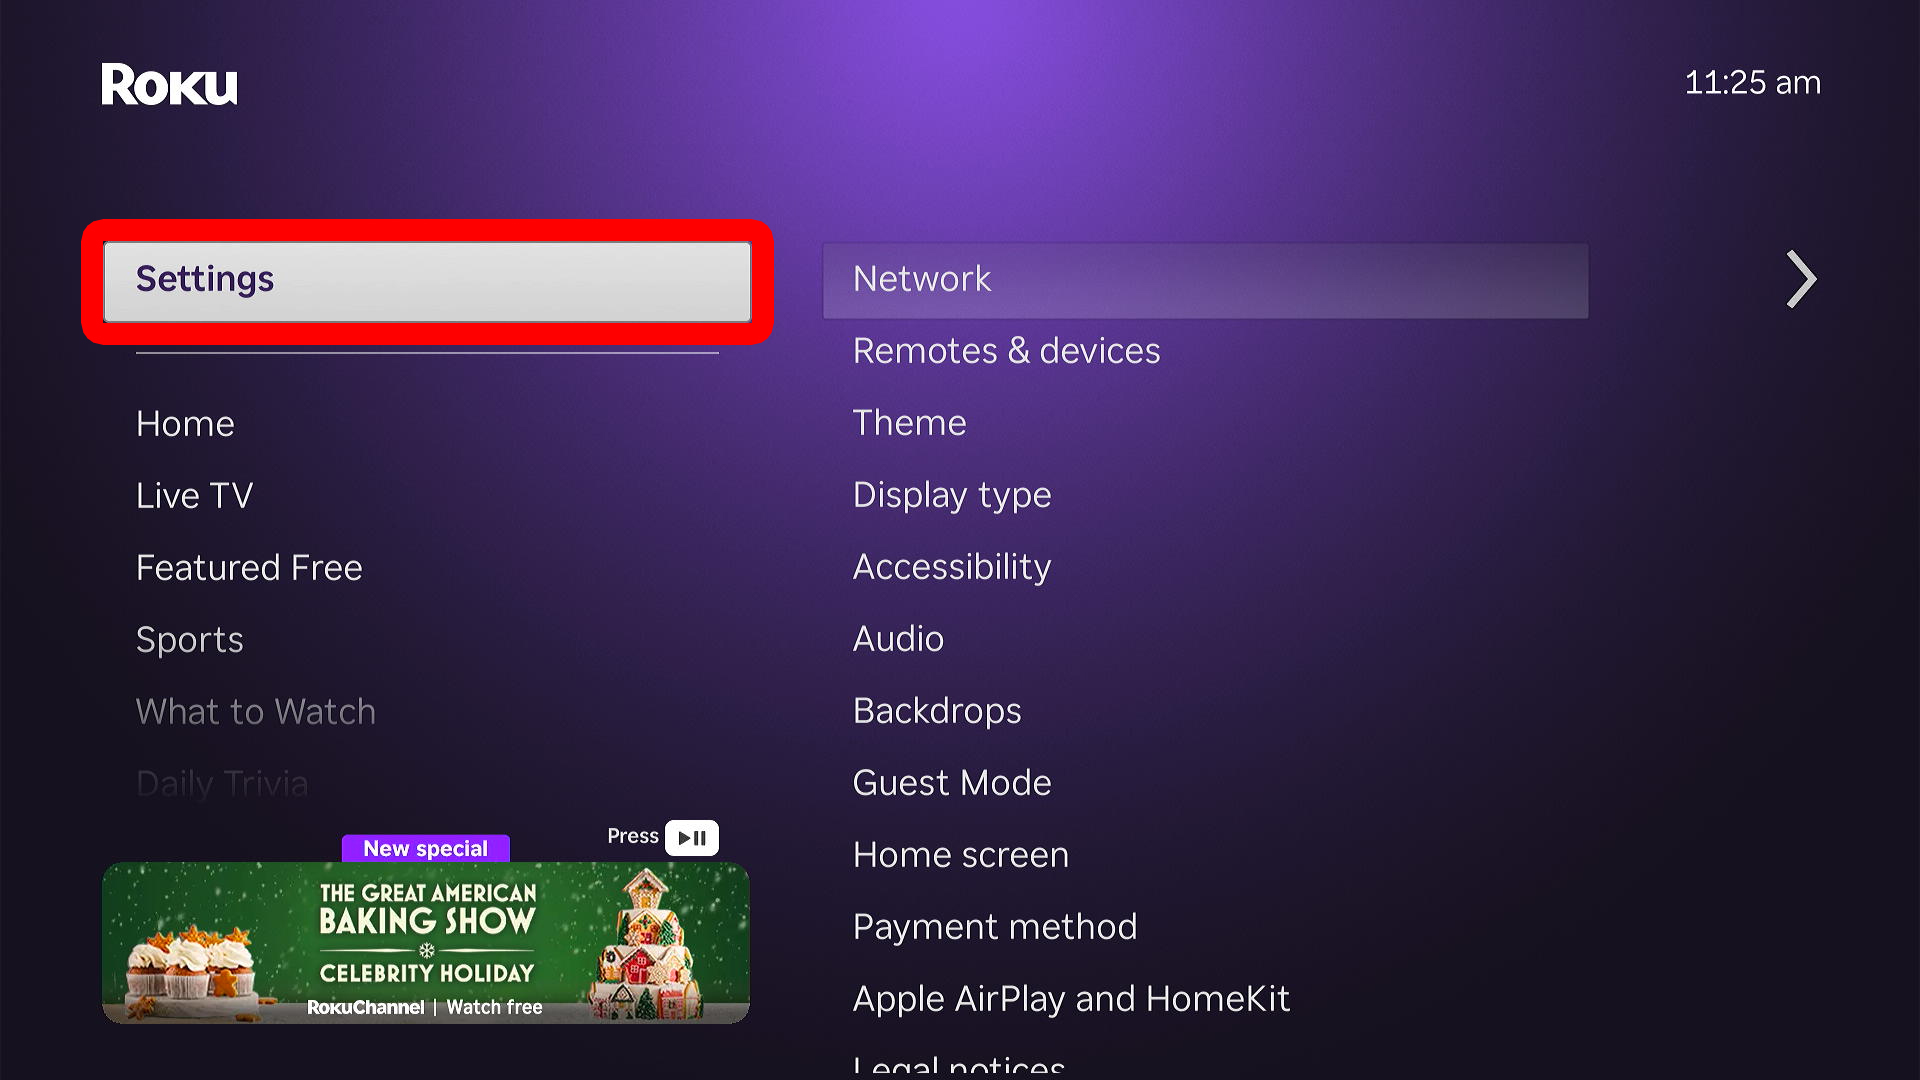
- Go to “Settings.”
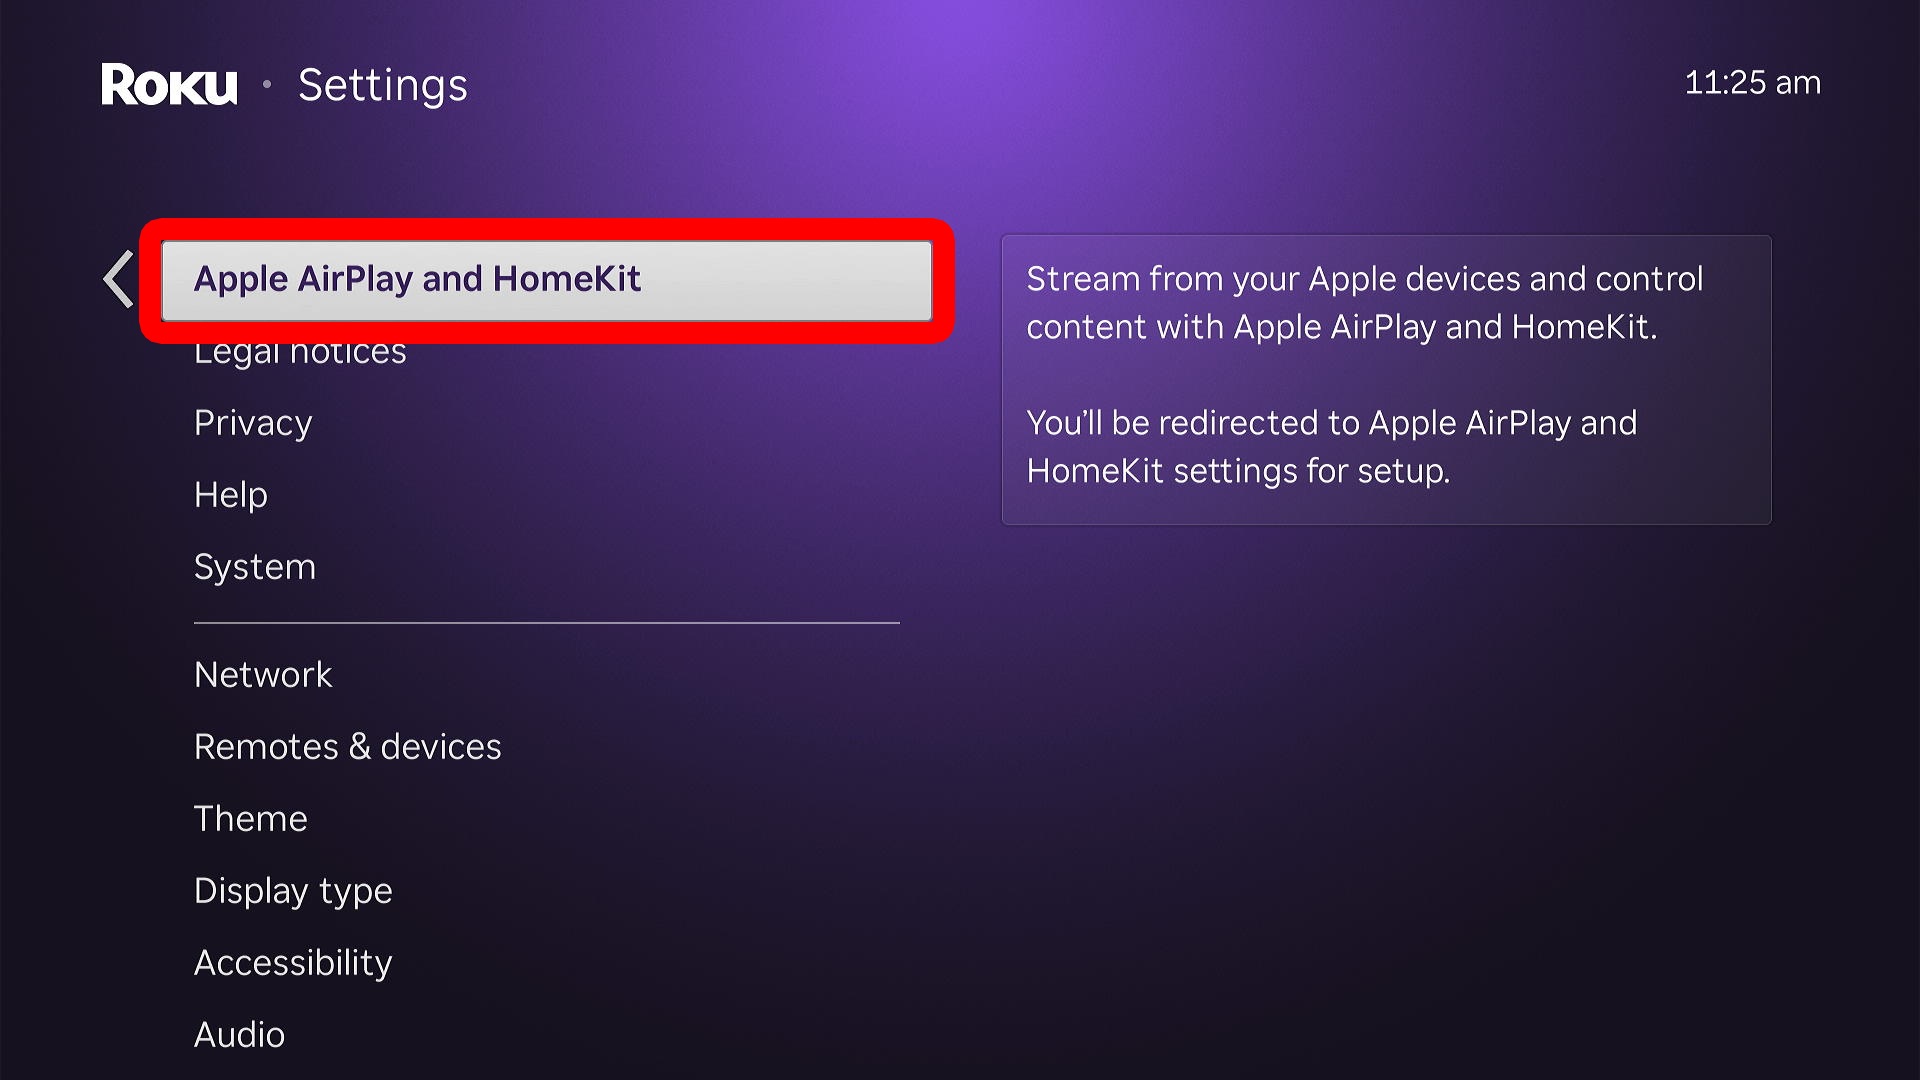
- Select “Apple AirPlay and HomeKit.”
- Finally, turn AirPlay “On.”
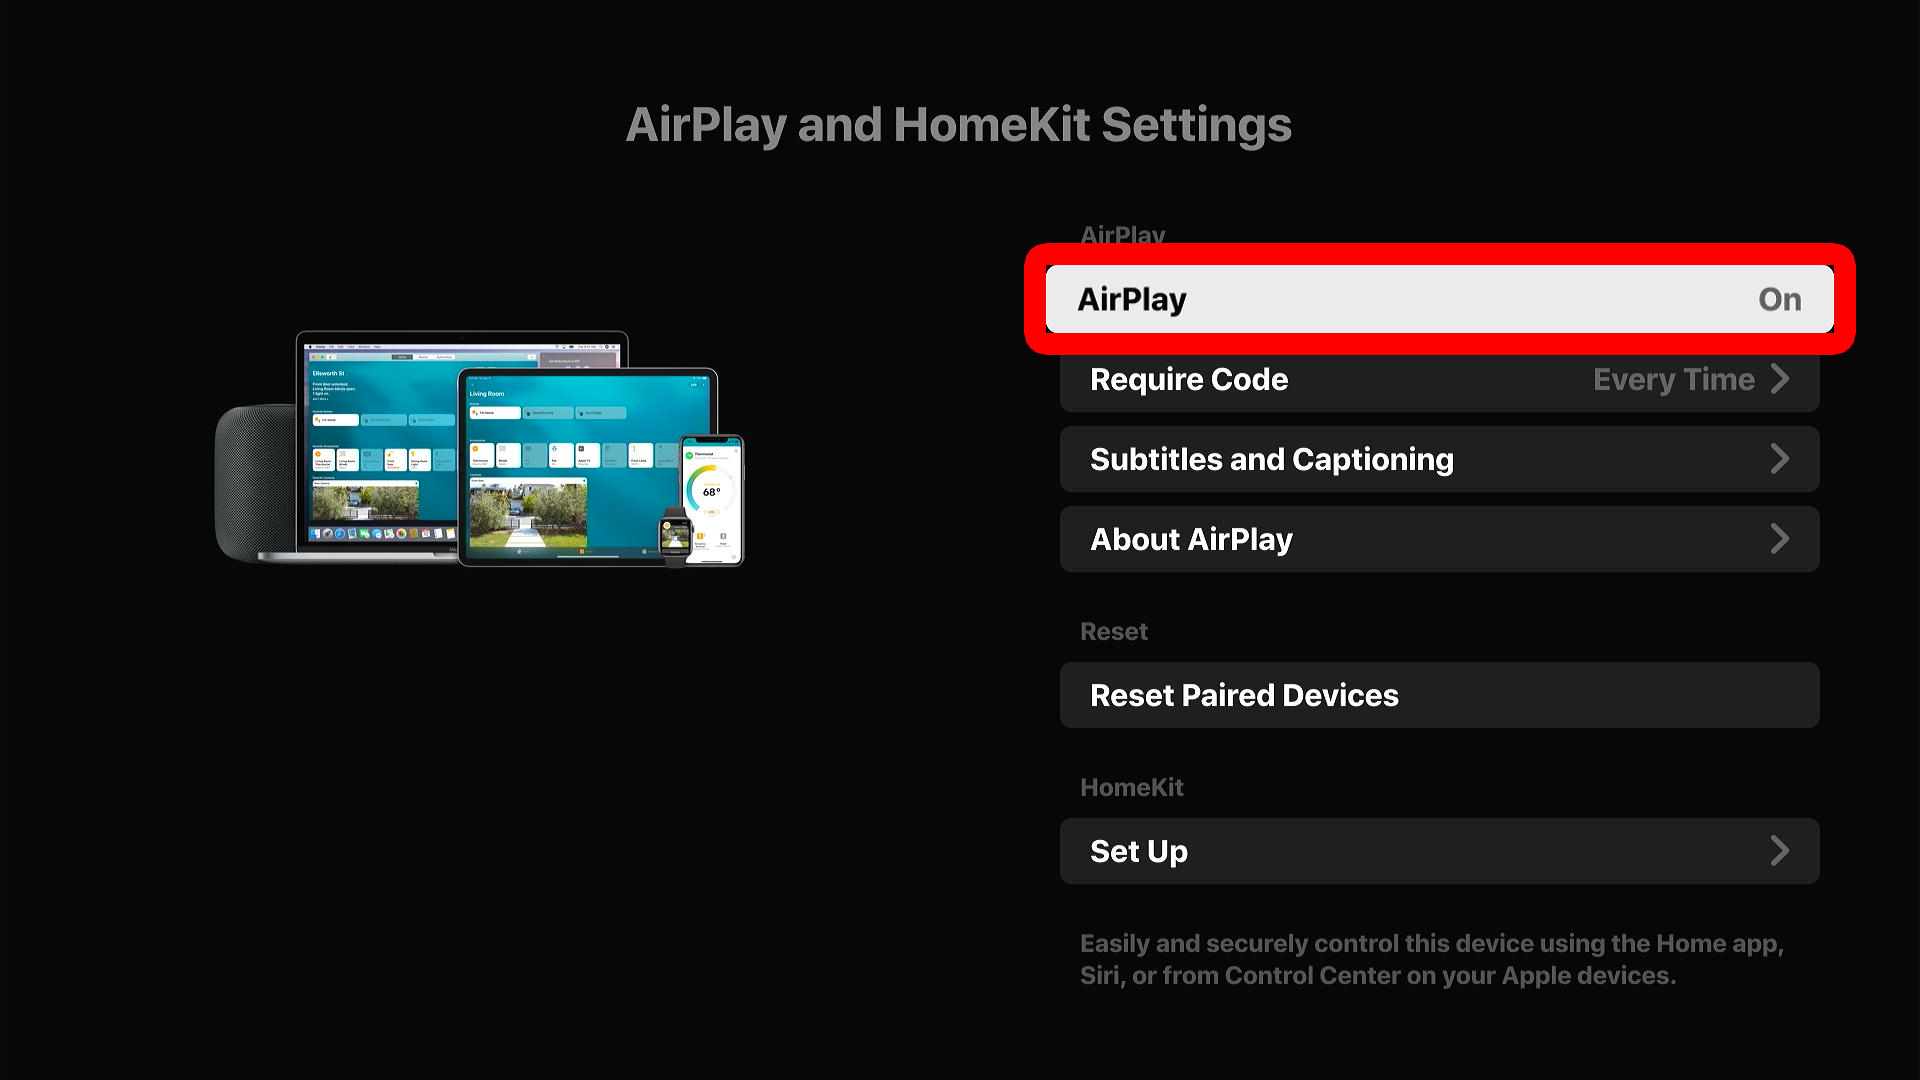
From here, select “Require Code” to choose whether you need to enter a four-digit code “Every Time,” “First Time Only,” or “Use Password Instead.”
Read More: How to Change the Account on a Roku TV
If you’re still not able to mirror, make sure your Roku and Mac are connected to the same WiFi network.
How to Check Your WiFi Network on Roku
- Press the Home button on your Roku remote.
- Go to “Settings.”
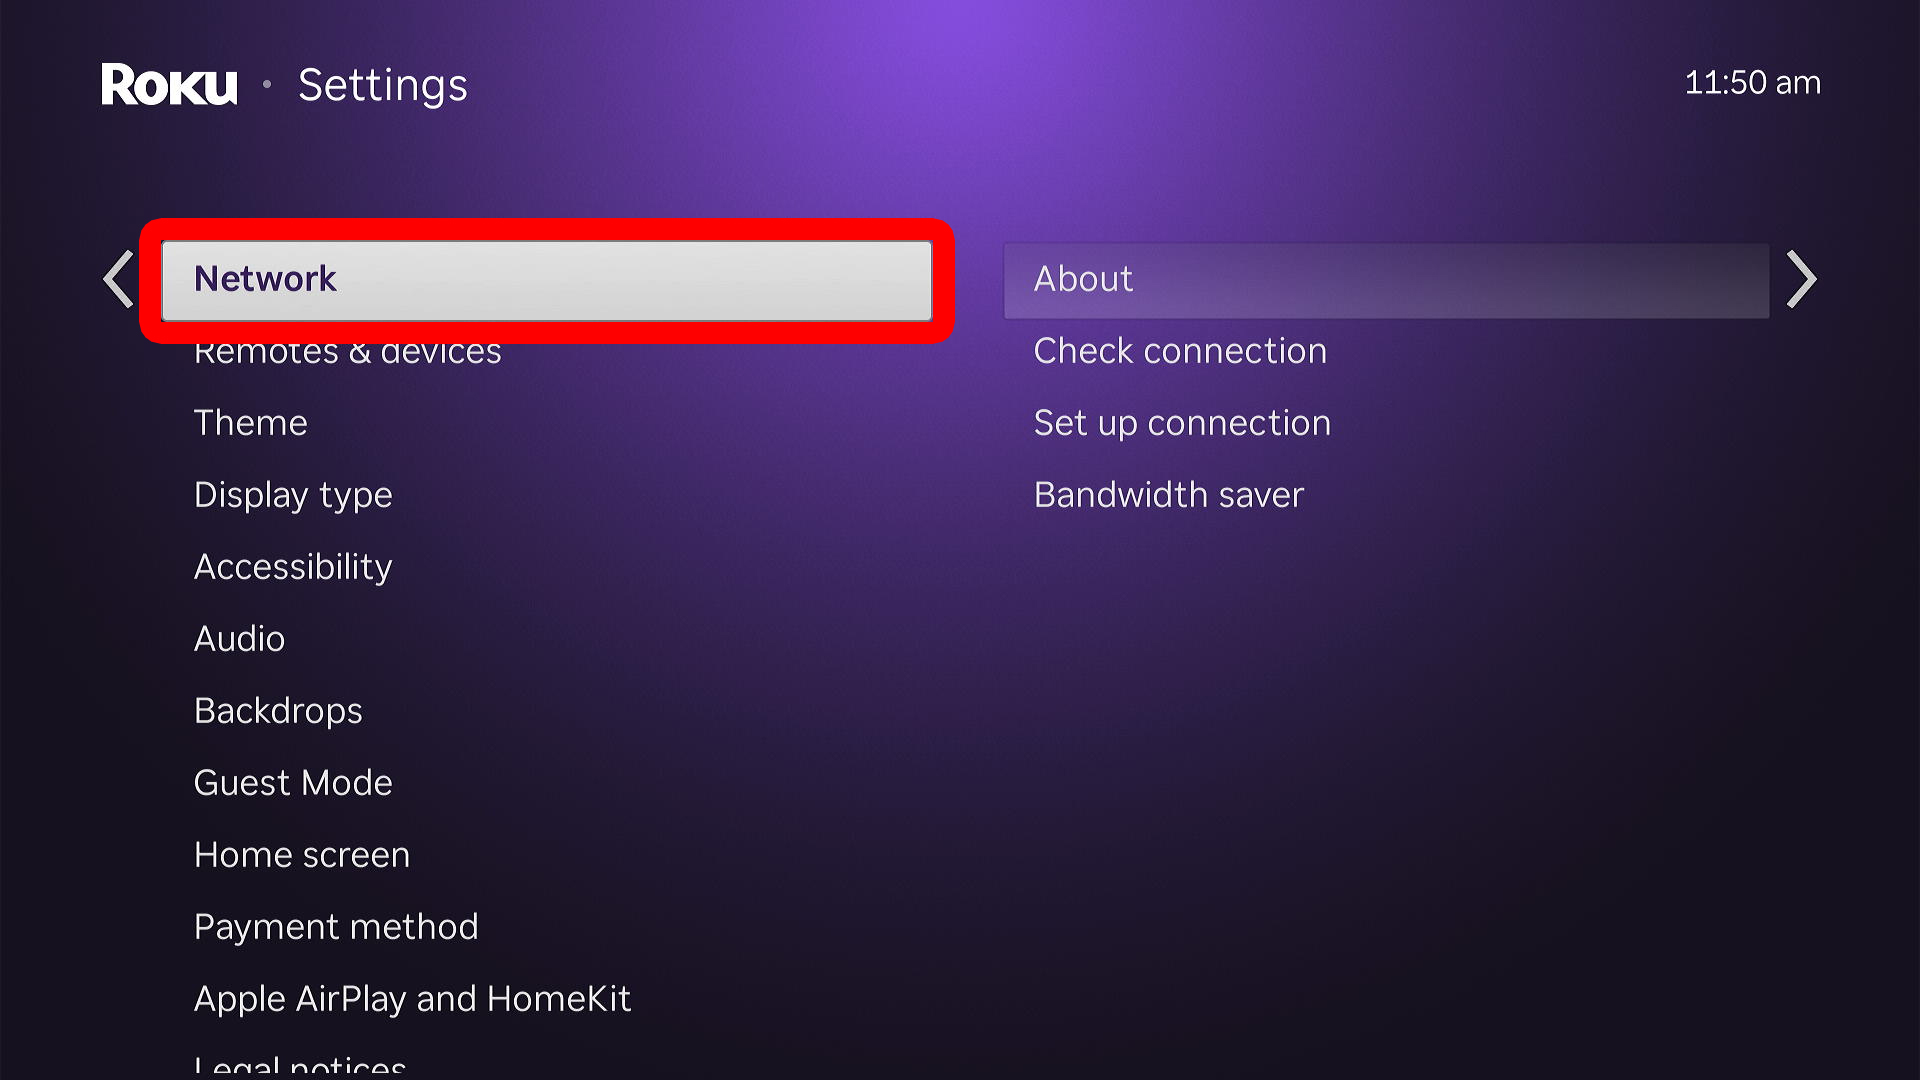
- Select “Network.”
- Go to “About.”
- Finally, you will see your WiFi network under “Network name.”
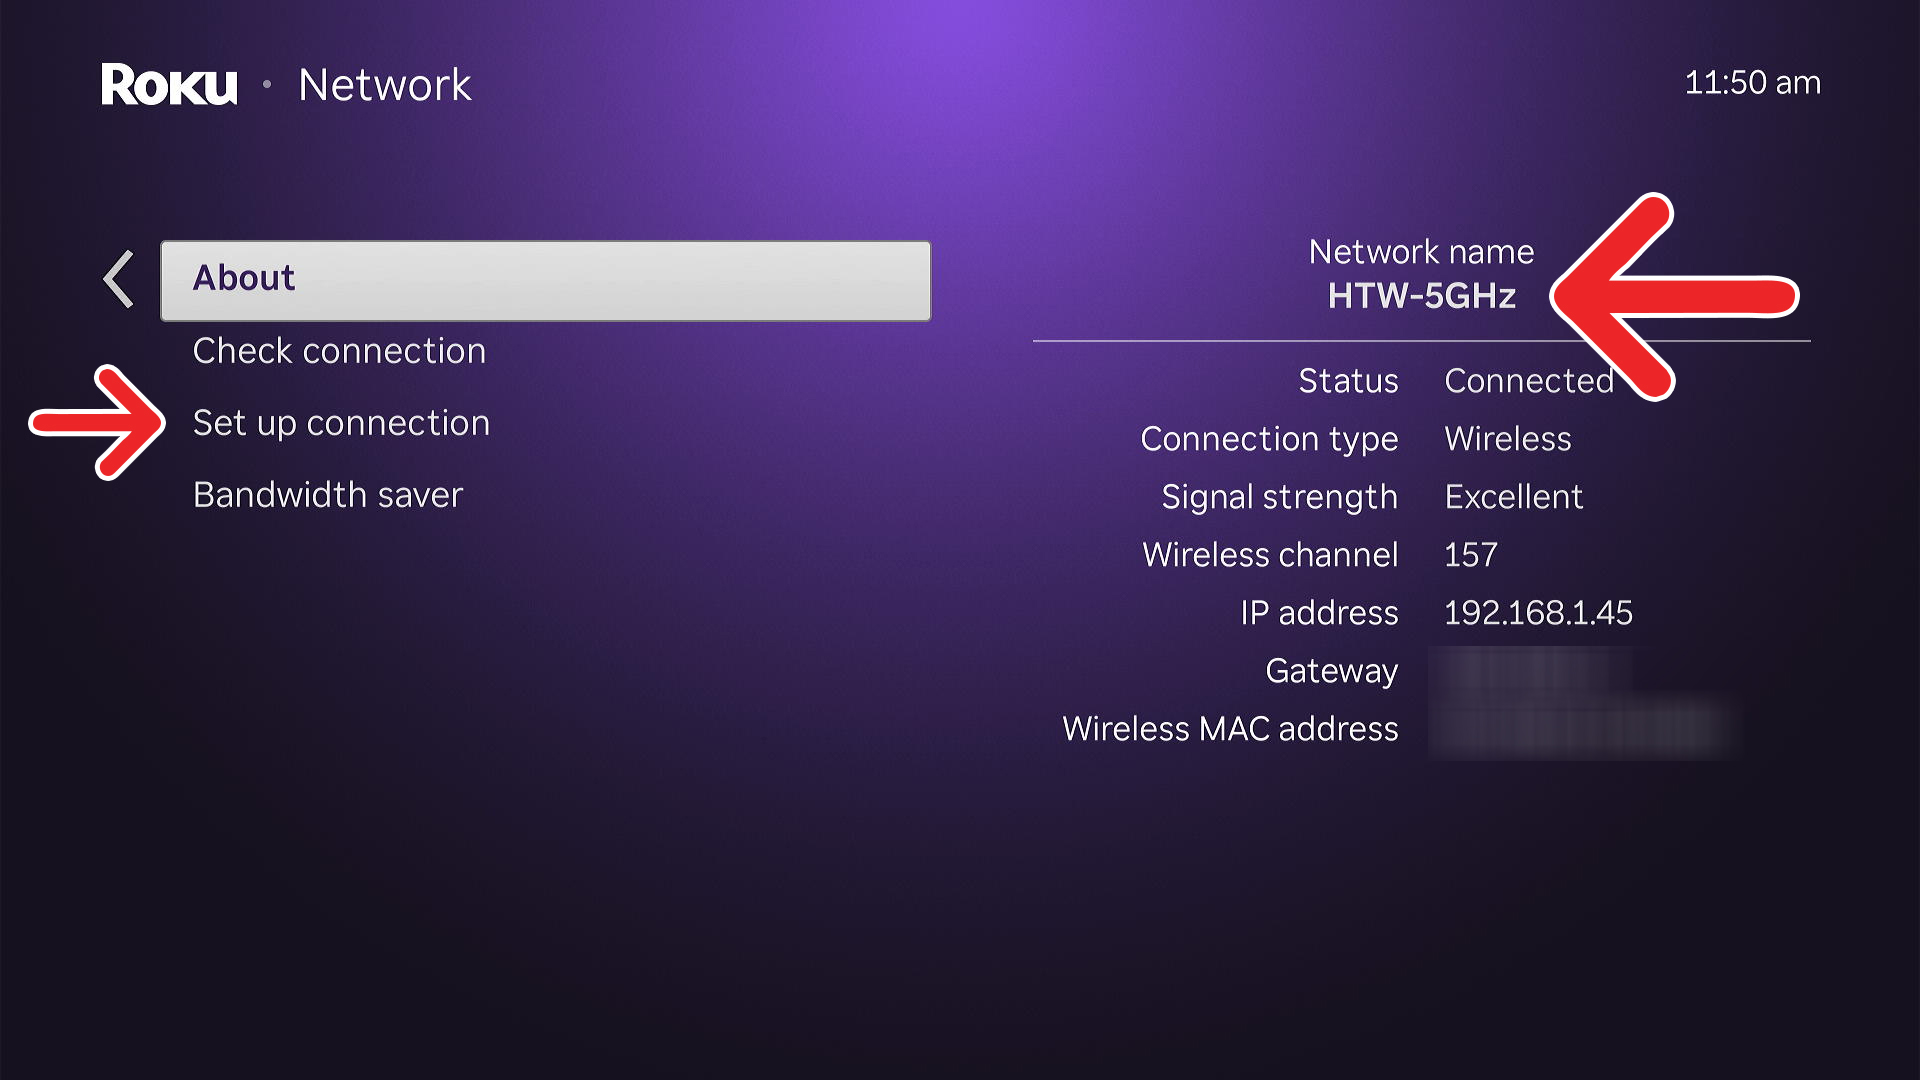
To change your WiFi network, press the back button and select “Set up connection > Wireless.” Then choose a new network, enter the password, and select “Connect.” If you don’t see your WiFi network listed, select “Scan again to see all networks.”
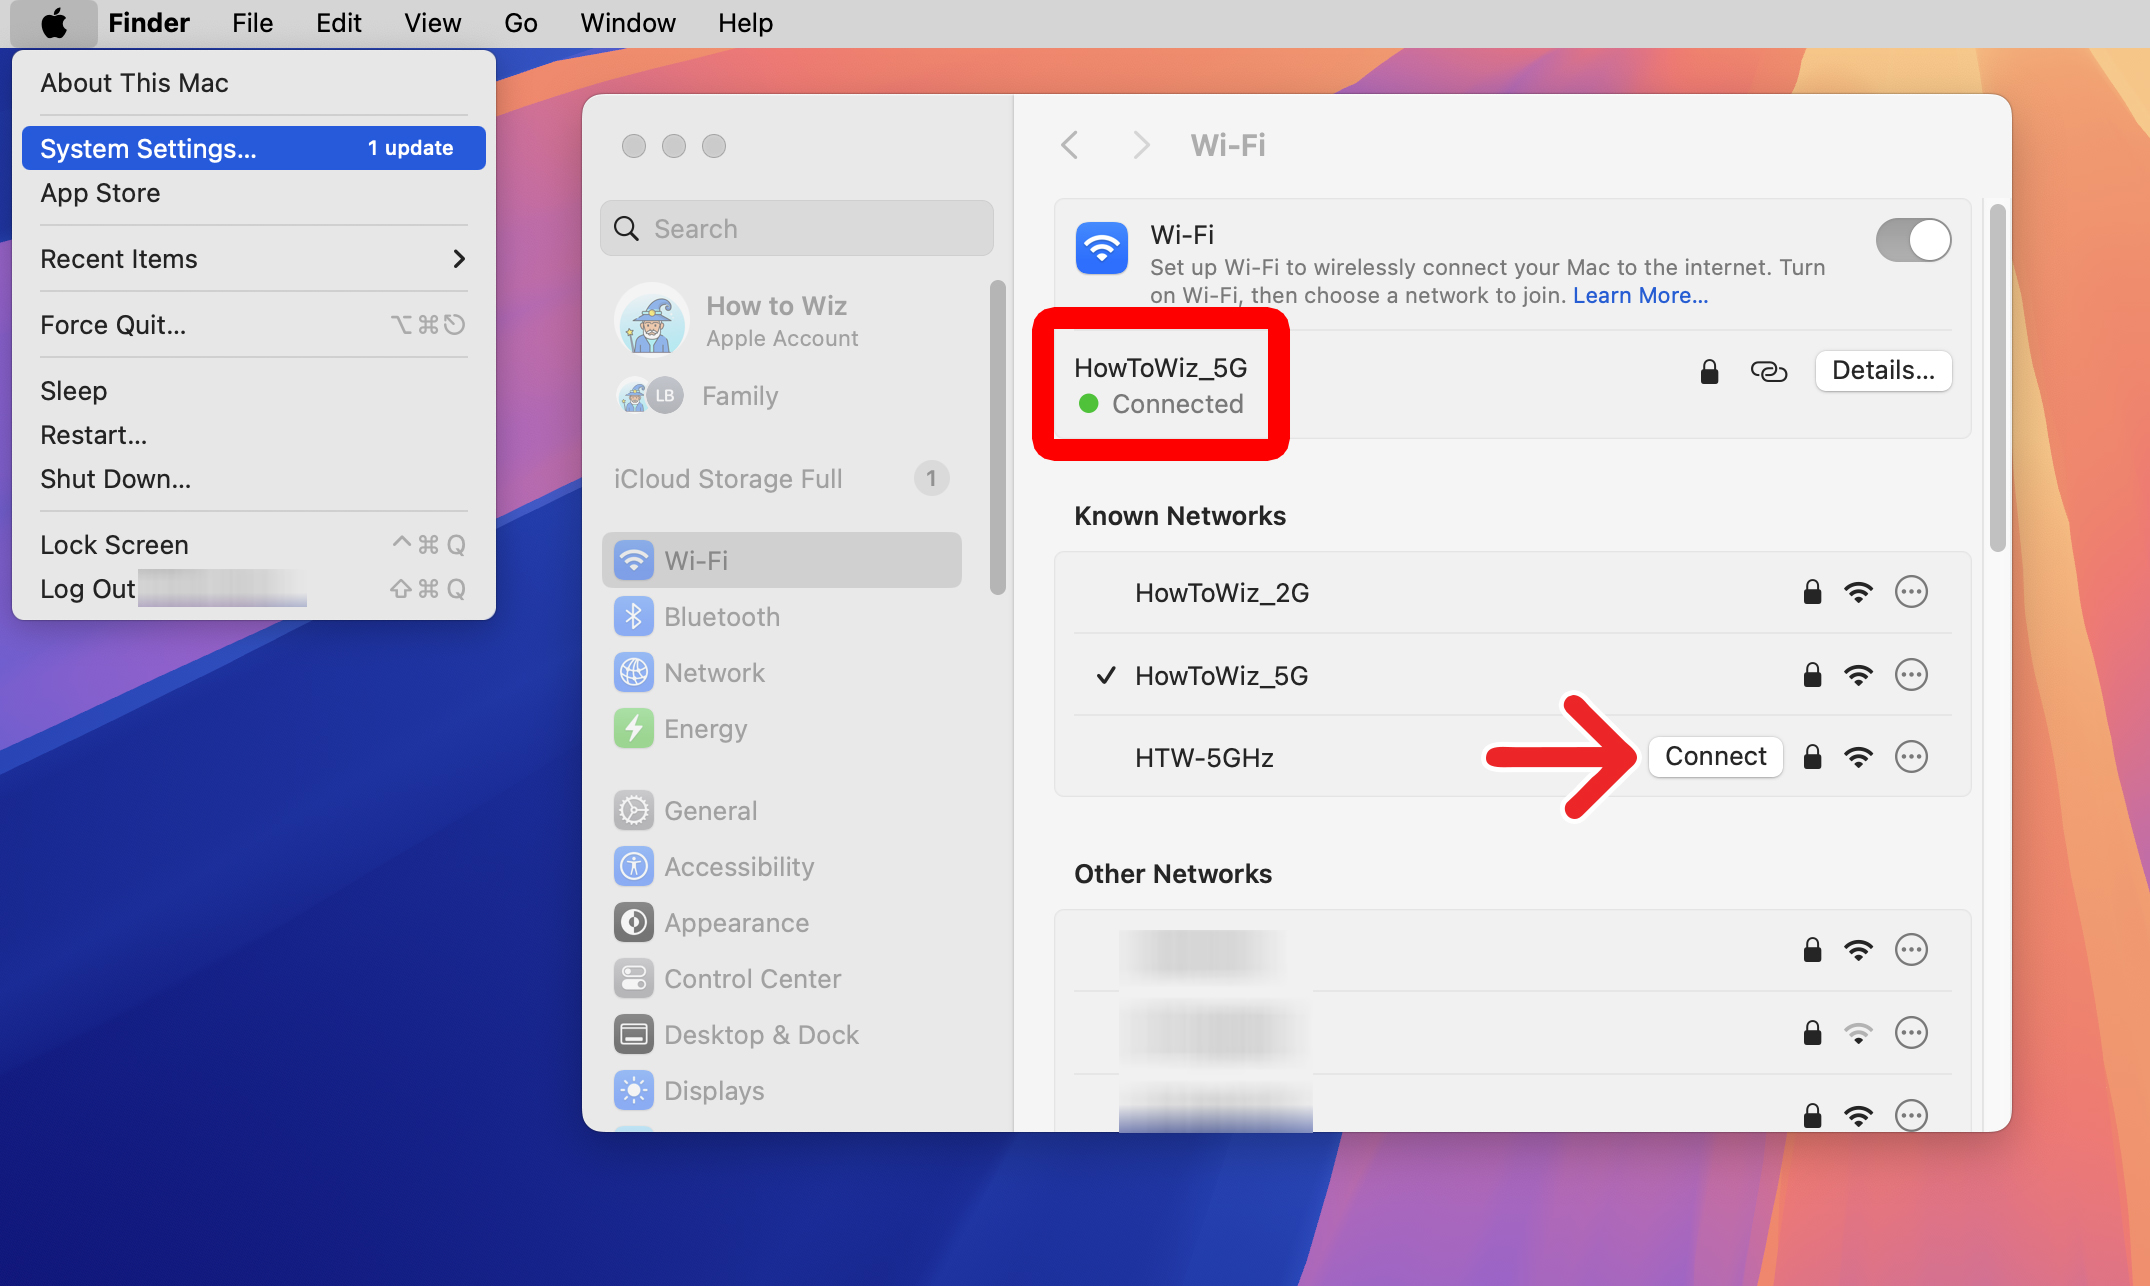
How to Check Your WiFi Network on a Mac
To check your WiFi network on a Mac, click the Apple icon in the top-left corner of your screen and select “System Settings.” Then click “Wi-Fi” in the left sidebar, and you will see which WiFi network you are connected to at the top of the window.
From here, you can change to a different WiFi network by clicking “Connect” next to the known or other networks below.
Read More: How to Find Your WiFi Passwords on a Mac