Struggling with slow WiFi? If you live in a crowded area, switching to a new channel can instantly speed things up. Here’s everything you need to know about how to change your WiFi channel and which channel is best for you.
What are WiFi Channels?
WiFi is split into “bands,” which you can think of as highways. These bands are then split into “channels,” which are like lanes on the highways. Your devices are like the cars—and when too many devices connect to the same channel, it can cause traffic jams and slower WiFi speeds for everyone.

How to Change Your WiFi Channel
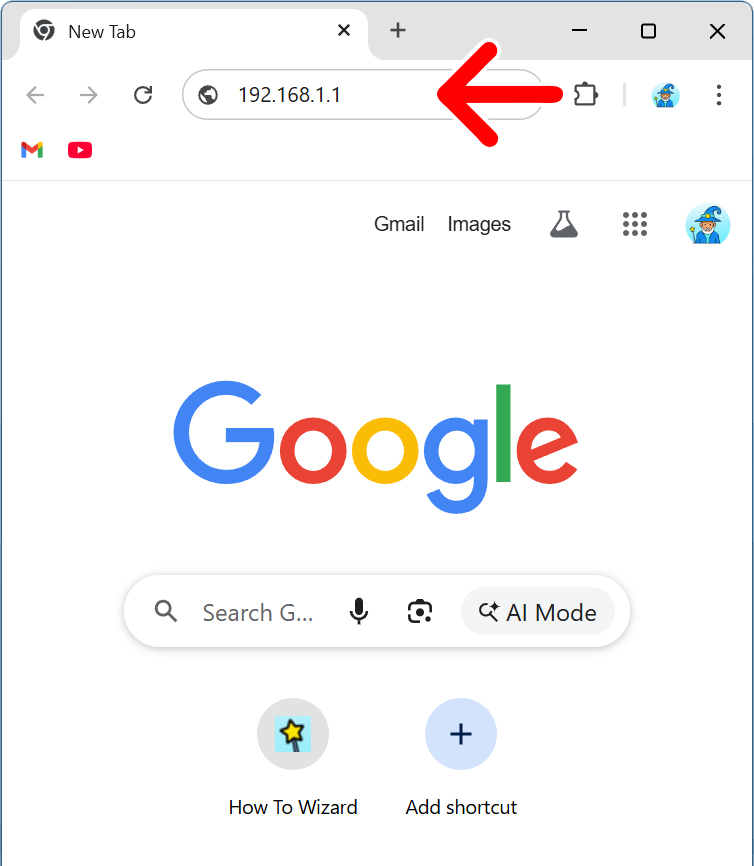
To change your WiFi channel, open a web browser and enter your router’s IP address into the address bar at the top of the browser window. Then sign in to your router and go to “Wireless” settings. Finally, change your WiFi channel and click “Apply.”
- Open a web browser. You can use any web browser you want (Chrome, Safari, Edge, etc.)
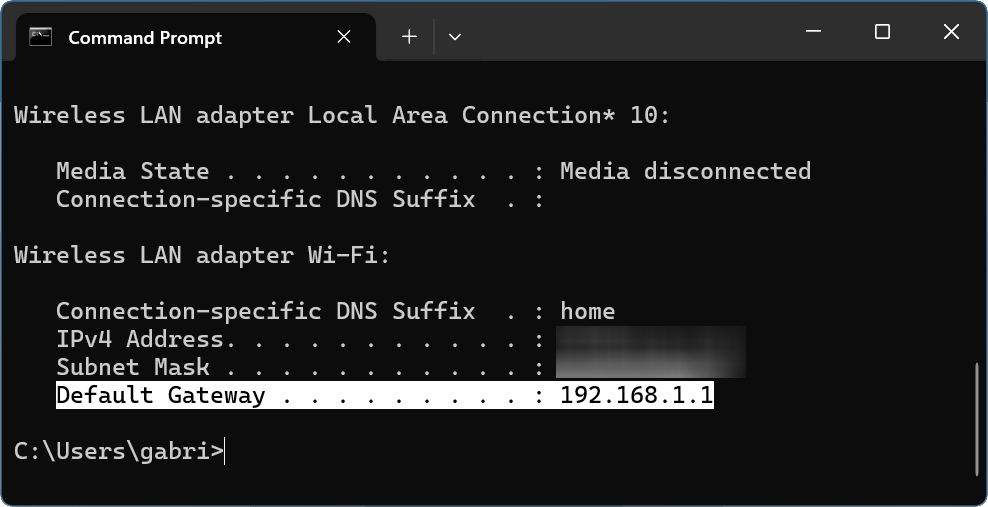
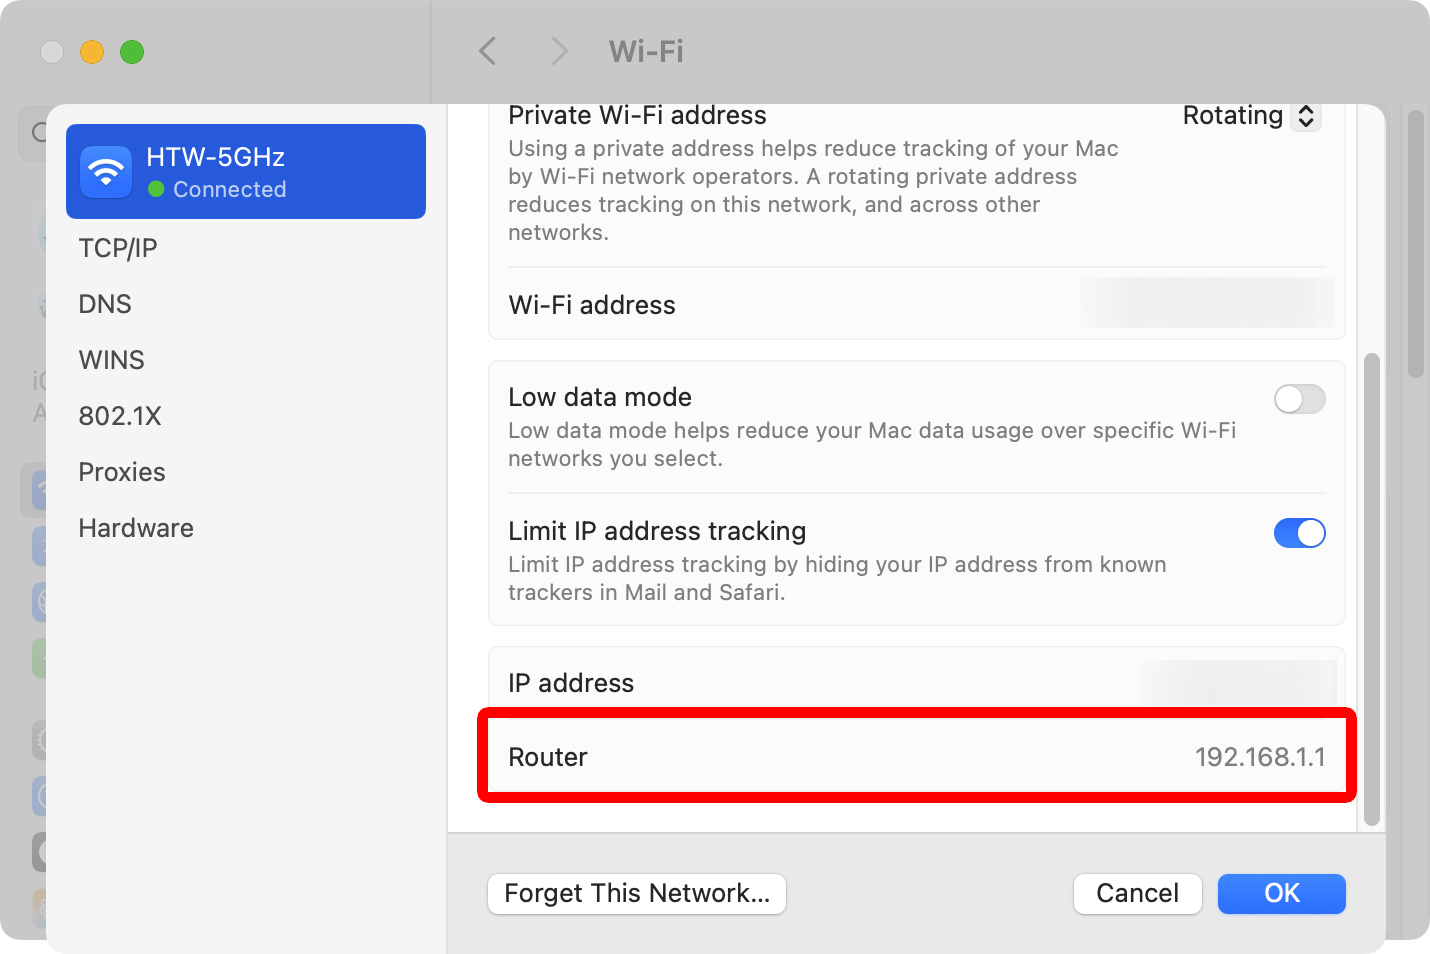
- Enter your router’s IP address into the browser’s address bar. The address bar is where you would normally enter a website URL. The most common router IP addresses are: 192.168.0.1, 192.168.1.1, and 10.0.0.1. If none of these work, you’ll need to find your router’s IP address manually on your computer.


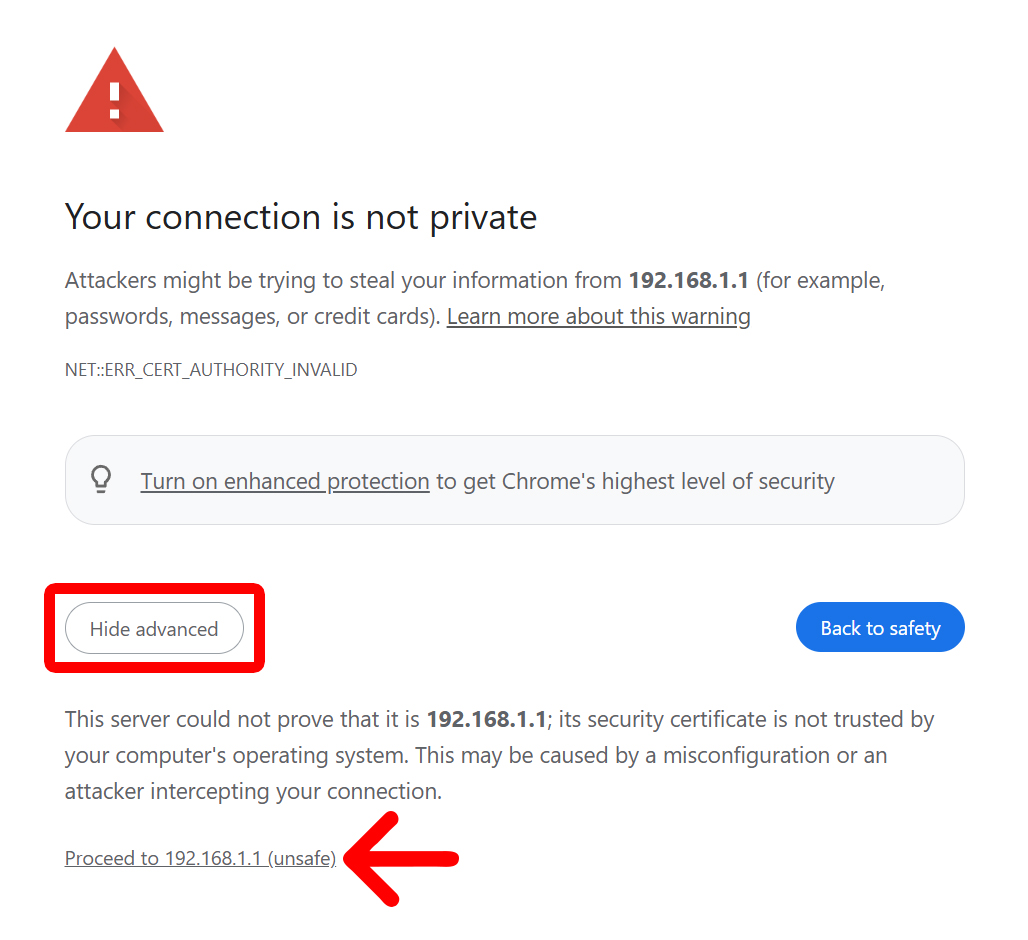
- If you see a warning screen, click “Advanced > Proceed.” On Safari, you will need to click “Show Details > Visit this website.”

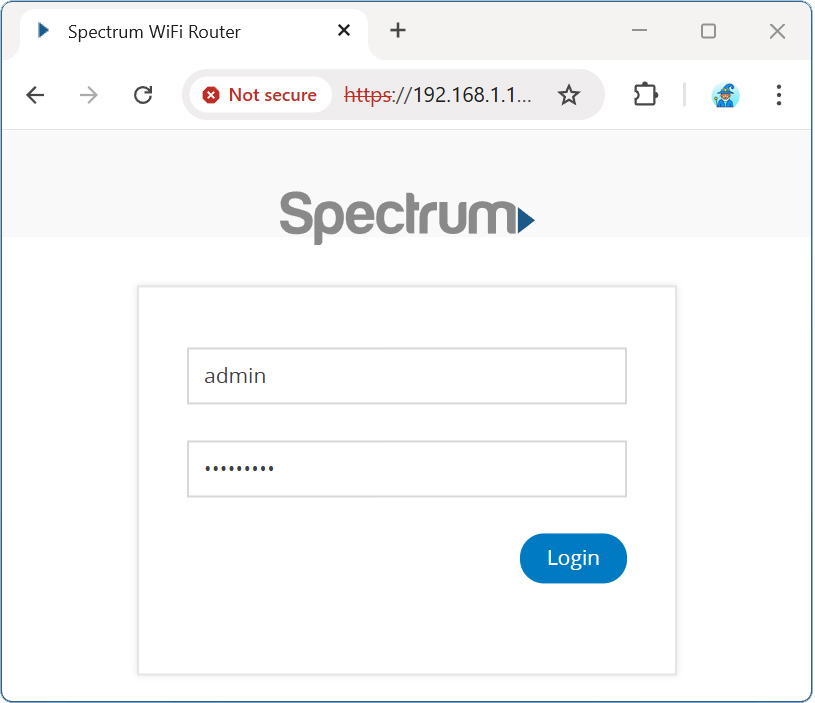
- Enter your router’s username and password. If you can’t remember your password, you can always reset your router to factory settings. Then use the default username and password, which are usually both “admin” or blank.

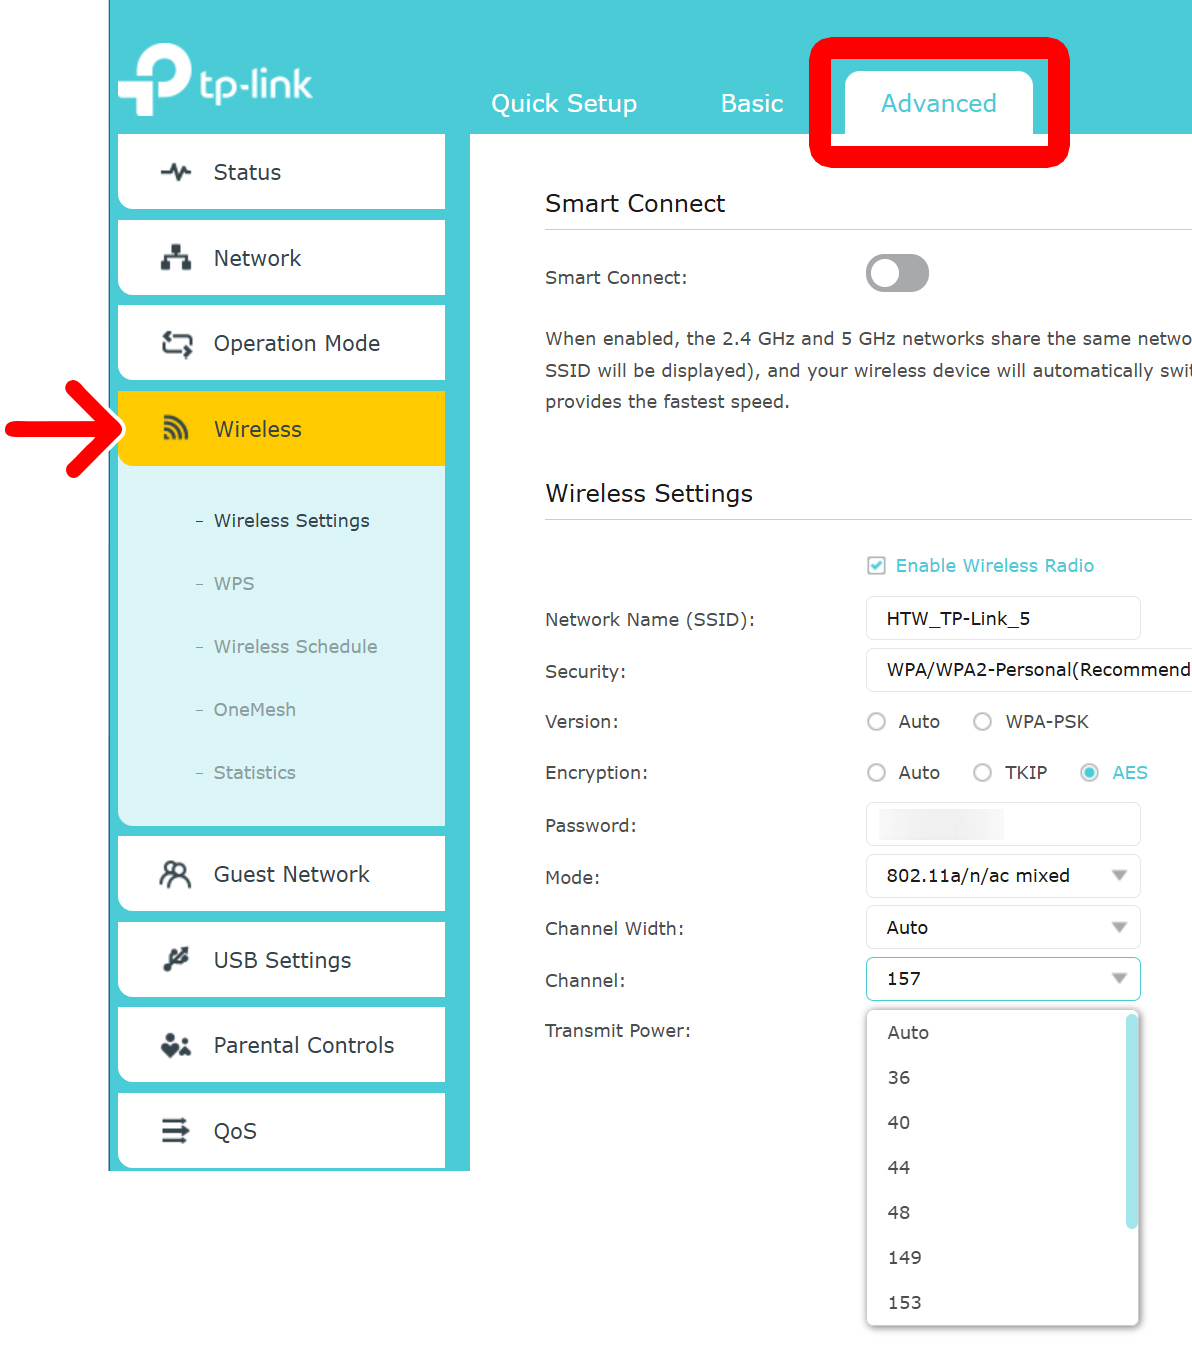
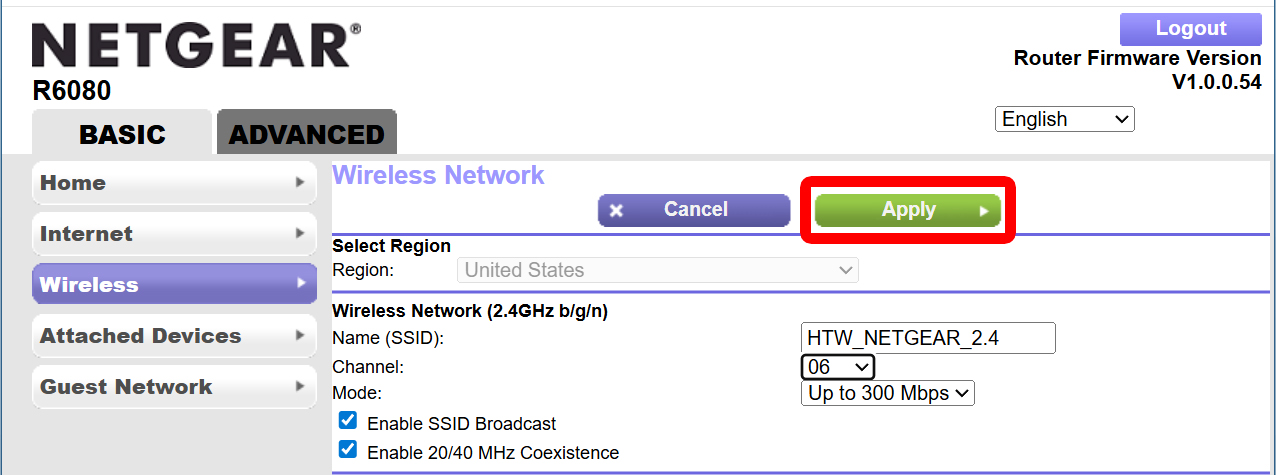
- Go to your “Wireless” settings. In some cases, you might have to go to “Advanced” settings first.

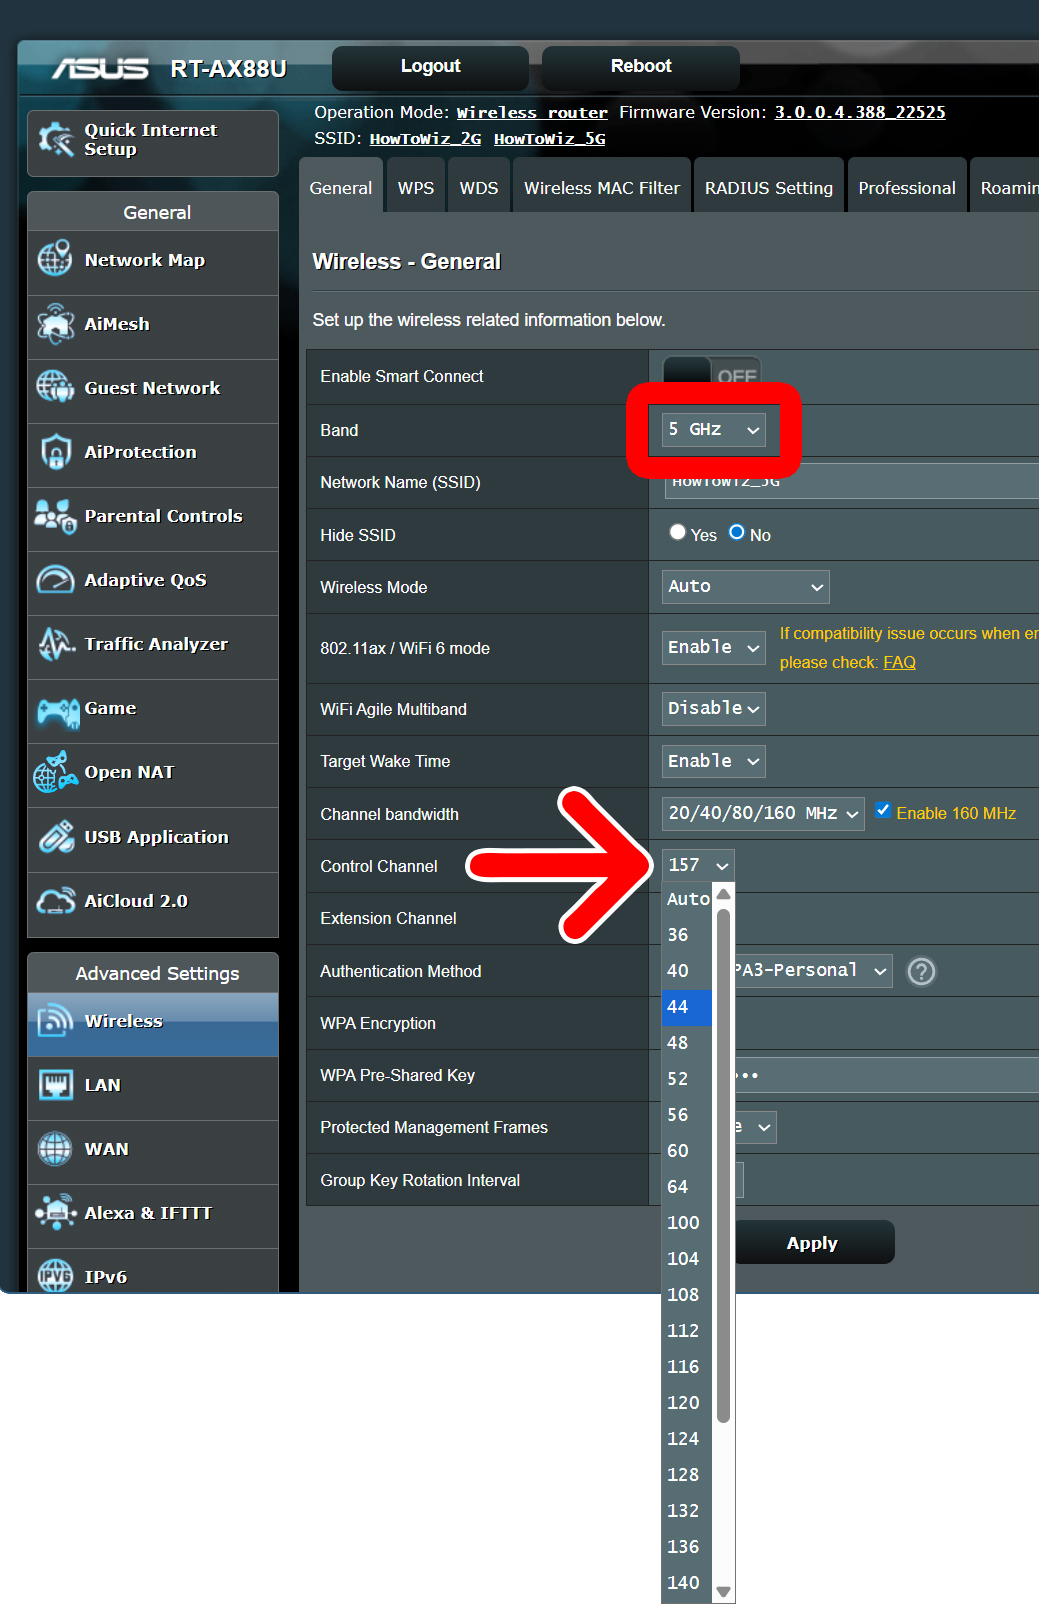
- Select your WiFi band. Make sure you are on the right band (2.4GHz, 5GHz, or 6GHz).
- Change your WiFi channel. In most cases, you will see a drop-down menu next to “Channel Selection” or something similar.

- Finally, click “Save” or “Apply.”

The Best WiFi Channels
The Best 2.4 GHz Channels
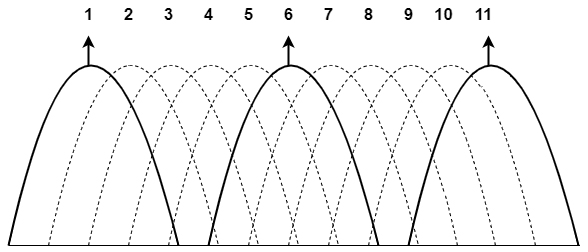
There are 11 channels available on the 2.4GHz band in the US. However, most routers only use channels 1, 6, and 11 because they offer the greatest number of non-overlapping channels. So, you should choose one of these channels to reduce interference from other networks.
The Best 5GHz Channels
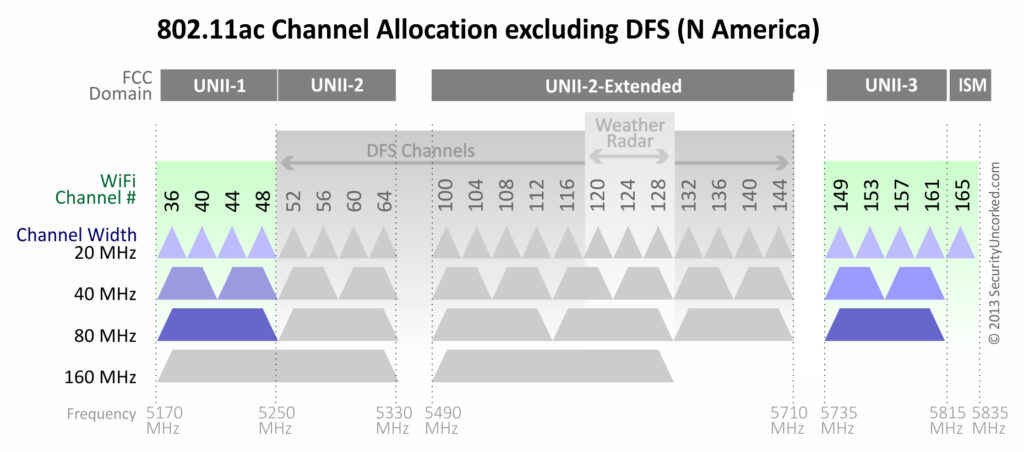
The best WiFi channels on the 5GHz band are 36, 40, 44, and 48 on the lower end of the band or 149, 153, 157, and 161 on the higher end of the band. However, the upper-end channels are not always available in all areas.
It’s not recommended to use any “DFS channels” (52-144) since they share spectrum with military and weather radar systems. If radar is detected, your router may be forced to change channels, which can interrupt your WiFi connection.
The Best 6GHz Channels
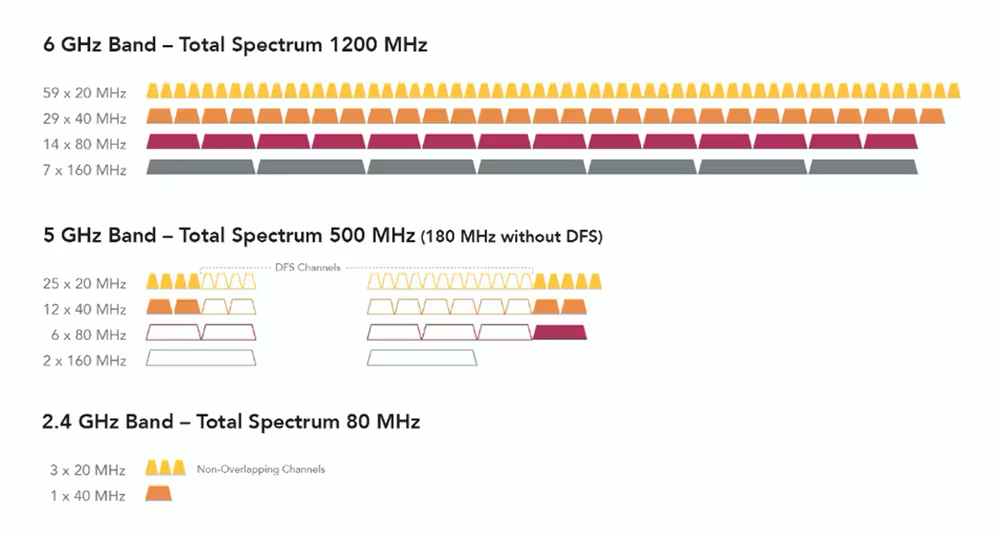
The best WiFi channels on the 6GHz band are usually 5, 21, 37, 53, 69, 85, 101, 117, 133, 149, 165, 181, 197, 213, and 229. These are known as “Preferred Scanning Channels,” which means your devices will scan for these channels first when looking for a network.
The 6GHz WiFi band was only opened in 2020, and not many routers and devices have been designed to utilize the new spectrum so far. So, you can think of the 6GHz band as a brand-new 56-lane highway without any traffic yet. That means you can use almost any channel without interference.
How to Find the Best WiFi Channel
To find the best WiFi channel for your router, you’ll need to download a free program like NetSpot. Then open the app and click the graph icon in the top-left corner. Next, choose your band and select all networks. Finally, find the least-crowded channel and change to it.
- Download and install NetSpot. You can use this app to find the best channel for free on Windows or Mac computers.
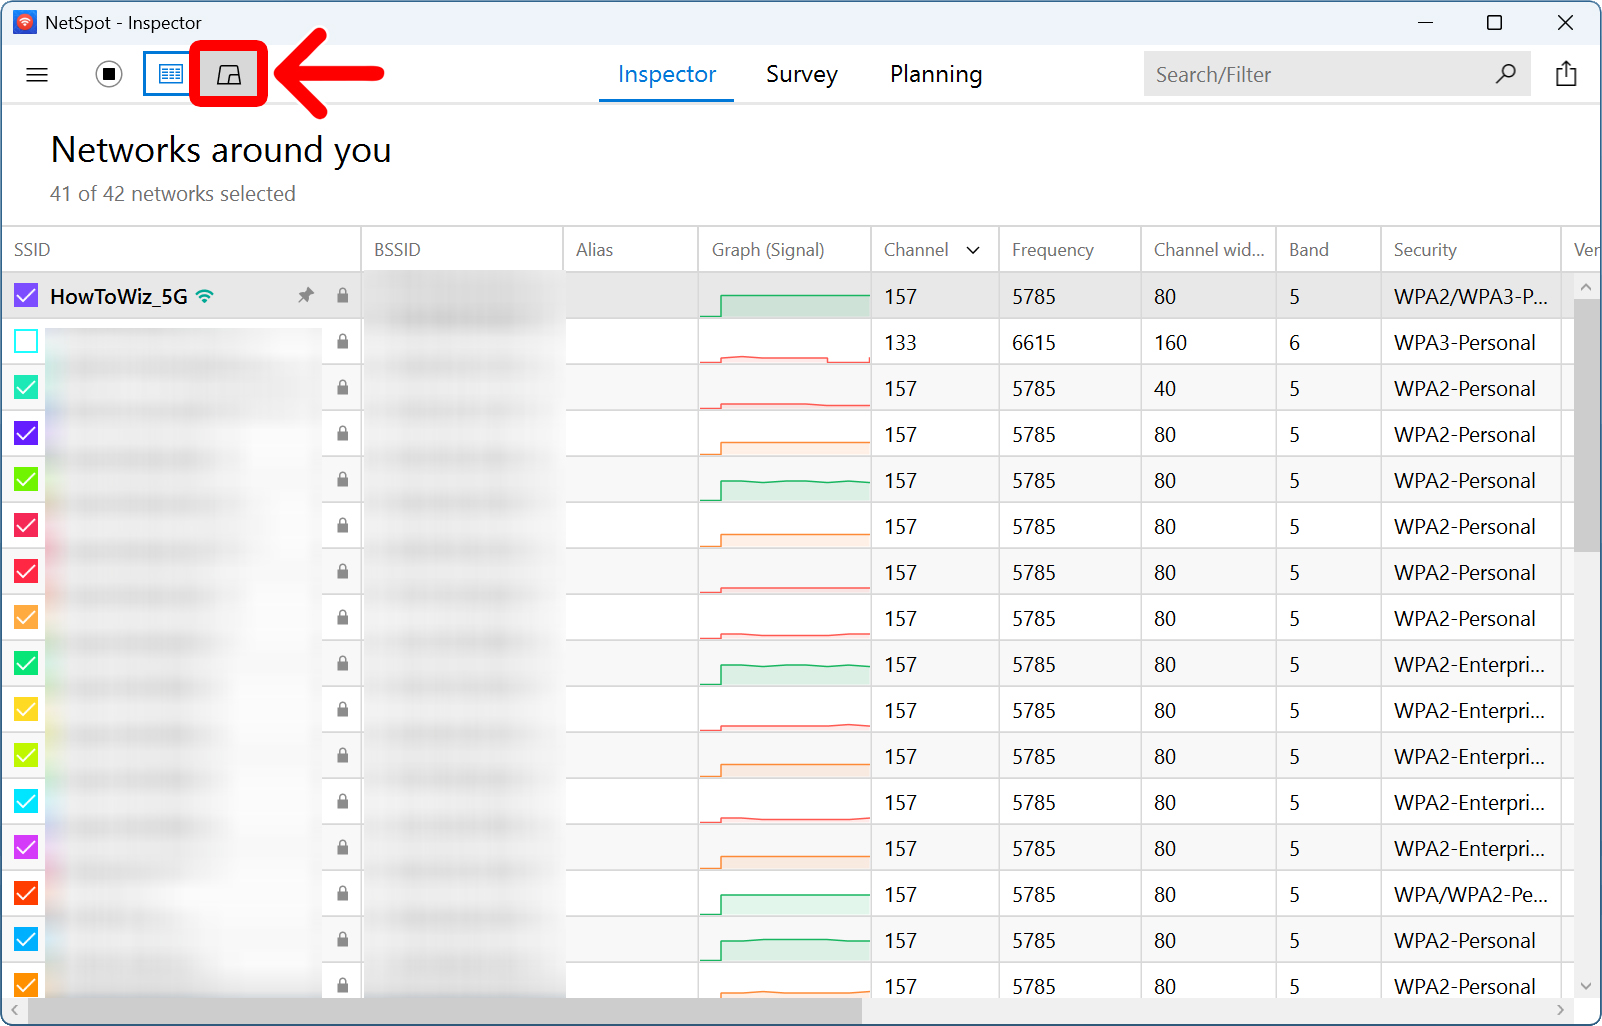
- Open the app and click the graph button. You will see this in the top-left corner of the app (to the left of “Inspector”).

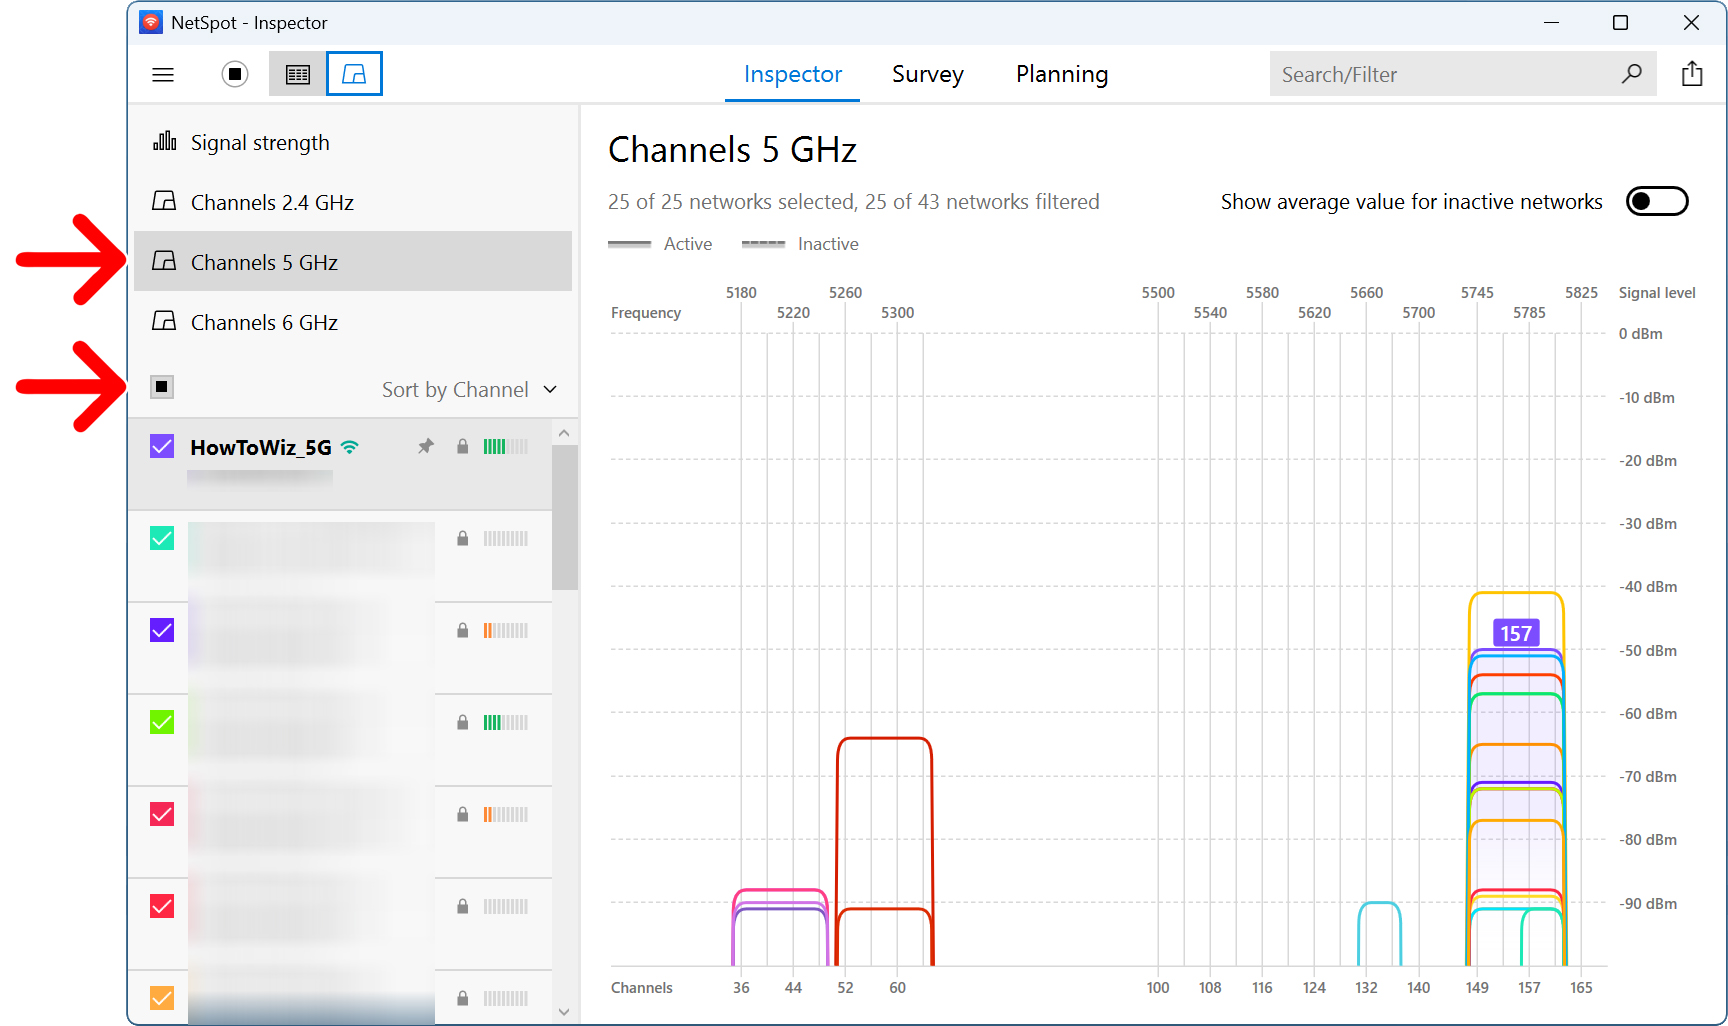
- Choose your band. You will see options for the 2.4GHz, 5GHz, and 6GHz bands on the left sidebar in the app.
- Check the box next to “Sort by SSID.” This will show all the networks in your area.
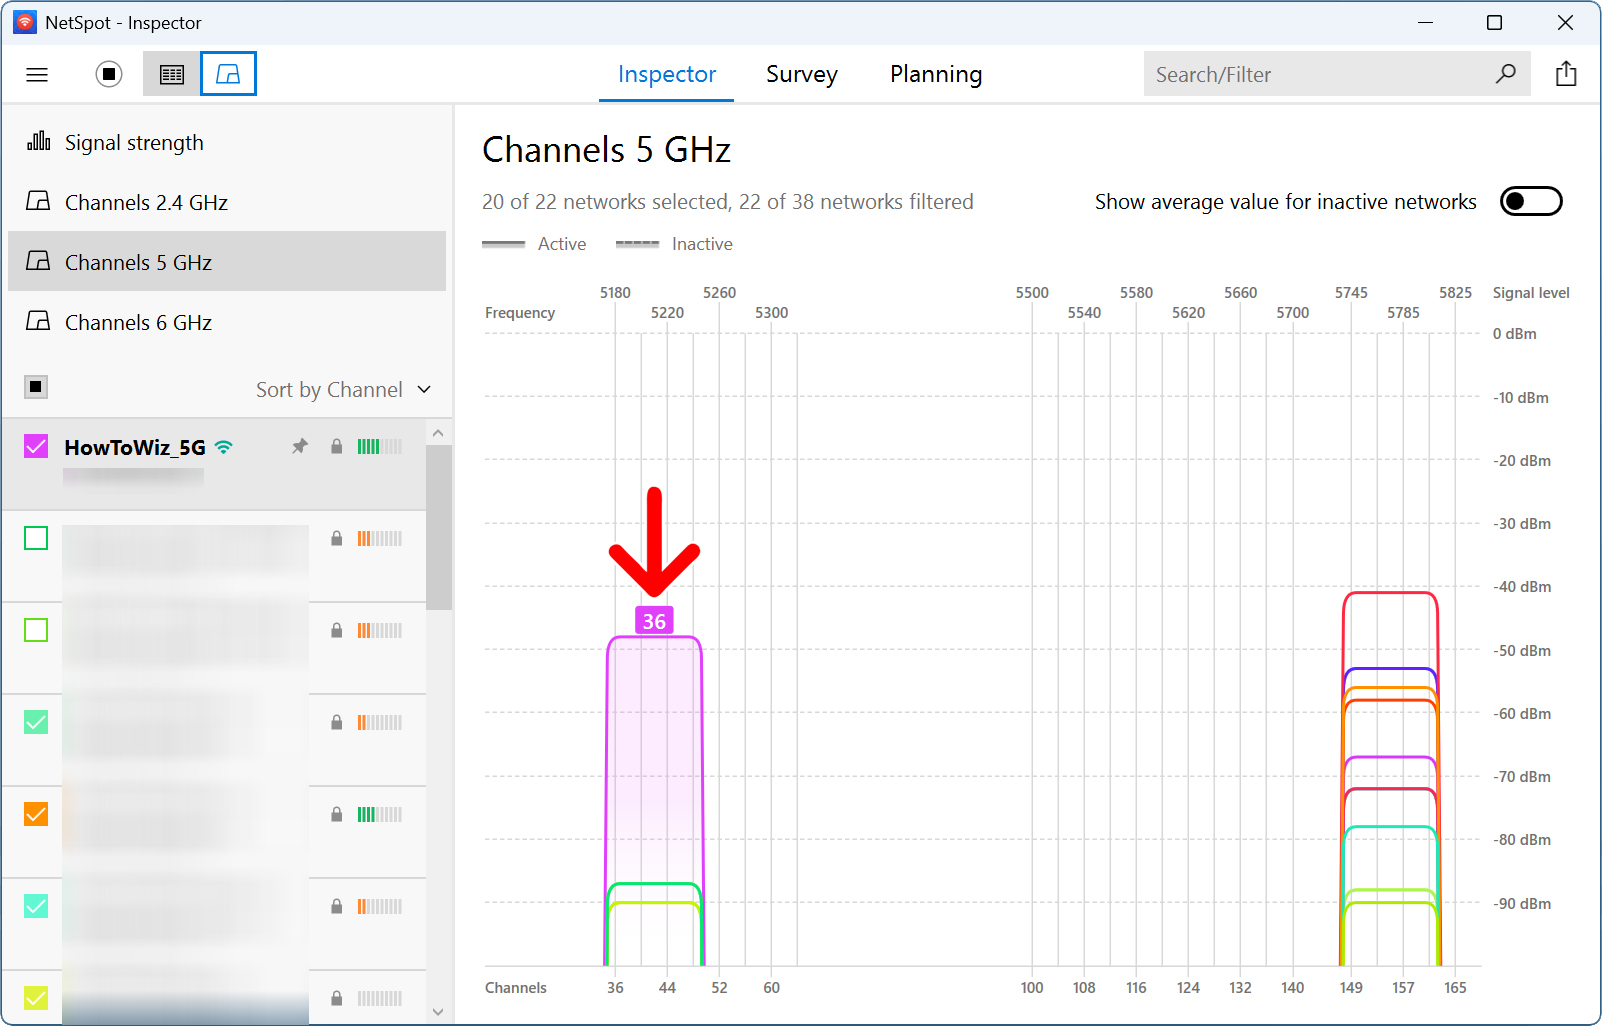
- Finally, find the least crowded channel and change to it in your router’s settings.
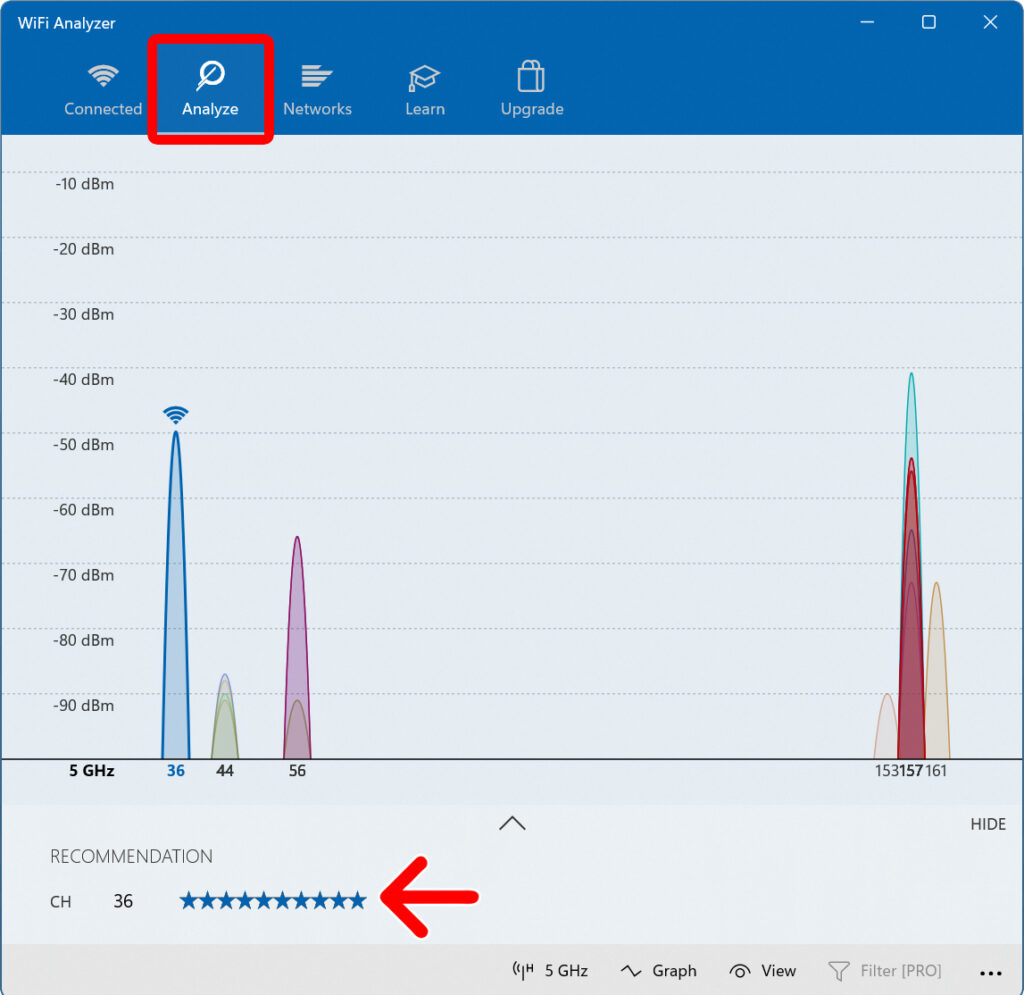
Windows users can also use a program called WiFi Analyzer to automatically see the best WiFi channel recommended at the bottom of the “Analyze” tab.