Your computer’s performance comes down to the hardware inside. Knowing what CPU, GPU, RAM, and storage you have can help you decide if your PC is powerful enough for gaming, work, or everyday use. Here’s how to check the specs on a Windows 11 PC, including the most important hardware details of your CPU, GPU, RAM, storage, and more.
How to See Basic Specs in Windows 11
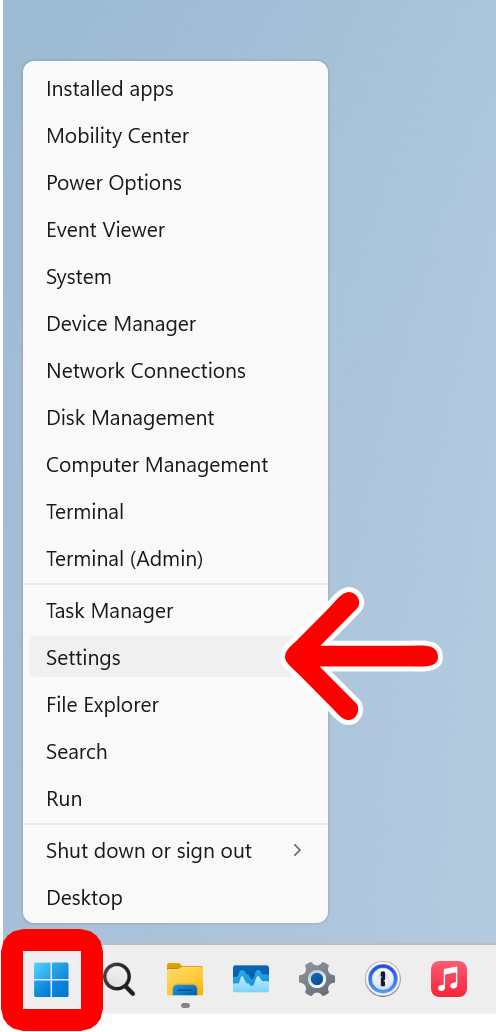
To check your Windows 11 specs, right-click the Windows logo at the bottom of your screen and select “Settings.” Then go to “System” in the left sidebar and select “About” on the right. Finally, you’ll find your basic specs under “Device Specifications.”
- Right-click the Windows logo at the bottom of your screen.
- Select “Settings.”

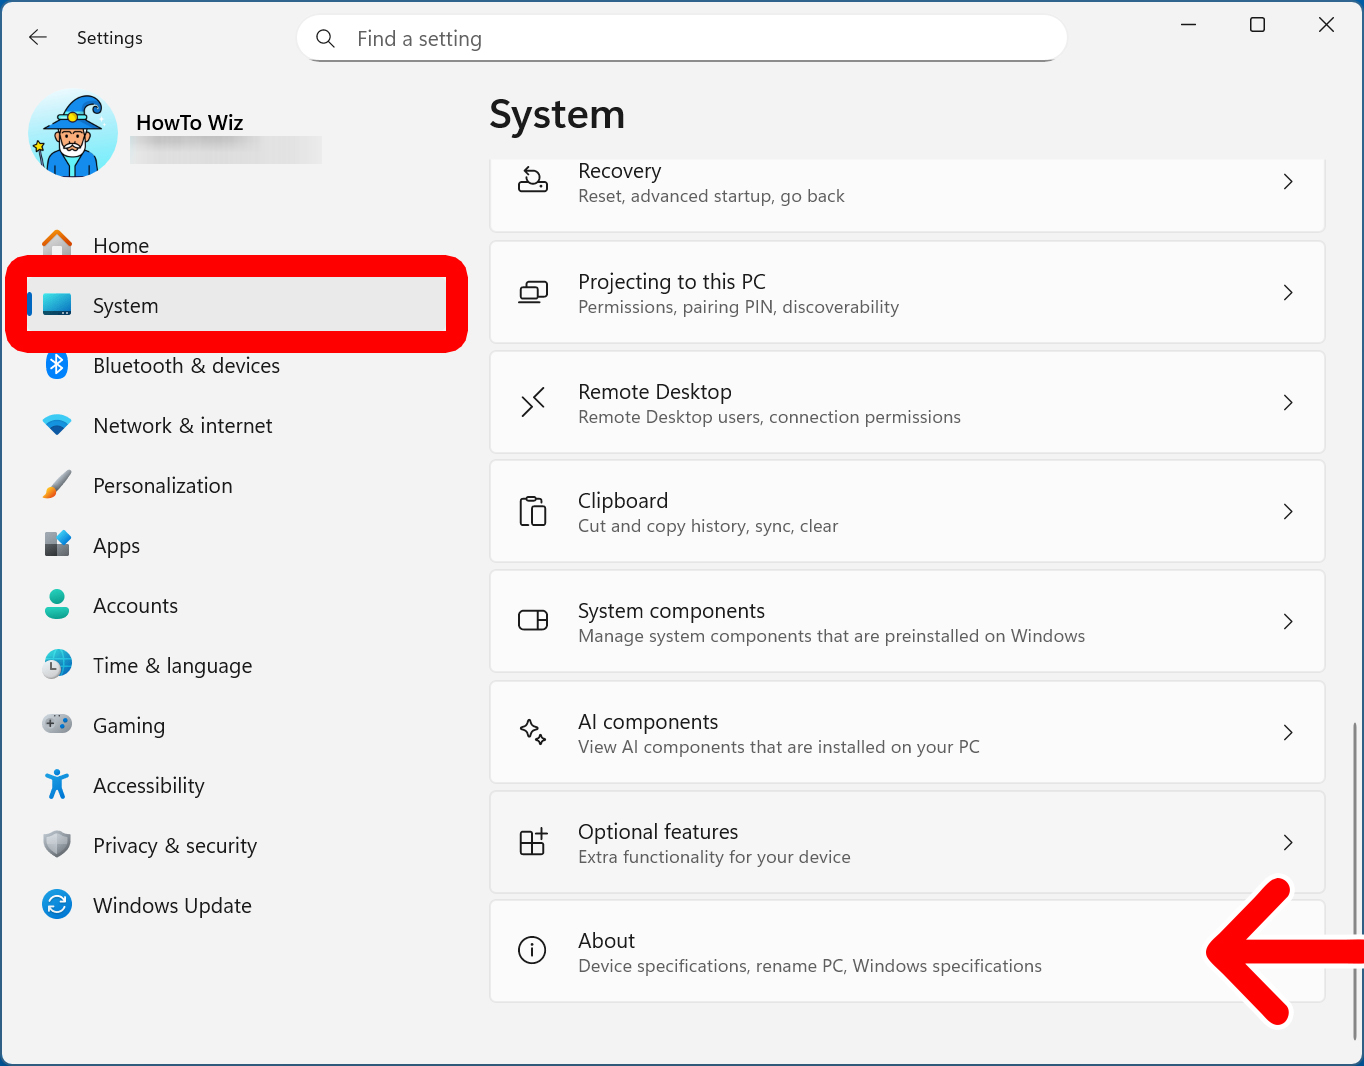
- Go to “System.” You will see this in the left sidebar of the Settings window. If you don’t see this option, try expanding the window by clicking the square “maximize” icon in the top-right corner.
- Select “About.” You will see this by scrolling down the right side of the window.

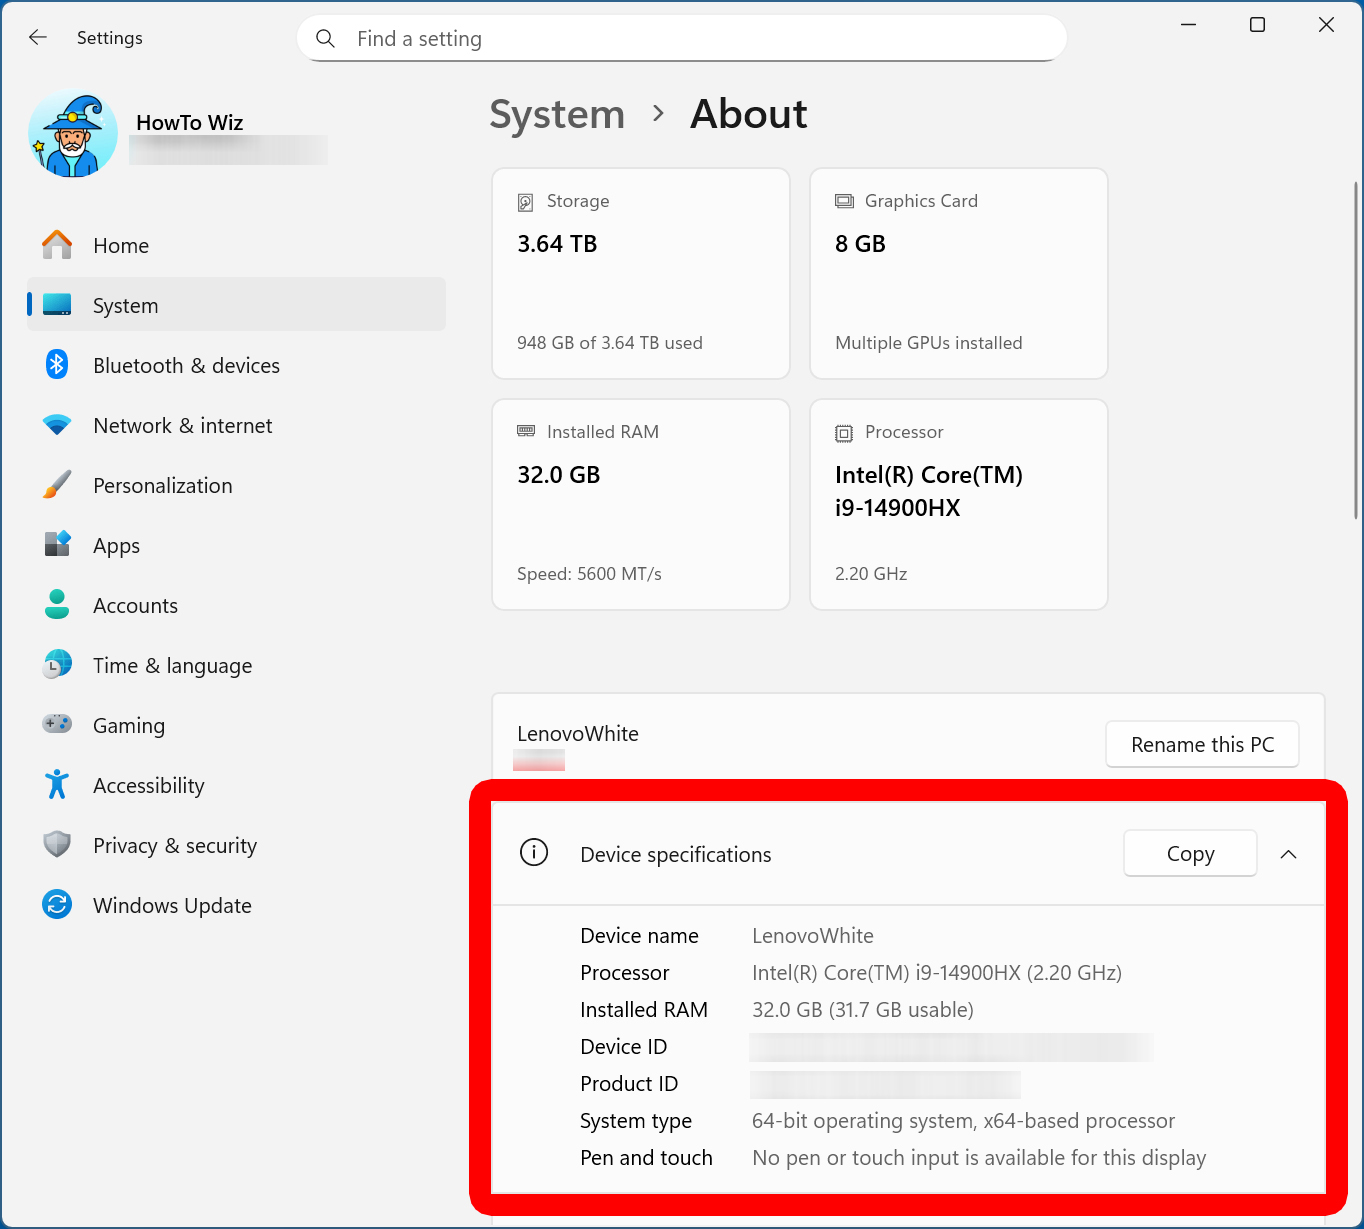
- Finally, check your specs under “Device Specifications.” You can see your CPU model next to “Processor” and your memory capacity next to “Installed RAM.” You can also see your total hard drive storage capacity and GPU dedicated memory at the top of the window.
If you want more detailed information about your CPU, memory, storage, and GPU, the Windows 11 Task Manager has it all. Here’s how to access it:
How to Check Detailed Specs in Windows 11
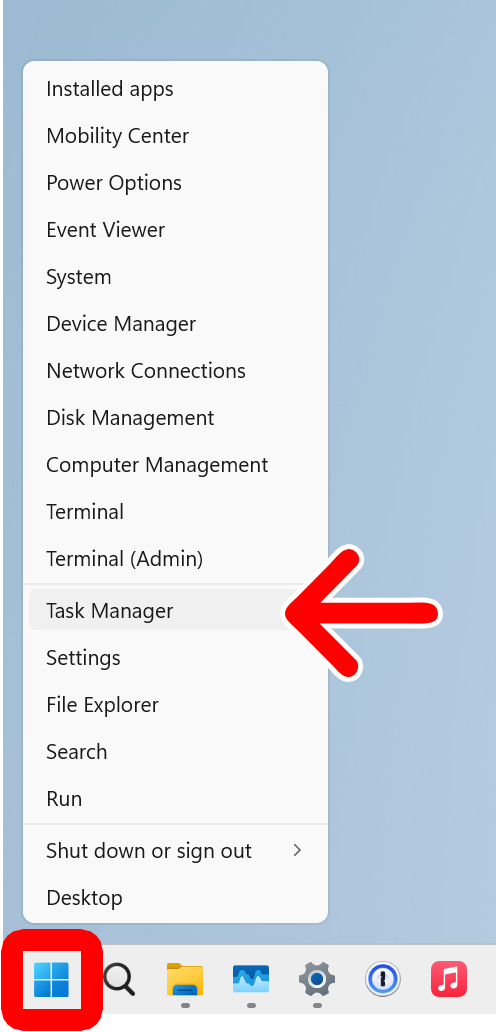
To check your specs on a Windows 11 PC, right-click the Windows logo at the bottom of your screen and select “Task Manager.” Then click the “Performance” tab in the left sidebar, and select “CPU,” “Memory,” “Disk,” “Wi-Fi,” or “GPU.”
- Right-click the Windows logo at the bottom of your screen.
- Select “Task Manager.”
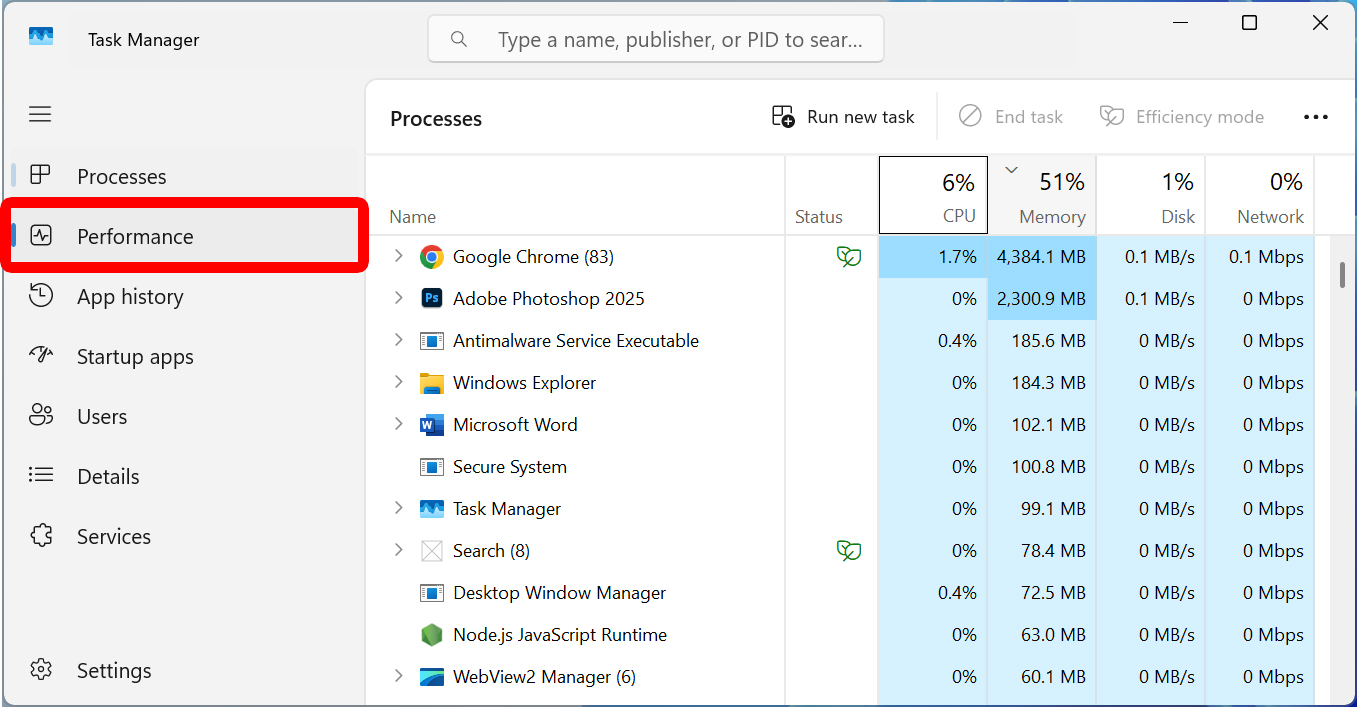
- Click the “Performance” tab. You will see this in the left sidebar. If you don’t see this option, click the three-line icon in the top-left corner.
- Finally, check your specs by selecting “CPU,” “Memory,” “Disk,” “Wi-Fi,” or “GPU.”
CPU
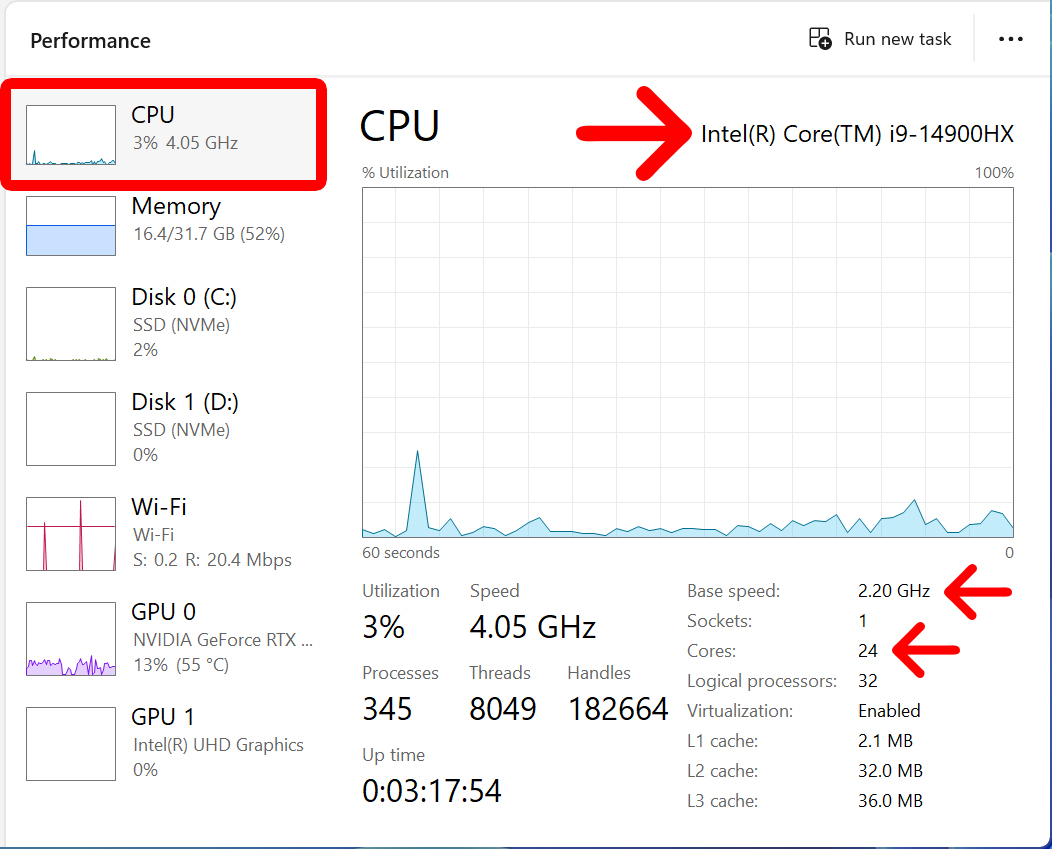
In the top-right corner, you’ll see your CPU model name.
Below the graph, you’ll see your processor’s “Base speed,” which tells you how fast your CPU will run under normal circumstances. For example, a 2.2GHz base speed will execute at 2.2 billion cycles per second.
Another important spec to check is the number of “Cores,” which tells you how many individual processing units your PC has. In general, the more cores you have, the more tasks your Windows PC can handle simultaneously.
Memory
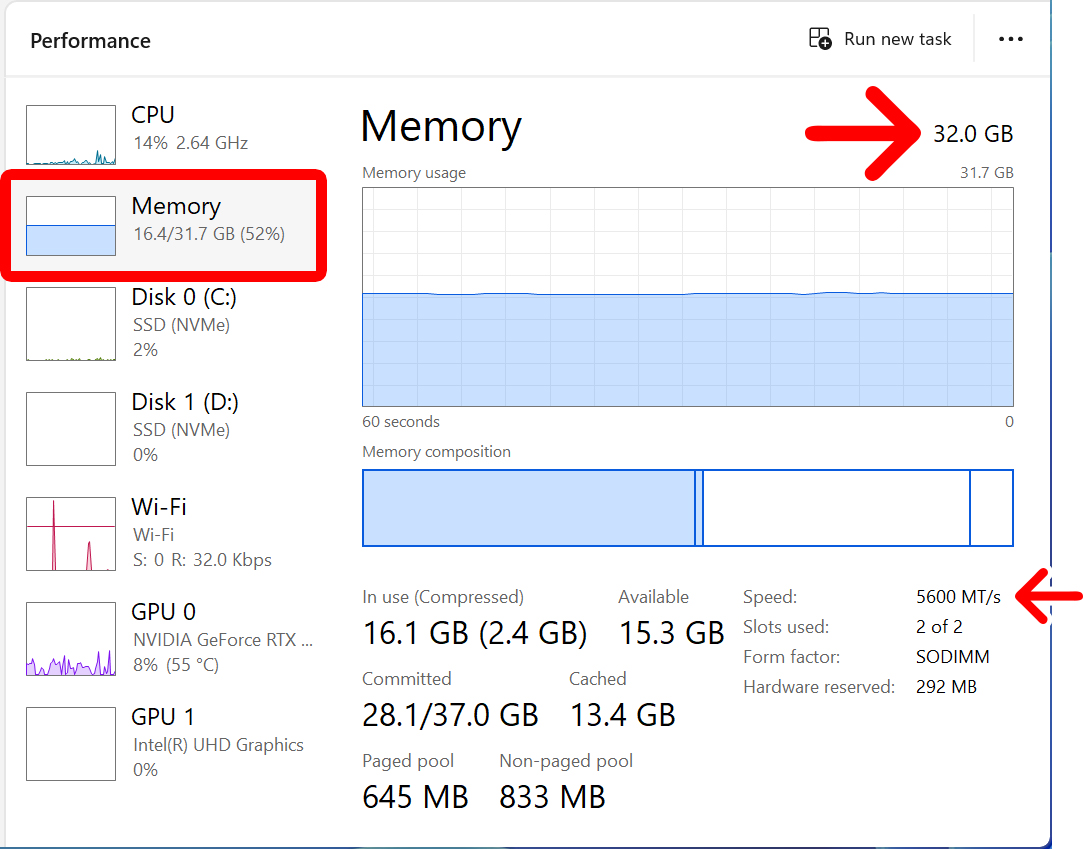
In the top-right corner, you’ll see your total RAM capacity.
Below the graph, you’ll see your RAM “Speed,” which tells you how fast the RAM can transfer data to and from your CPU.
Disk
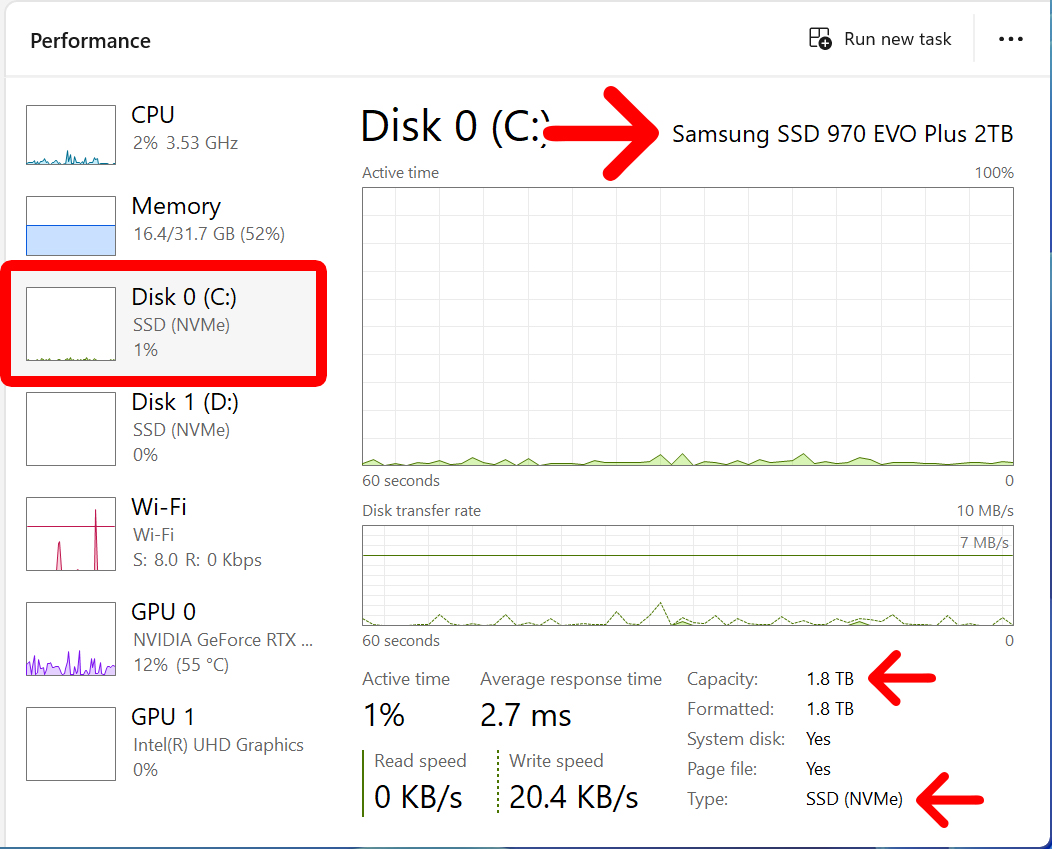
In the top-right corner, you will see your hard drive’s model name.
Below the graph, you’ll also see the drive’s total “Capacity,” which is the maximum amount of storage space your drive can hold.
You can also check hard drive “Type,” which tells you whether your Windows 11 PC uses a traditional hard-disk drive (HDD), a solid-state drive (SSD), or another storage format.
Wi-Fi
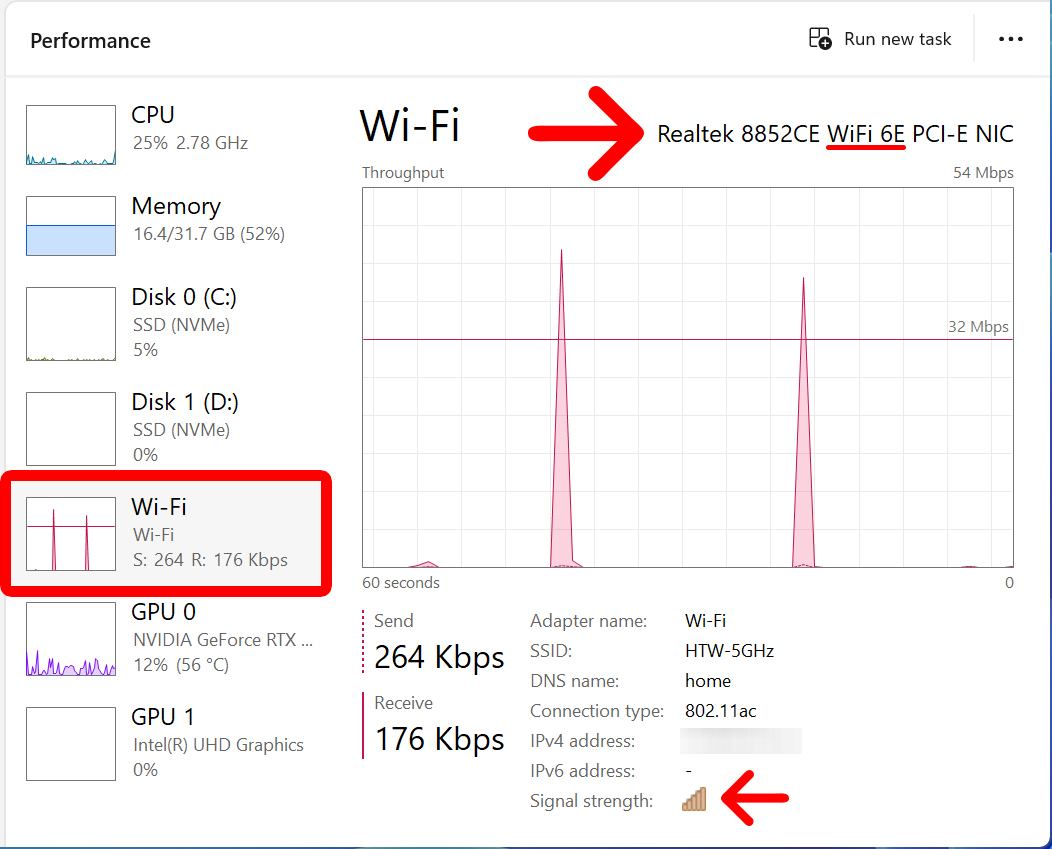
You will see your WiFi adapter model name in the top-right corner.
Below the graph, you will see the “Signal strength” of the current WiFi network you’re connected to.
Read More: How to Change Your WiFi Channel
GPU
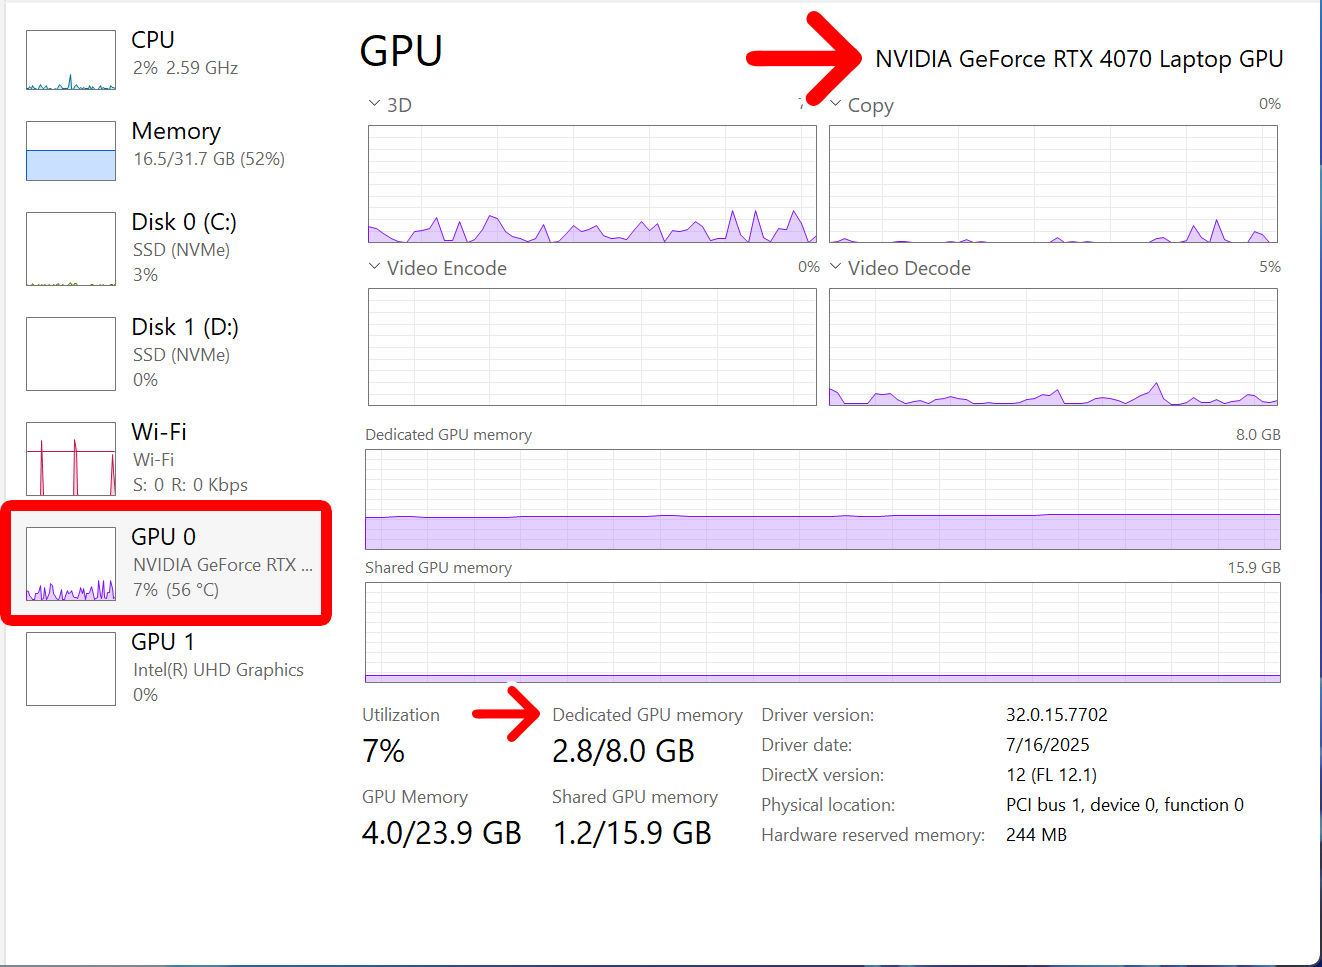
In the top-right corner, you’ll see your GPU’s model name.
Below the graph, you will also see your “Dedicated GPU memory,” (also called VRAM) which will show you how well your GPU can handle tasks like video editing and gaming.
Read More: How much VRAM is enough?