A smart plug can turn everyday electronics into smart home devices. That means you can control your coffee maker with voice commands, schedule your lamp to turn on at sunrise, and more. Here’s everything you need to know about how to set up an Amazon Smart Plug, and how to change its settings in the Alexa app.
How to Set Up Your Amazon Smart Plug with Voice Commands
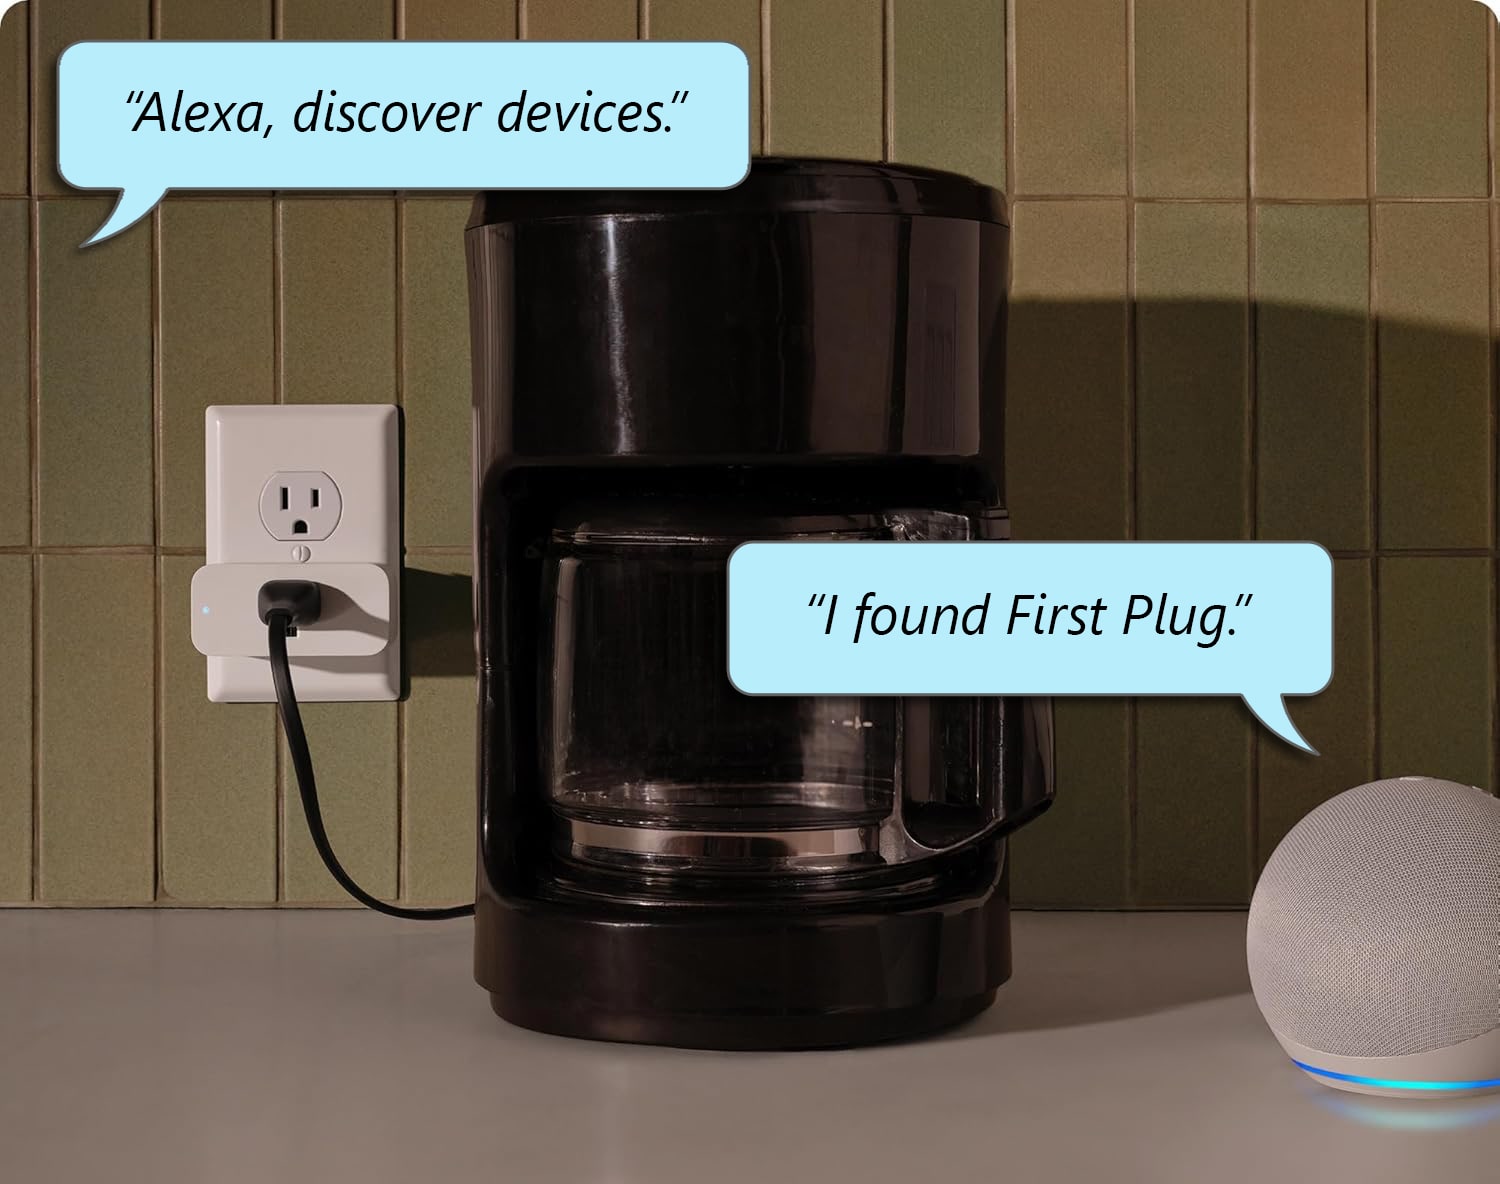
To set up an Amazon Smart Plug, first plug it into a power outlet. Then, press and hold the power button on the device until the light starts blinking red and blue. Next, say, “Alexa, discover devices.” Finally, wait for your smart plug to be connected.
You will know your smart plug has been connected when Alexa says, “I found [first plug], and you can control it by saying ‘Turn on [first plug].’”
After you set up a smart plug with voice commands, you can skip to the section below on How to Change Smart Plug Settings in the Alexa App.
How to Set Up an Amazon Smart Plug with the Alexa App
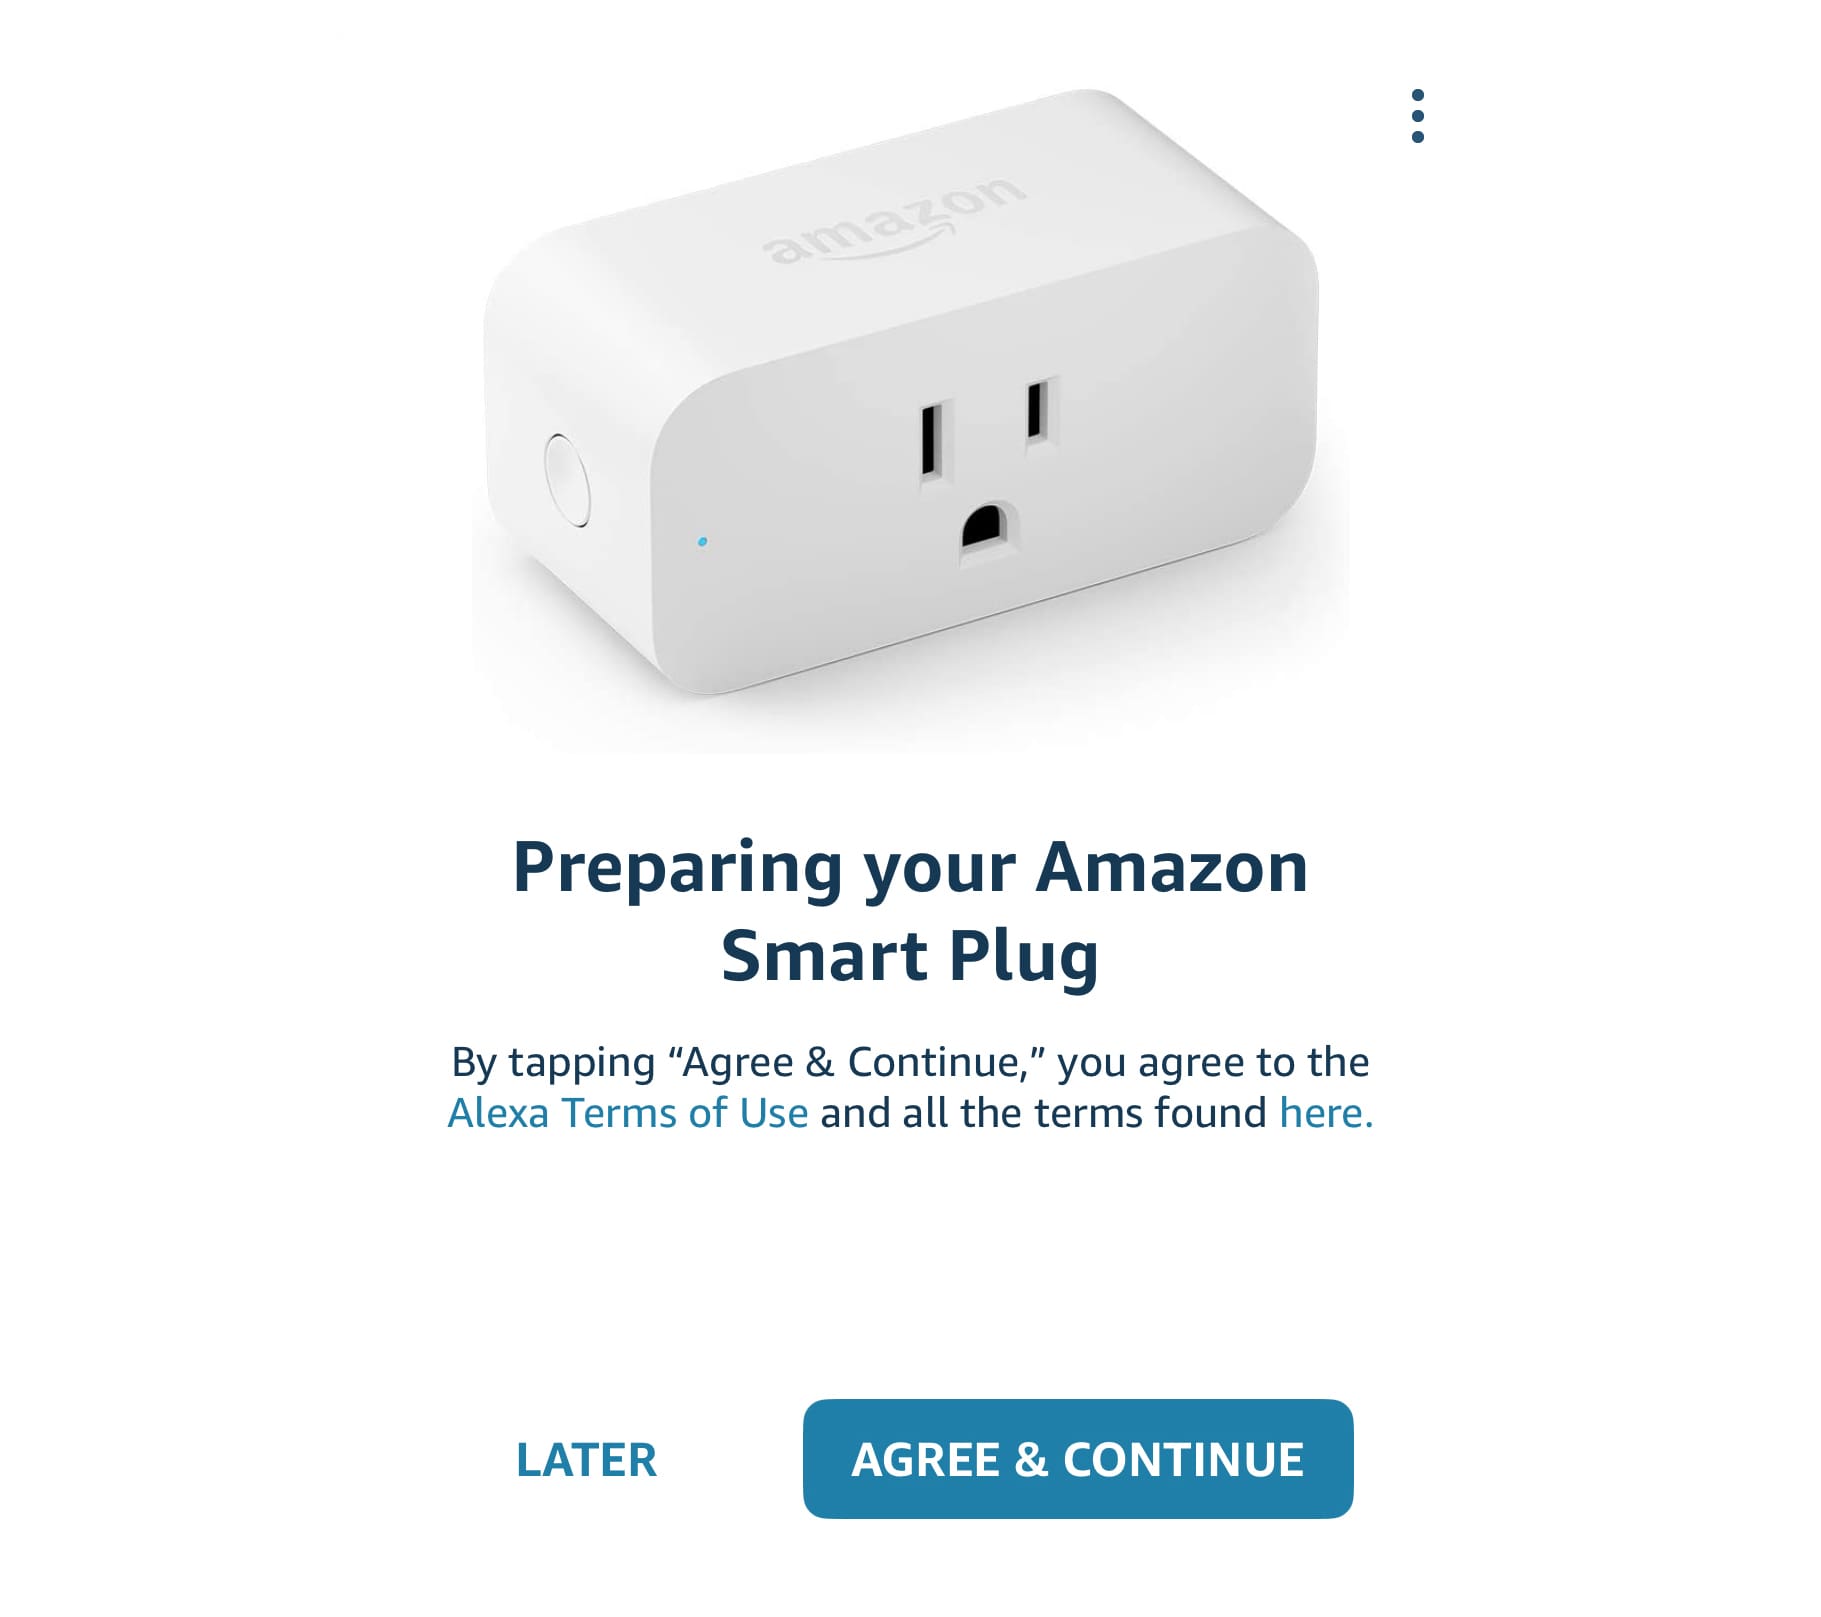
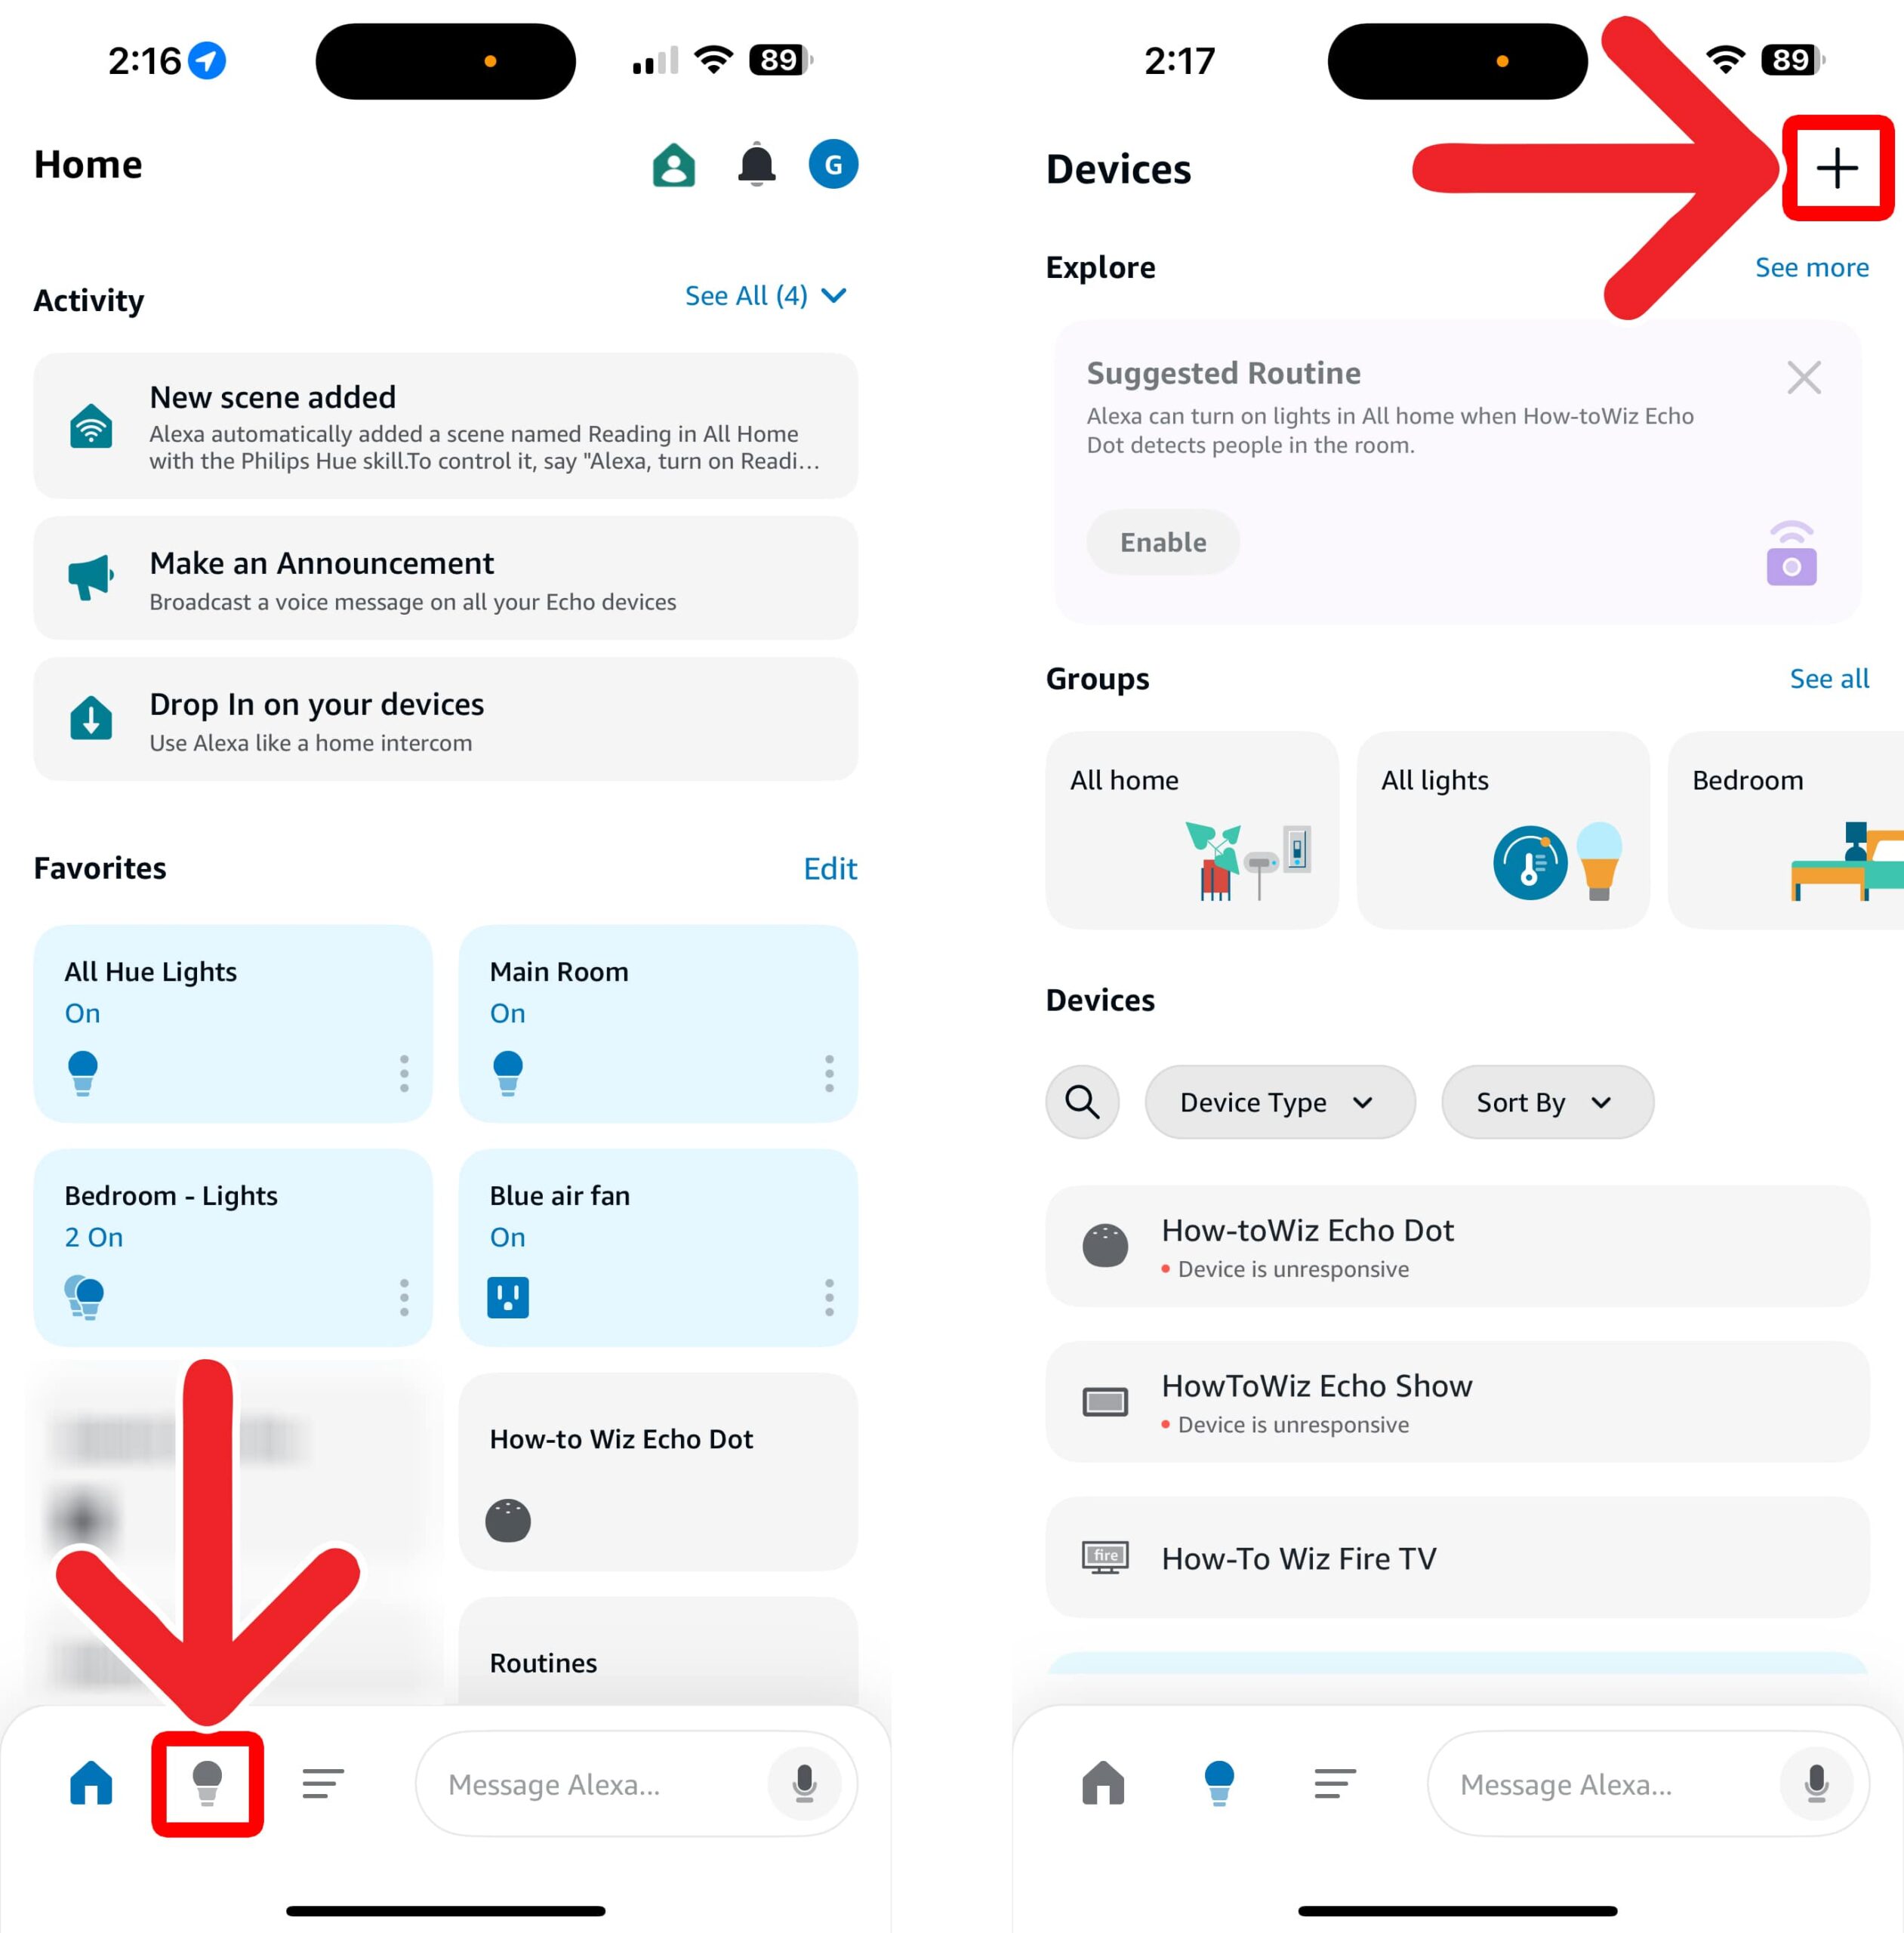
To set up an Amazon Smart Plug, first plug it into a power outlet. Then open the Alexa app and tap the light bulb icon at the bottom of your screen. Next, tap the plus sign icon and select “Add Device > Plug > Amazon.” Finally, follow the on-screen instructions.
- Plug your Amazon Smart Plug into a power outlet.
- Open the Alexa app. If you don’t already have the app, you can download it from the Apple App Store or the Google Play Store.

- Go to “Devices.” This is the light bulb icon at the bottom of your screen.
- Tap the plus sign icon. You will see this in the top-right corner of your screen.

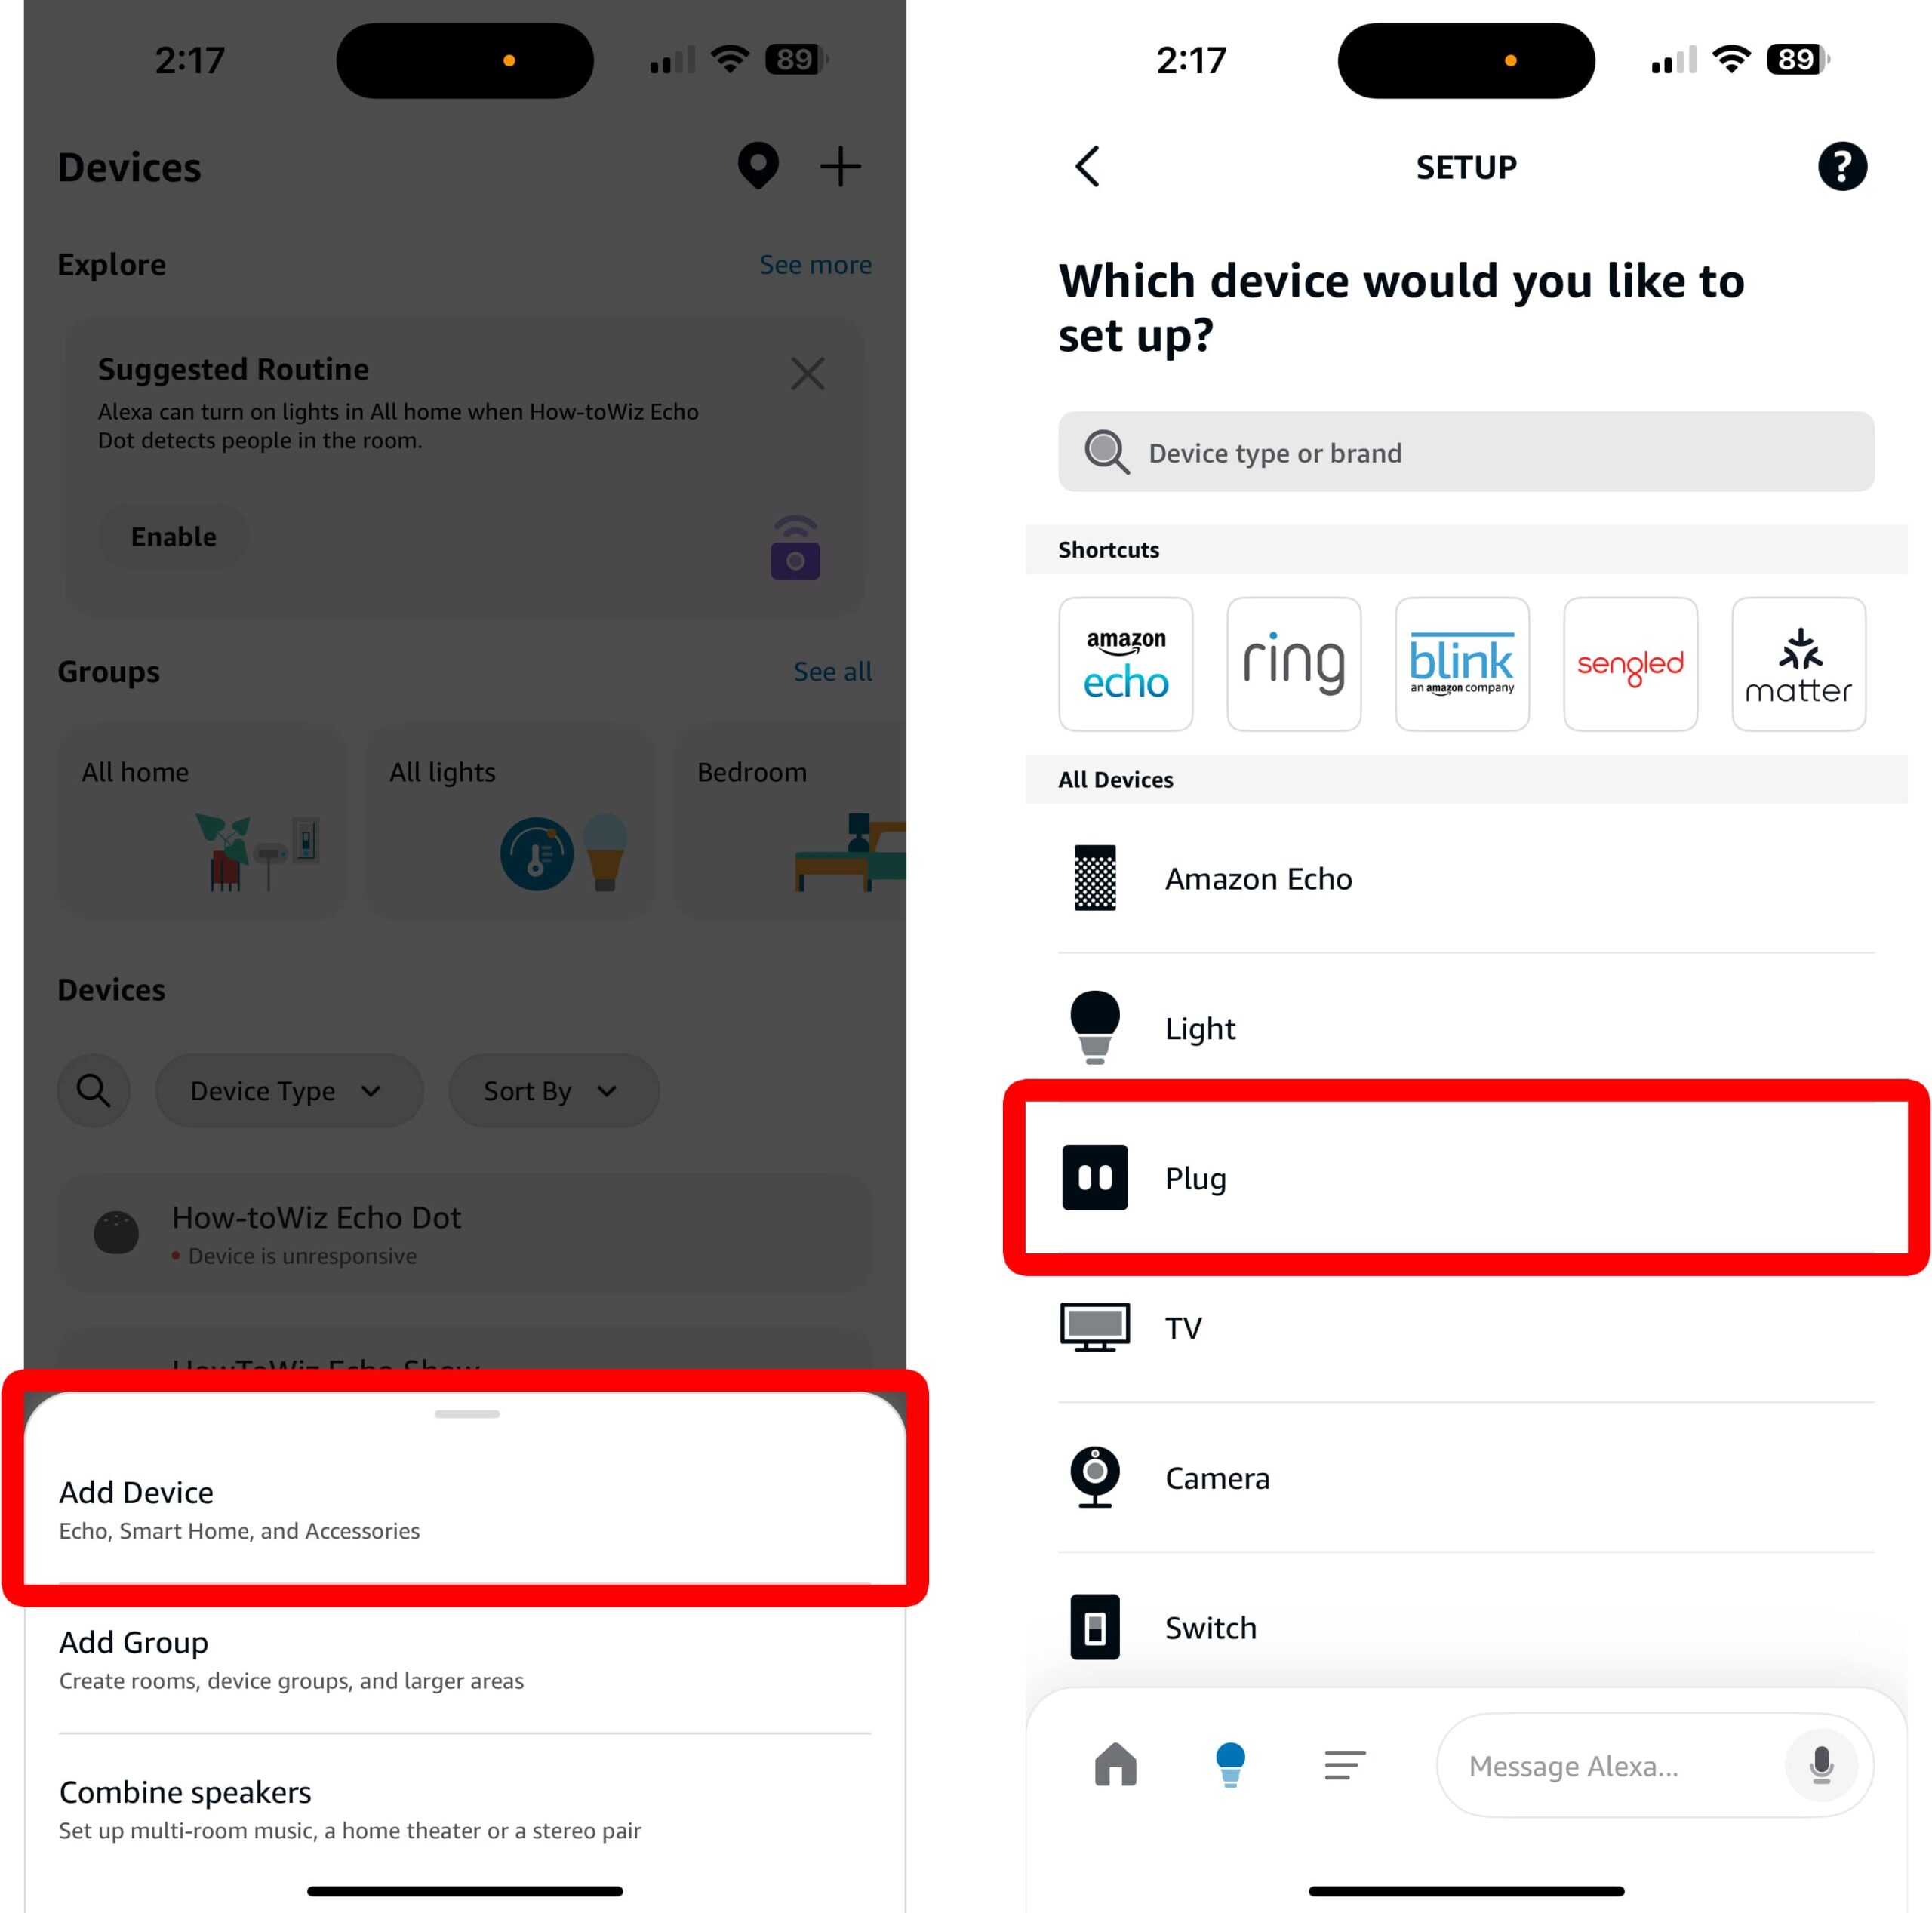
- Select “Add Device.”
- Choose “Plug.”

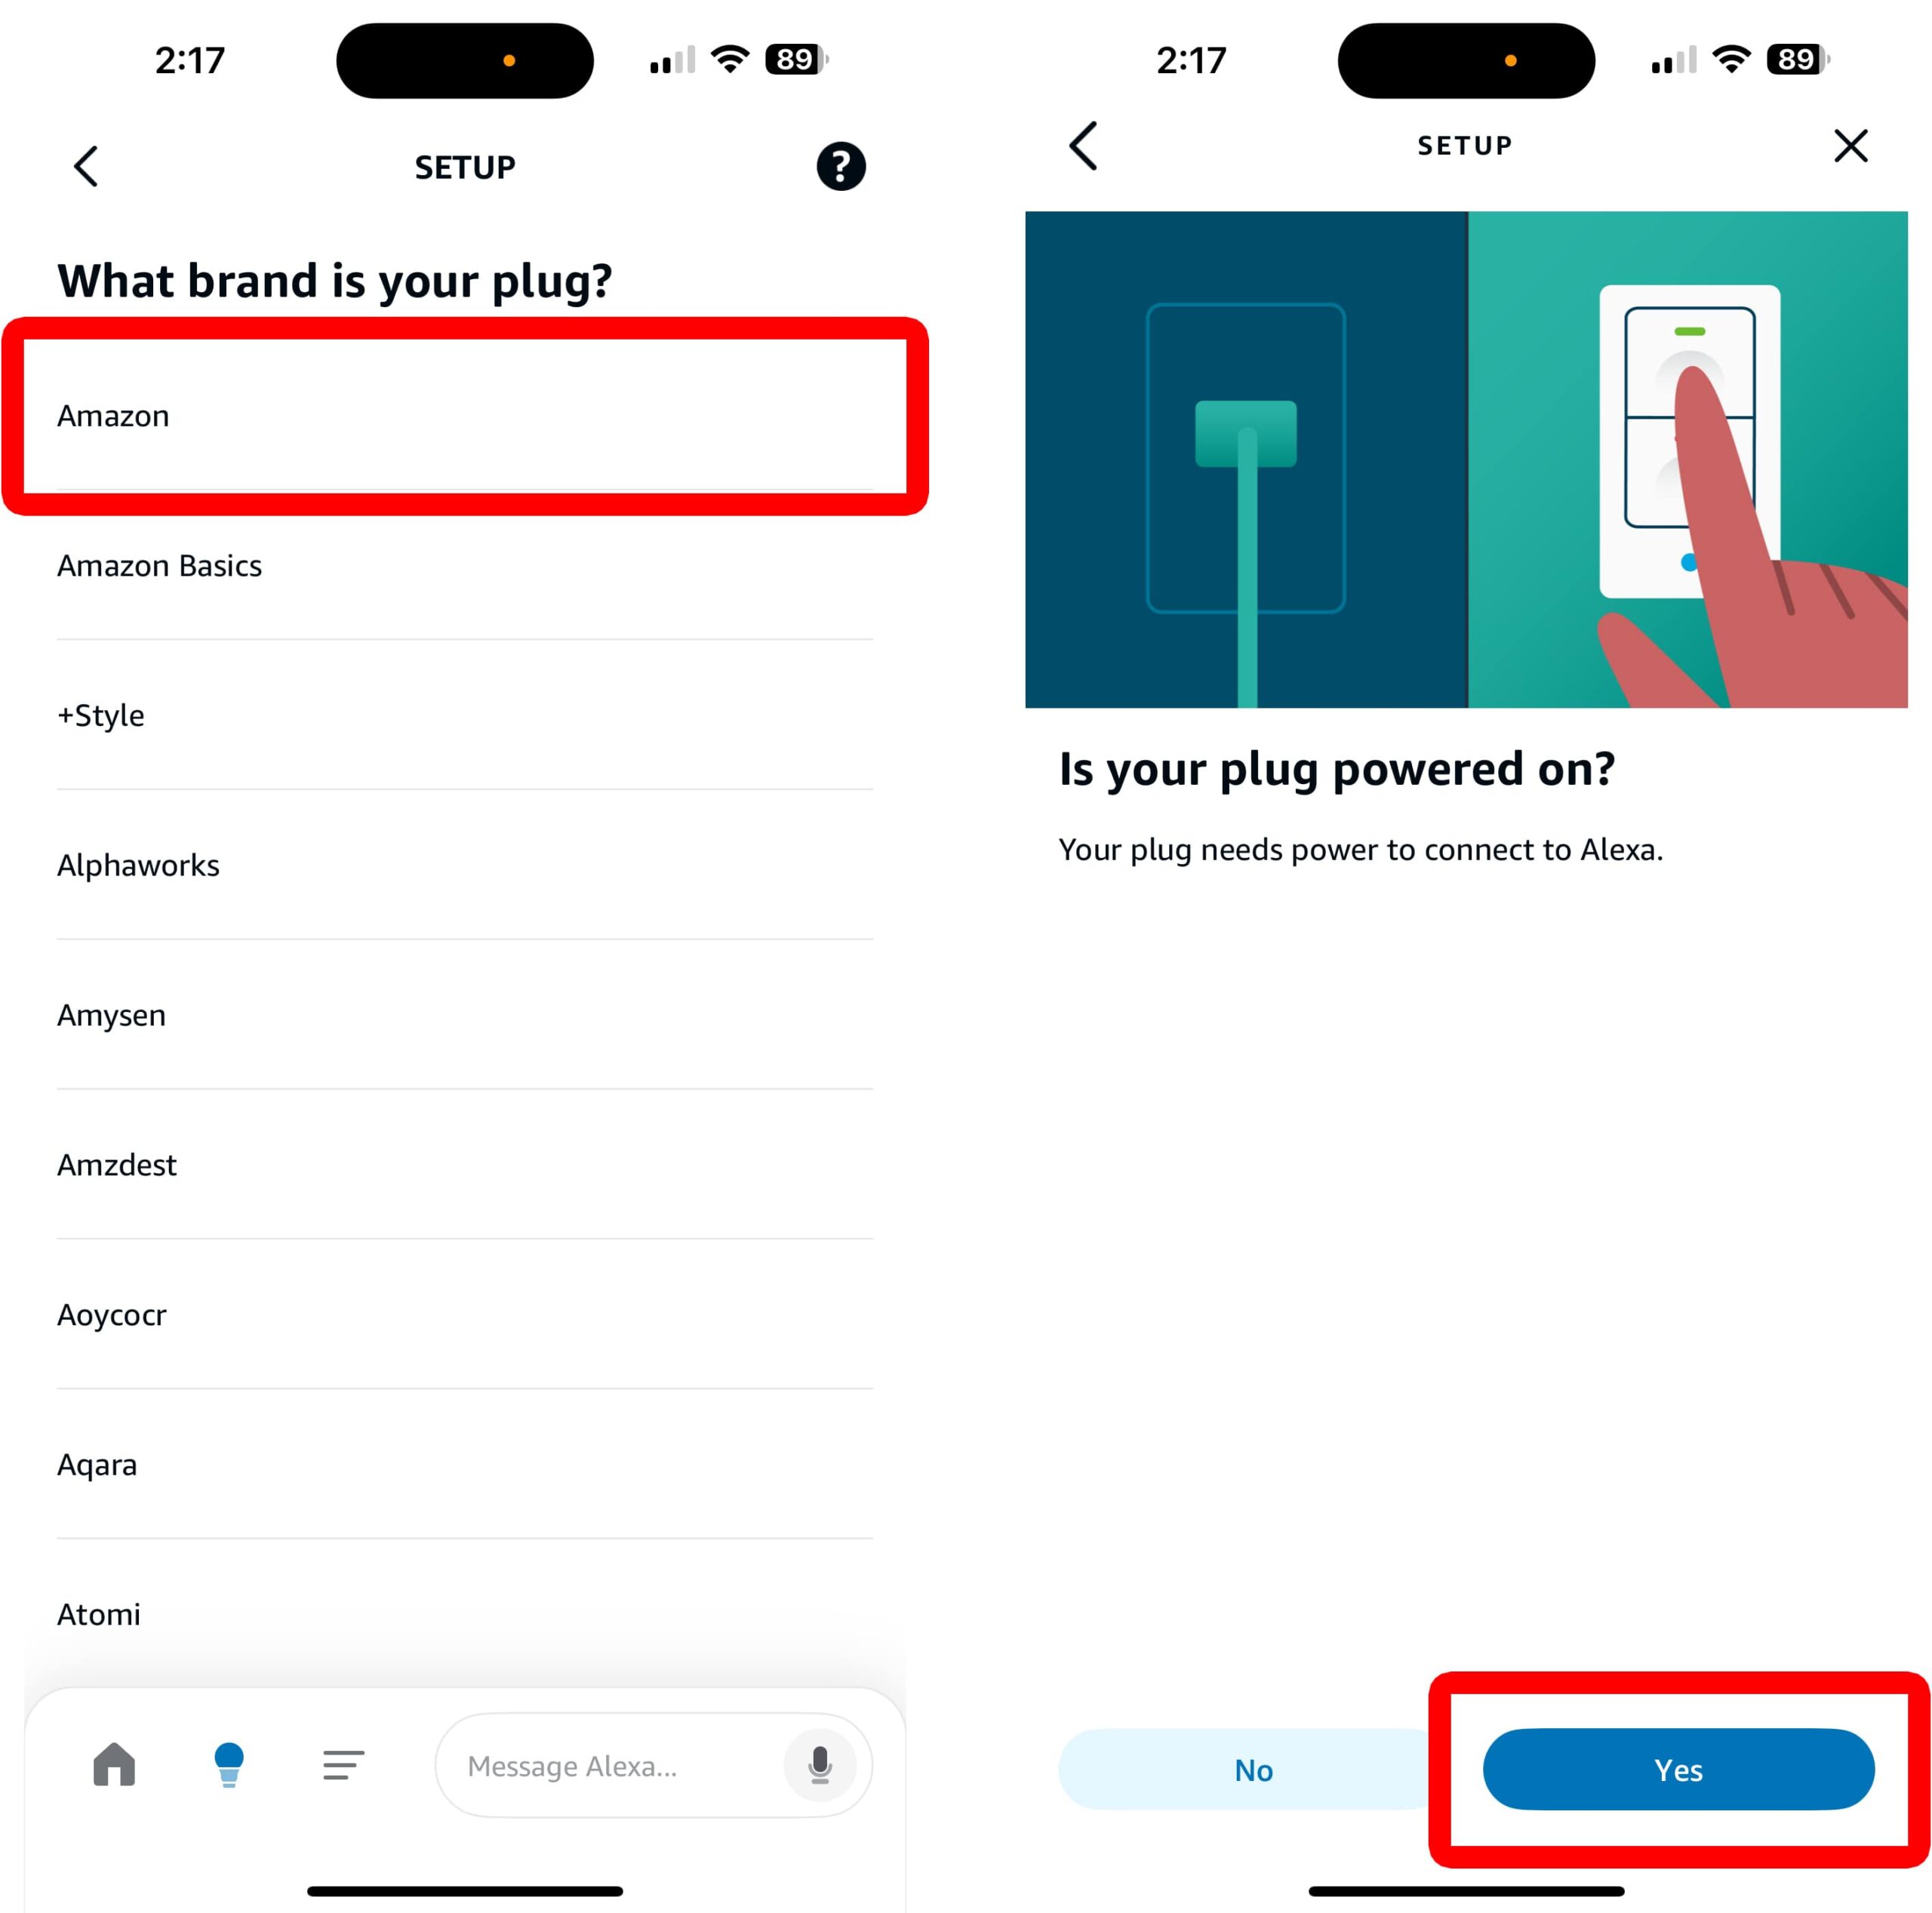
- Select “Amazon.”
- Tap “Yes.”
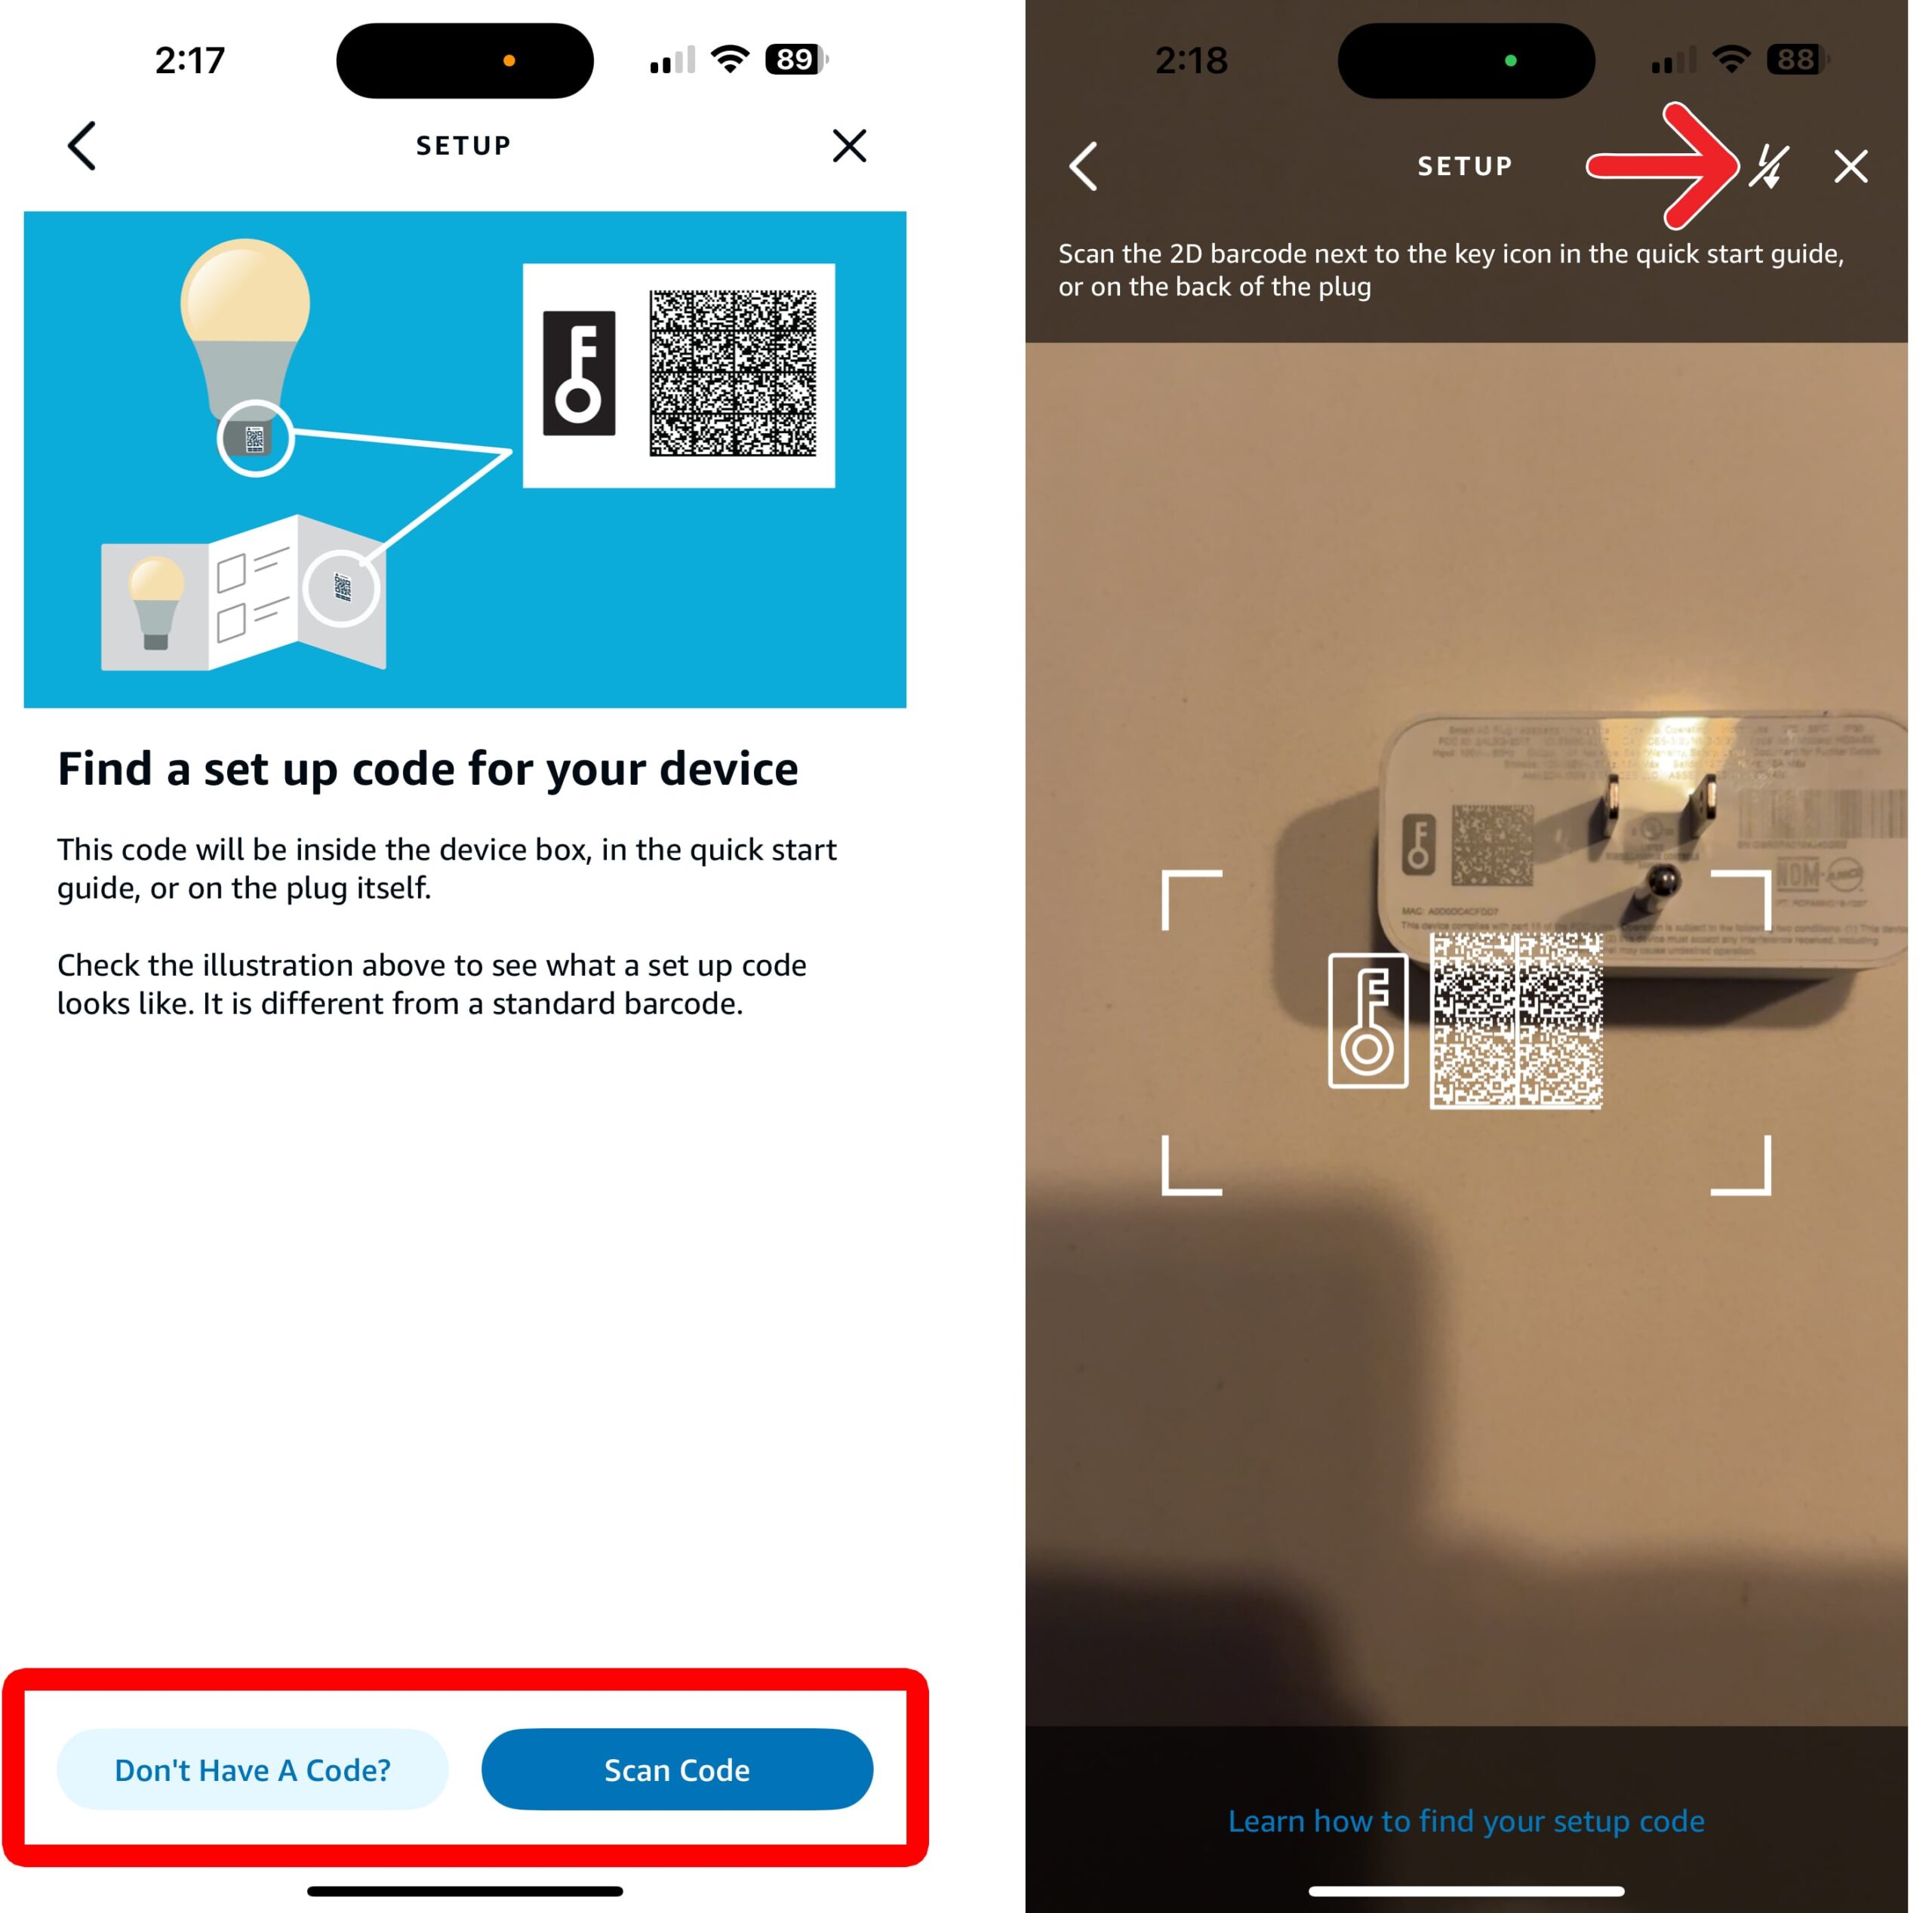
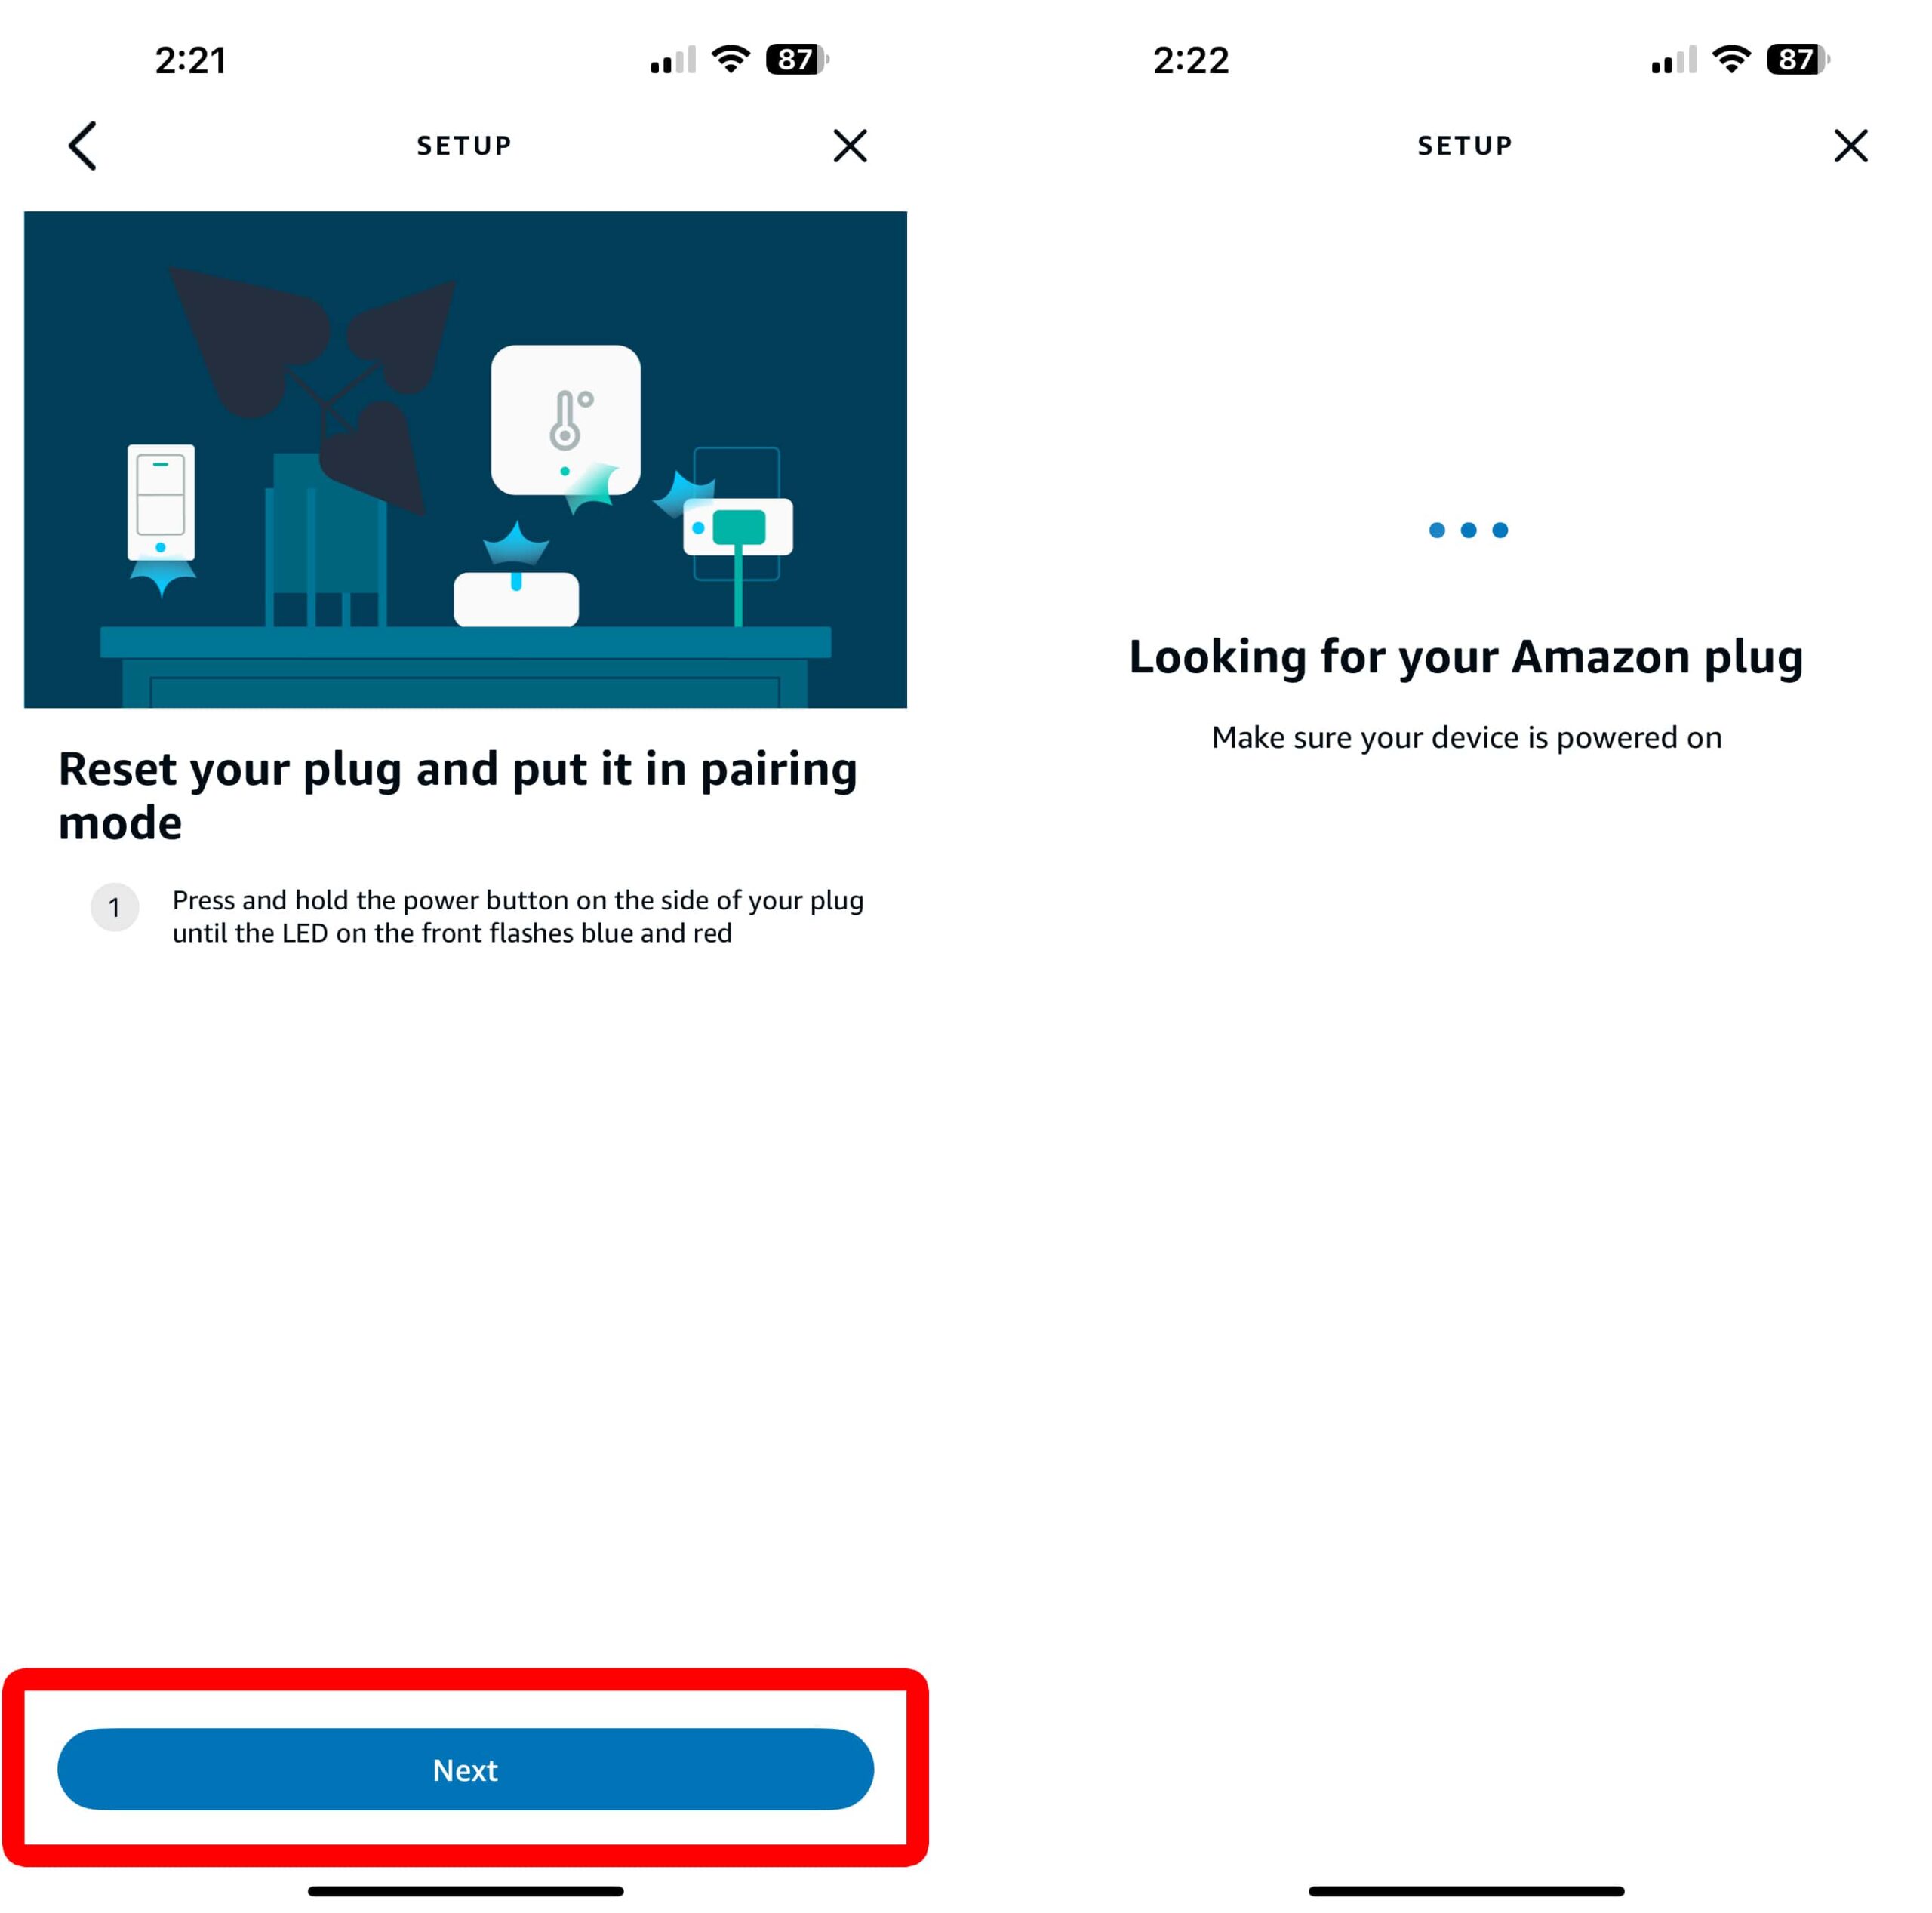
- Choose “Scan Code” or “Don’t Have A Code.” If you select “Scan Code,” use the app to scan a QR code on the back of your device. Simply move your smartphone camera on top of the device. Once you scan the QR code, you’ll need to plug your device back in to complete the setup process.
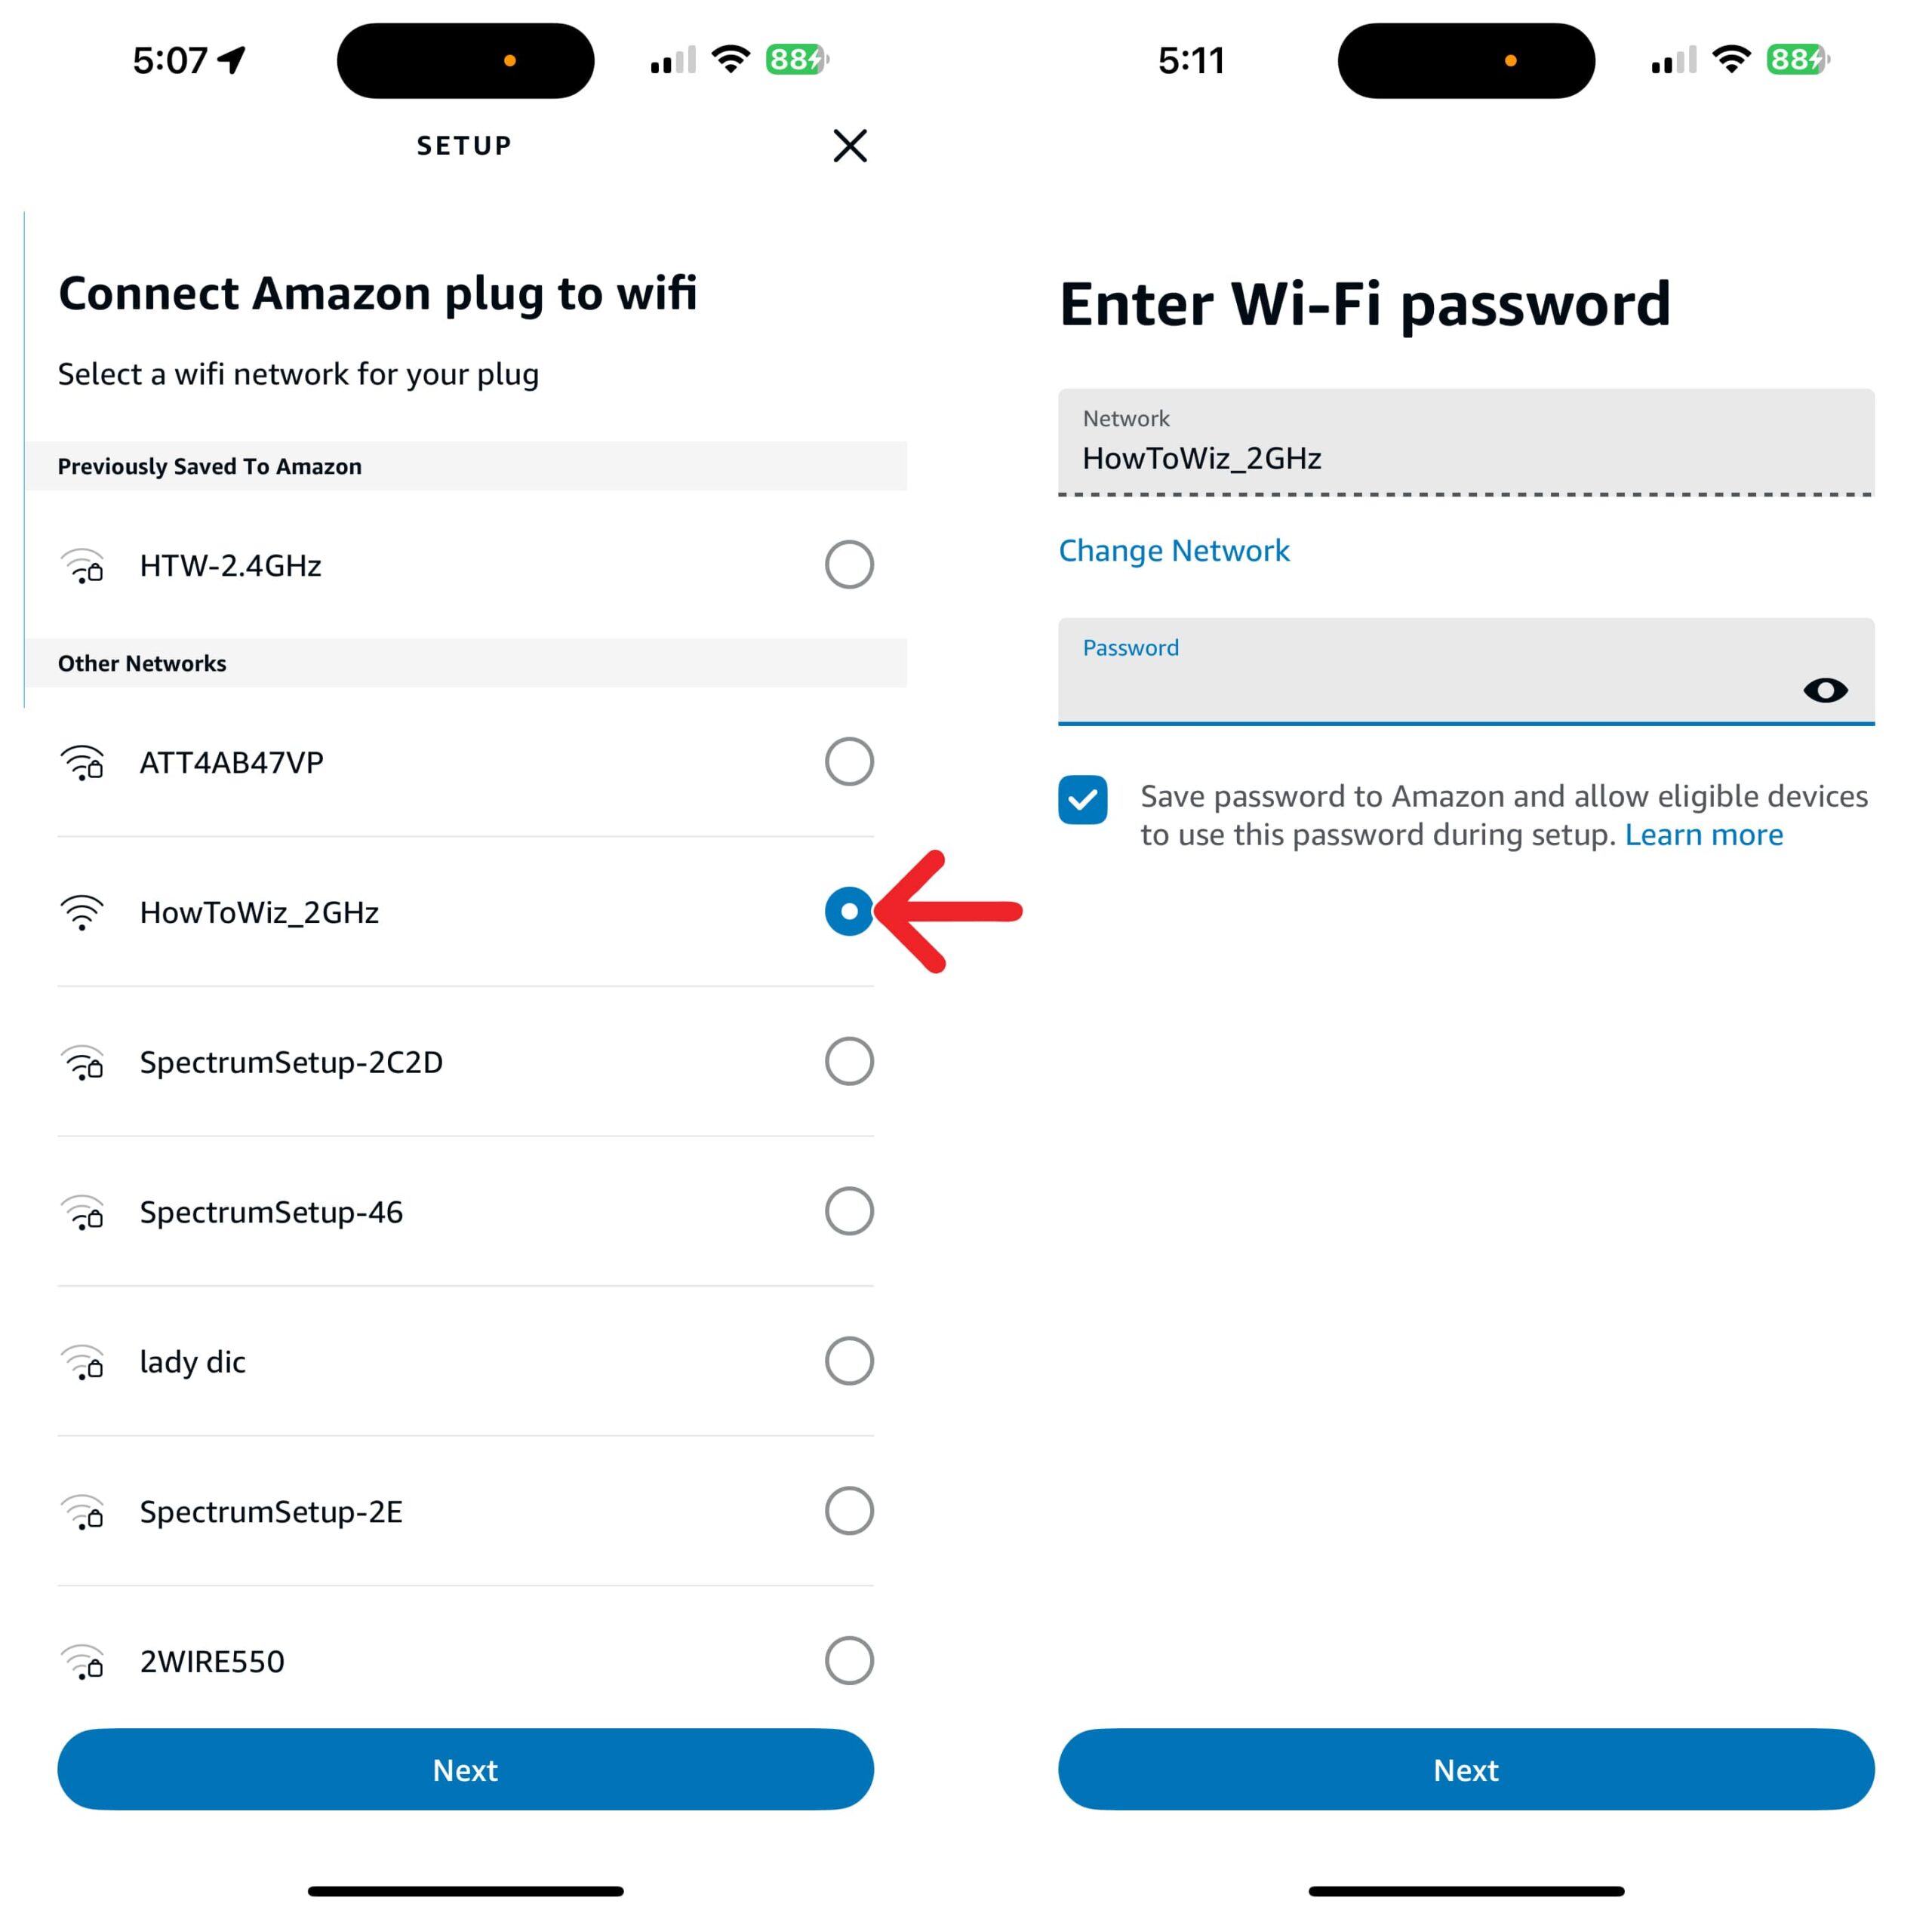
- Select your WiFi network. If this is the first time connecting to this WiFi network, you will also need to enter your password.
- Tap “Next.”
- Select a room and tap “Add to Group.” This lets you add your Amazon Smart Plug to an Alexa group. For example, if you choose “Dining Room,” you can control your smart plug and all other devices in that room by saying, “Alexa, turn off dining room.”
- Finally, tap “Continue > Done.”


The final screen will show the default name Alexa assigned to your smart plug. This is the name you can use to control your device. For example, if your Amazon Smart Plug is named “First plug,” you can control it by saying, “Alexa, turn on First plug.”
However, you can always change your smart plug’s name in the Alexa app settings.
How to Change Smart Plug Settings in the Alexa App
- Open the Alexa app.
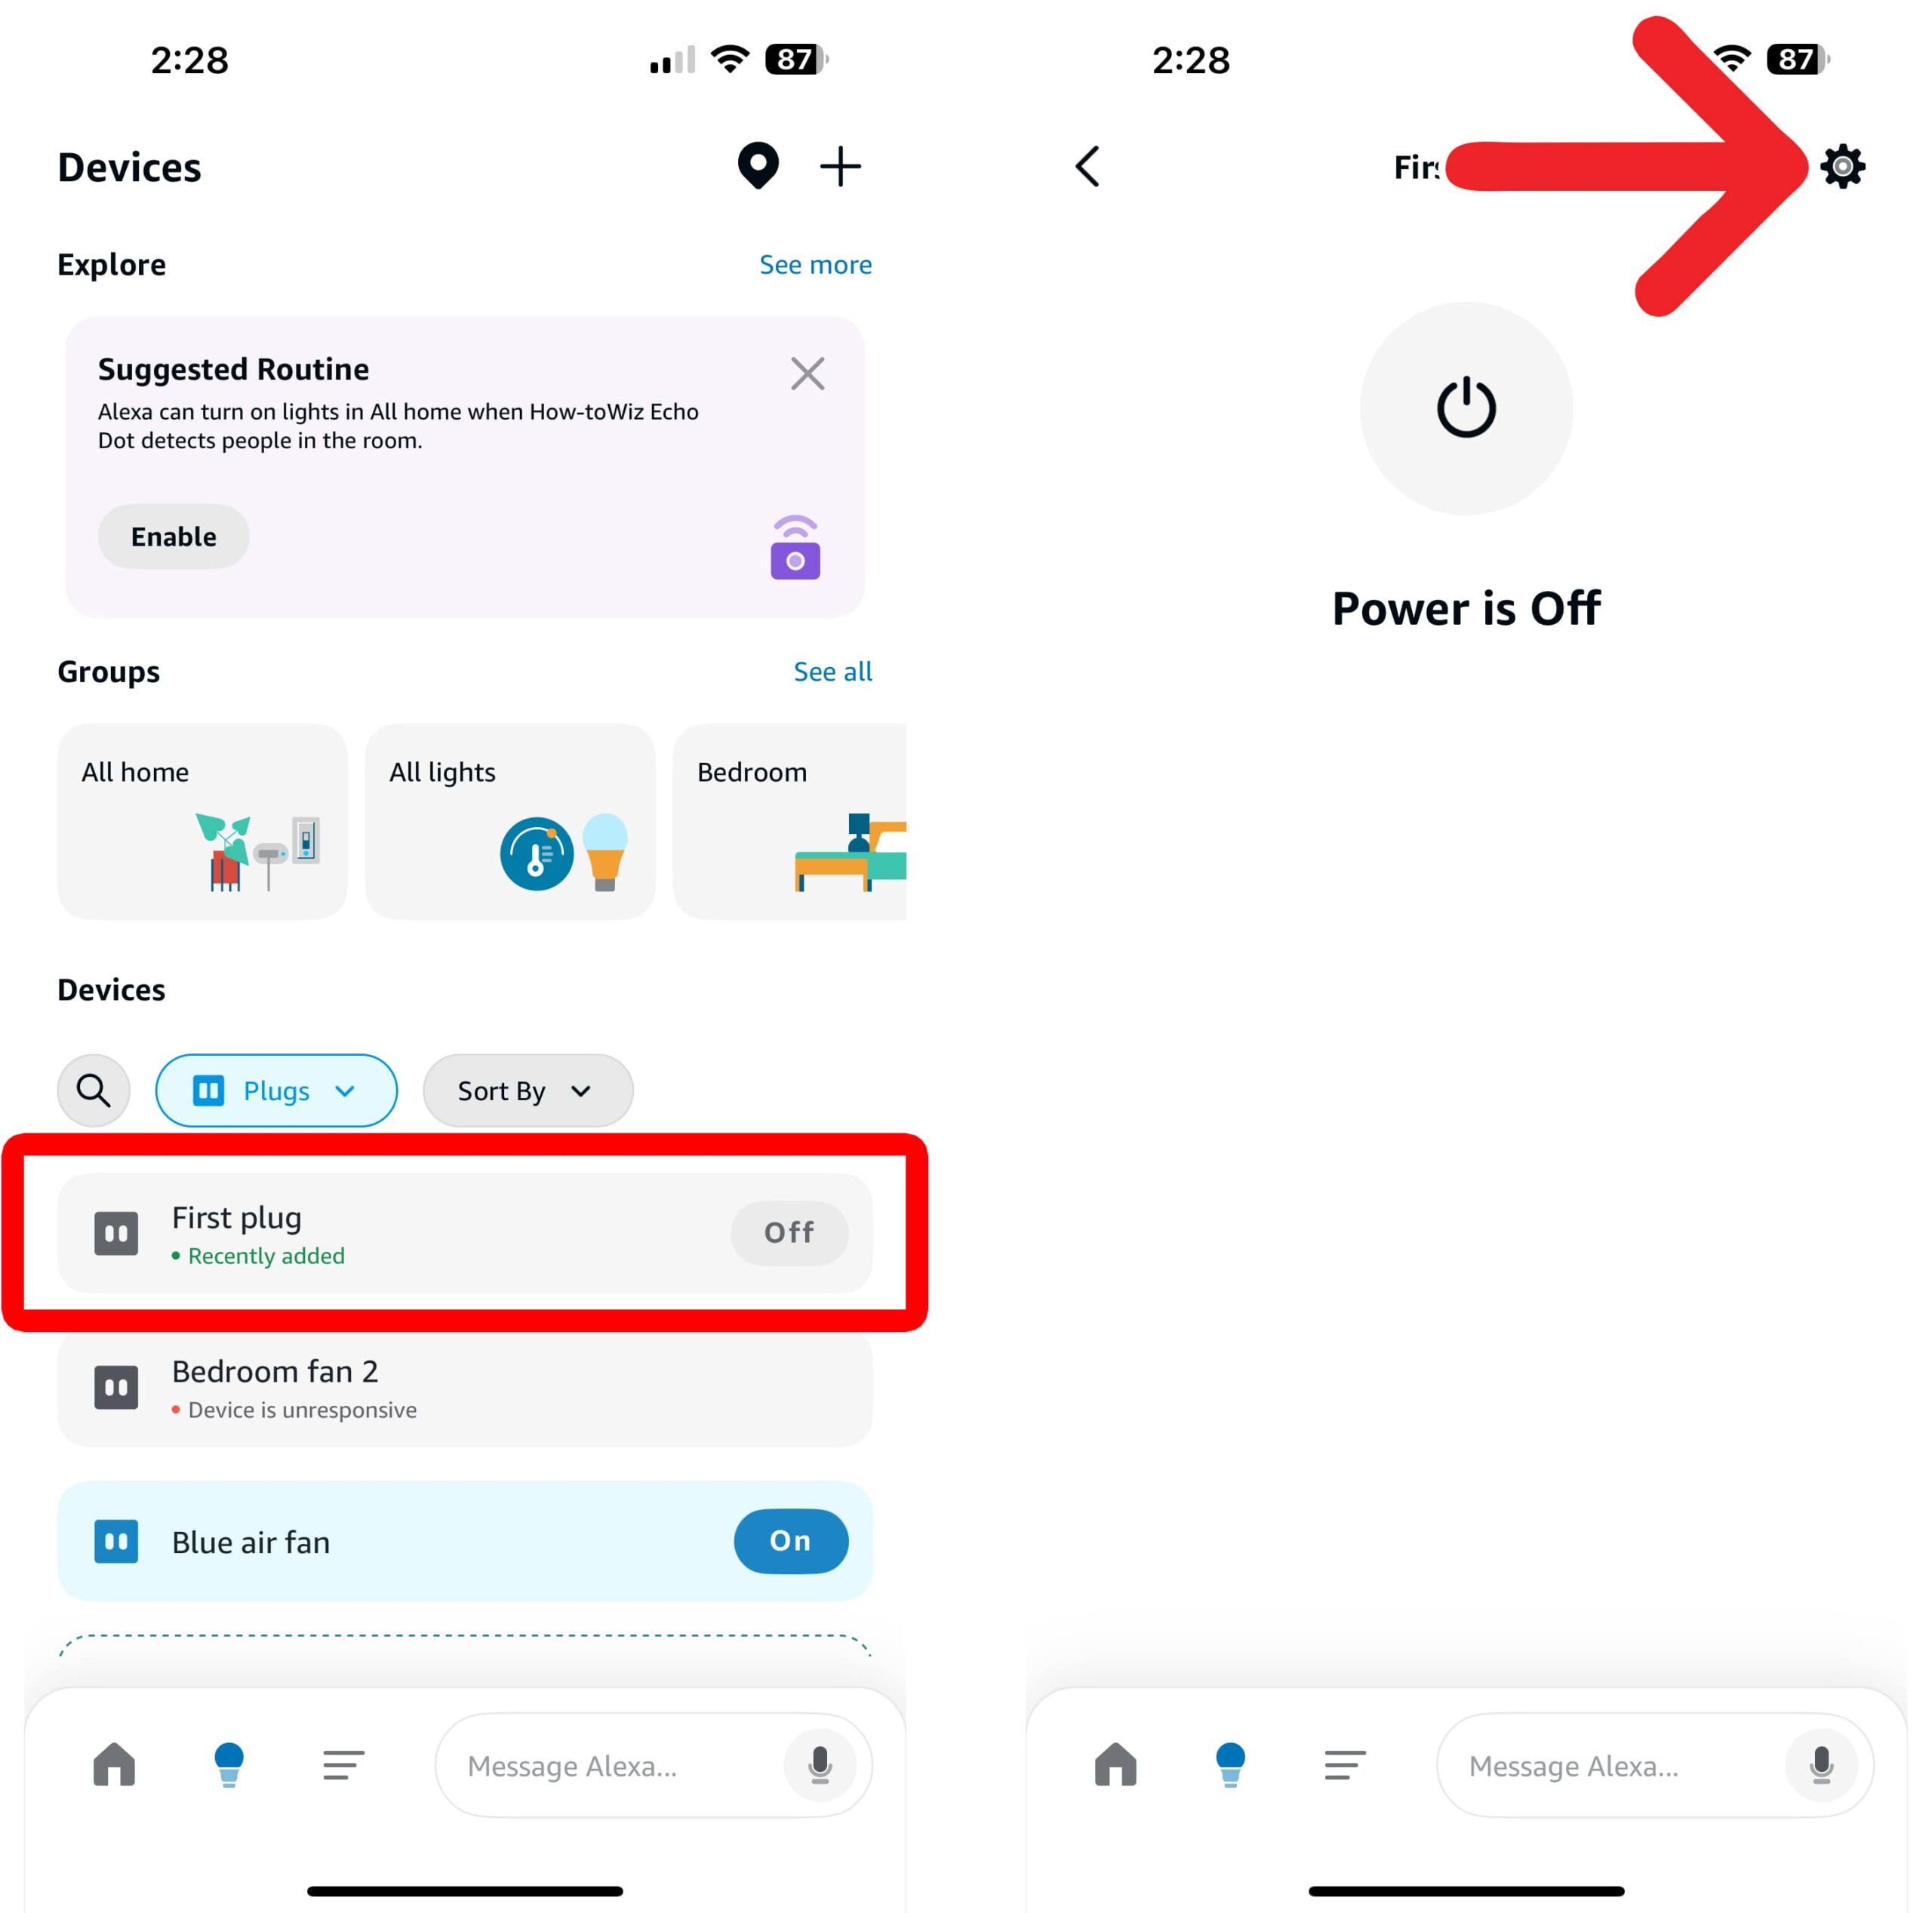
- Go to “Devices.”
- Select your smart plug.
- Tap the gear icon. You will see this in the top-right corner of the screen.
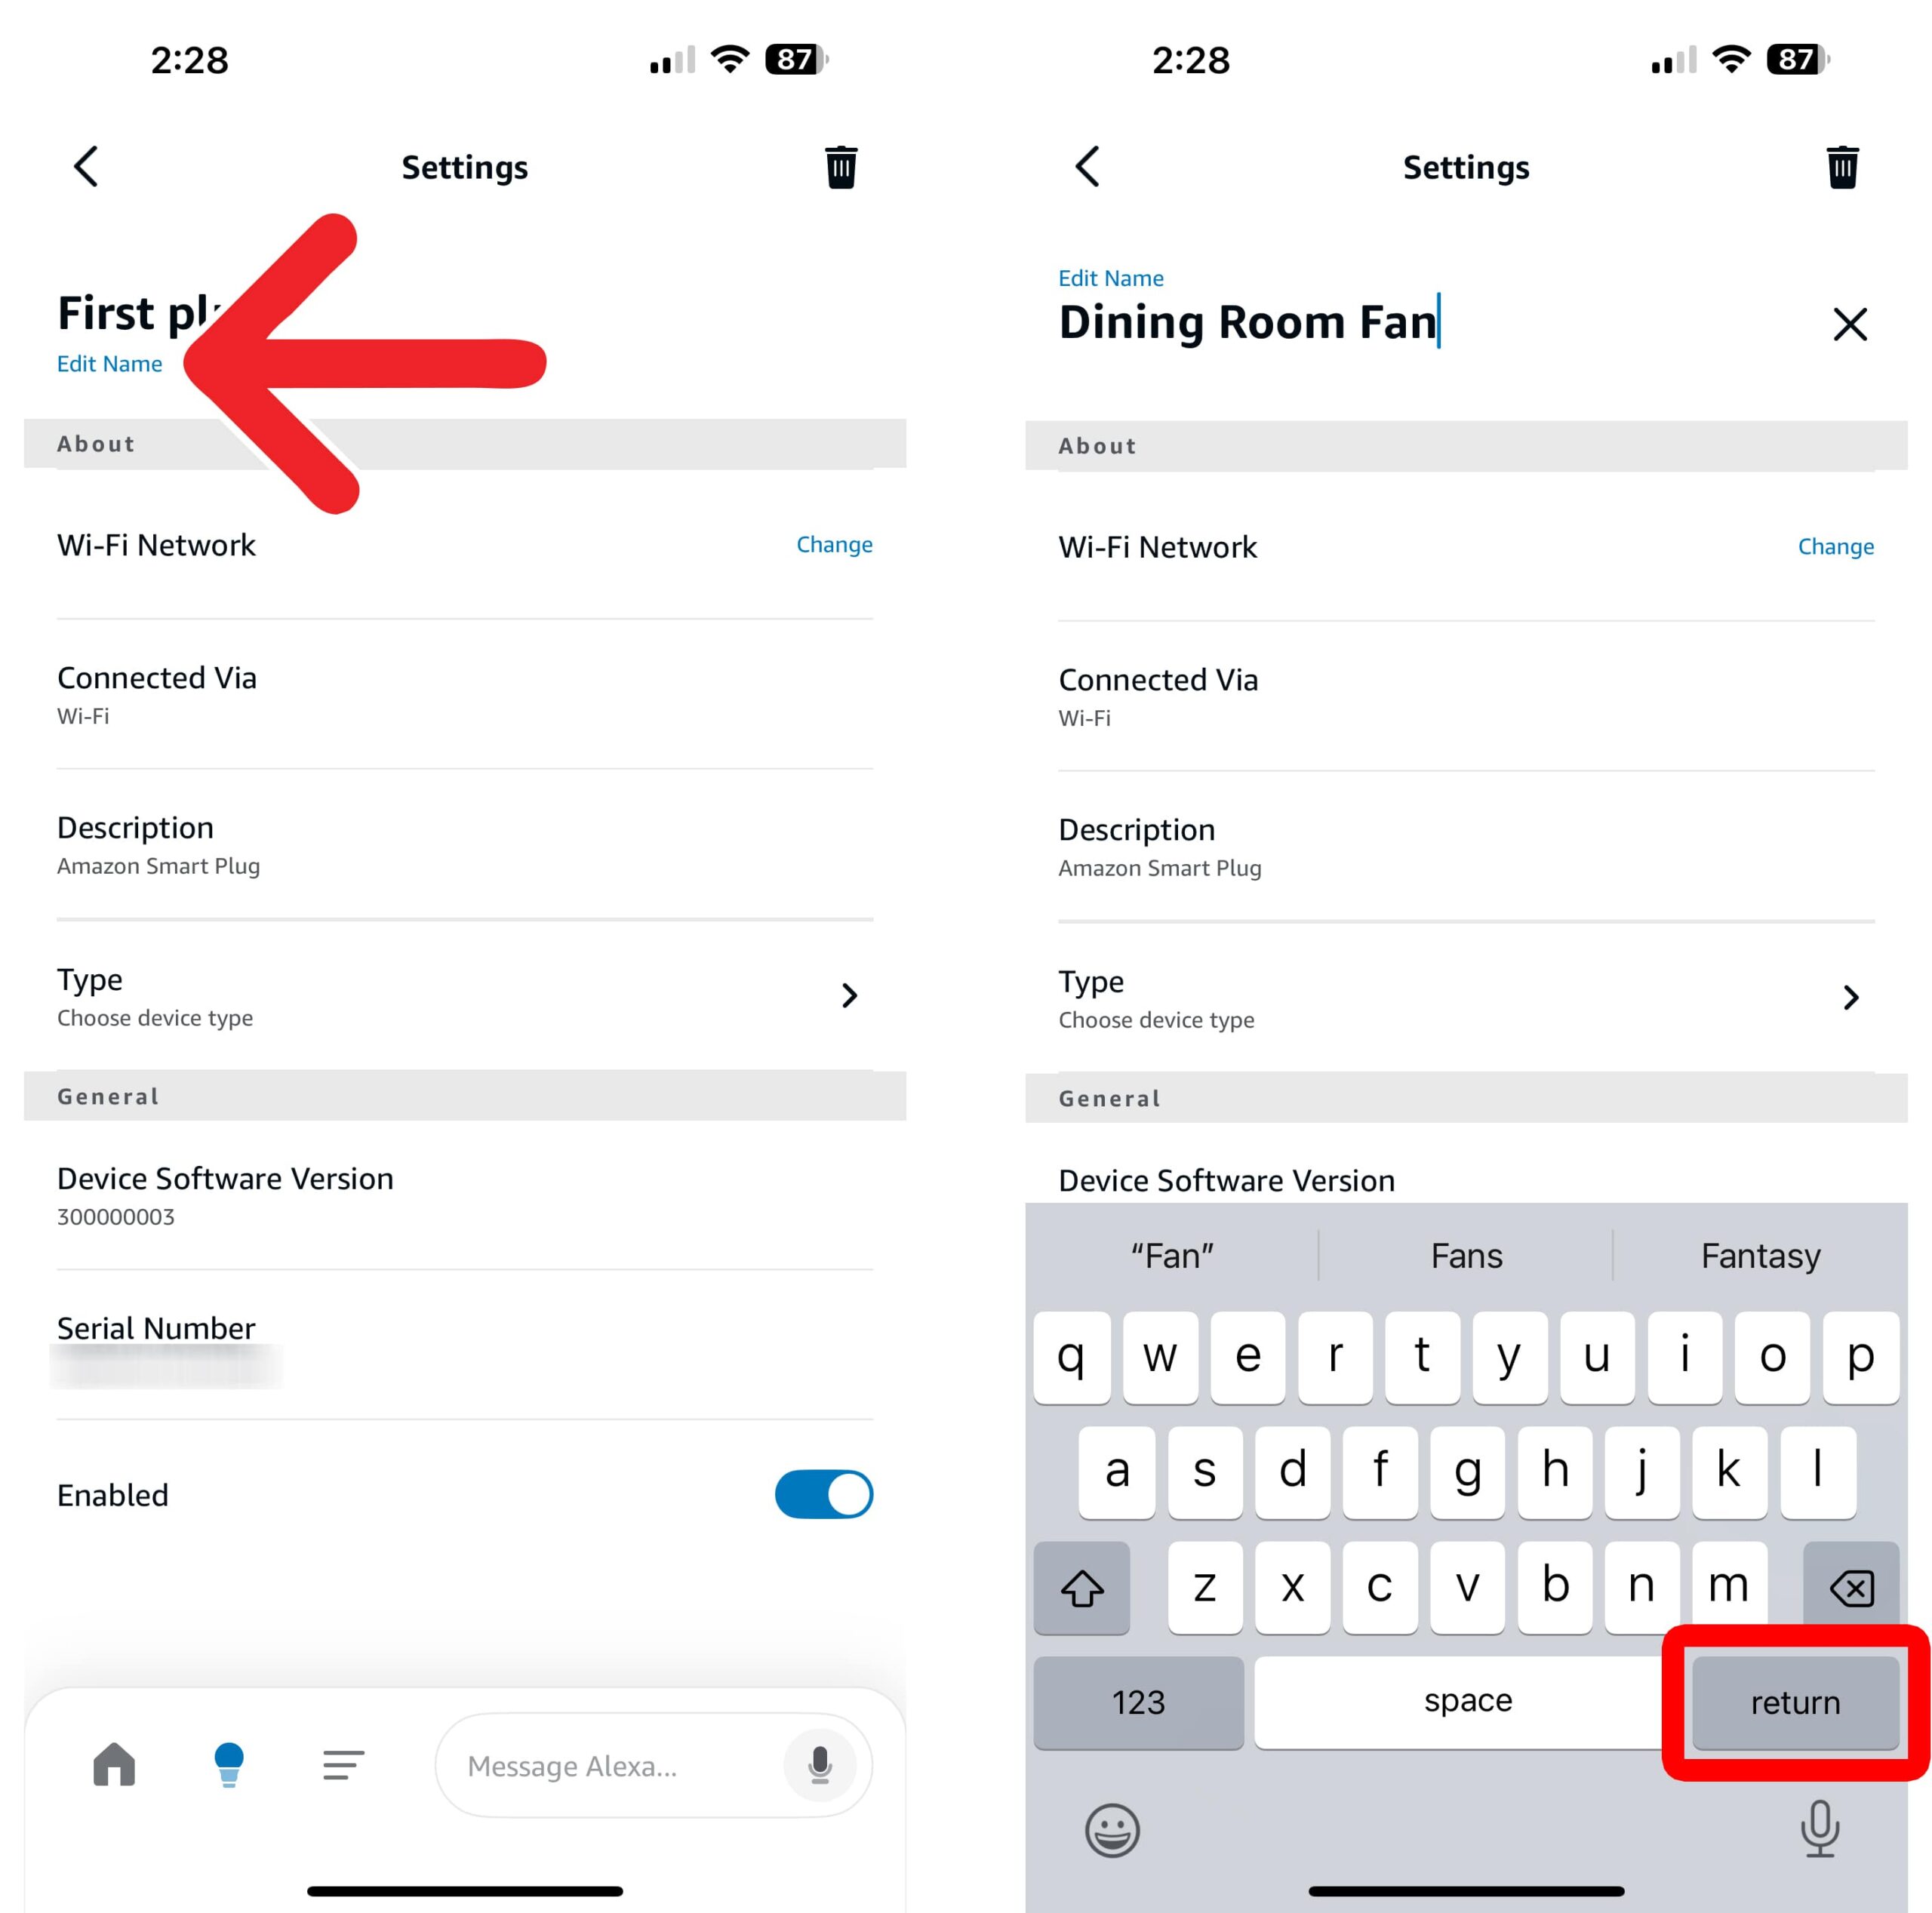
- Tap “Edit Name.” You will see this just below the default name at the top of your screen.
- Finally, enter a new name and tap “Return.”