Tired of notifications popping up in the middle of something important? Do Not Disturb mode can silence those alerts so you can focus on your work, school, or gaming. Here’s how to enable Do Not Disturb mode in Windows 11, schedule it to turn on automatically, and choose which apps can deliver notifications.
How to Quickly Enable Do Not Disturb Mode
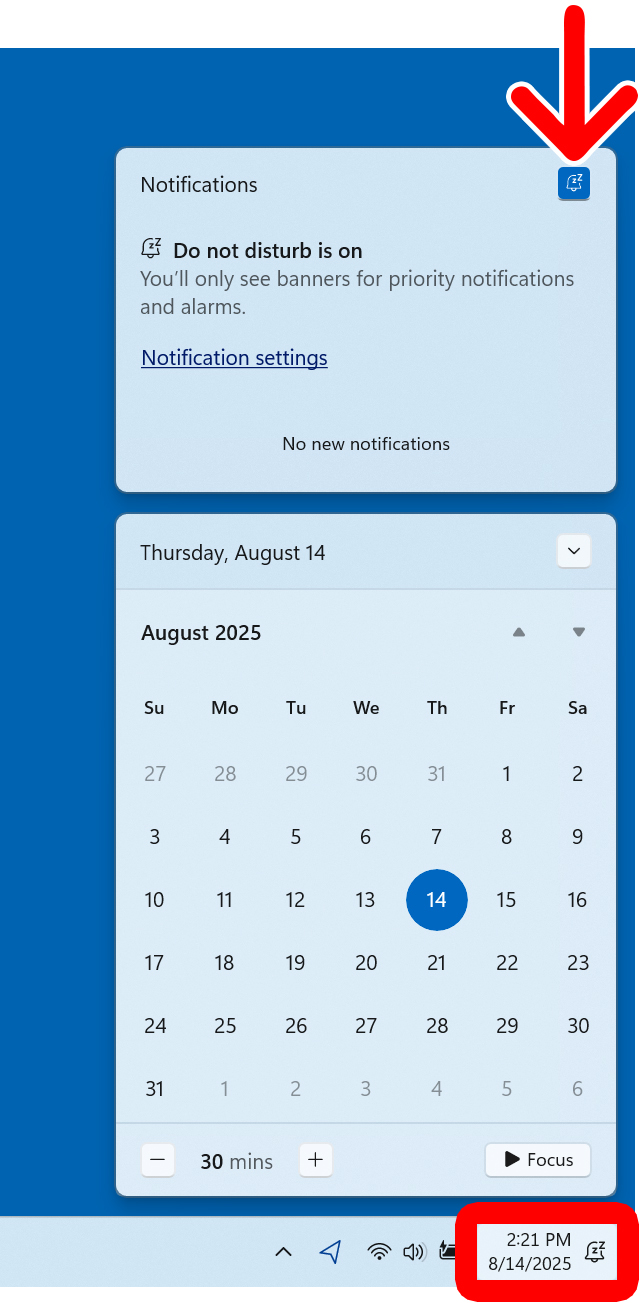
- Left-click the clock at the bottom of your screen. You can also press the Windows + N keys on your keyboard at the same time.
- Select the snooze icon to enable Do Not Disturb mode. You will see this in the top-right corner of the Notification Center. If the snooze button is blue, that means Do Not Disturb mode is turned on.

If you don’t want to click this button every time you want to turn on Do Not Disturb mode, or you want to permanently disable Do Not Disturb mode, you’ll need to go into your Windows 11 settings.
How to Turn On Do Not Disturb Mode in Windows 11
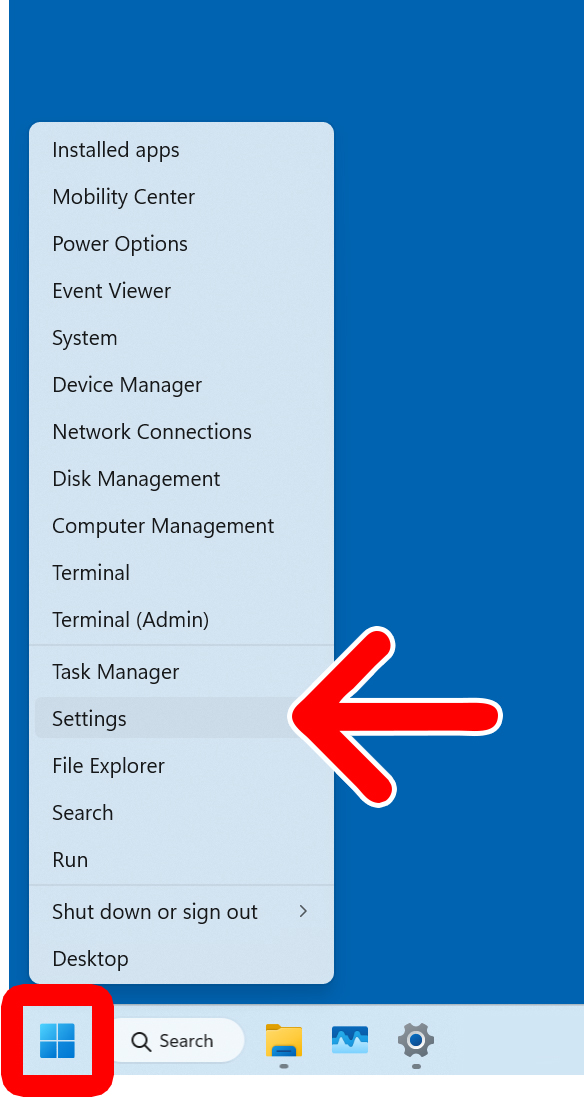
To turn on Do Not Disturb mode, right-click the Windows logo at the bottom of your screen and select “Settings.” Then go to “System” in the left sidebar and select “Notifications.” Finally, turn on the toggle next to “Do not disturb.”
- Right-click the Windows logo at the bottom of your screen.
- Select “Settings.”

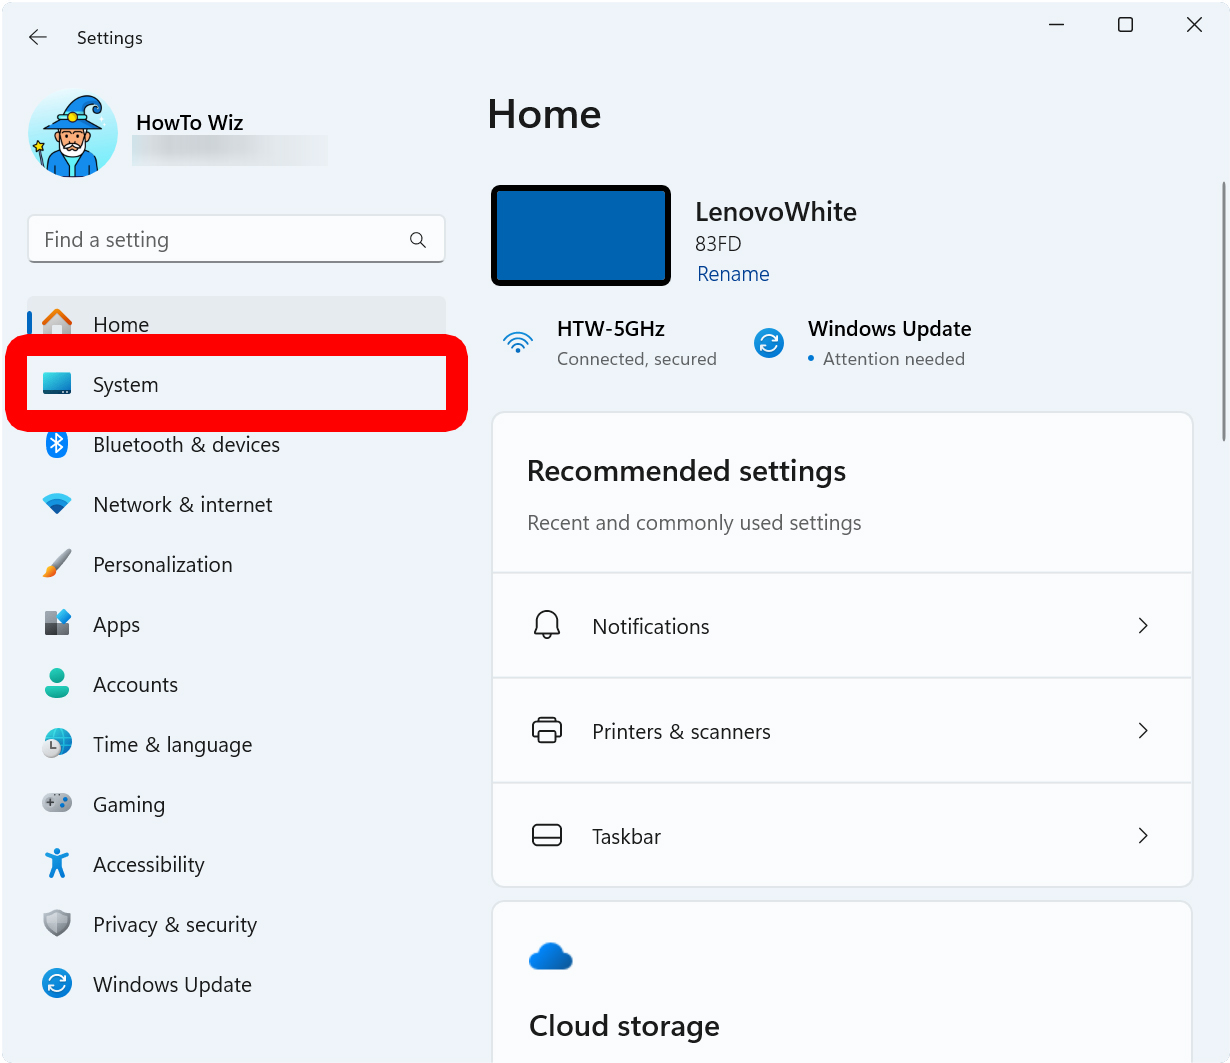
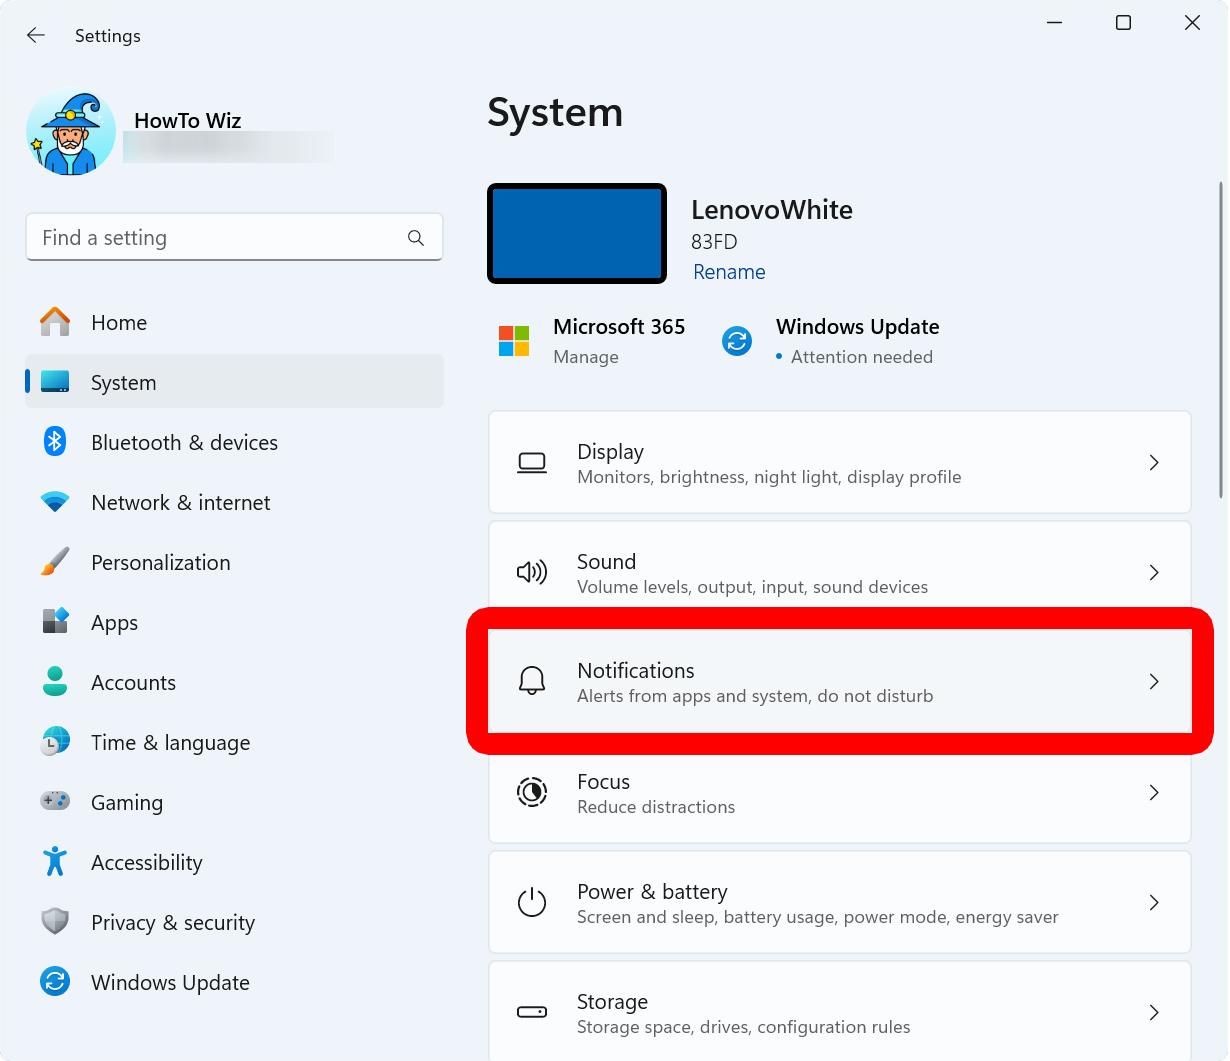
- Go to “System.” You will see this in the left sidebar menu of the Settings window. If you don’t see it, try expanding the Settings window.

- Select “Notifications.”

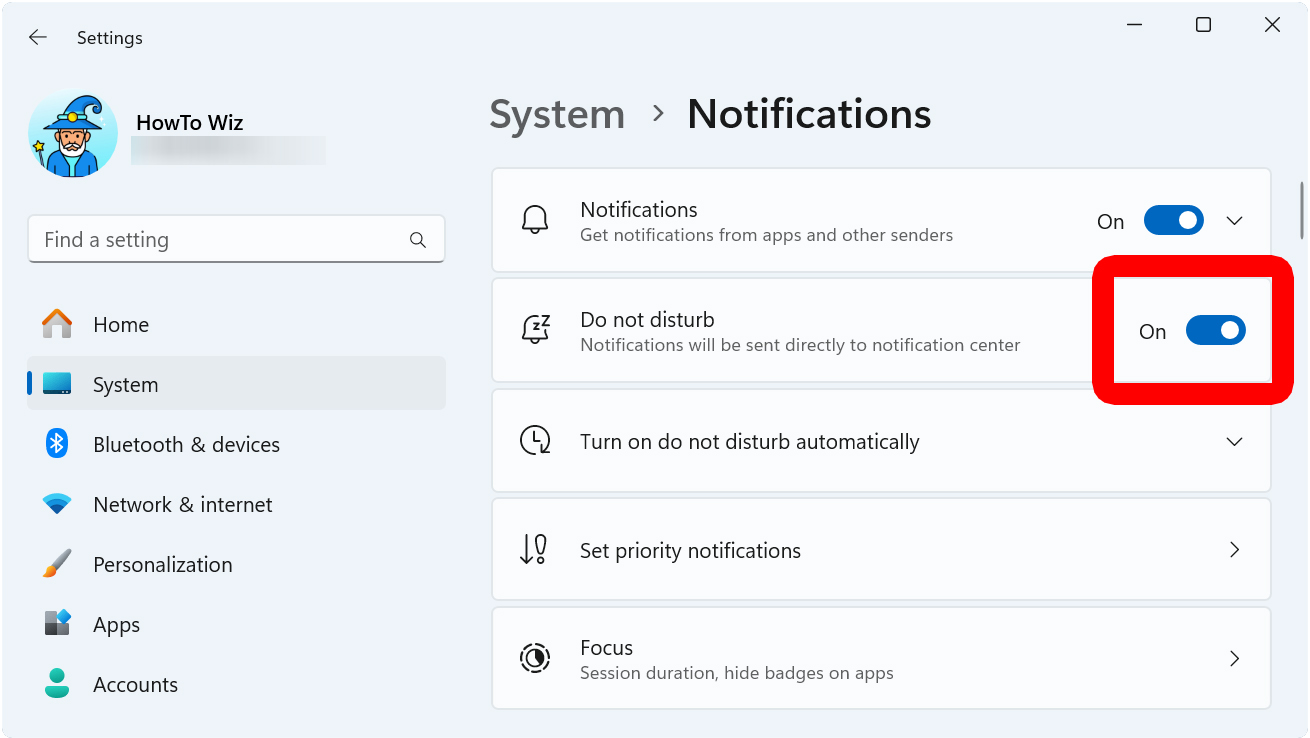
- Finally, turn on the toggle next to “Do not disturb.”

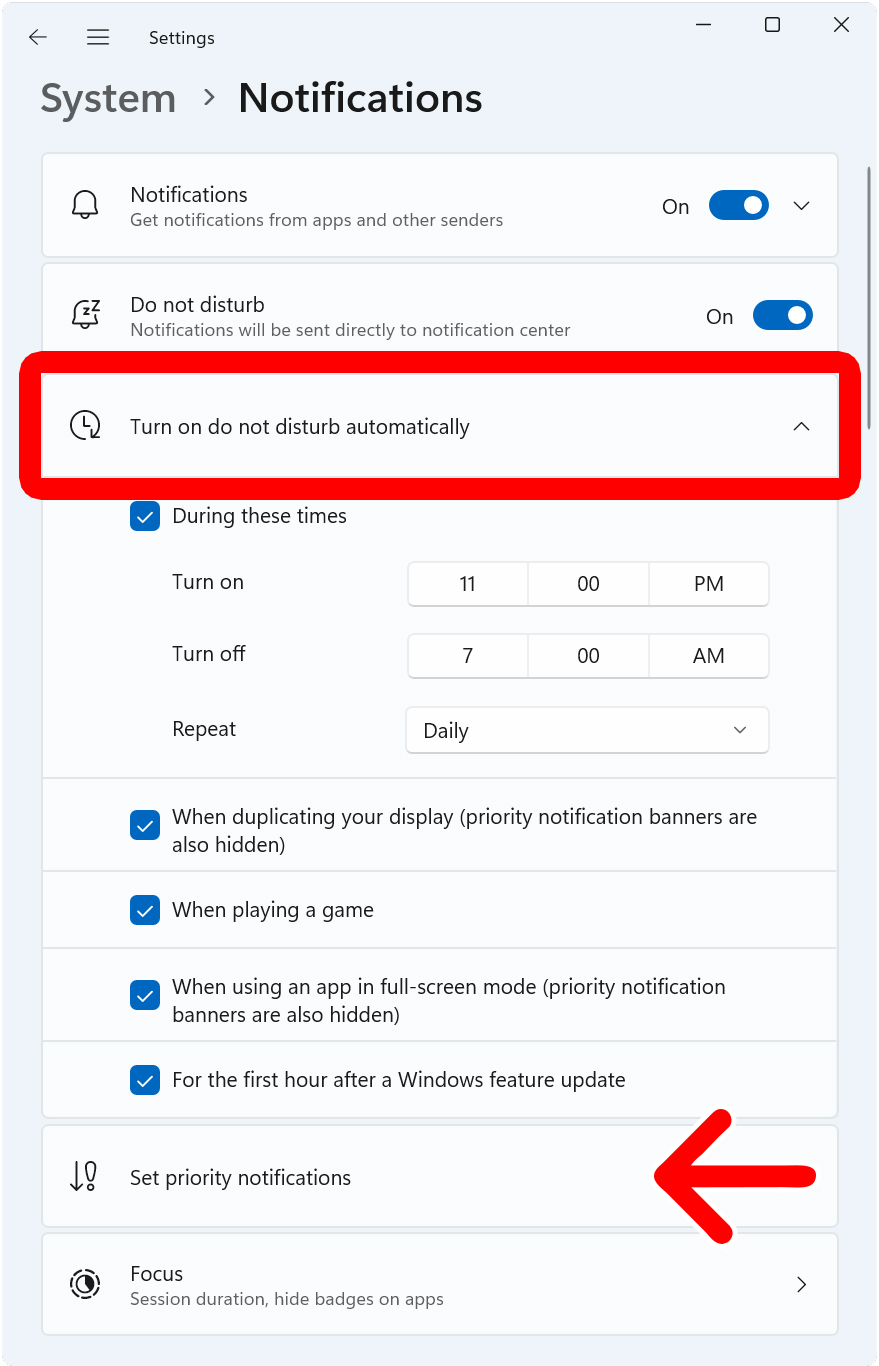
If you want to keep Do Not Disturb mode permanently turned on or off, make sure to scroll down and select “Turn on do not disturb automatically.” Then you can set a schedule to turn on Do Not Disturb between set times every day, on weekdays, or on weekends.
Next, select “Set priority notifications” and click “Add apps” to choose which apps and services will continue to deliver notifications while Do Not Disturb mode is enabled.
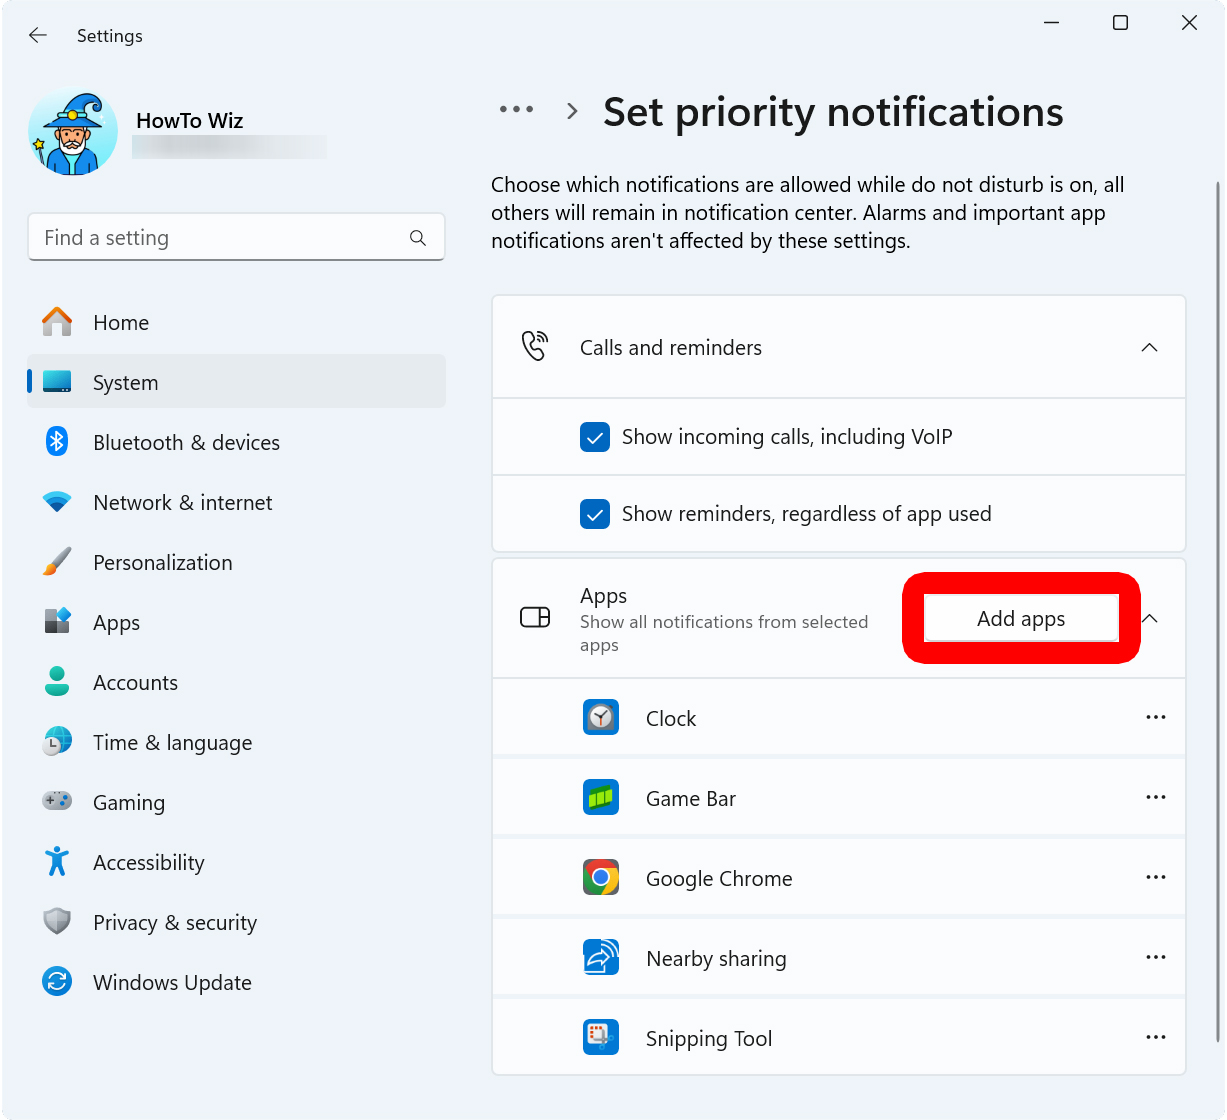
To remove apps from sending notifications while Do Not Disturb mode is enabled, click the three-dot icon next to an app and then select “Remove.”

Read More: How to Turn Off Chrome Notifications
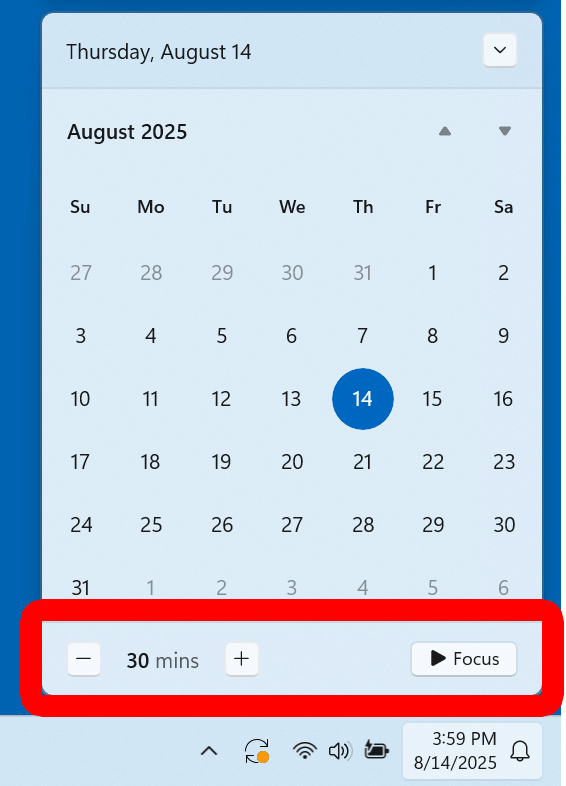
For even more control, go back to the Notifications settings page and select “Focus.”
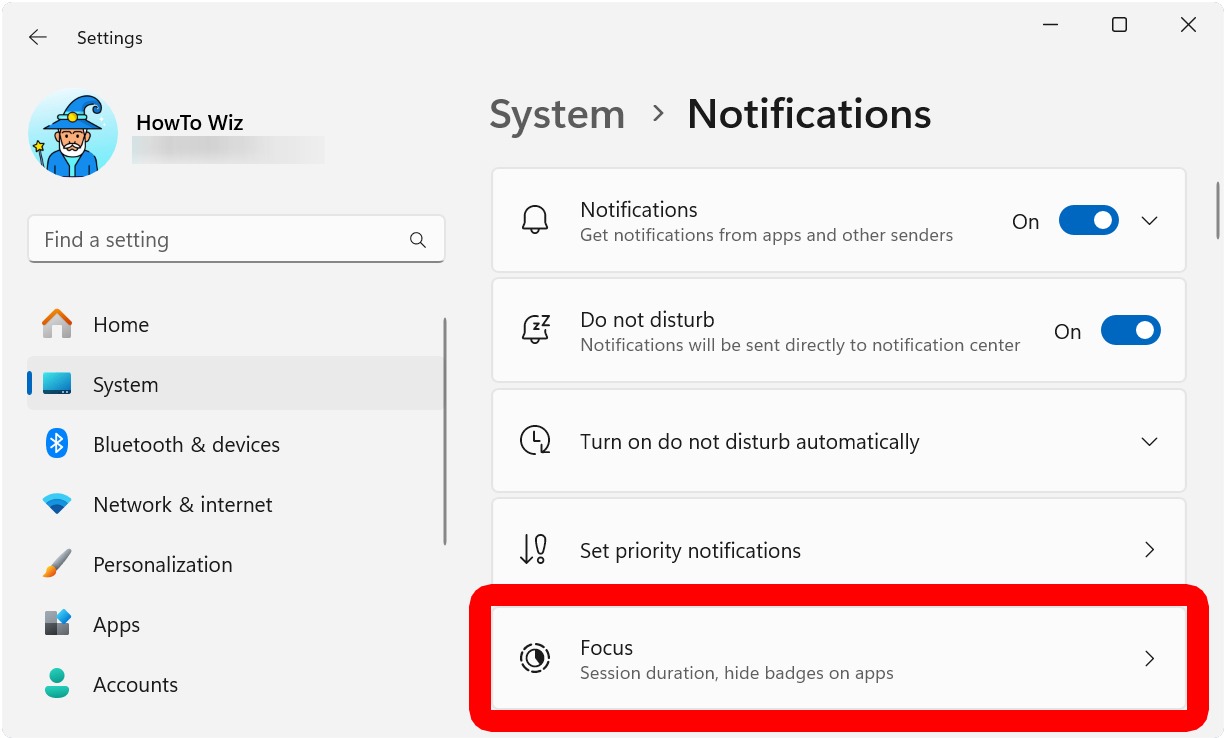
From here, you can click “Start focus session” to turn on Do Not Disturb mode and hide all badges and flashing apps in the taskbar for a certain period of time.
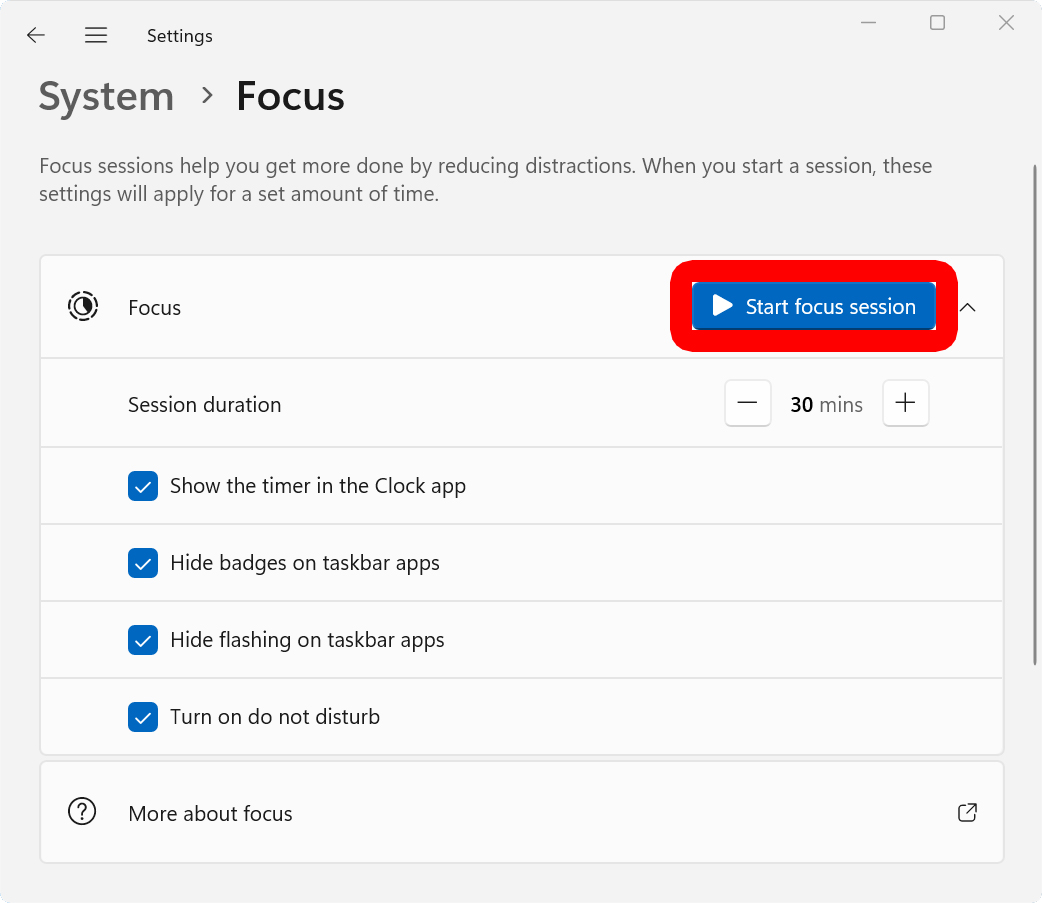
Then you can easily turn on Do Not Disturb mode and change the duration by left-clicking the clock in the bottom-right corner of your screen and selecting “Focus.”