Your iPhone is great at taking photos, but the small screen makes it hard to see them in full detail. Importing them to a Mac makes it easier to view, organize, and back up your pictures so your memories stay safe. Here’s how to import photos from your iPhone to a Mac, how to send them to a specific folder, and how to import them wirelessly.
Read More: How to Change the Wallpaper on a Mac
How to Import to the Photos App
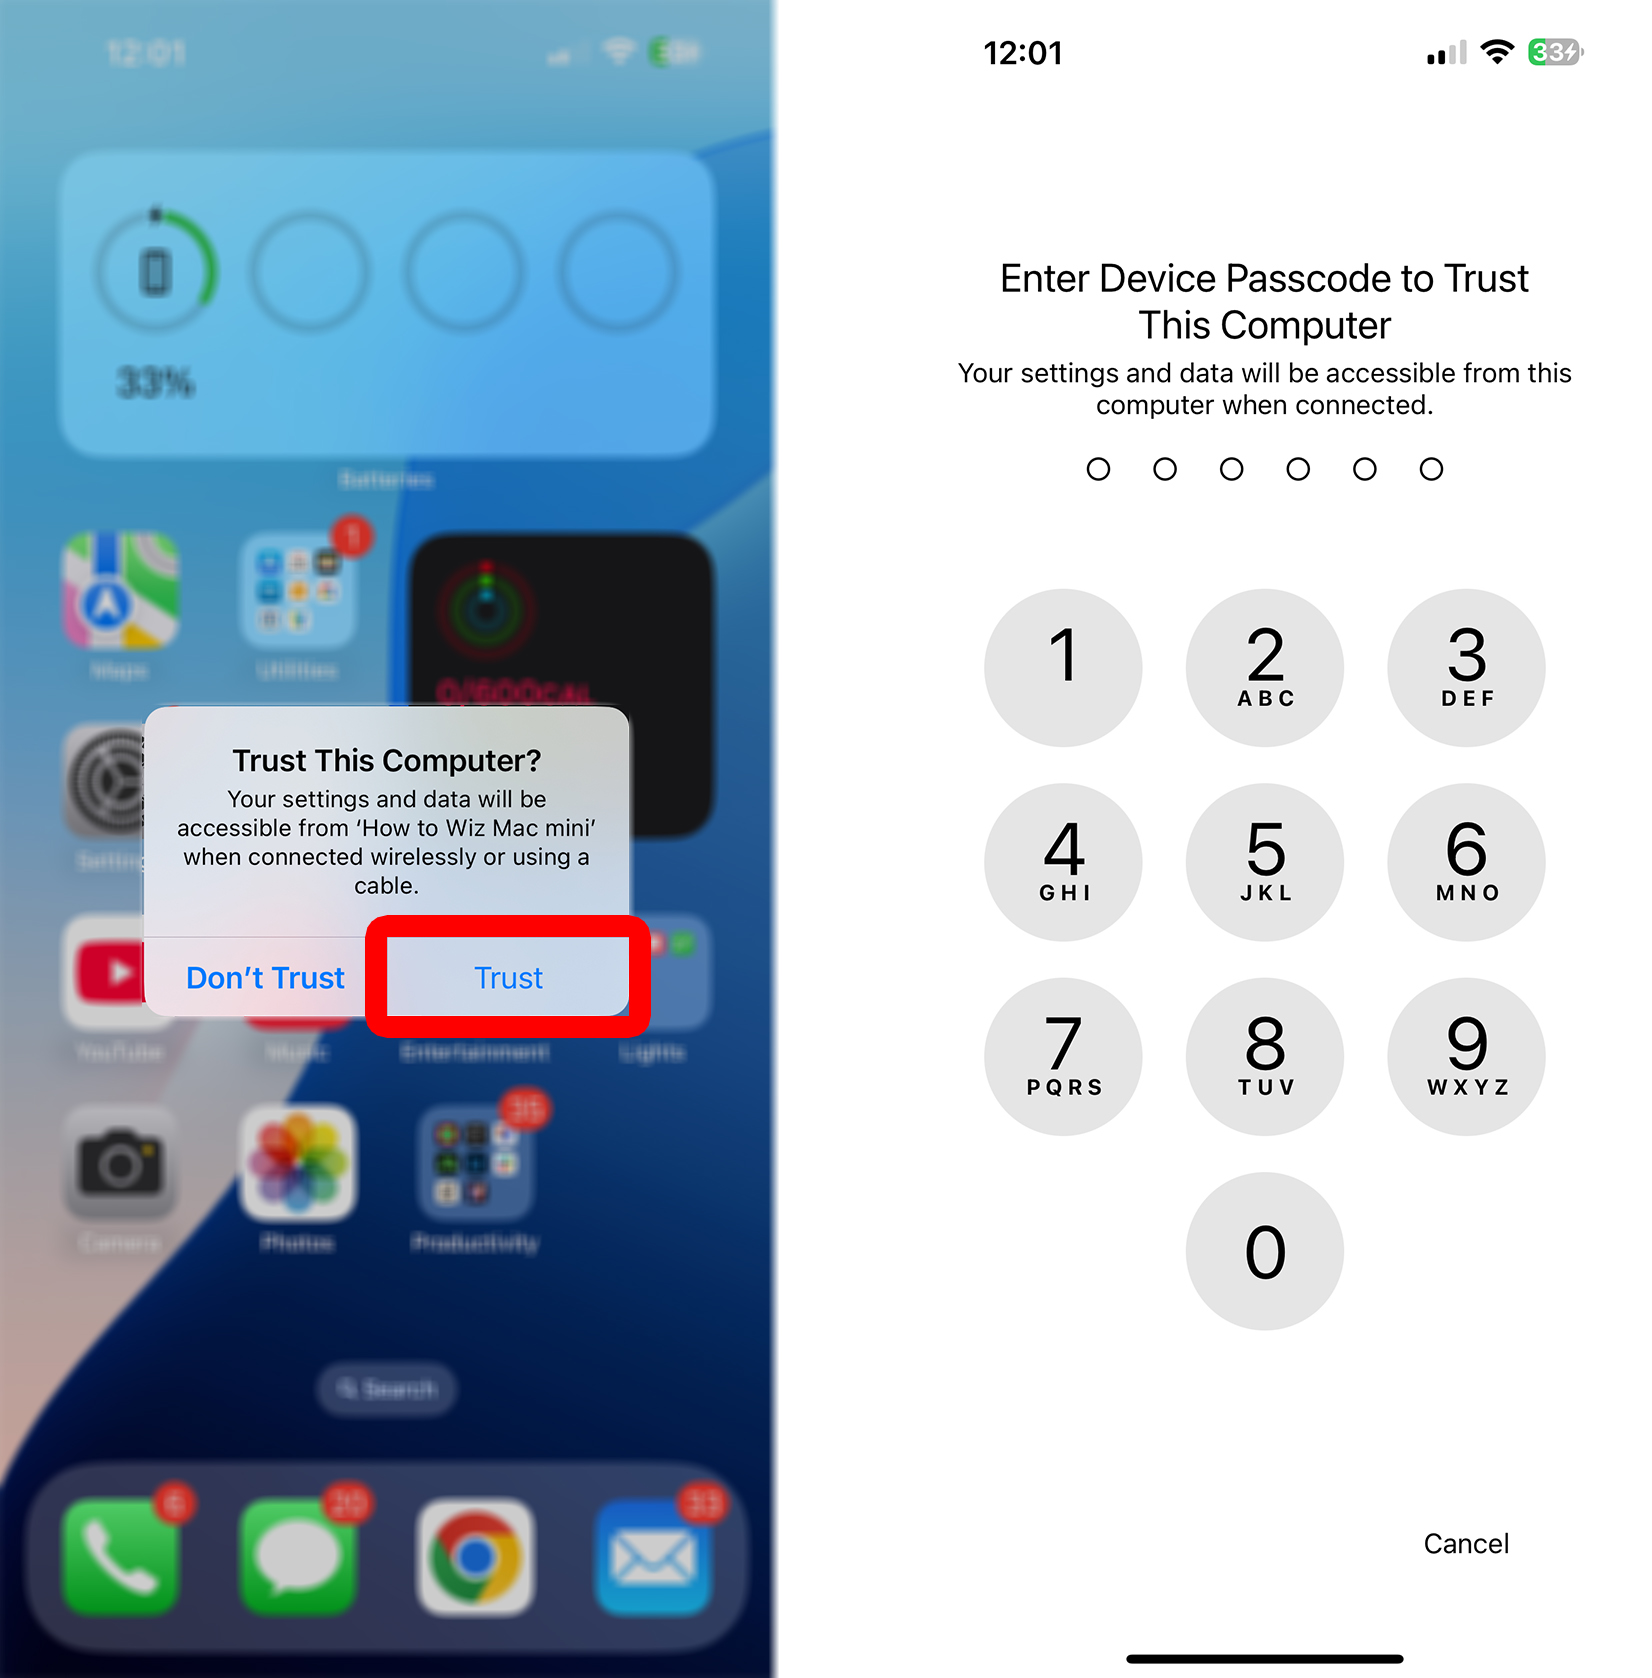
To import your photos, unlock your iPhone and plug it into a Mac. Then open the Photos app on the Mac and select your iPhone from the app’s left sidebar. Finally, choose the photos you want to import and click “Import Selected” or “Import All New Photos.”
- Plug your iPhone into a Mac. To transfer your photos faster, use a USB-C cable (or a Lightning to USB-C cable if you have an iPhone 14 or earlier model).

- Unlock your iPhone. To do this, swipe up from the bottom of your screen and log in with Face ID, Touch ID, or your iPhone passcode.

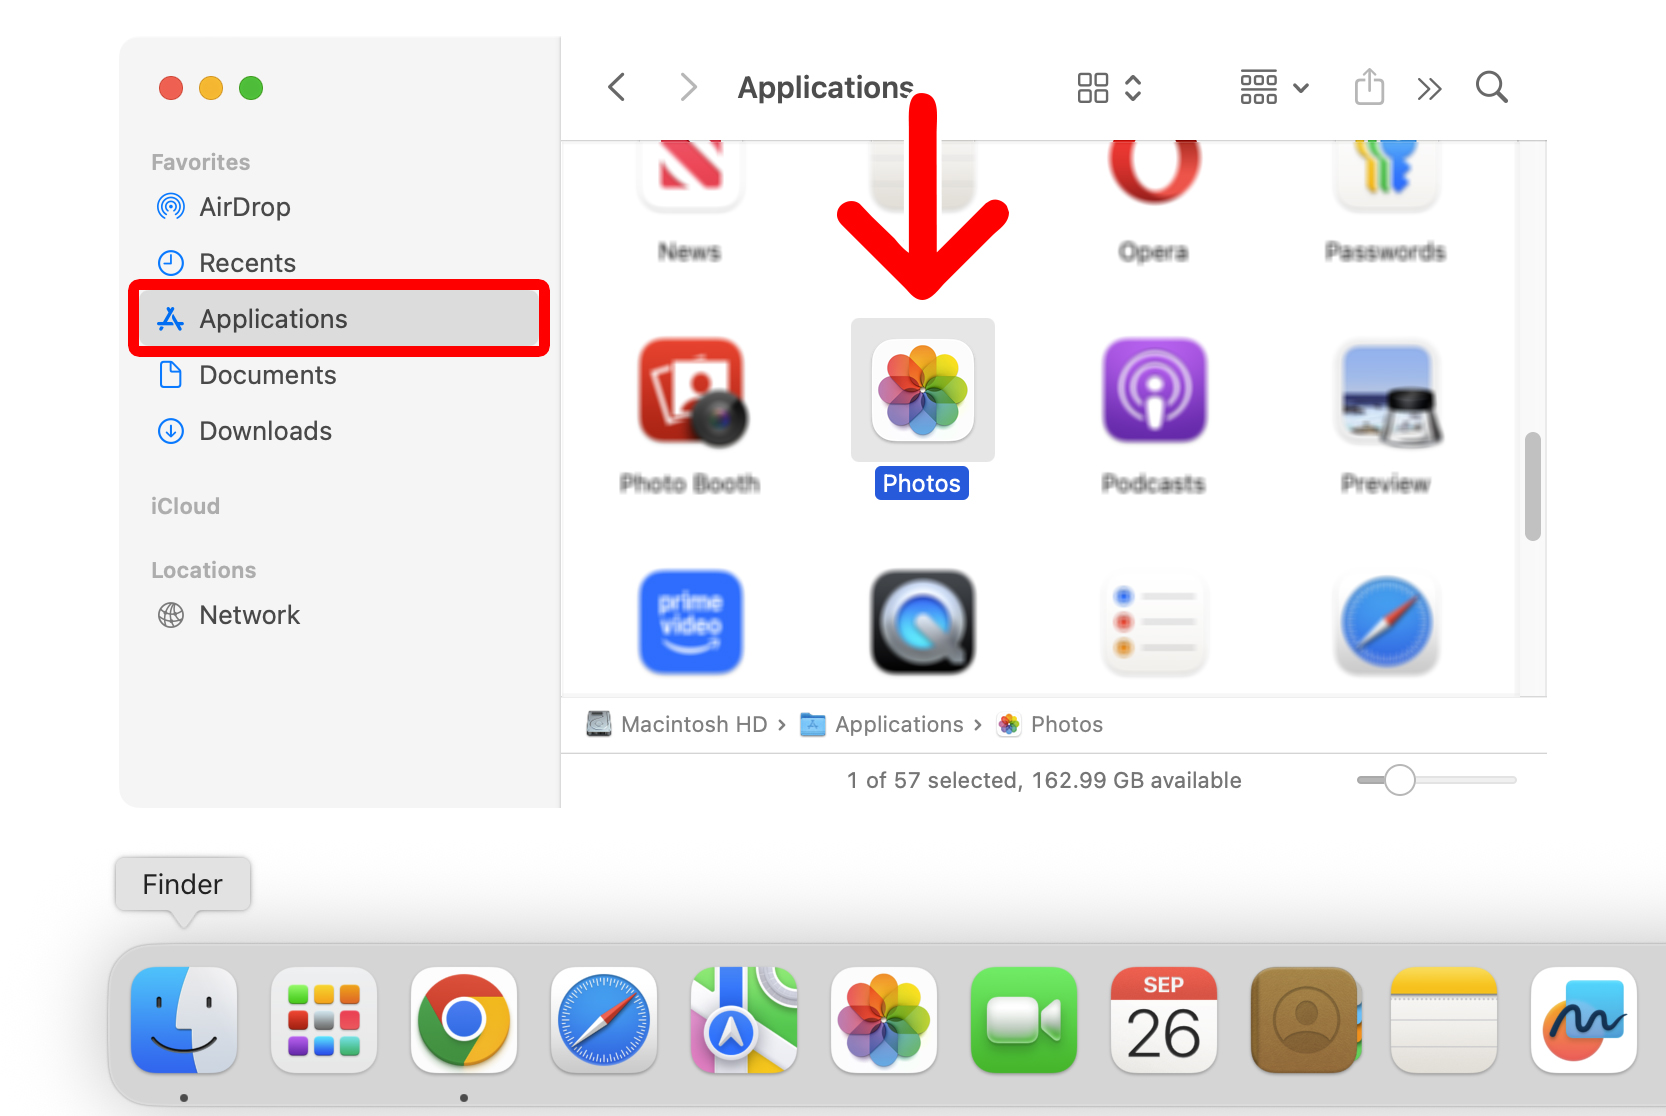
- Open the Photos app on your Mac. This is an app that comes pre-installed on all Macs. You can find it by opening a Finder window and then selecting “Applications” in the left sidebar.

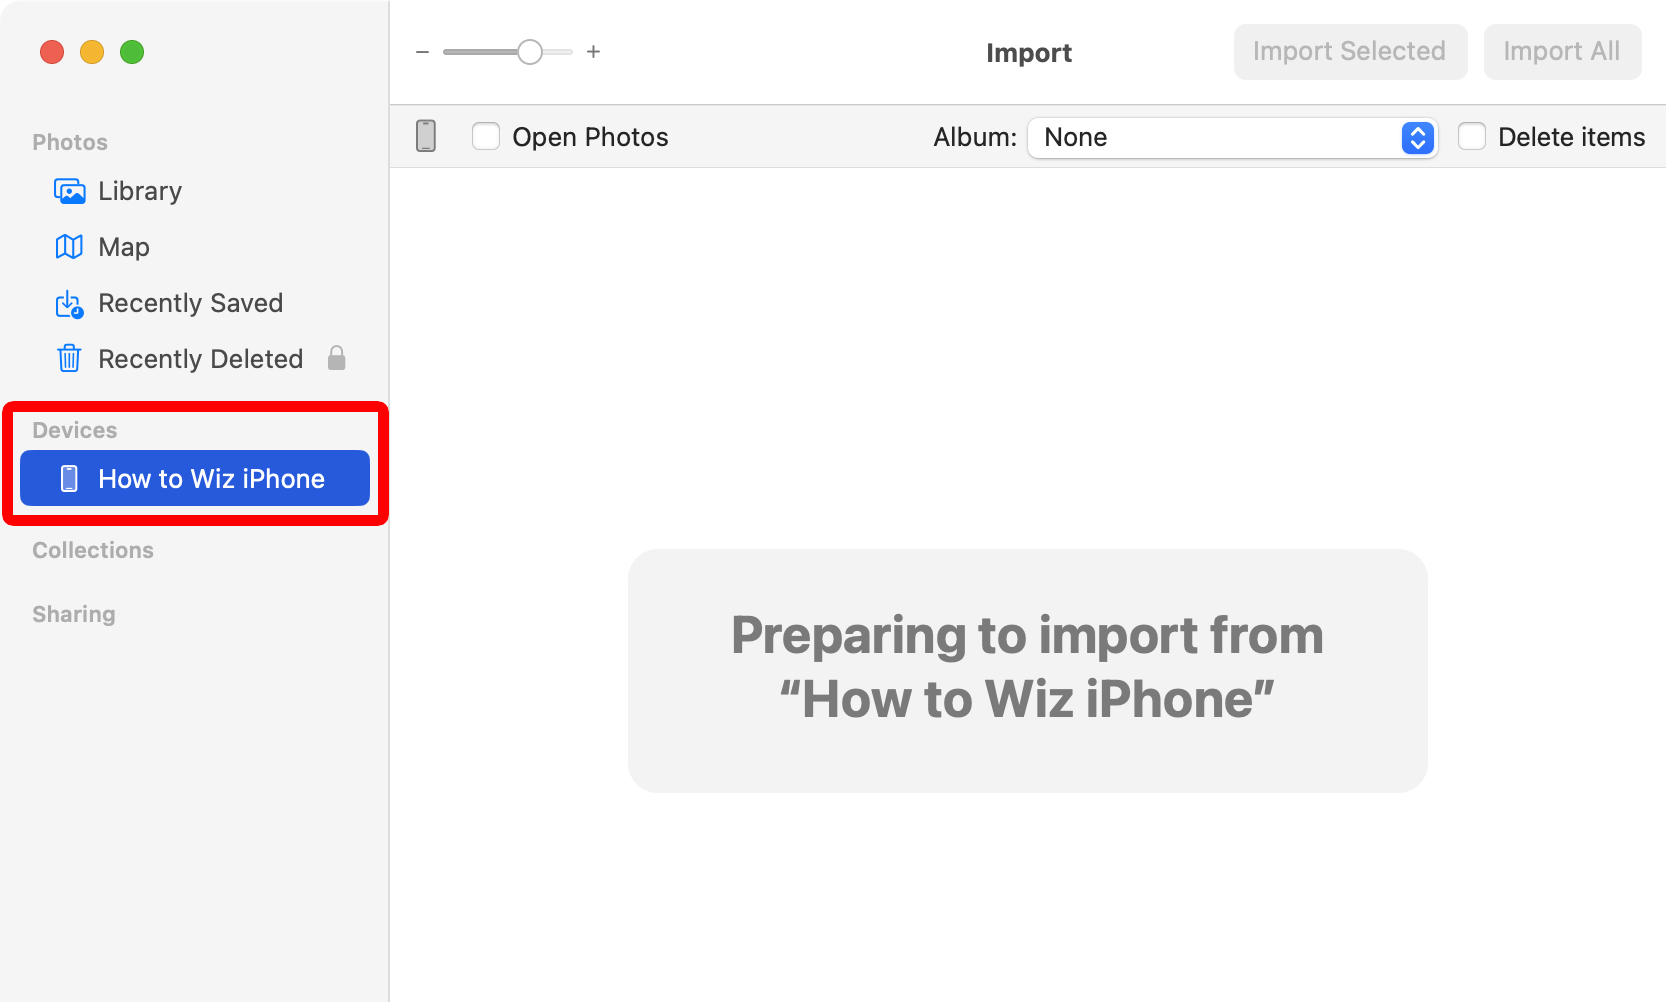
- Select your iPhone in the Photos app. It will appear under “Devices” in the left sidebar.

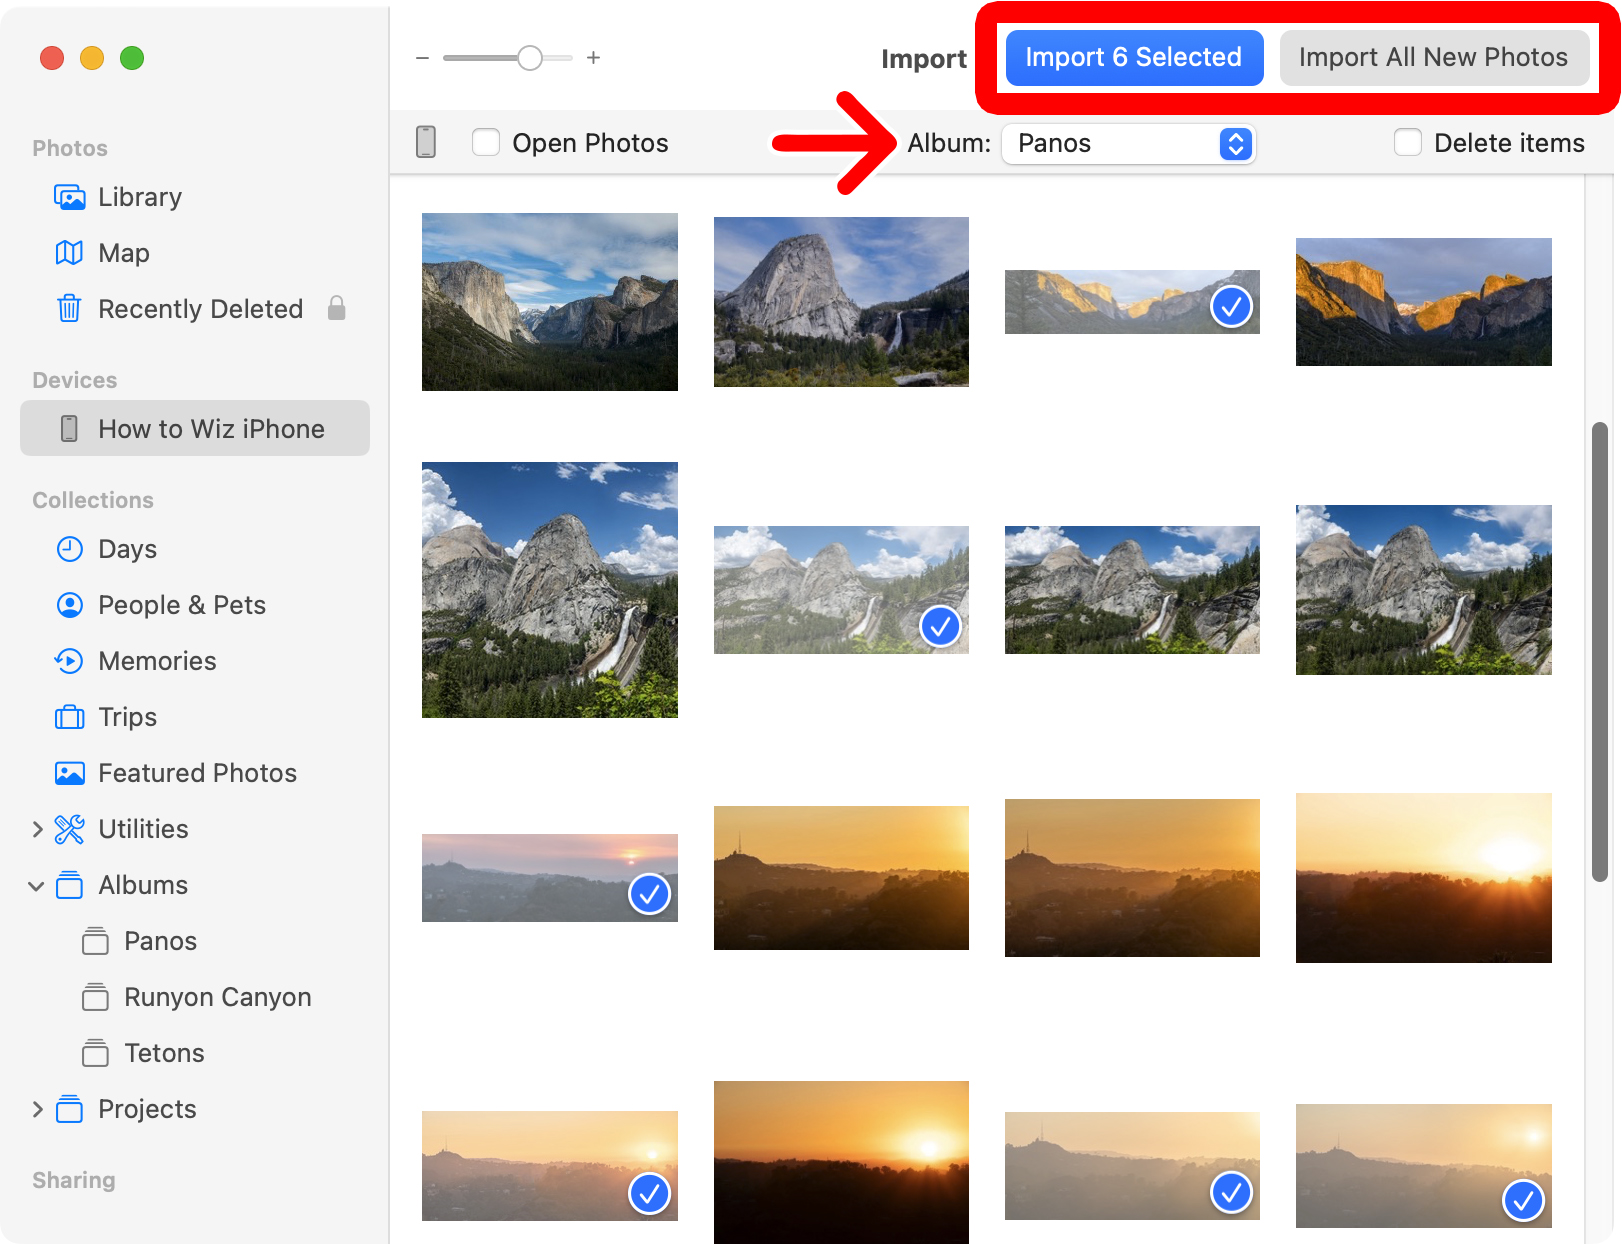
- Choose the photos you want to import. To select multiple photos, use the Shift or Command (⌘) keys on your keyboard.
- Select a Photos album. Use the drop-down menu at the top of the app to select a Photos album or create a new one.
- Finally, click “Import Selected” or “Import All New Photos.” If you select individual photos, you will only see “Import [number] Selected.” If you want to import everything, you’ll need to deselect all your photos.


Check the box next to “Open Photos” if you want to automatically open the Photos app when you plug your iPhone into a Mac. Check the box next to “Delete Items” if you want to automatically delete the photos from your iPhone after you import them to this Mac.
Read More: How to Delete All Photos from an iPhone
How to Import Photos to a Folder on Your Mac
To import photos to a specific folder on your Mac, open the Image Capture app and select your iPhone in the left sidebar. Then select your photos and click the drop-down menu next to “Import To.” Finally, choose a folder and click “Download” or “Download All.”
- Plug your iPhone into a Mac.
- Unlock your iPhone. To do this, swipe up from the bottom of your screen and use Face ID/Touch ID or enter your iPhone passcode.
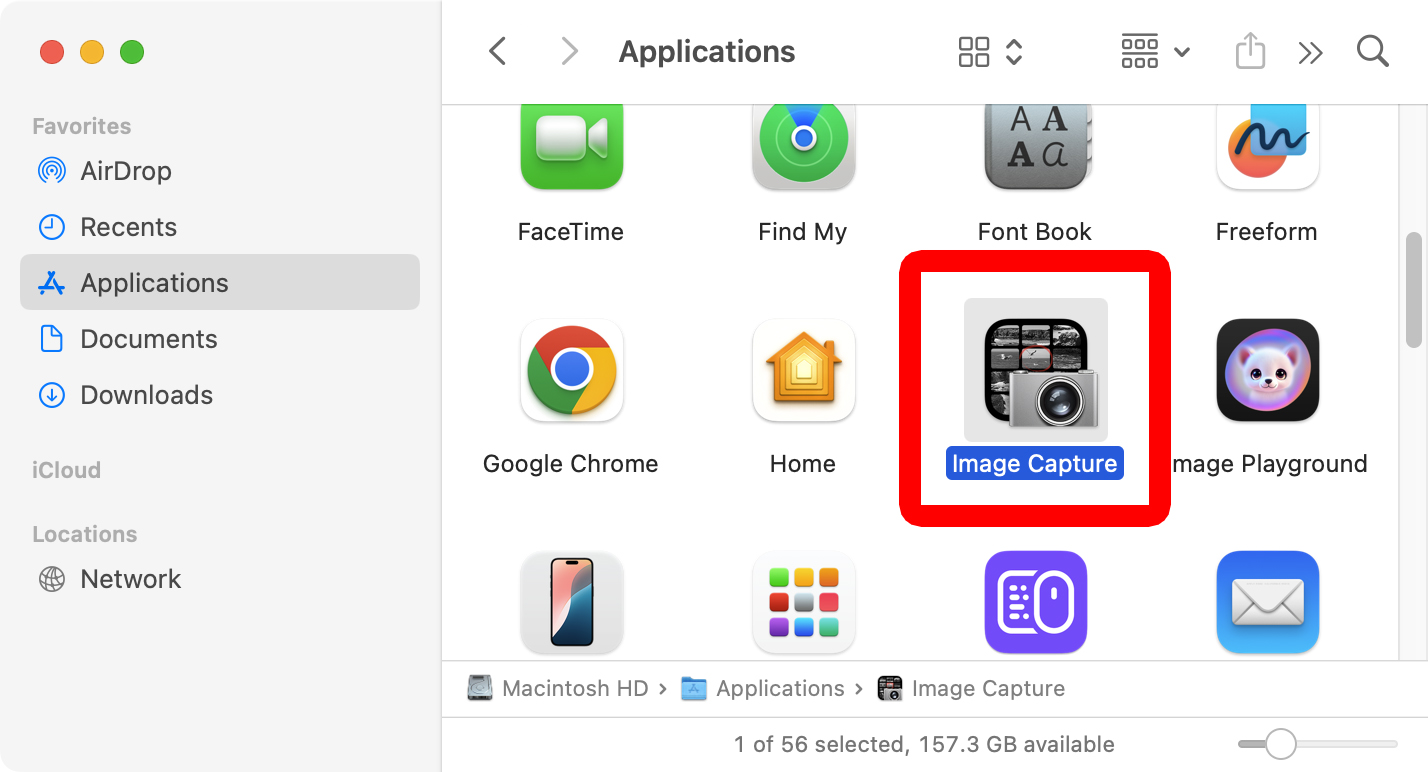
- Open the Image Capture app. This is an app that comes pre-installed on your Mac. To find it, open a Finder window and click “Applications” in the left sidebar.

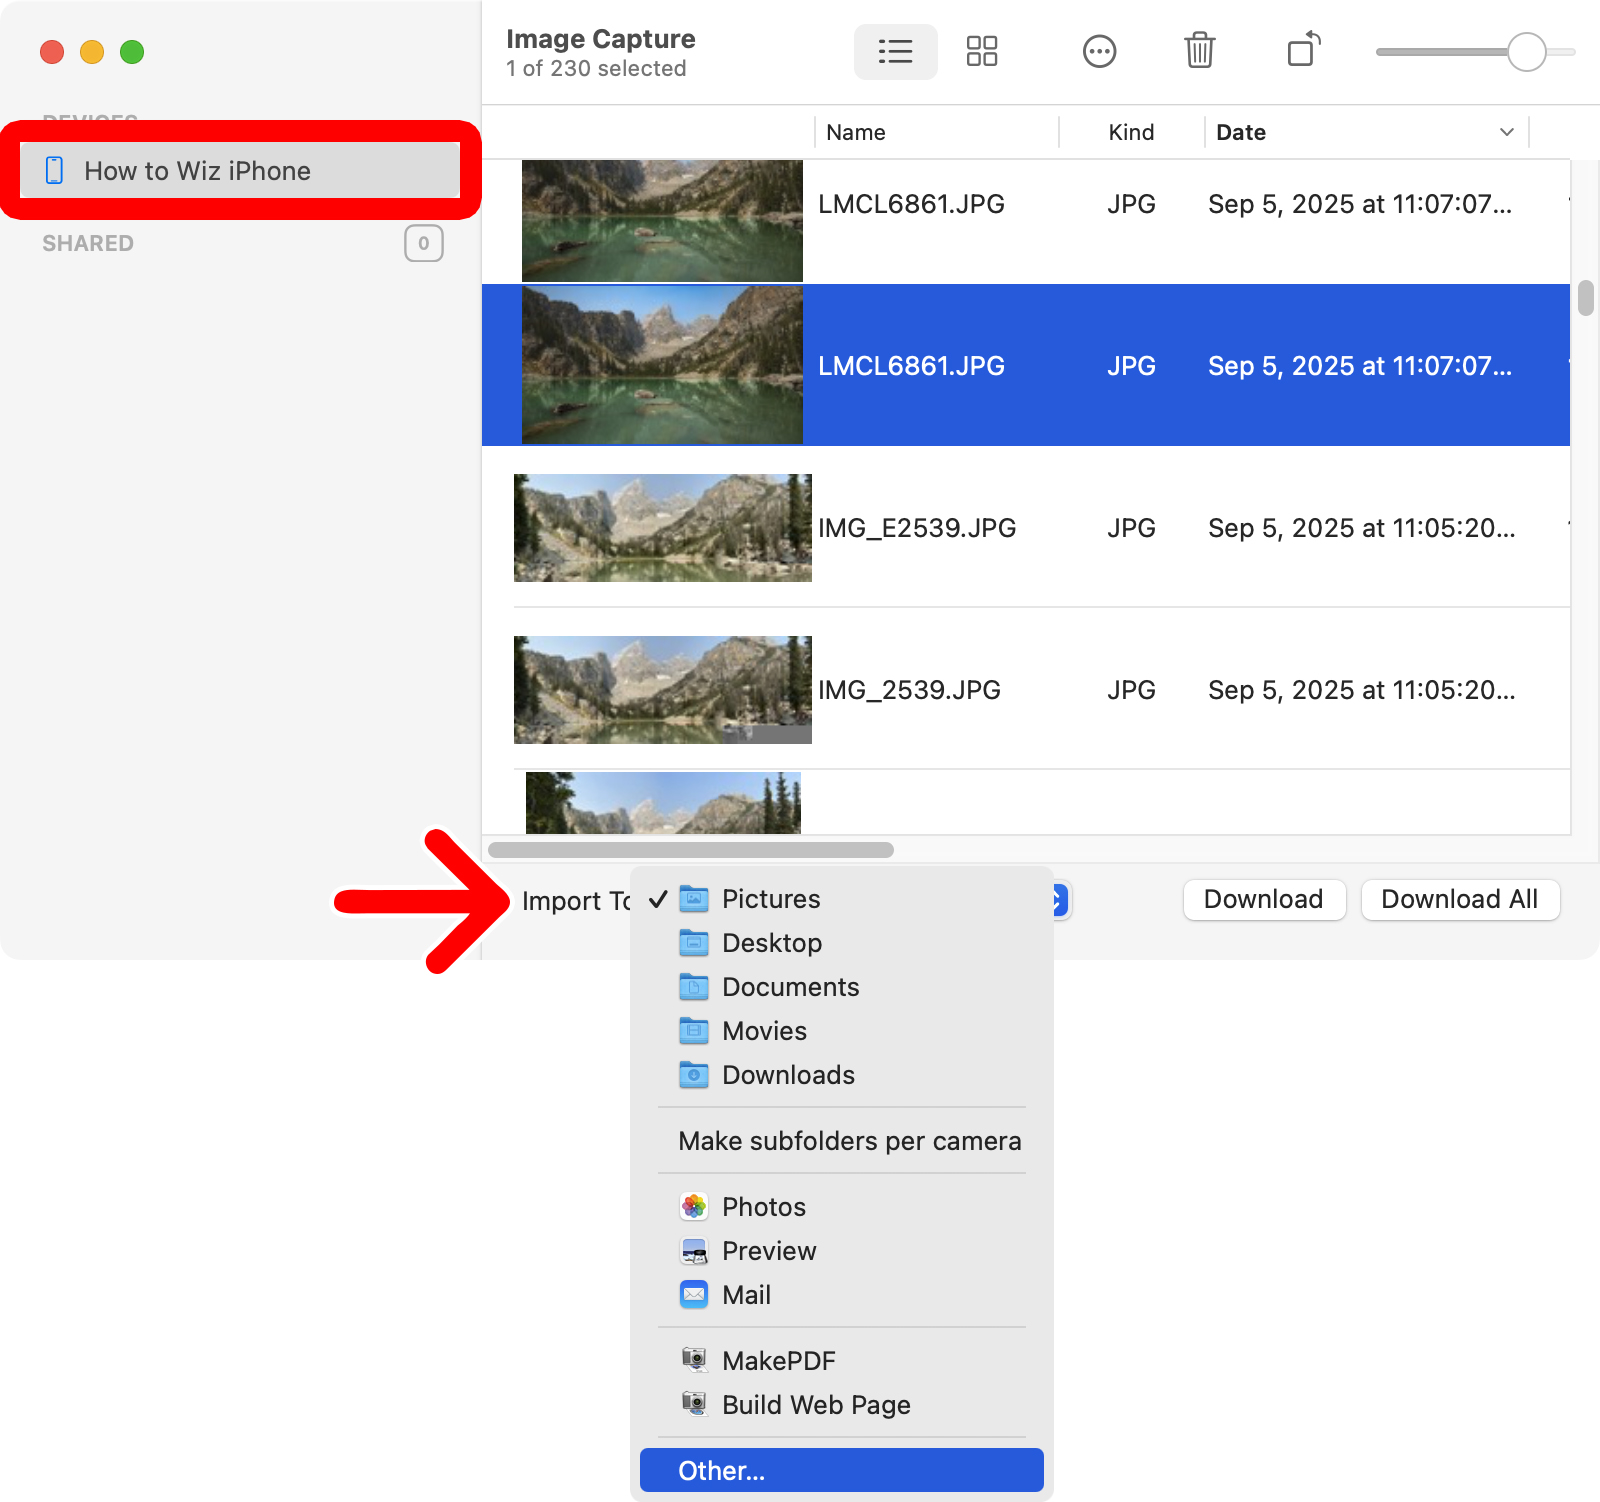
- Select your iPhone from the left sidebar.
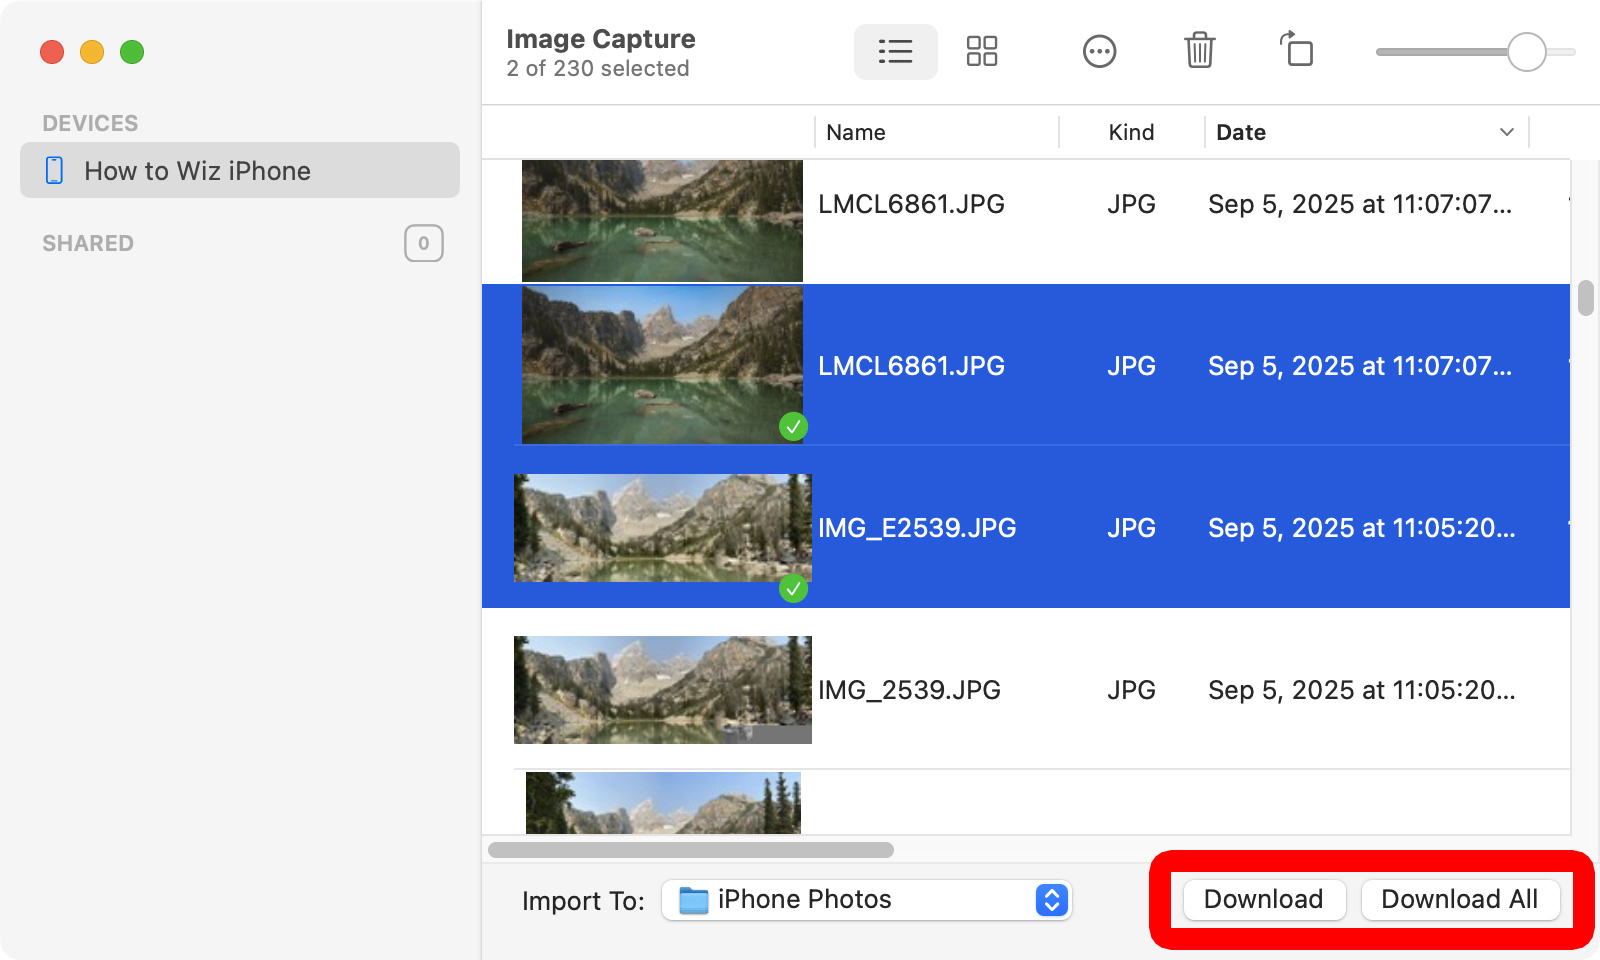
- Choose the photos you want to import.
- Click the drop-down menu next to “Import To.” This lets you choose a specific folder on your Mac where you want to import your photos.
- Finally, click “Download” or “Download All.”
How to Import Photos to a Mac Wirelessly
To import your photos to a Mac, open the Photos app on your iPhone and tap “Select” in the top-right corner. Then select the photos you want to import and tap the “Share” icon in the bottom-left corner. Finally, select “AirDrop” and choose your Mac to send them to your Downloads folder.
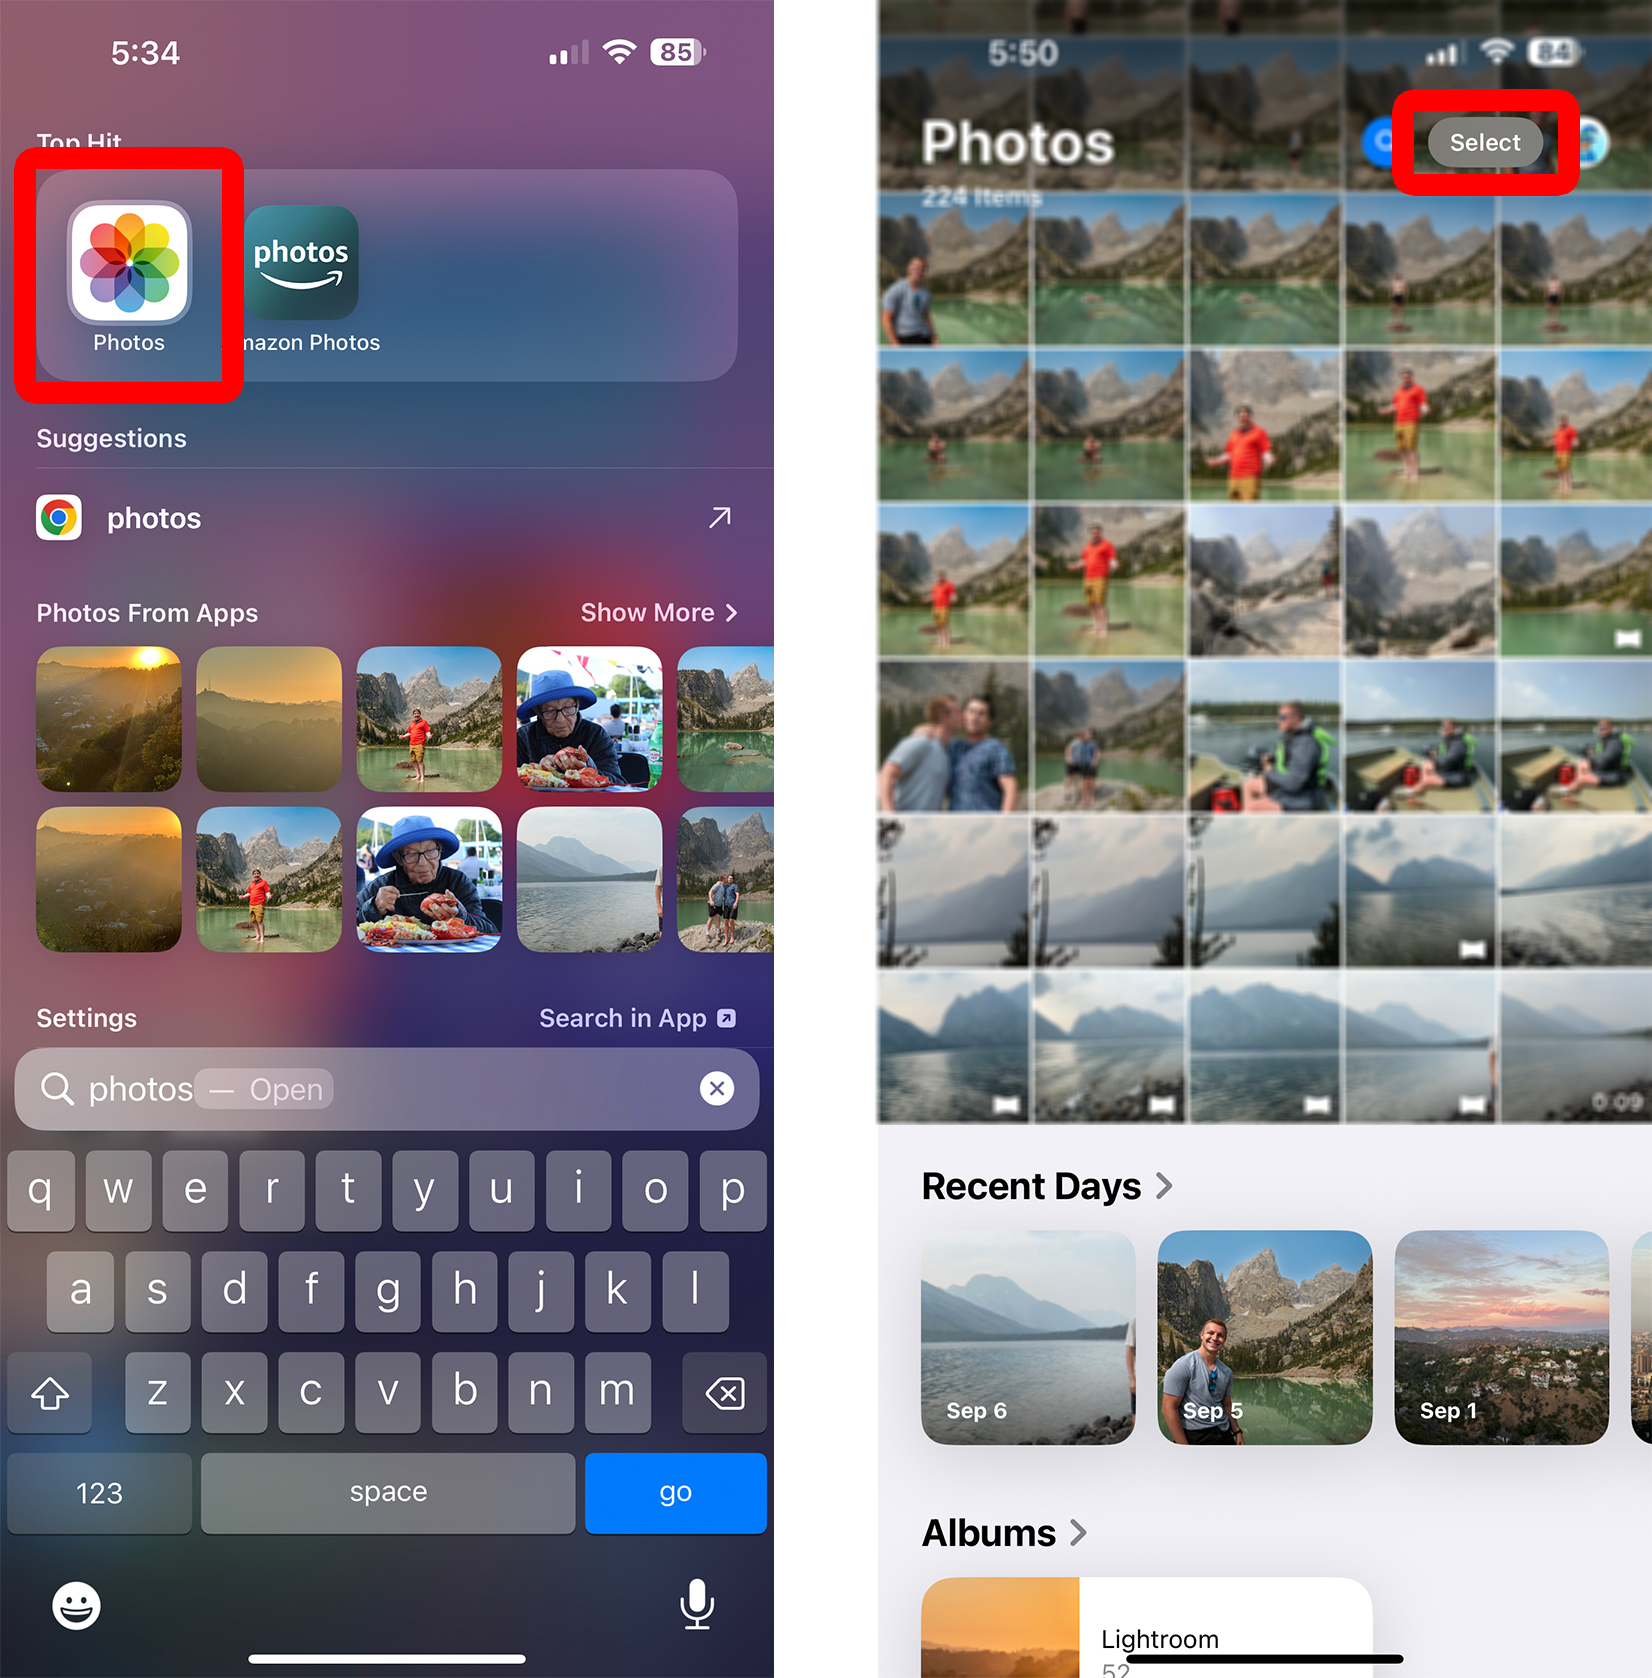
- Open the Photos app on your iPhone. This is an app that comes pre-installed on your iPhone. If you can’t find it, swipe down from the middle of your home screen and type “Photos” into the search bar.
- Tap “Select.” You will see this in the top-right corner of the app.
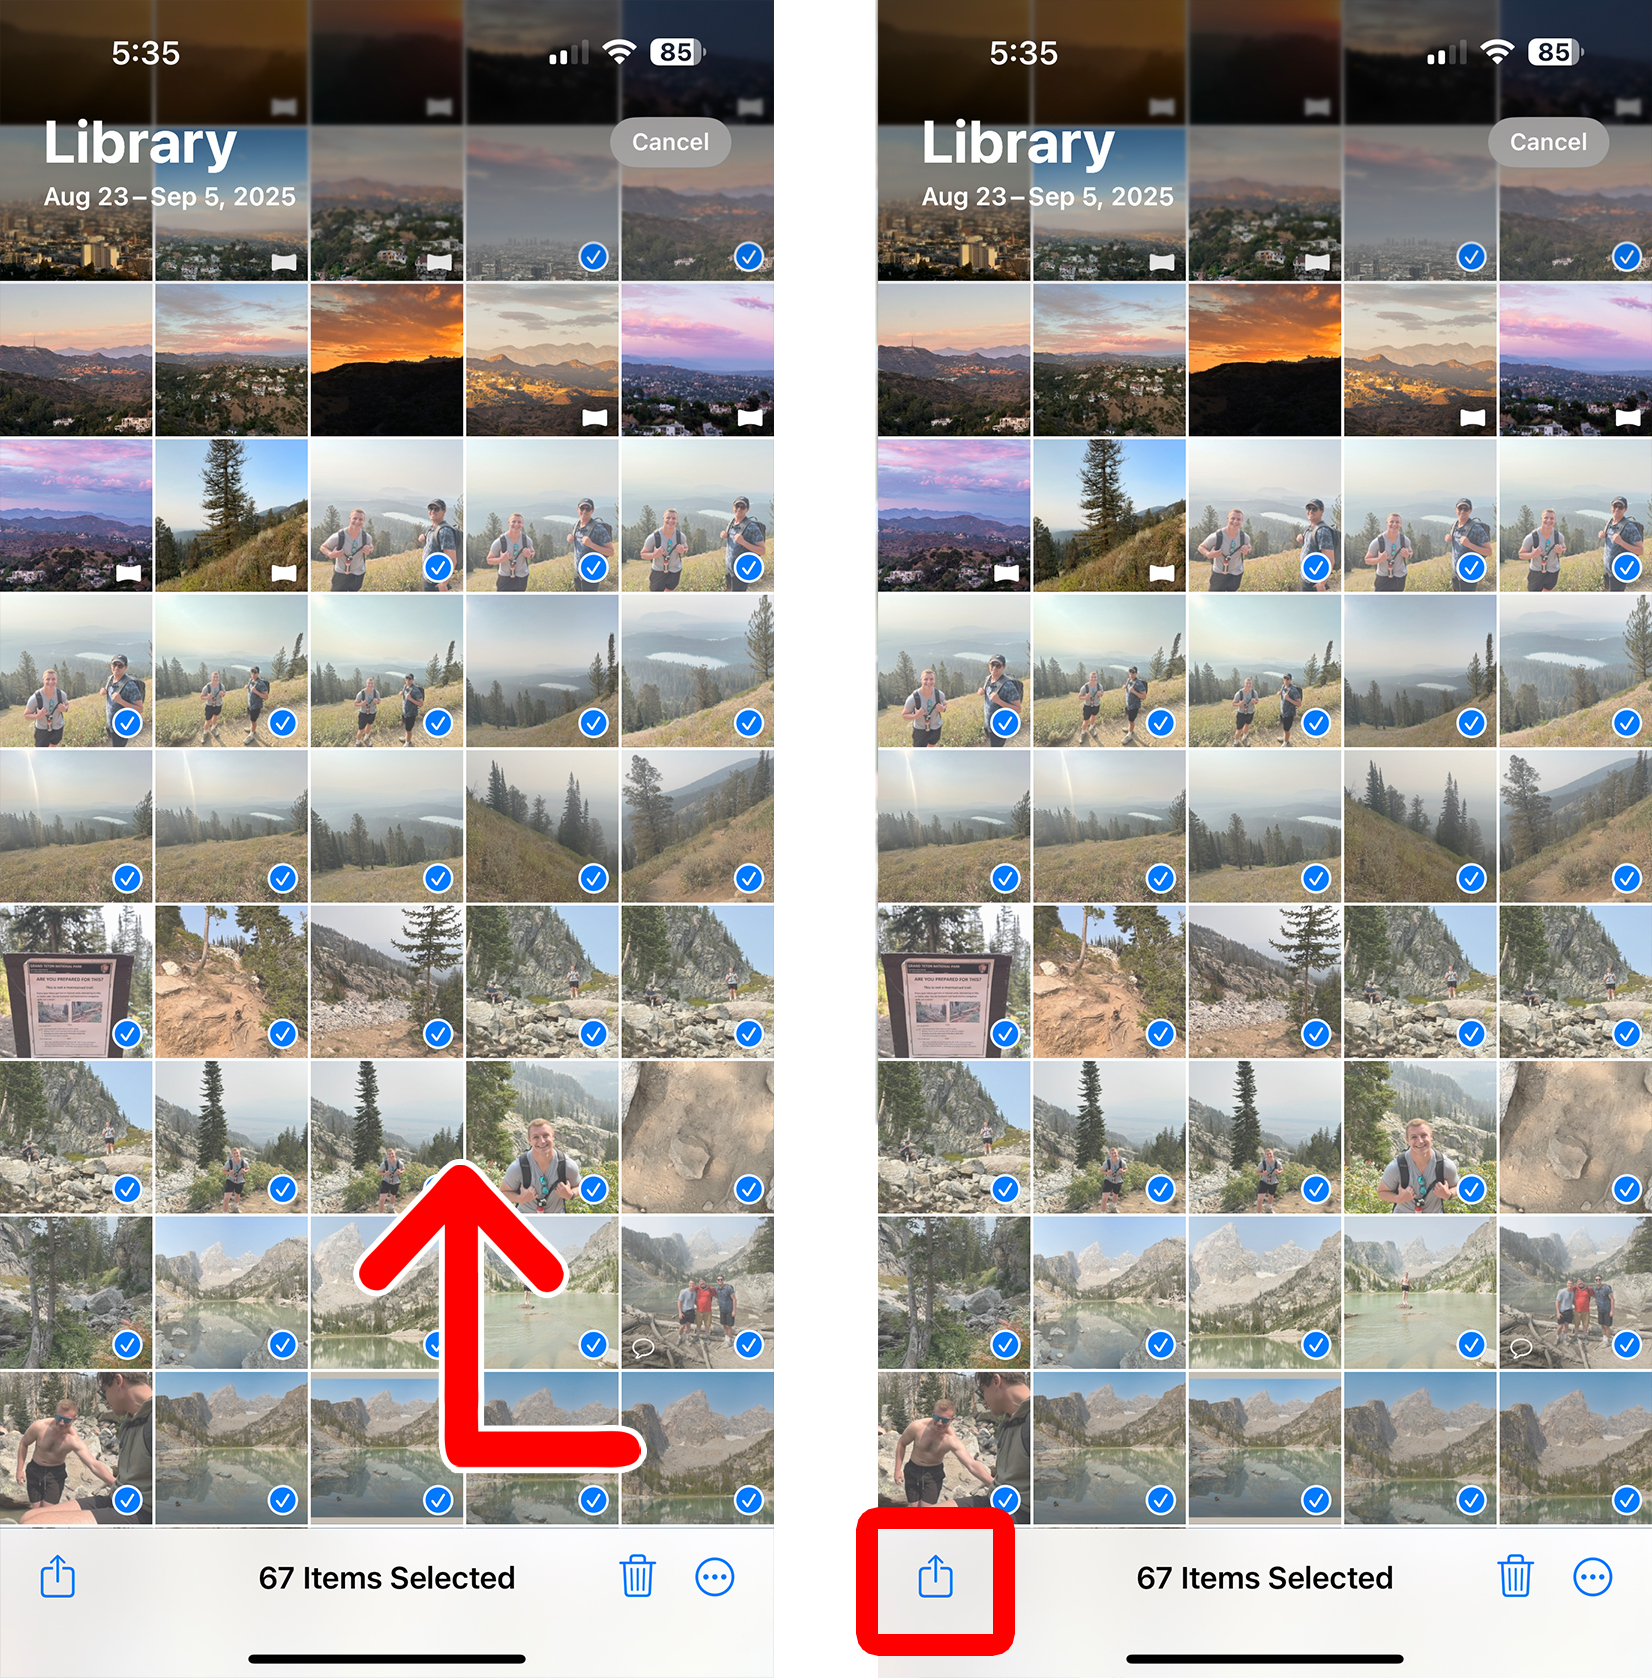
- Select the photos you want to import. You can select photos individually by tapping them, or select multiple by tapping and dragging your finger up.
- Tap the “Share” icon. You will see this in the bottom-left corner of your screen.
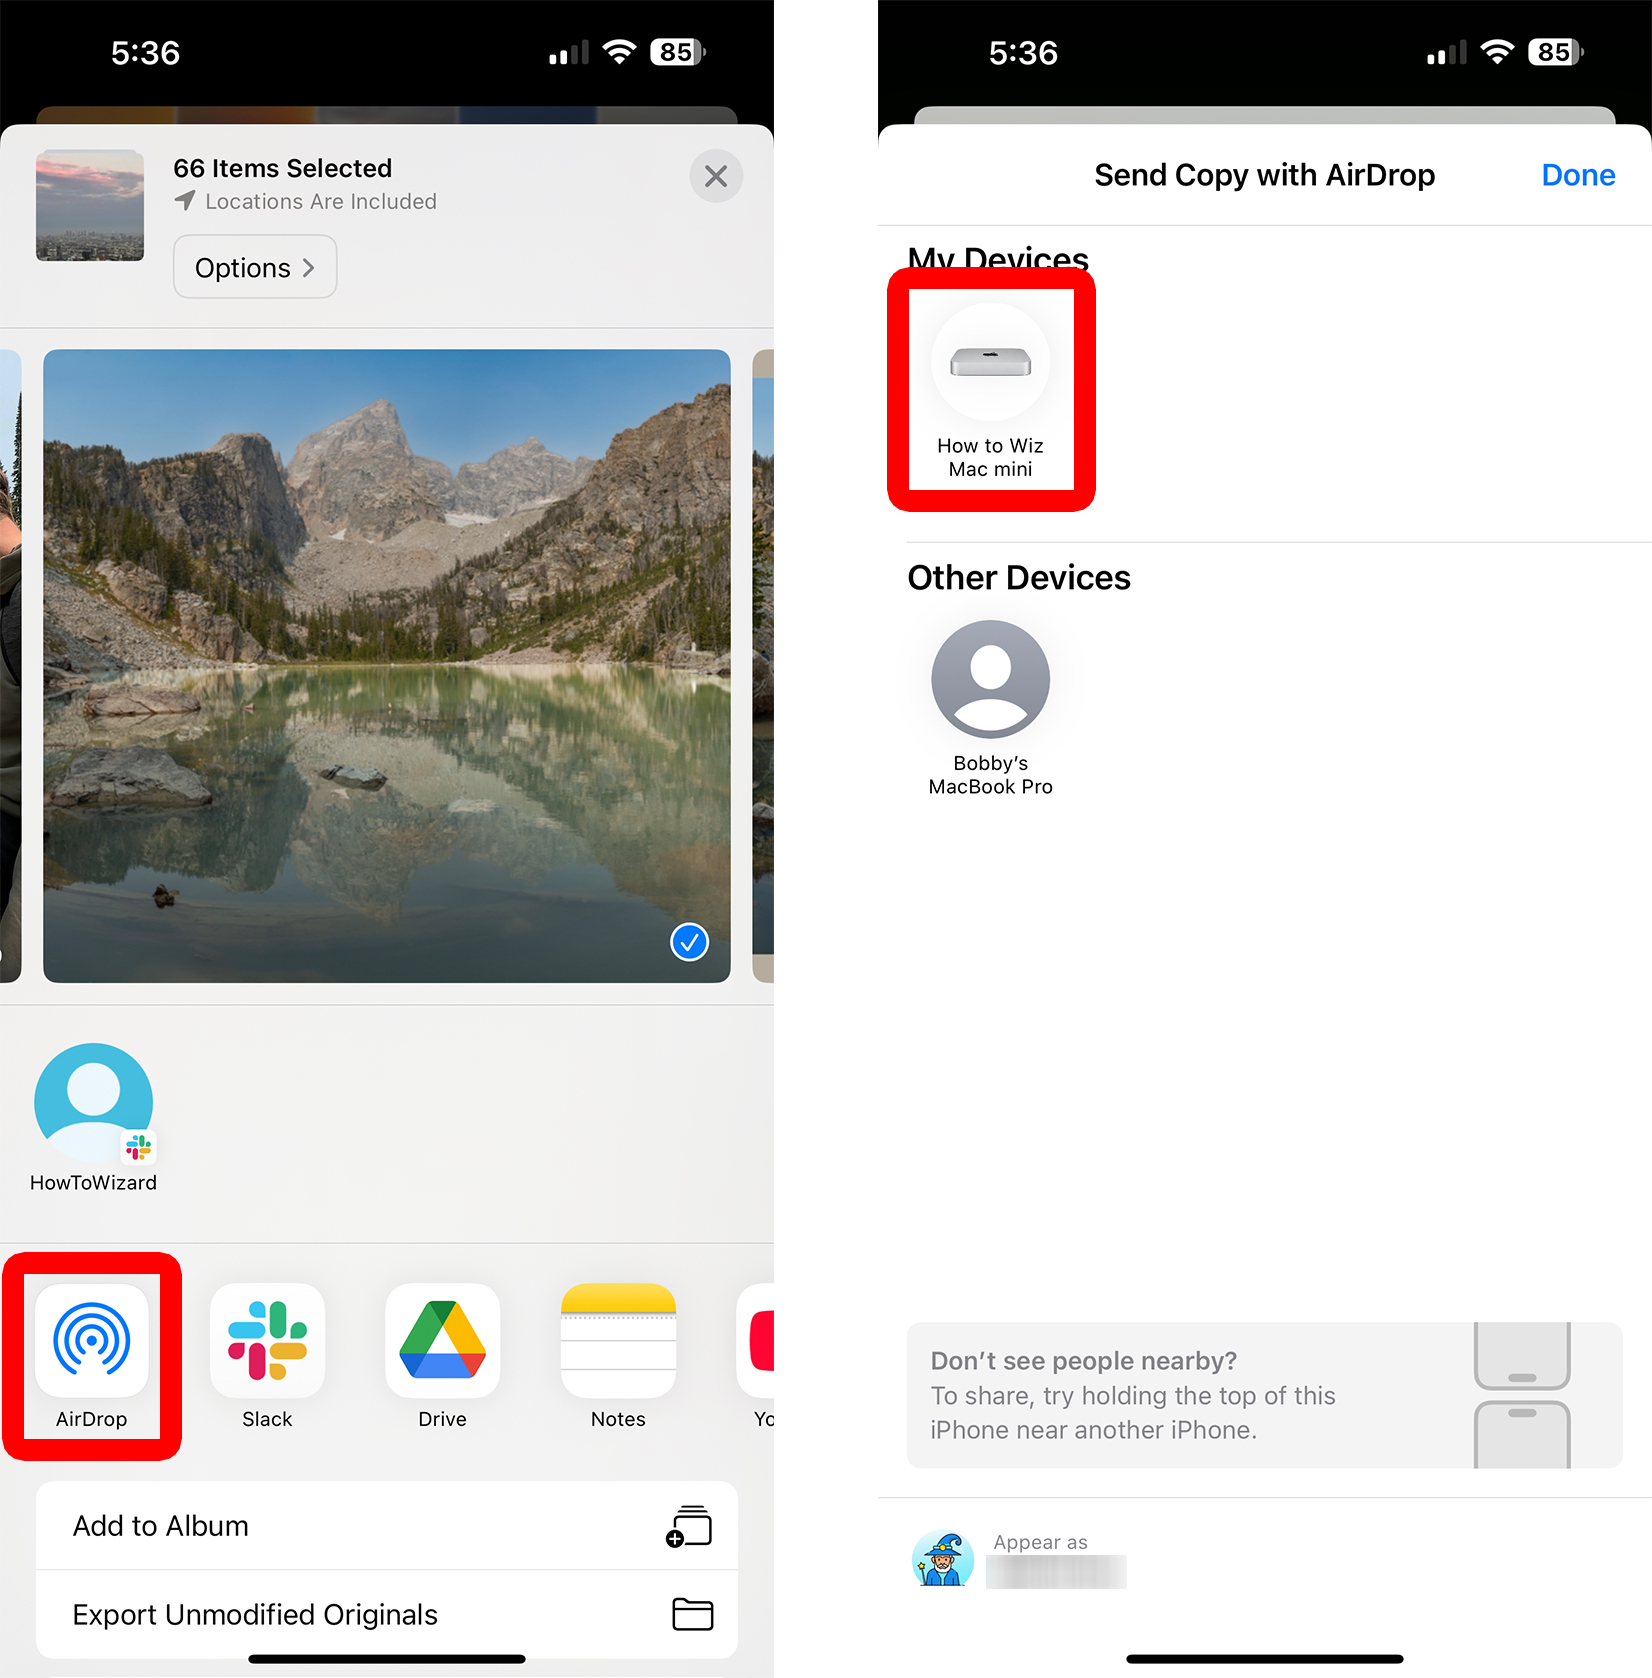
- Tap “AirDrop.” If you don’t see this option, swipe to the left and select “More.” Then, scroll down to add AirDrop to your list of favorites. If you still don’t see it, try connecting your iPhone and Mac to the same WiFi network.
- Select your Mac under “My Devices.”
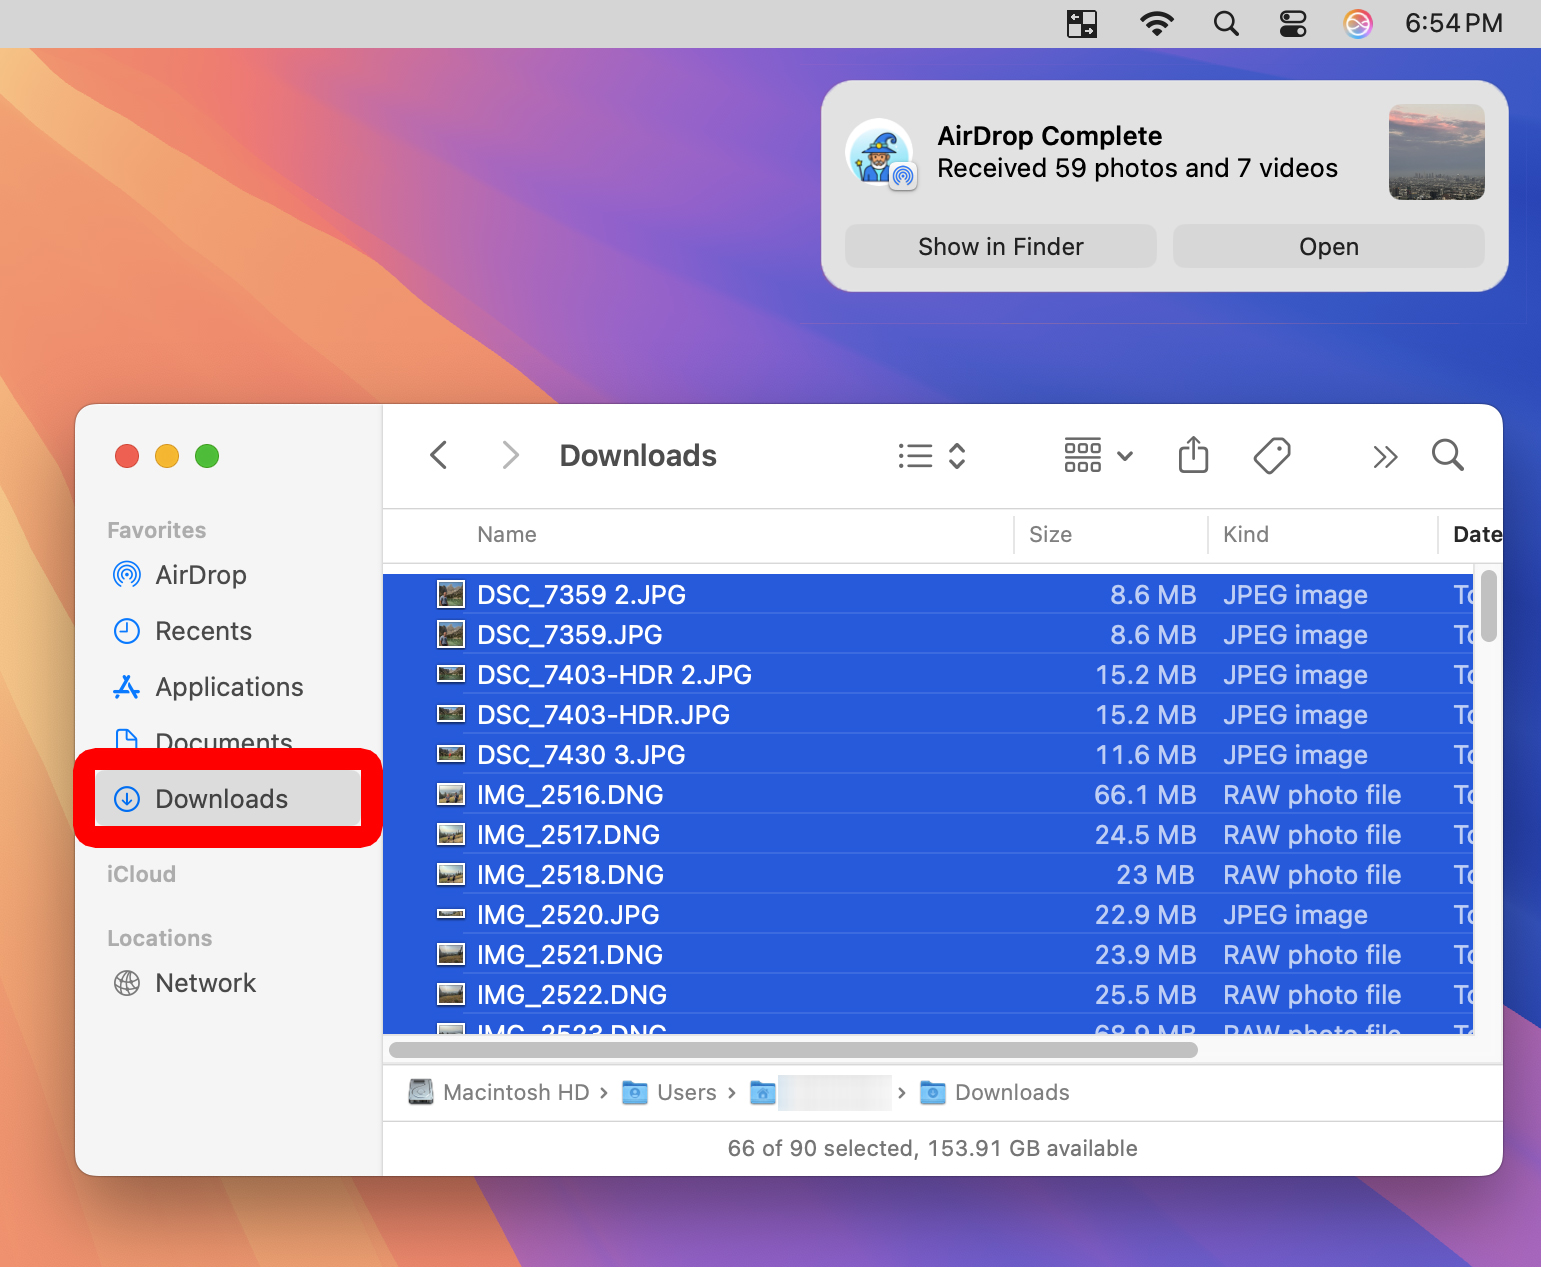
- Finally, the photos will be imported to the Downloads folder on your Mac. To access them, open a Finder window and select “Downloads” in the left sidebar.