Slow internet? Unknown devices on your network? It might be time to change your WiFi password. According to CISA, you should use a unique password at least 16 characters long to protect your privacy online. Here’s everything you need to know about how to change your WiFi network name and password, so your network stays private and secure.
Read More: How to Find Your WiFi Password in Windows 11
Read More: How to Find Your WiFi Passwords on a Mac
How to Change Your WiFi Network Name and Password
To change your WiFi network name and password, open a web browser and enter your router’s IP address in the address bar. Then sign in to your router and go to “Wireless” settings. Finally, enter a new WiFi password and click “Save” or “Apply.”
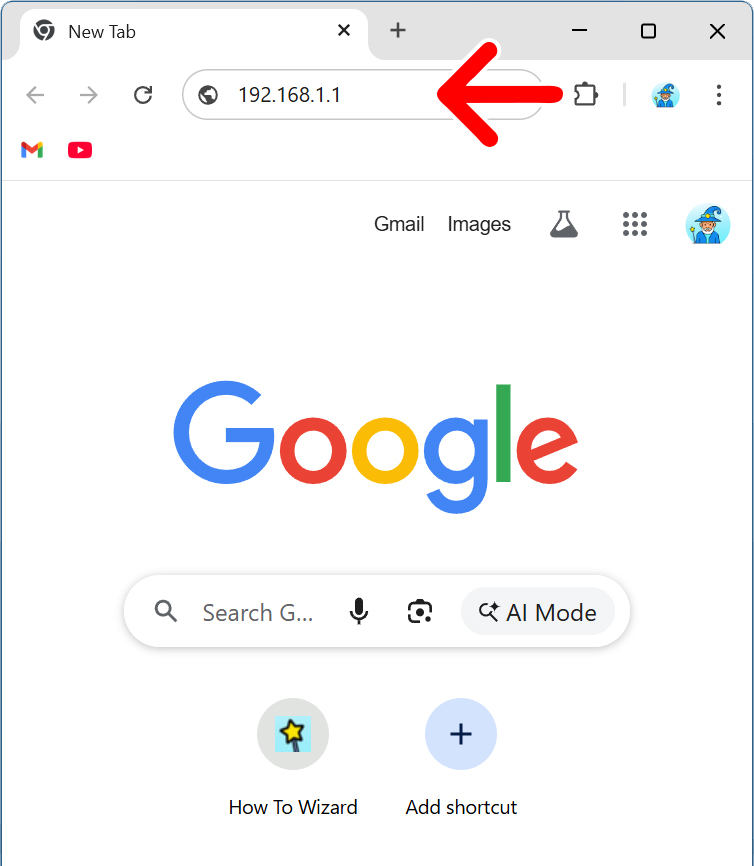
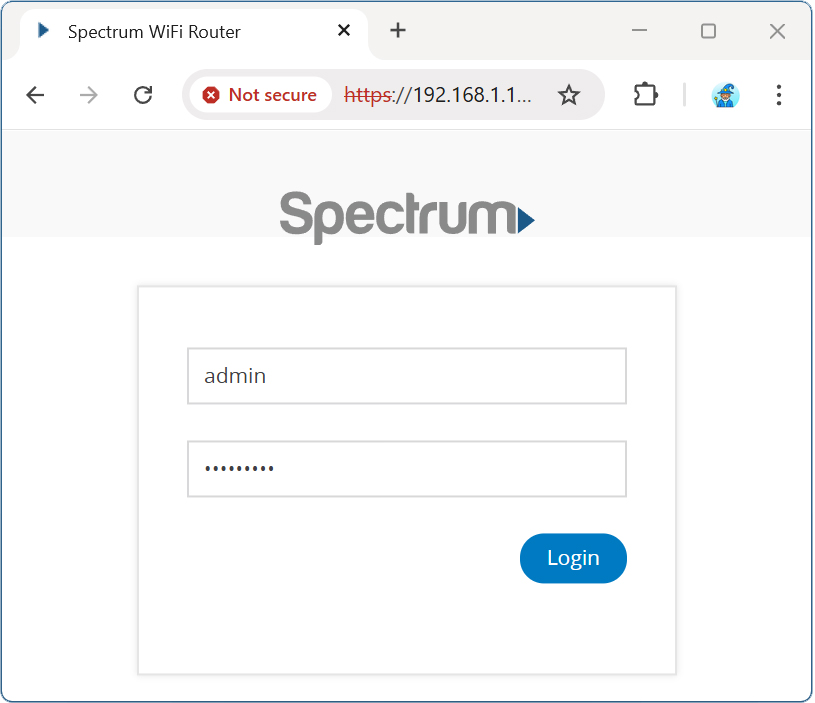
- Open a web browser. You can use any web browser on your computer to find and change your WiFi password.
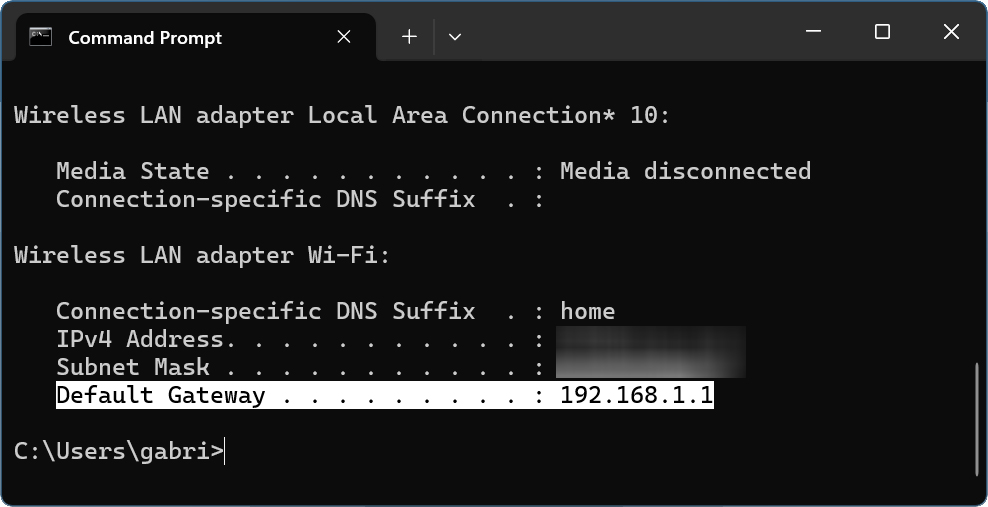
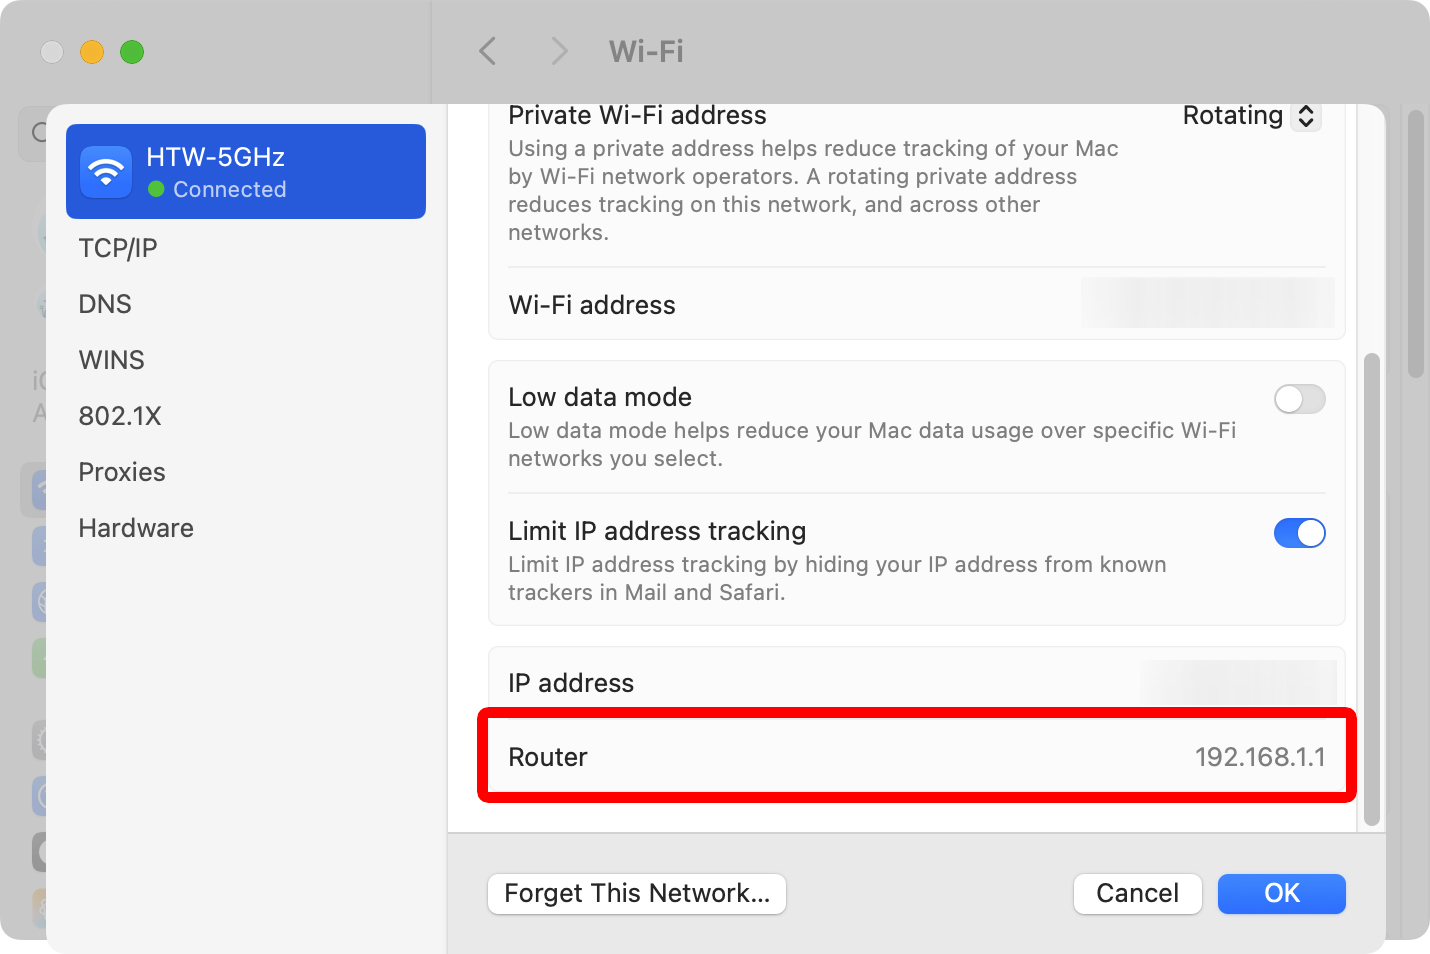
- Enter your router’s IP address into the browser’s address bar. This is the same place you enter a website URL at the top of your browser window.


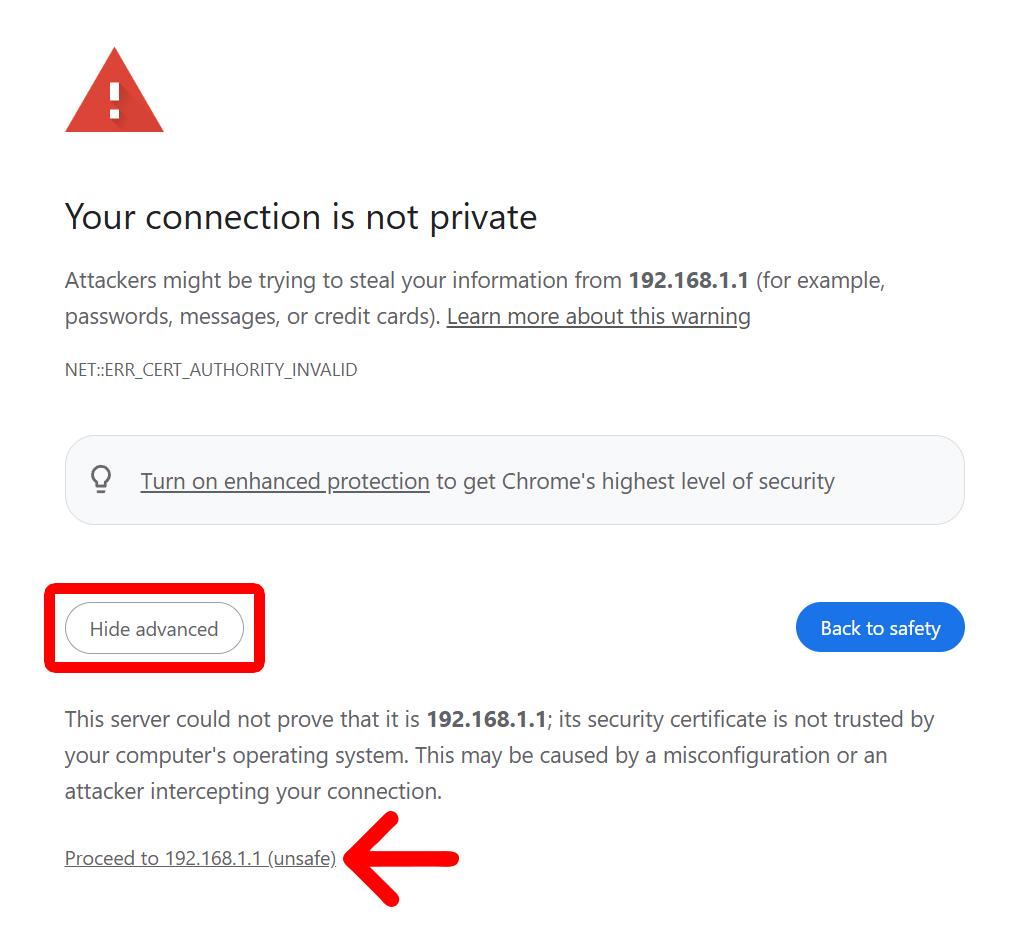
- If you see a warning screen, click “Advanced > Proceed.” On Safari, you will need to click “Show Details > Visit this website.”

- Enter your router’s username and password.

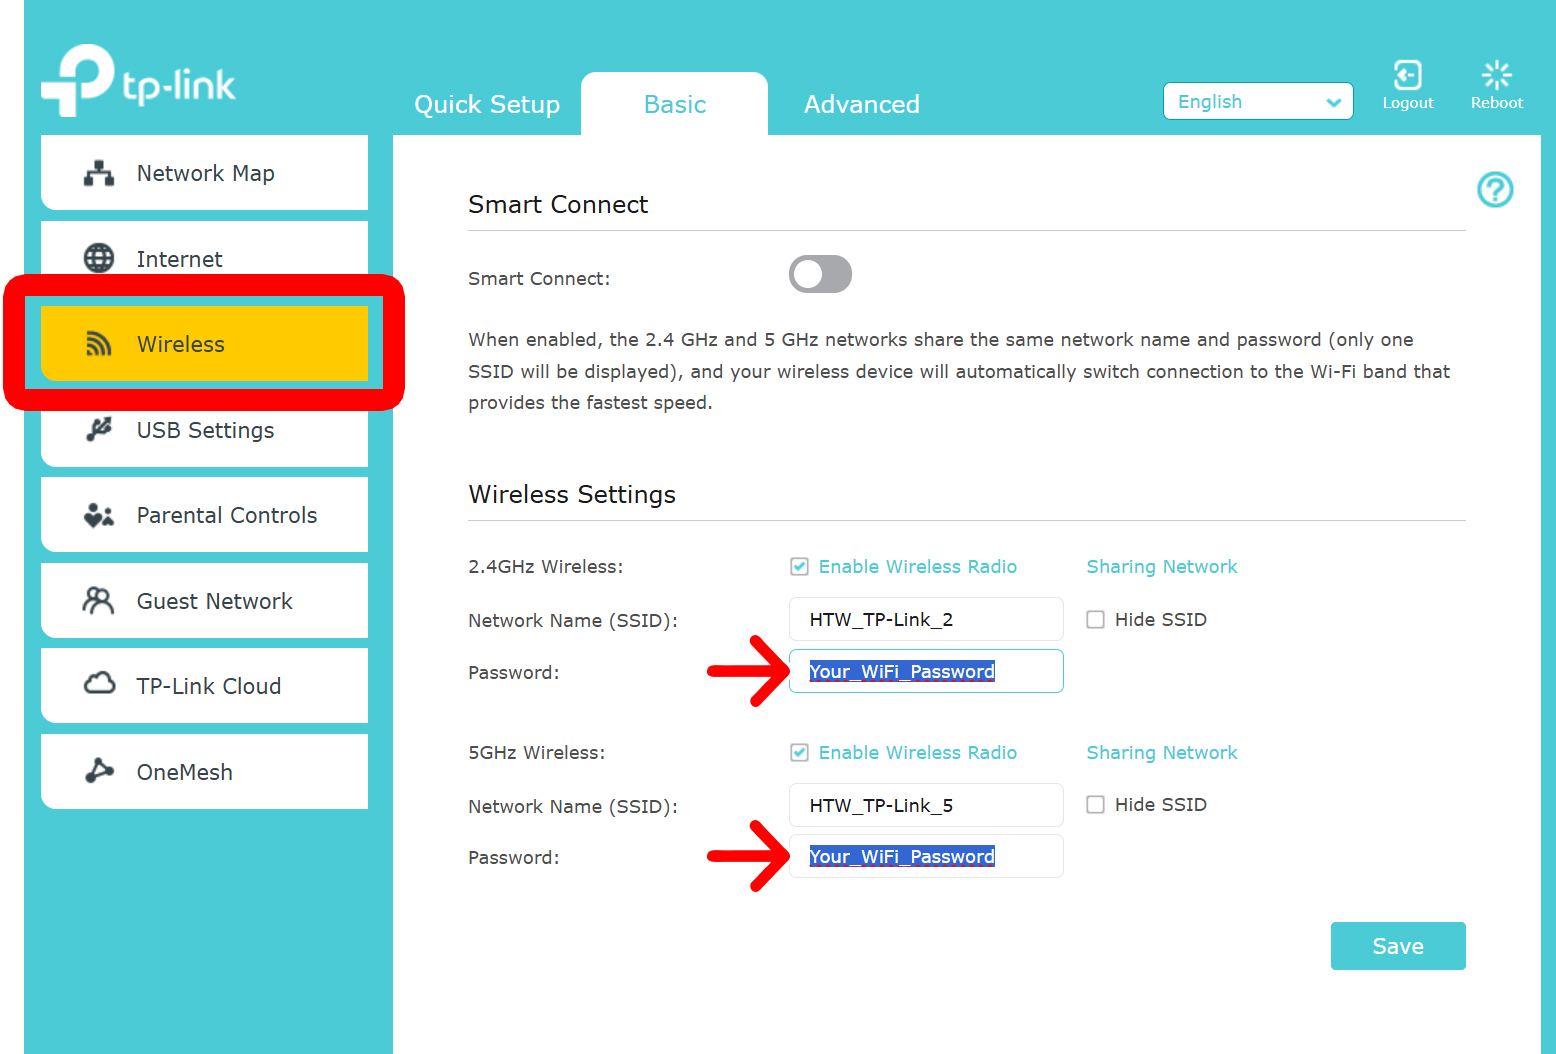
- Go to “Wireless” settings. You will usually see this as a tab on the left or top of the window.

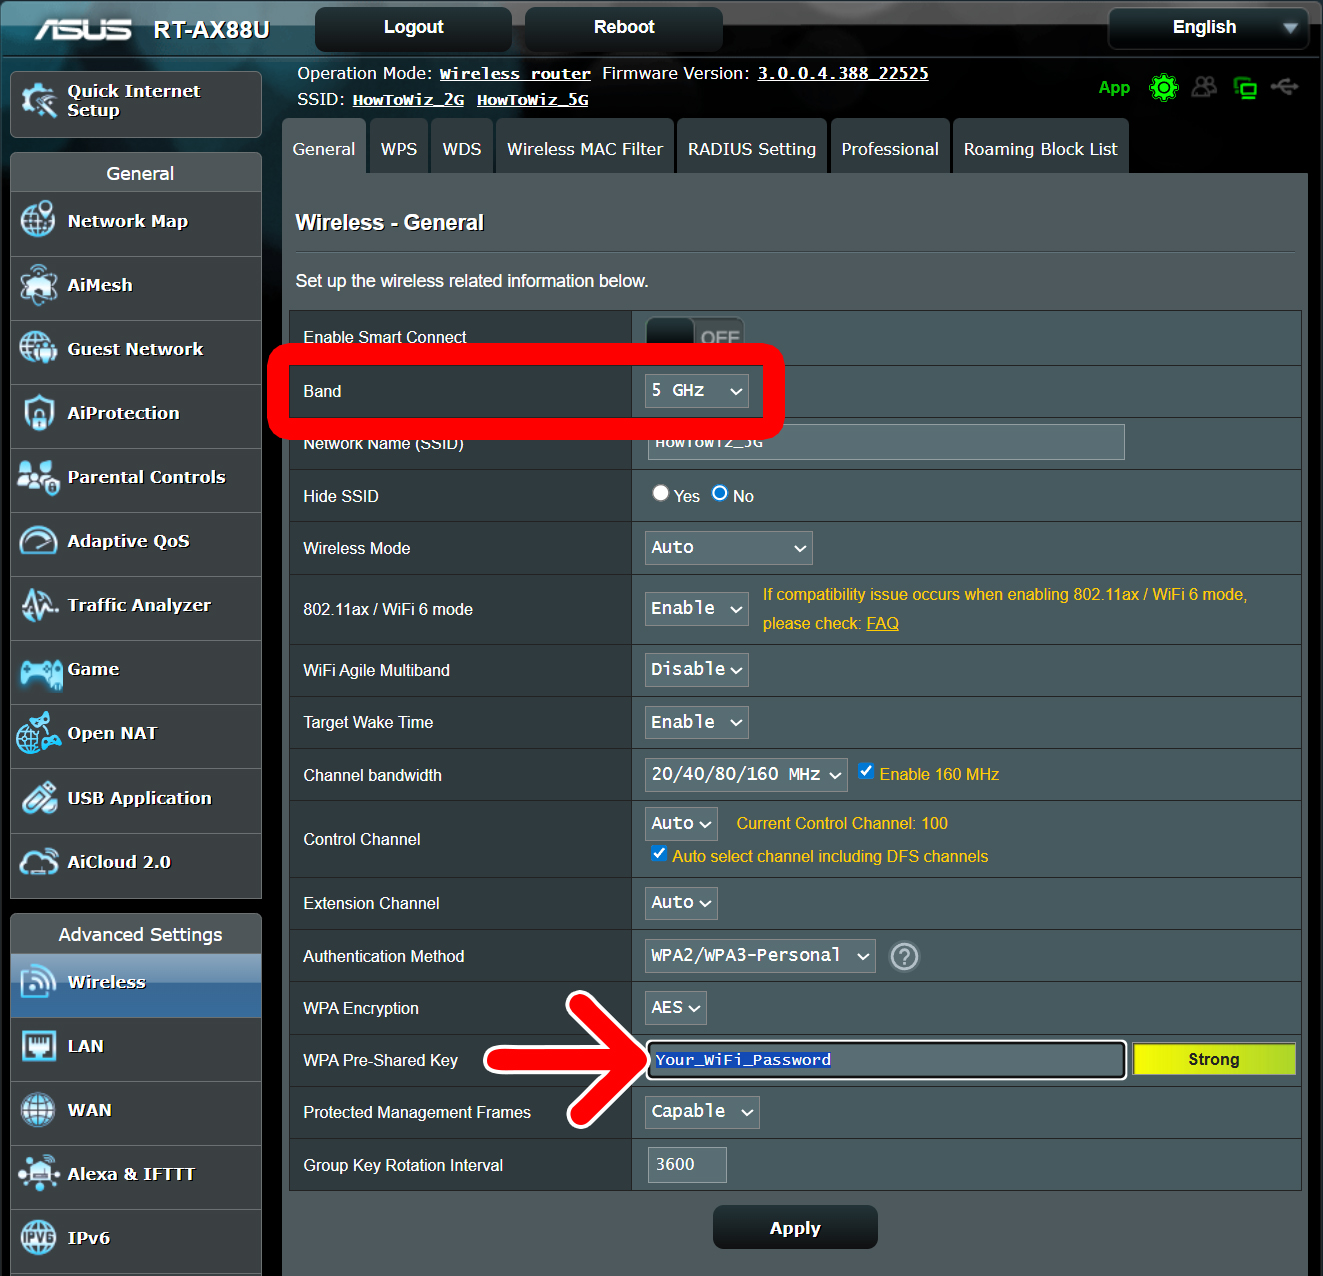
- Choose a WiFi band. Some routers will let you connect to more than one “band” (or WiFi network). Some routers list all WiFi bands on the page; others have a drop-down menu.

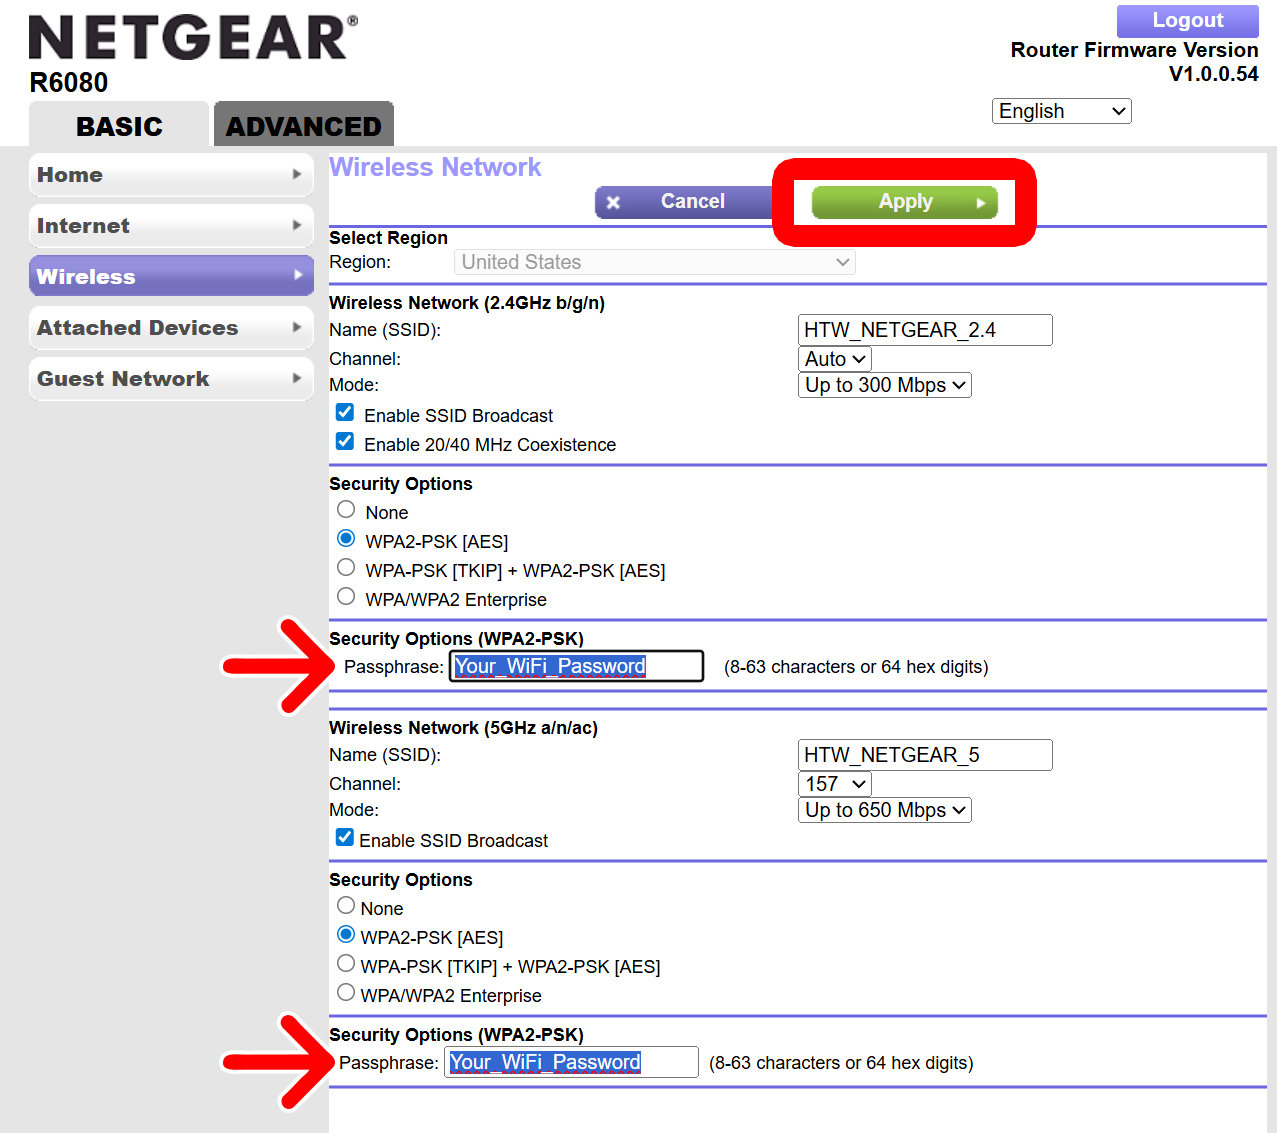
- Enter a new WiFi password. Click on the text field next to “Password,” “Passphrase,” “WPA Key,” or something similar. Then type a new WiFi password into the text field to change your old password.
- Finally, click “Save” or “Apply.” You will usually see these at the top or bottom of the settings page.

Read More: How to Change WiFi Networks on an Echo Dot